Leaderboard
-
ChoonDoode
Members11Points1,166Posts -
TheWanderer
Resident Member8Points4,540Posts -
langers2k
Resident Member8Points8,593Posts -
.jpg.68c7823d355ff3e5b20e82ddbf78398c.jpg)
PetrolDave
Resident Member6Points8,216Posts


.thumb.jpg.f83a46b9b3c0d976b9dbffbb523c9874.jpg)
Popular Content
Showing content with the highest reputation on 27/06/22 in all areas
-
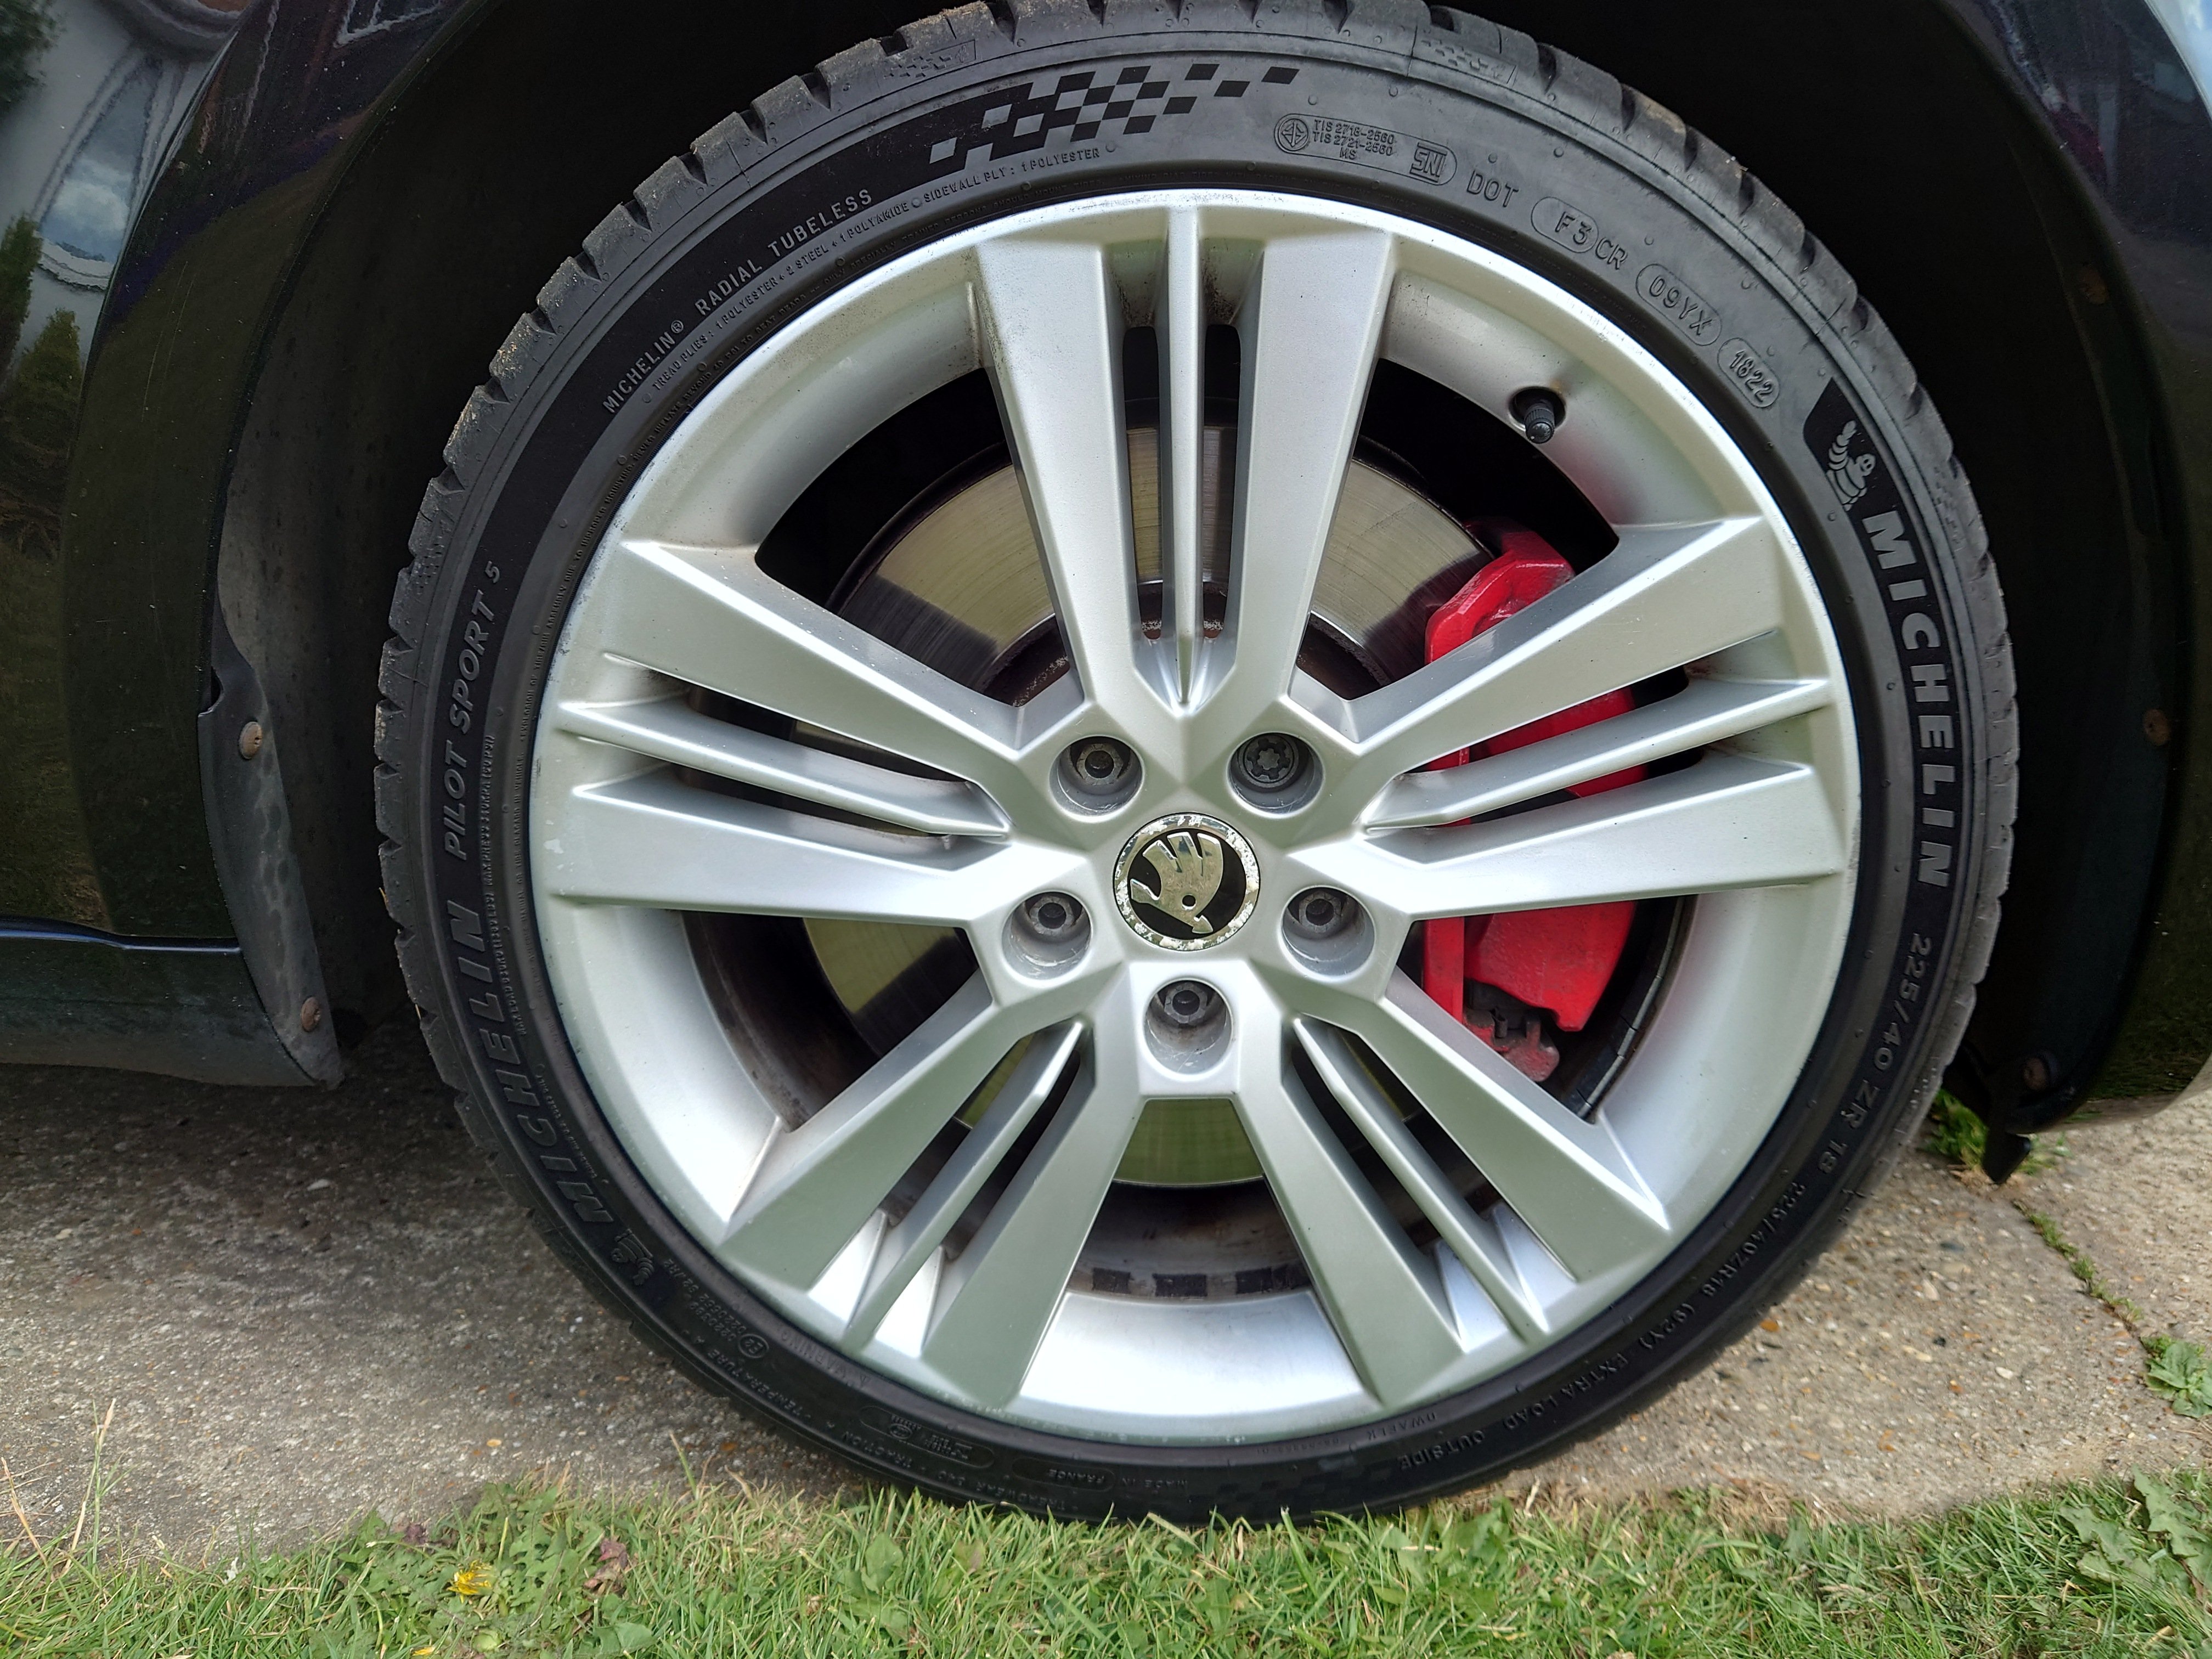
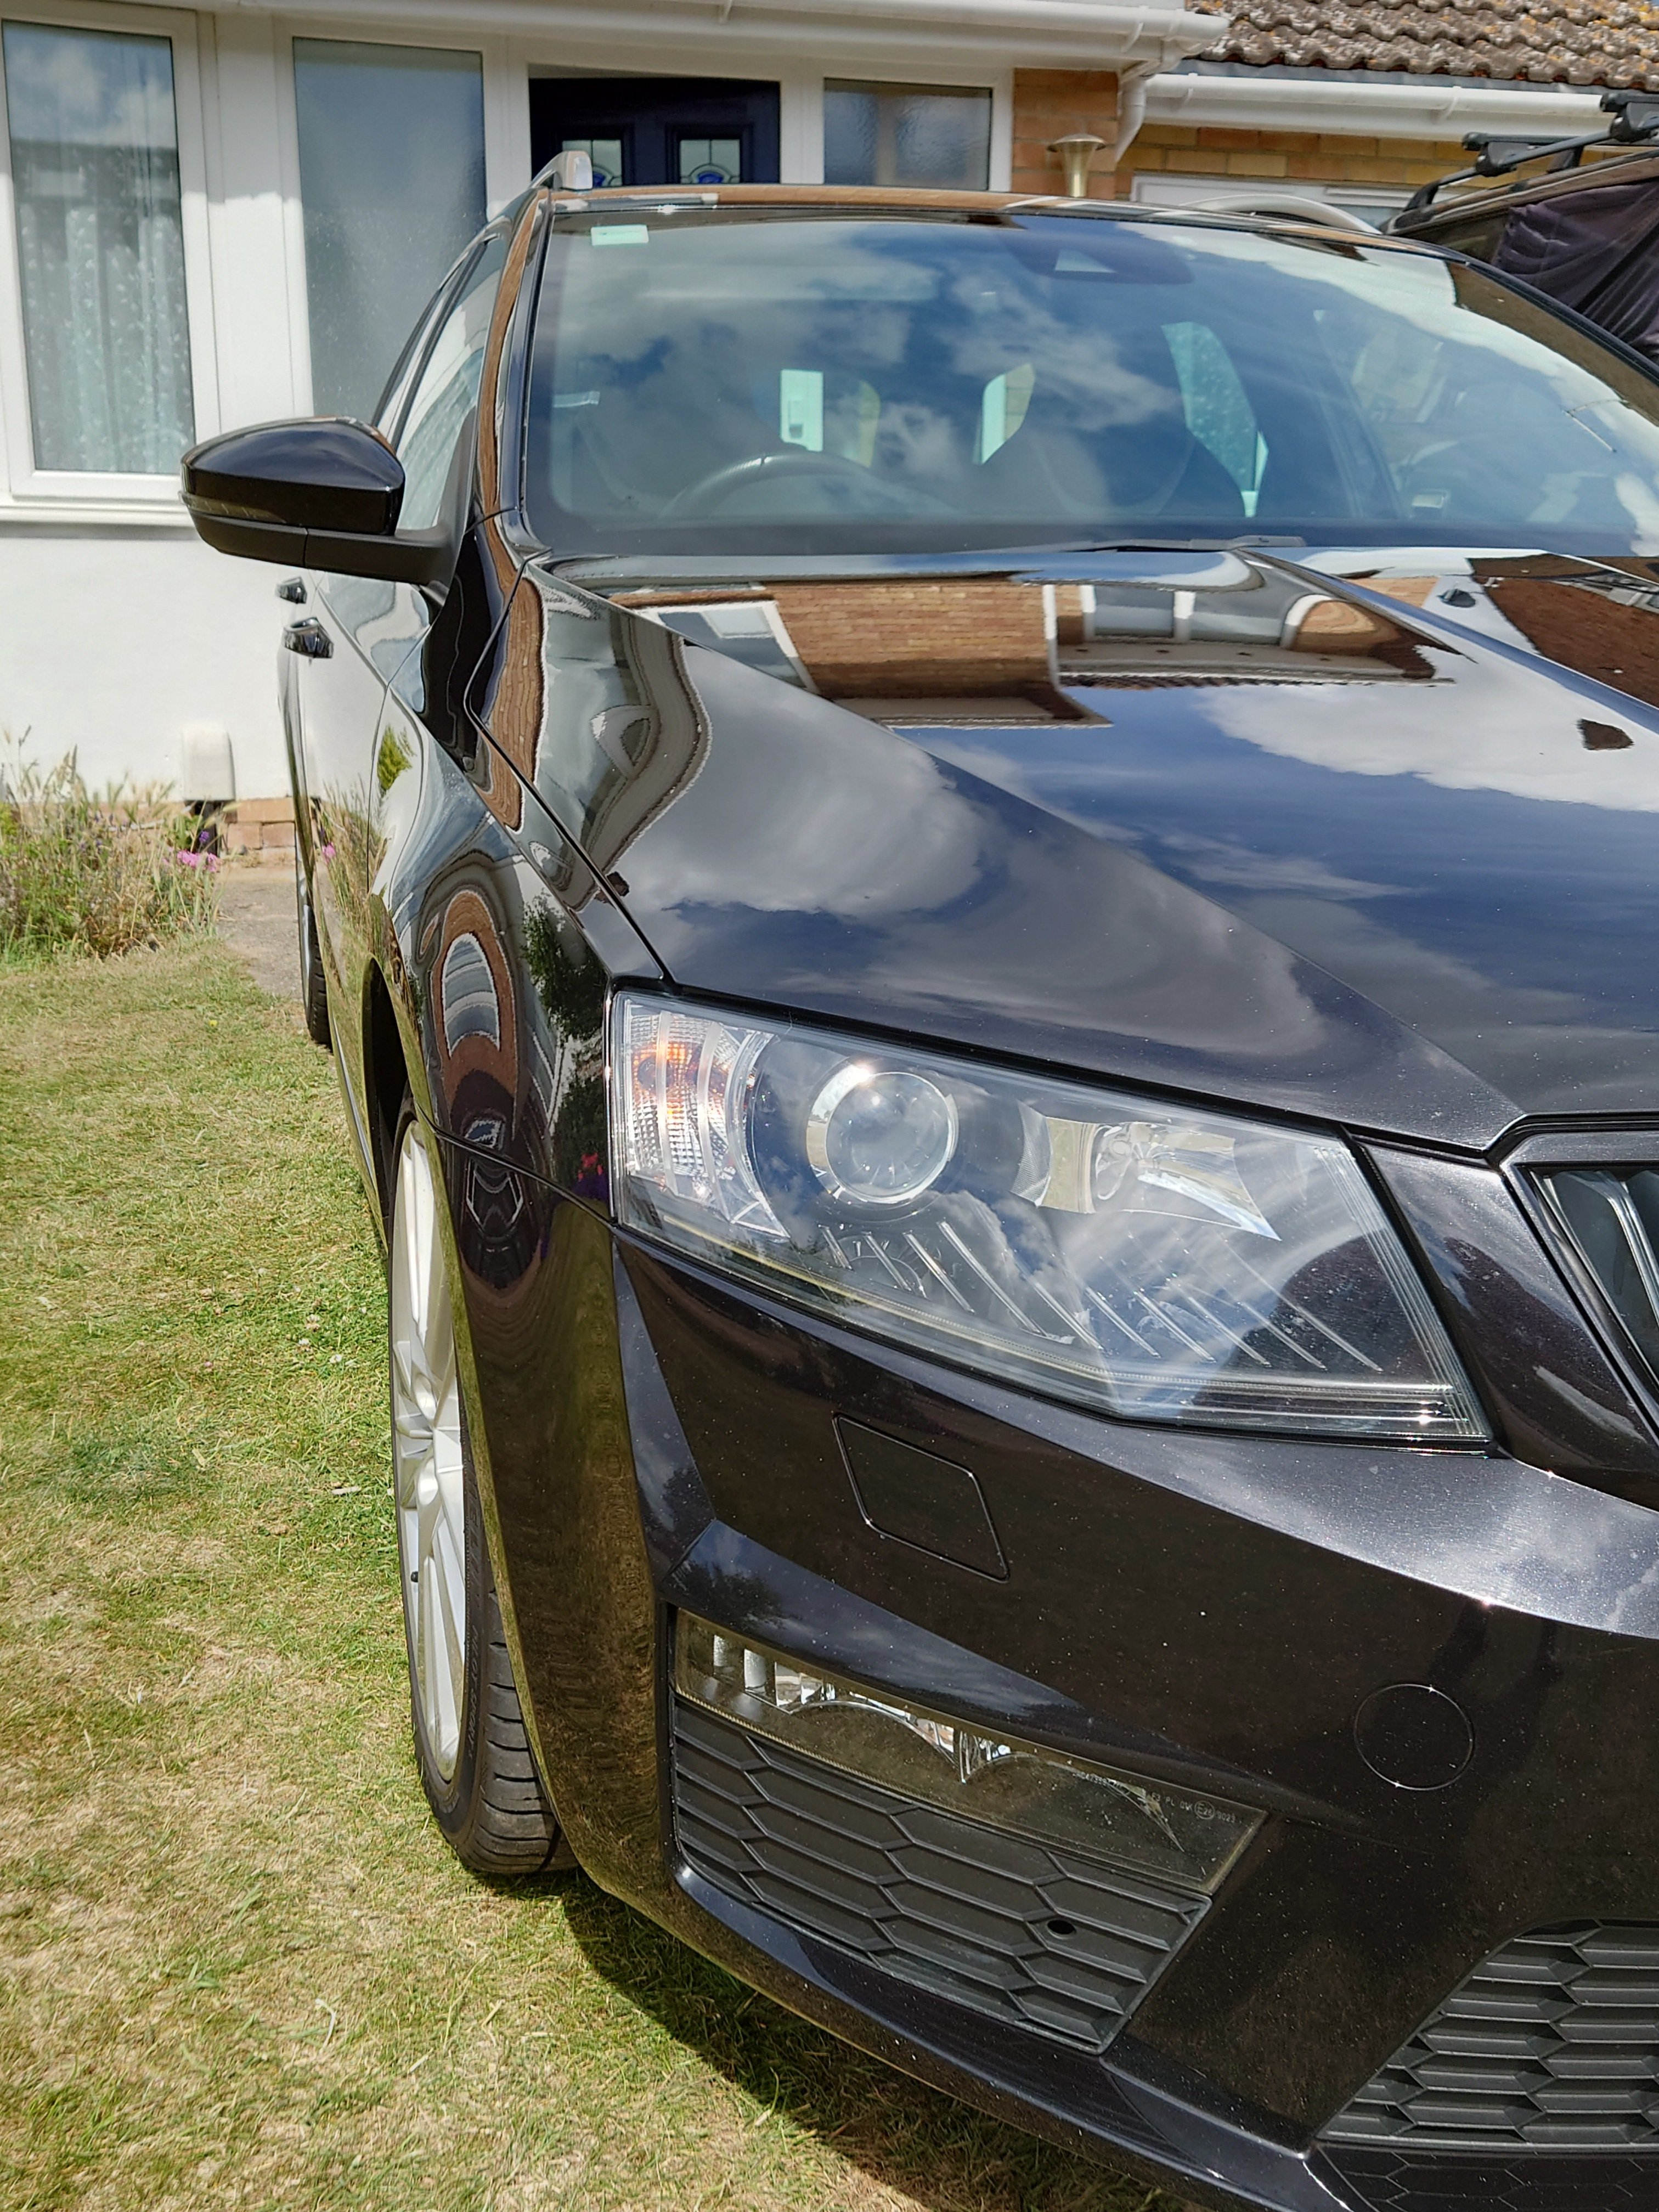
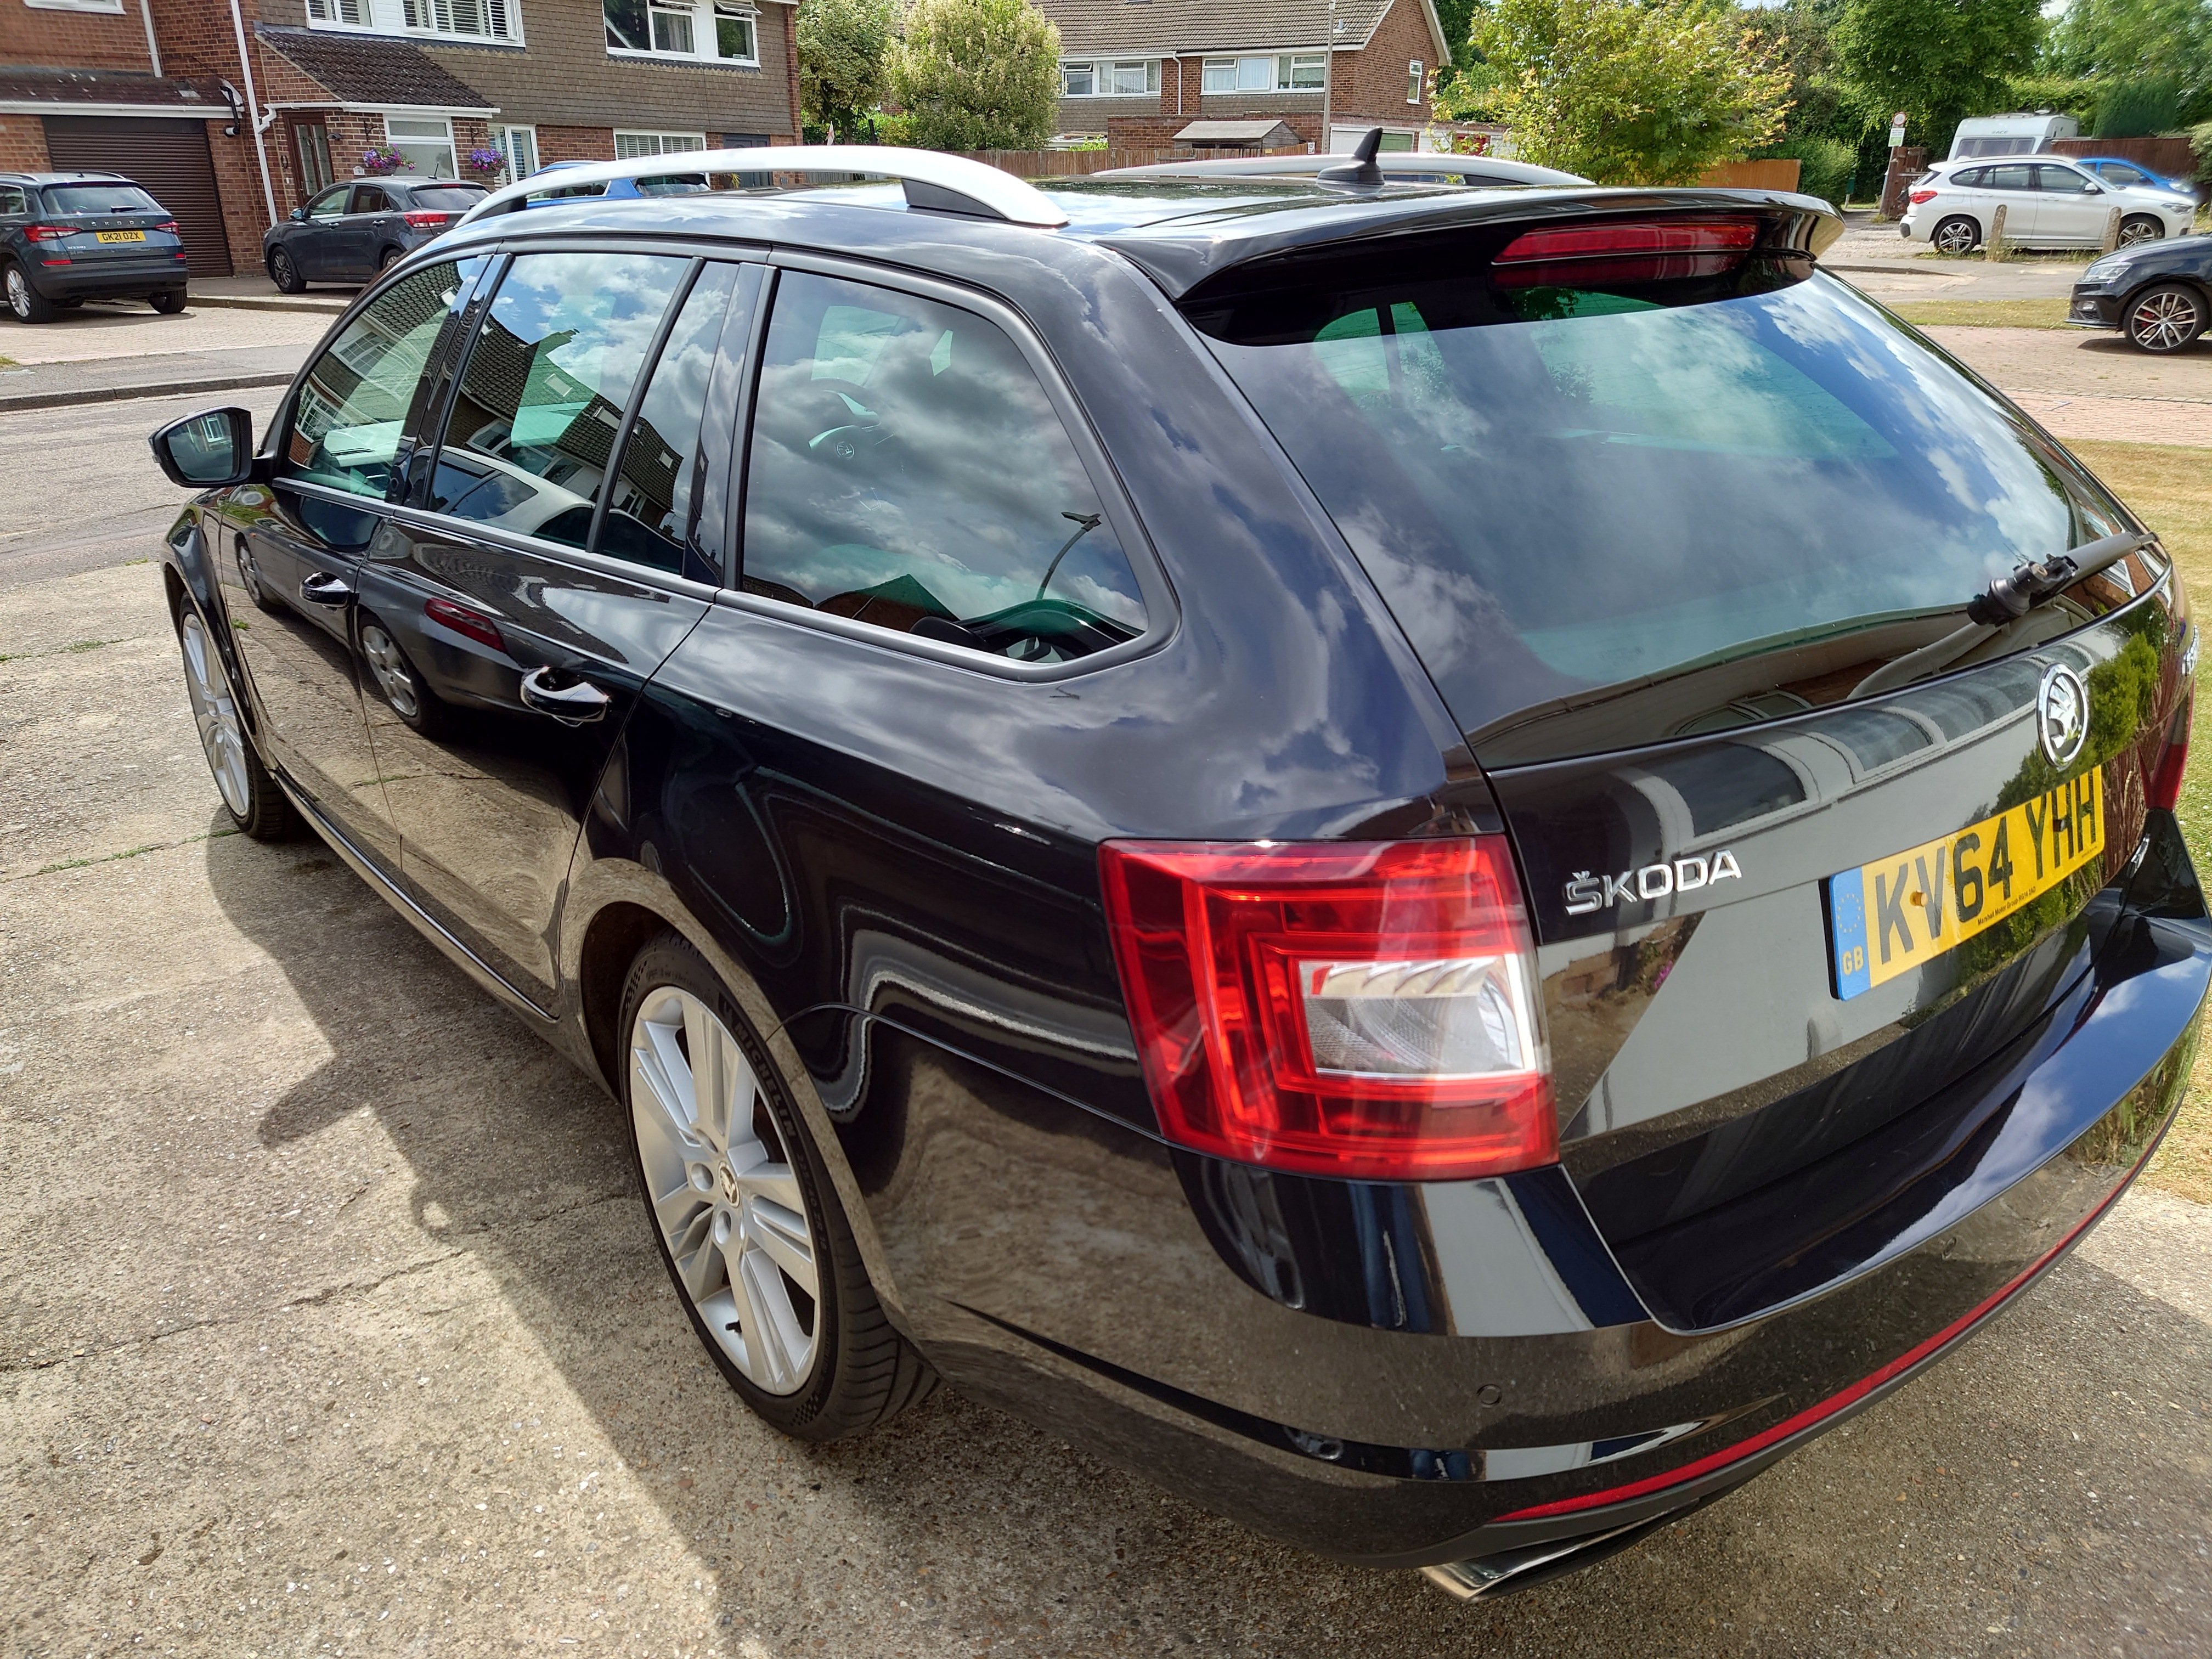
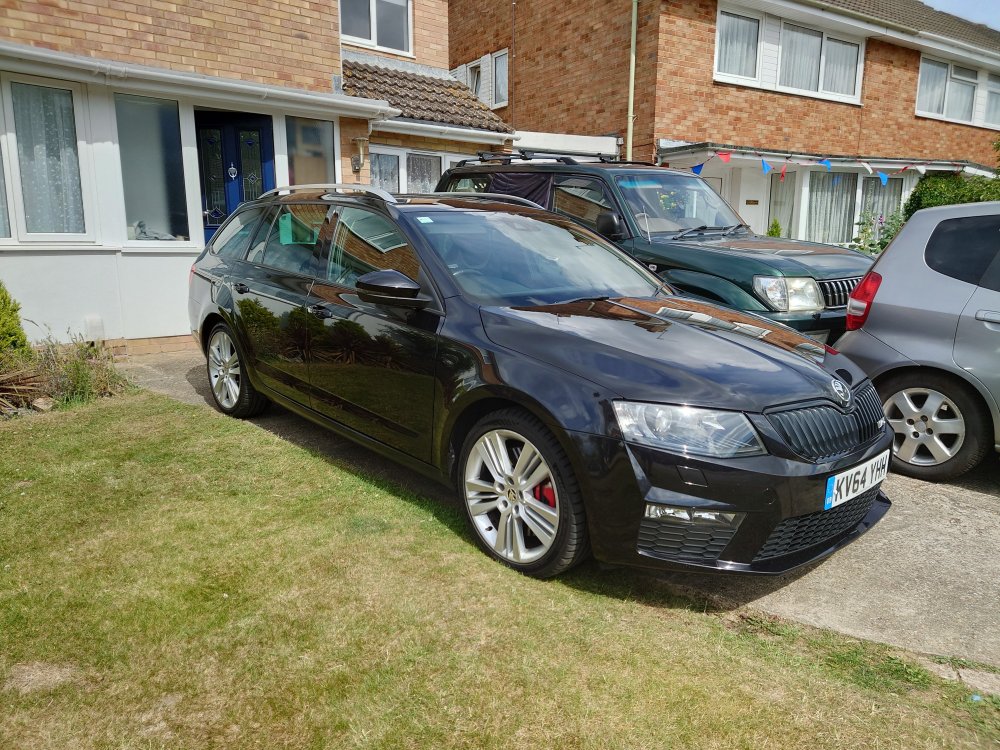
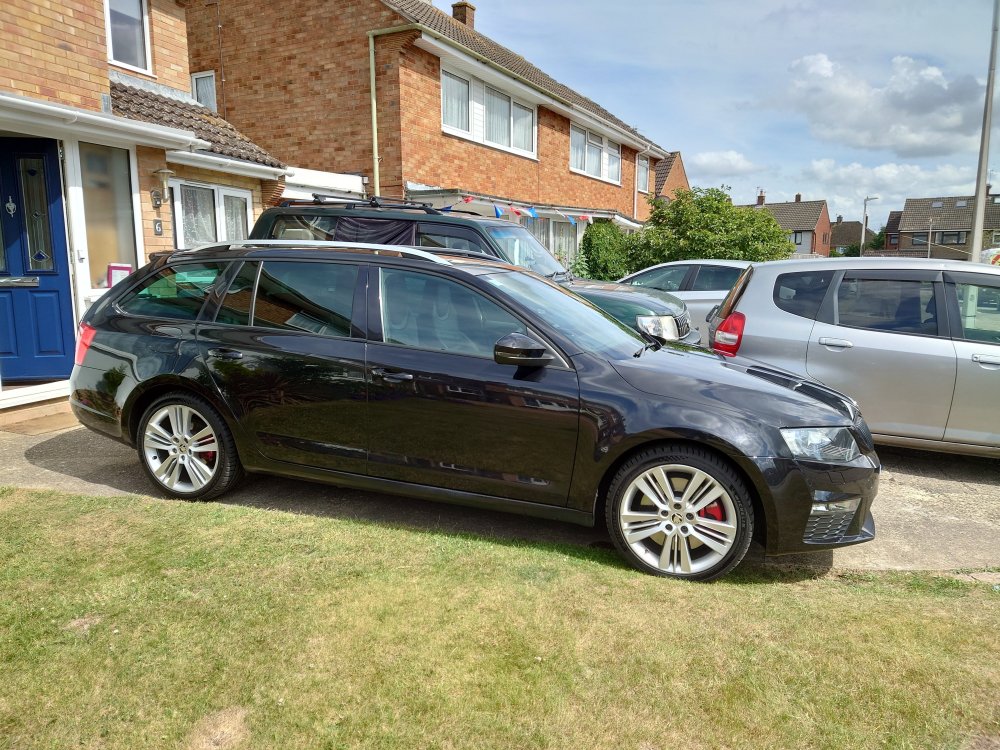
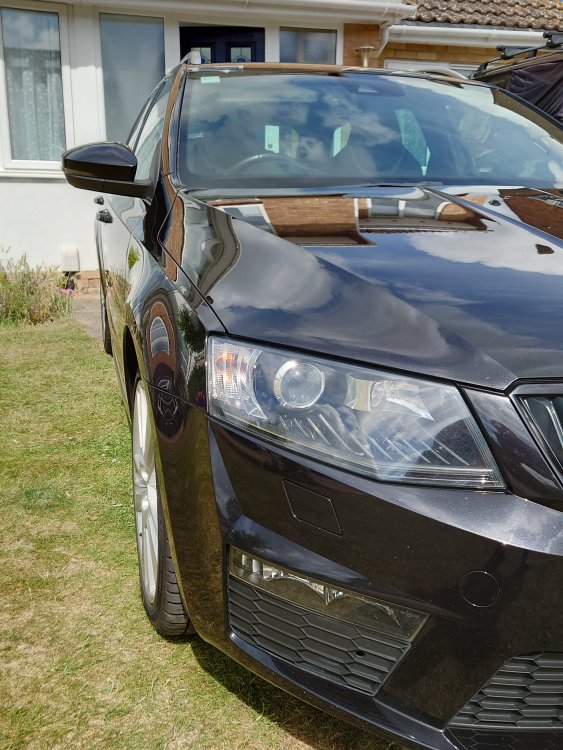
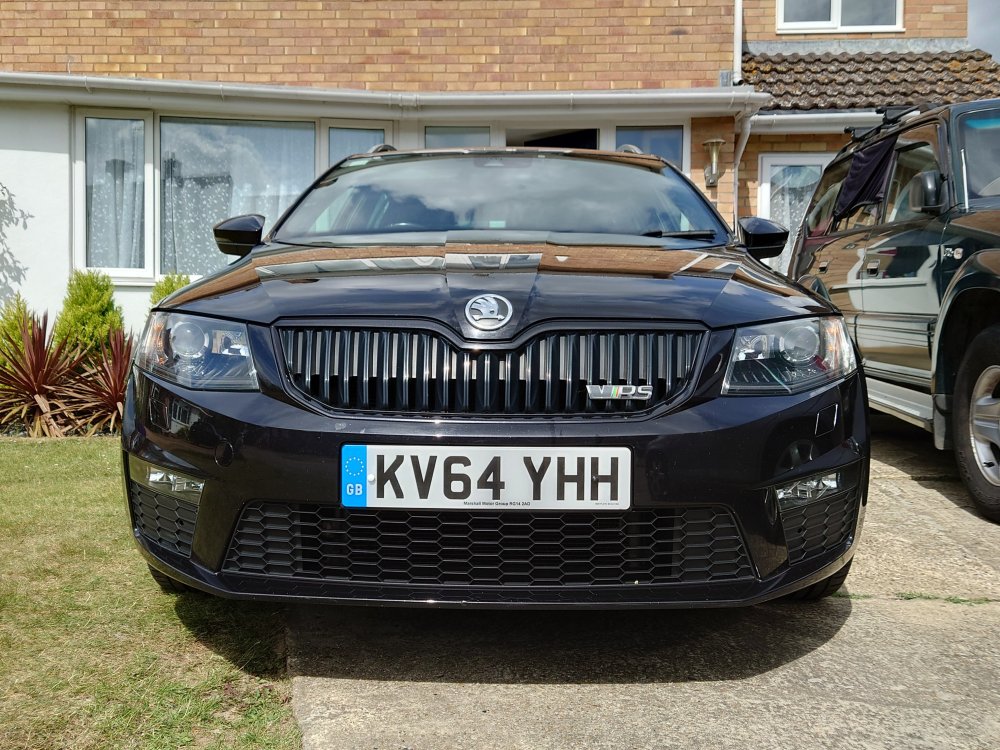
5 pointsSo I thought I would start a new project thread as I seem to have a issue with keeping cars as I bought them. So I have owned many cars previously, Japanese, German etc however I needed something practical and fast so the VRS mk3 hits the spot. I bought the car in May and have already changed the tyres from all different tyres to a set of Michelin PS5's. Also I have upgraded the headunit to a 2019 mib2 unit, so Android auto etc. So after driving this for a couple of months I feel like the car is mapped as it's surprisingly quick and able to spin the tyres in the dry in 3rd. Now plans for the future, first a service later this week, also thinking of changing the plugs,then to fit the R600 intake that already have. After that I just want the car to be detailed and fully serviced to it can go on for years.


 5 points
 -
5 pointsLooks like the rumours of them sorting the backlog appear to be true! I've just spoken with the dealer and its looking like good news! The car is now built (finally) and currently en-route from the factory to the EU port, should be with the dealer in around 5 weeks time!5 points
-
4 points400+ miles between fillups isn't unusual for mine, longest was 430 miles. Worse tank was 33.0 mpg, best was 42.2, average is 37.8. Just depends how you drive it4 points
-
3 pointssorry. It's all well and good showing a map of charging points, but as @TheWandererhas already pointed out in his requirements (and in the vast majority of peoples' as well) the charge times are a current issue. Worst case scenario at peak times, you're looking at a little bit of queueing outside the petrol station forecourt, few minutes to fuel up and then possibly another few minutes idling in the shop itself. 20 minutes or so. Until this charging network gets sorted, get it wrong with forgetting to charge and it could see you desperately looking for a charger. But don't worry, the AA has a plan already.....3 points
-
3 pointsI've just reached UK pension age so probably older than middle aged, however I don't expect my car (new in 2020) to be the last car I will ever drive so I fully expect I will be driving an EV later in my driving life. I hope that by then the public charger availability and hogging issues discussed on here will be a thing of the past.3 points
-
3 pointsI'm sorry but EV's have a hell of a long way to go before they can be considered a fuel for everyone. A colleague of mine uses the salary sacrifice car scheme because it just means he doesn't have to worry about a lot of car related stuff. A several years ago, the lease company starting leasing EV or hybrid vehicles. He got a Hyundai Kona EV version and thinks it's great. He tootles to and from the shops, the occasional journey into the city, but nowhere too far...........that is until him and his missus went to Edinburgh on a holiday. Now even in a petrol VRS, you're getting there to and back in one day and on a single tank of fuel (from where I live in Liverpool at least). In his EV, oh no. They had to have there and back, a stop over in the Lake district to charge up because, and in his own words, 'we can't guarantee we'll be able to find a proper charger which could charge the car up in a time to get us there at a reasonable time of the day'. And I love the argument about 'oh it's how you charge the battery'. No, I'm sorry, that's a cop out from manufacturers of the cars and cells. That's one hell of a 'covering their backside' act. I've been in recent months on a couple of touring holidays with my car and motorbike in the trailer, and at no point have I ever thought to myself 'I wonder if I've the range to get to where I'm going next', because I ever were to doubt myself, there is never a petrol station too far away. Yes, with all the crud in the car and trailer, the MPG dropped from what it normally would be, but it wasn't a huge drop. Now, if you watch the video below, you'll see a lot of the problems EVs have.3 points
-
My best car was my late lamented Audi a6 2.5TDi quattro Avant... ...which I bought at 160k and, over the next 10 years, did 160k of my own. During that time it did an average of 42mpg. Held the road beautifully and took me all over the place. My Superb 4x4 estate is like an updated version of it. My 'fun' car at the moment is a 2006 A4 Convertible TDi 140 - which I lavish far too much money and time on... ...but which has also taken me to some great places..3 points
-
3 pointsOh, I'm pretty sure I know why they're not all that common. Same reason why all 'halo' cars sitting at the top of a range aren't the best sellers. Yes, it's got a pointlessly powerful/thirsty engine in it. Yes, it's stupidly expensive for a Kodiaq. No, it's not as quick as a Lamborghini Urus. No, it's not as big as a Range Rover. But I'm guessing that those people, myself included, who bought one did so because... well, go figure.3 points
-
Well thanks for making me feel especially old now. You kids with your Myface and Spacebooks and Clock tocks.... IRC is Internet Relay Chat (Internet Relay Chat - Wikipedia) - a number of server networks that hosted chat rooms that people could join. It also had a reputation for sharing 'warez' (a precursor to torrents for sharing software etc.) through bots in dedicated rooms. Here endeth the history lesson3 points
-
3 pointsDon't you worry about tenders. They all get delivered to the date. Here in Slovenia and Croatia many police cars were delivered (probably there is a delivery date in the contract), while we peasents wait for crumbs like we are getting the car for free.3 points
-
3 pointsall I'll say is I've never seen a plastic compound fuel tank needing to be changed. But you have an electric car, that battery is going to be unable to hold anywhere near it's advertised range, let alone it's actual one once it starts to age. Fossil fuel rules, OK!!!3 points
-
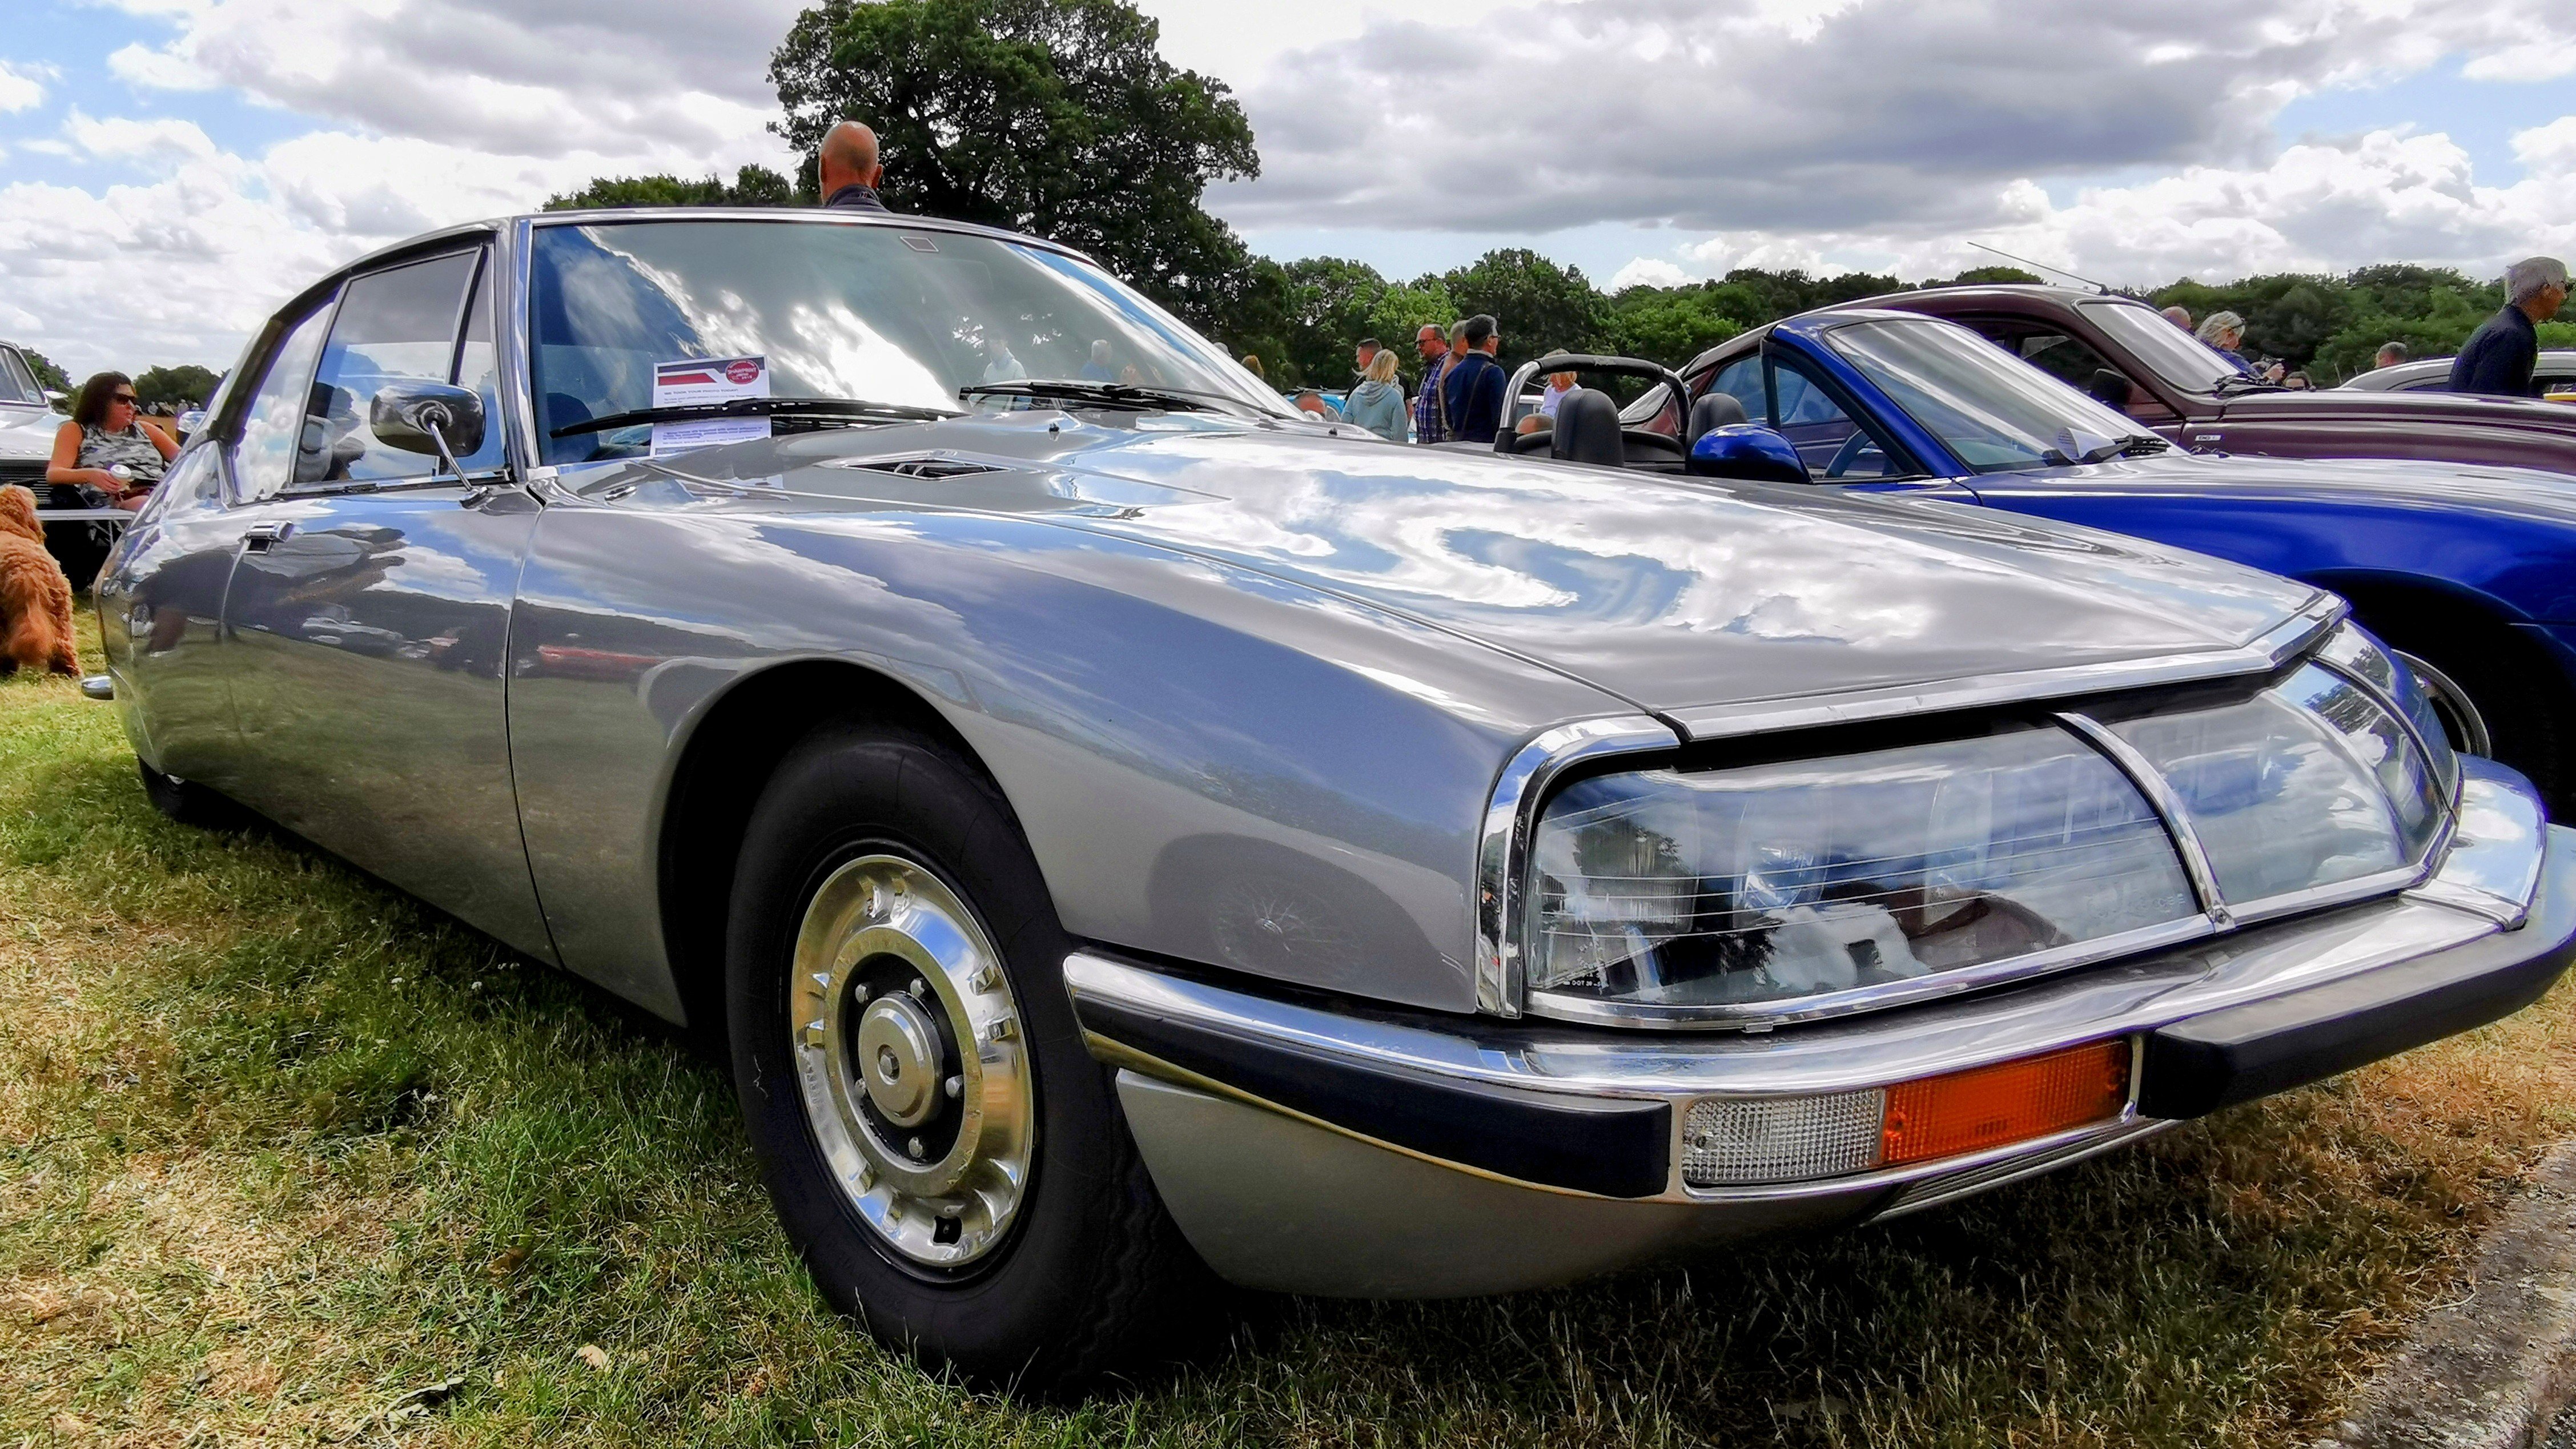
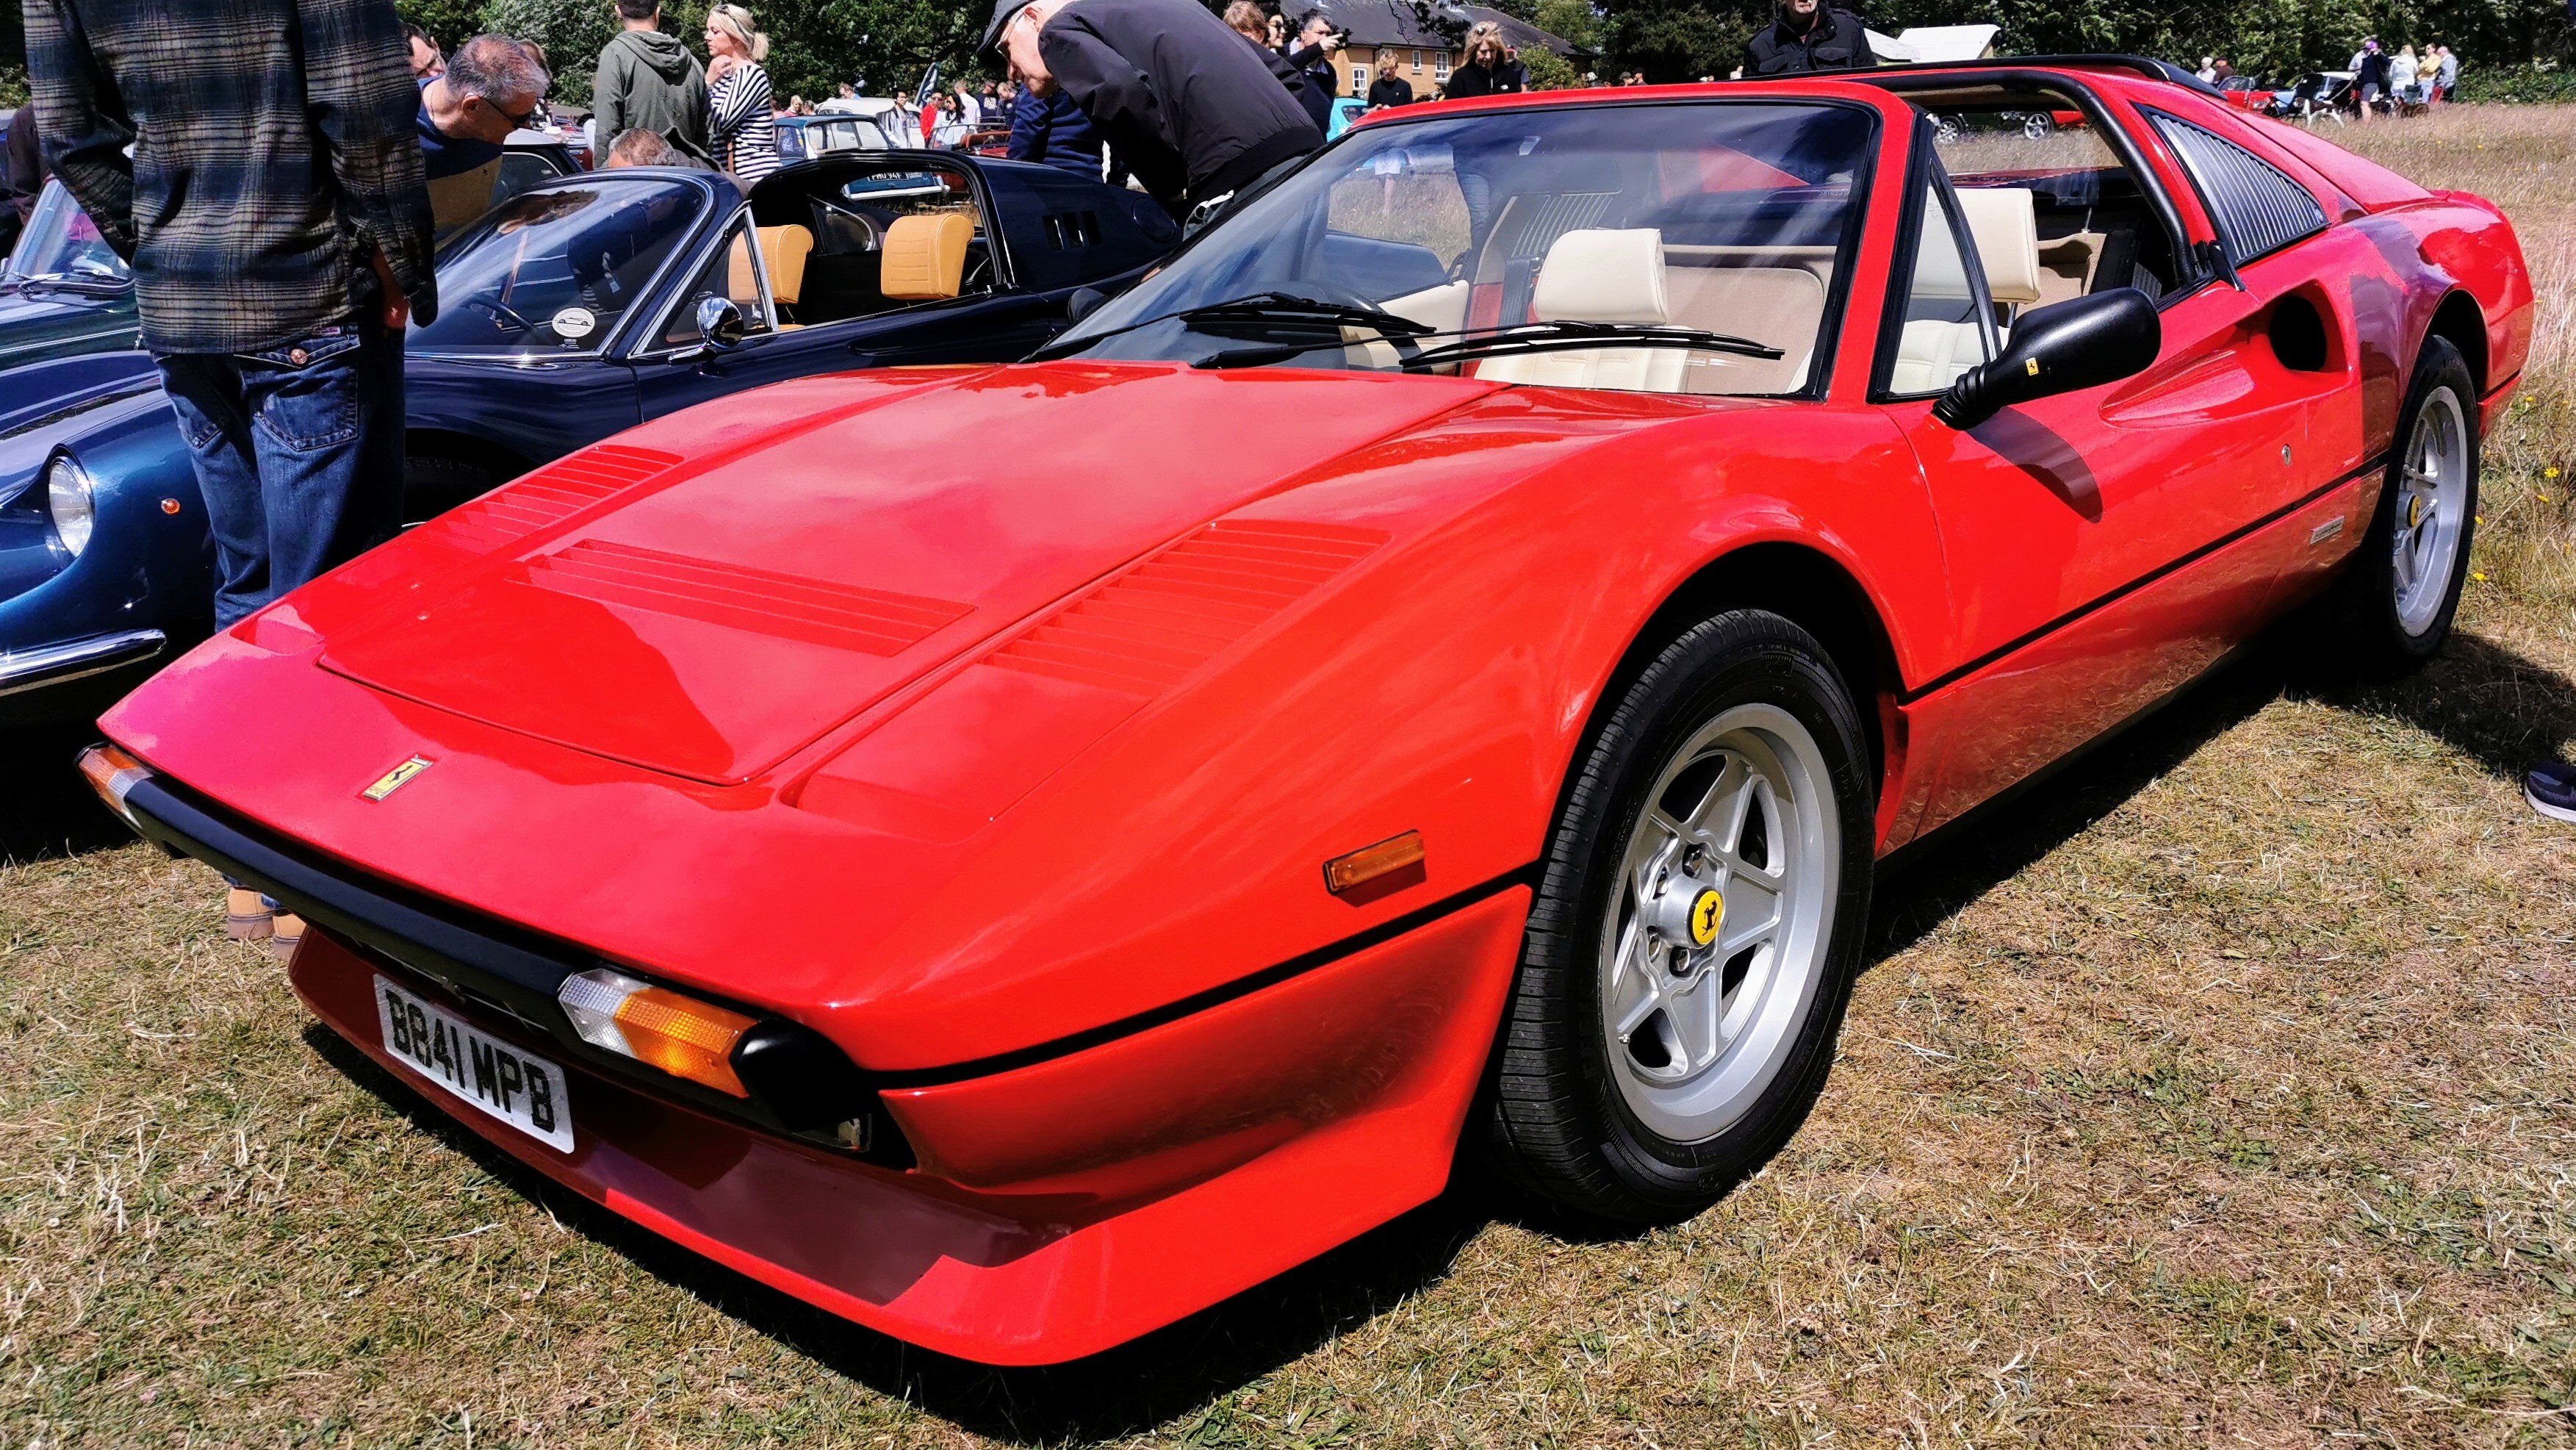
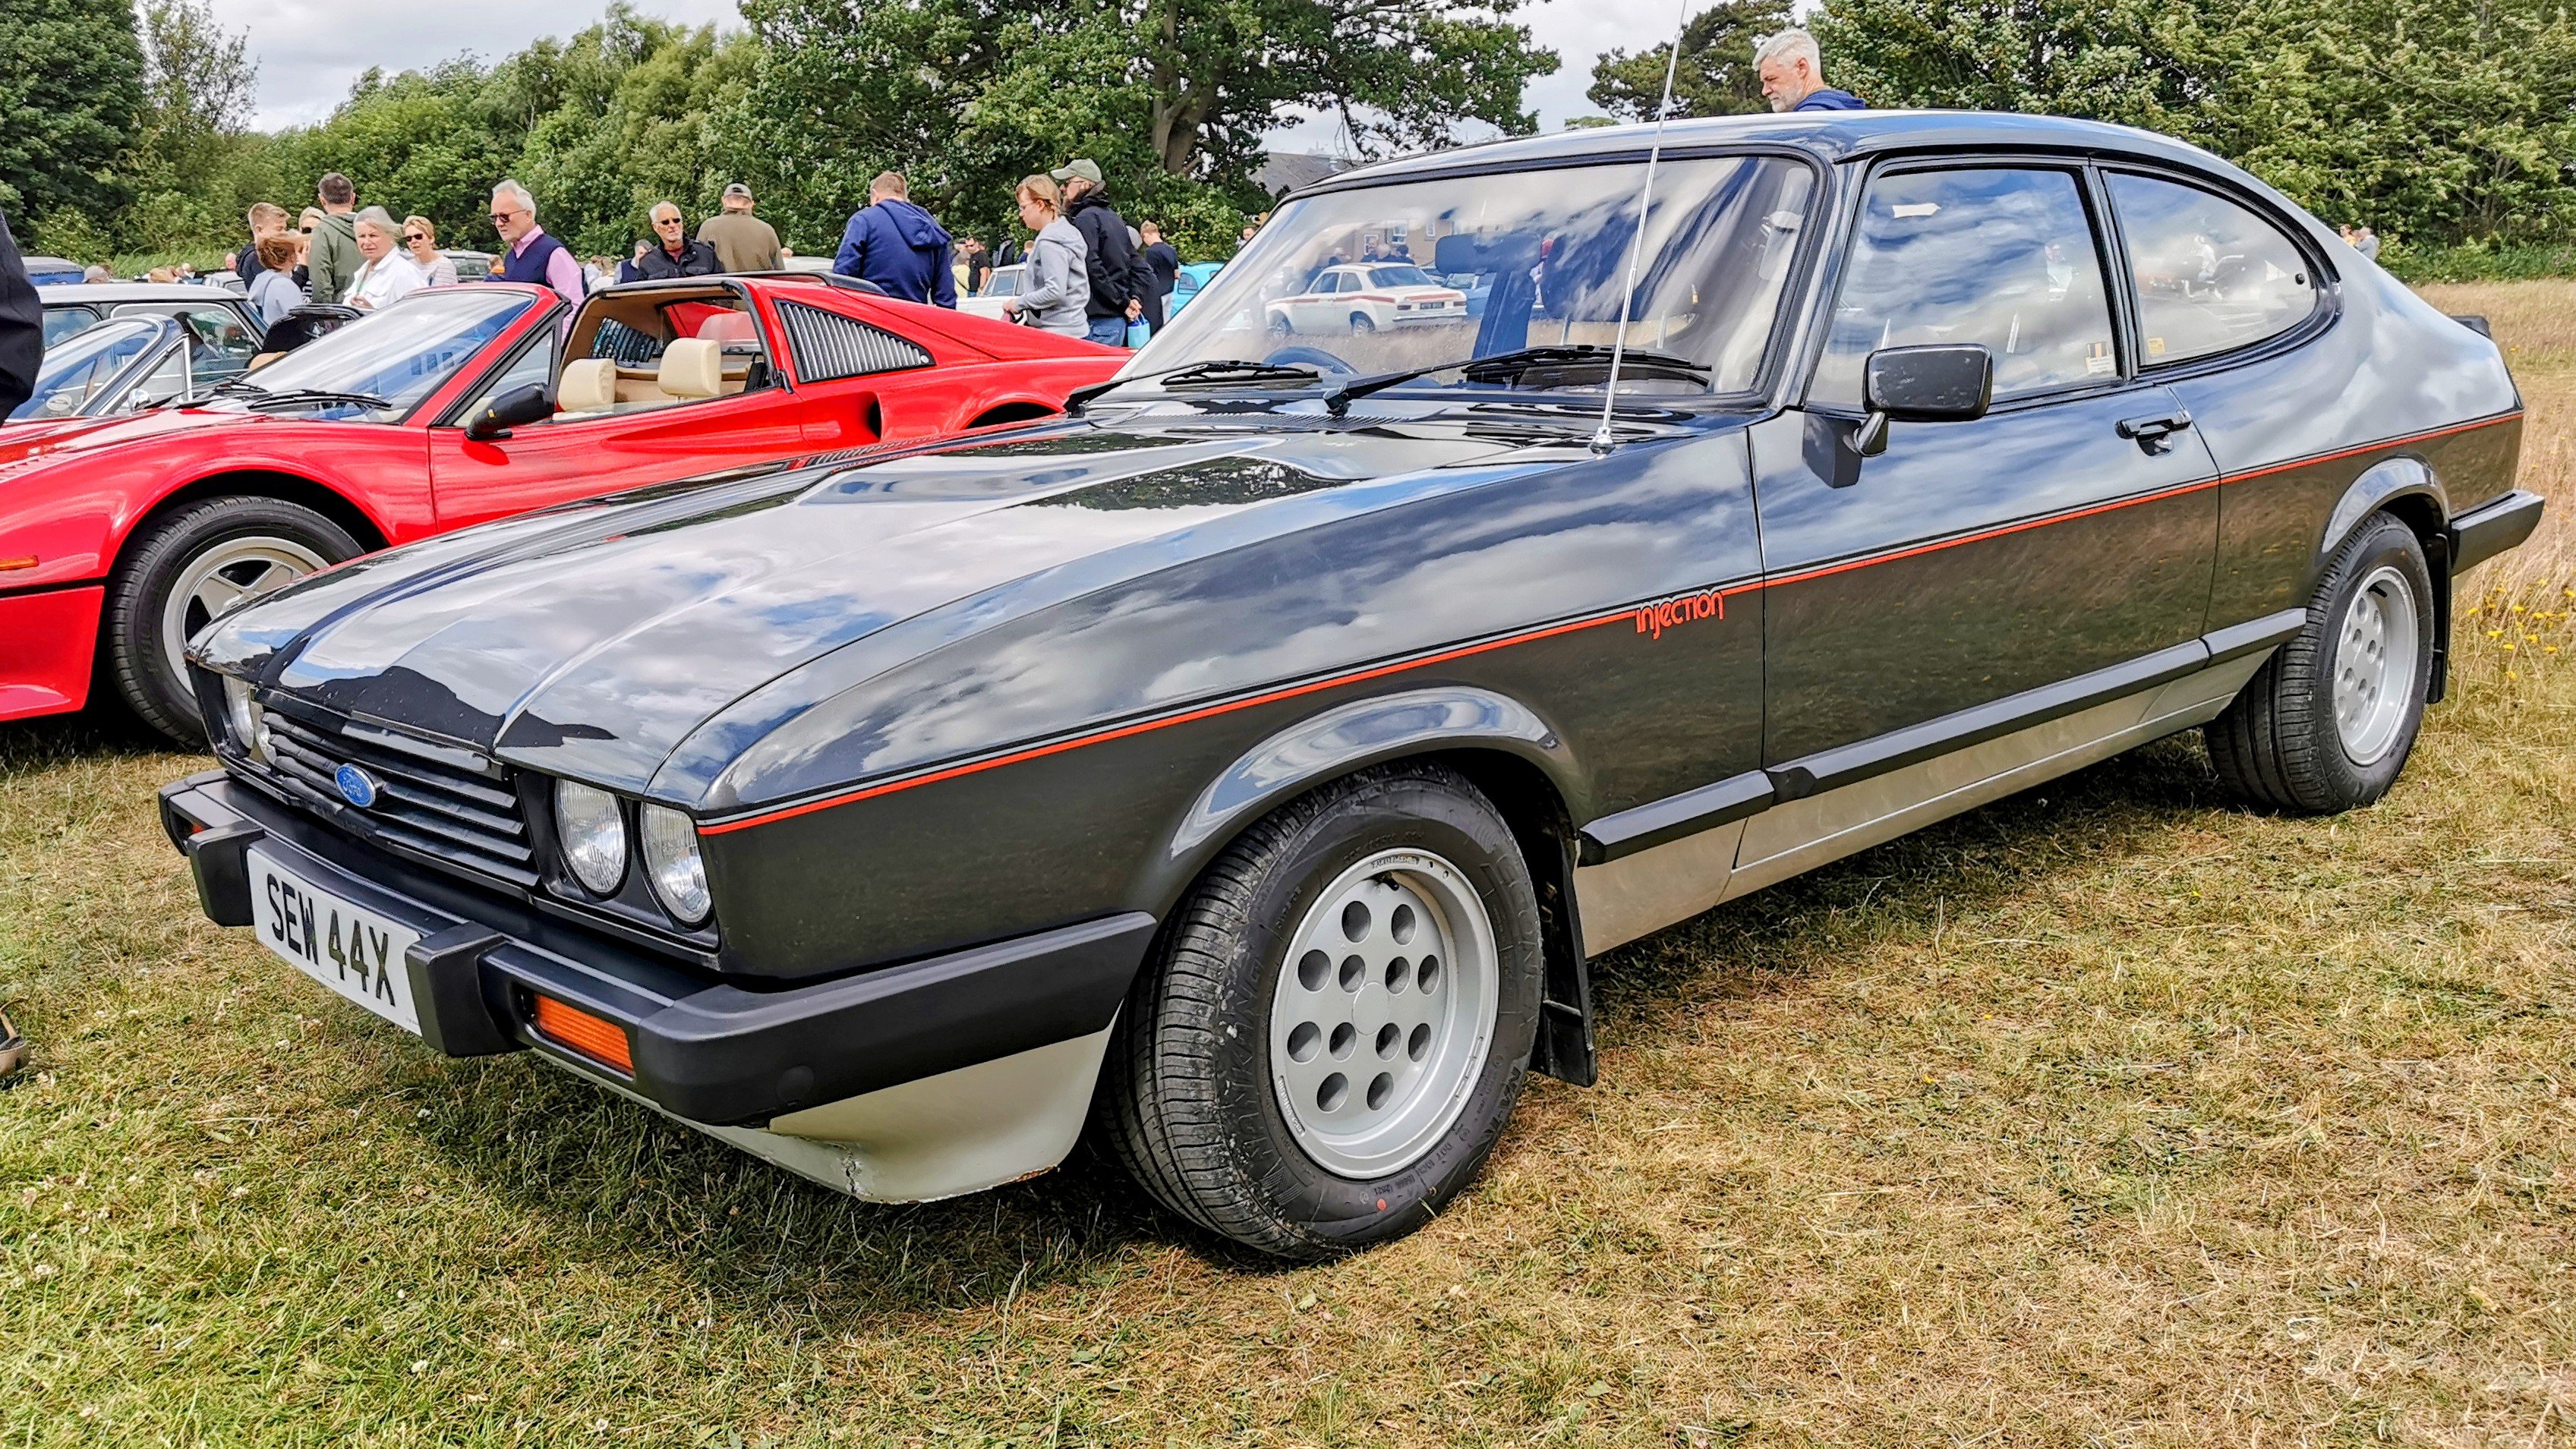
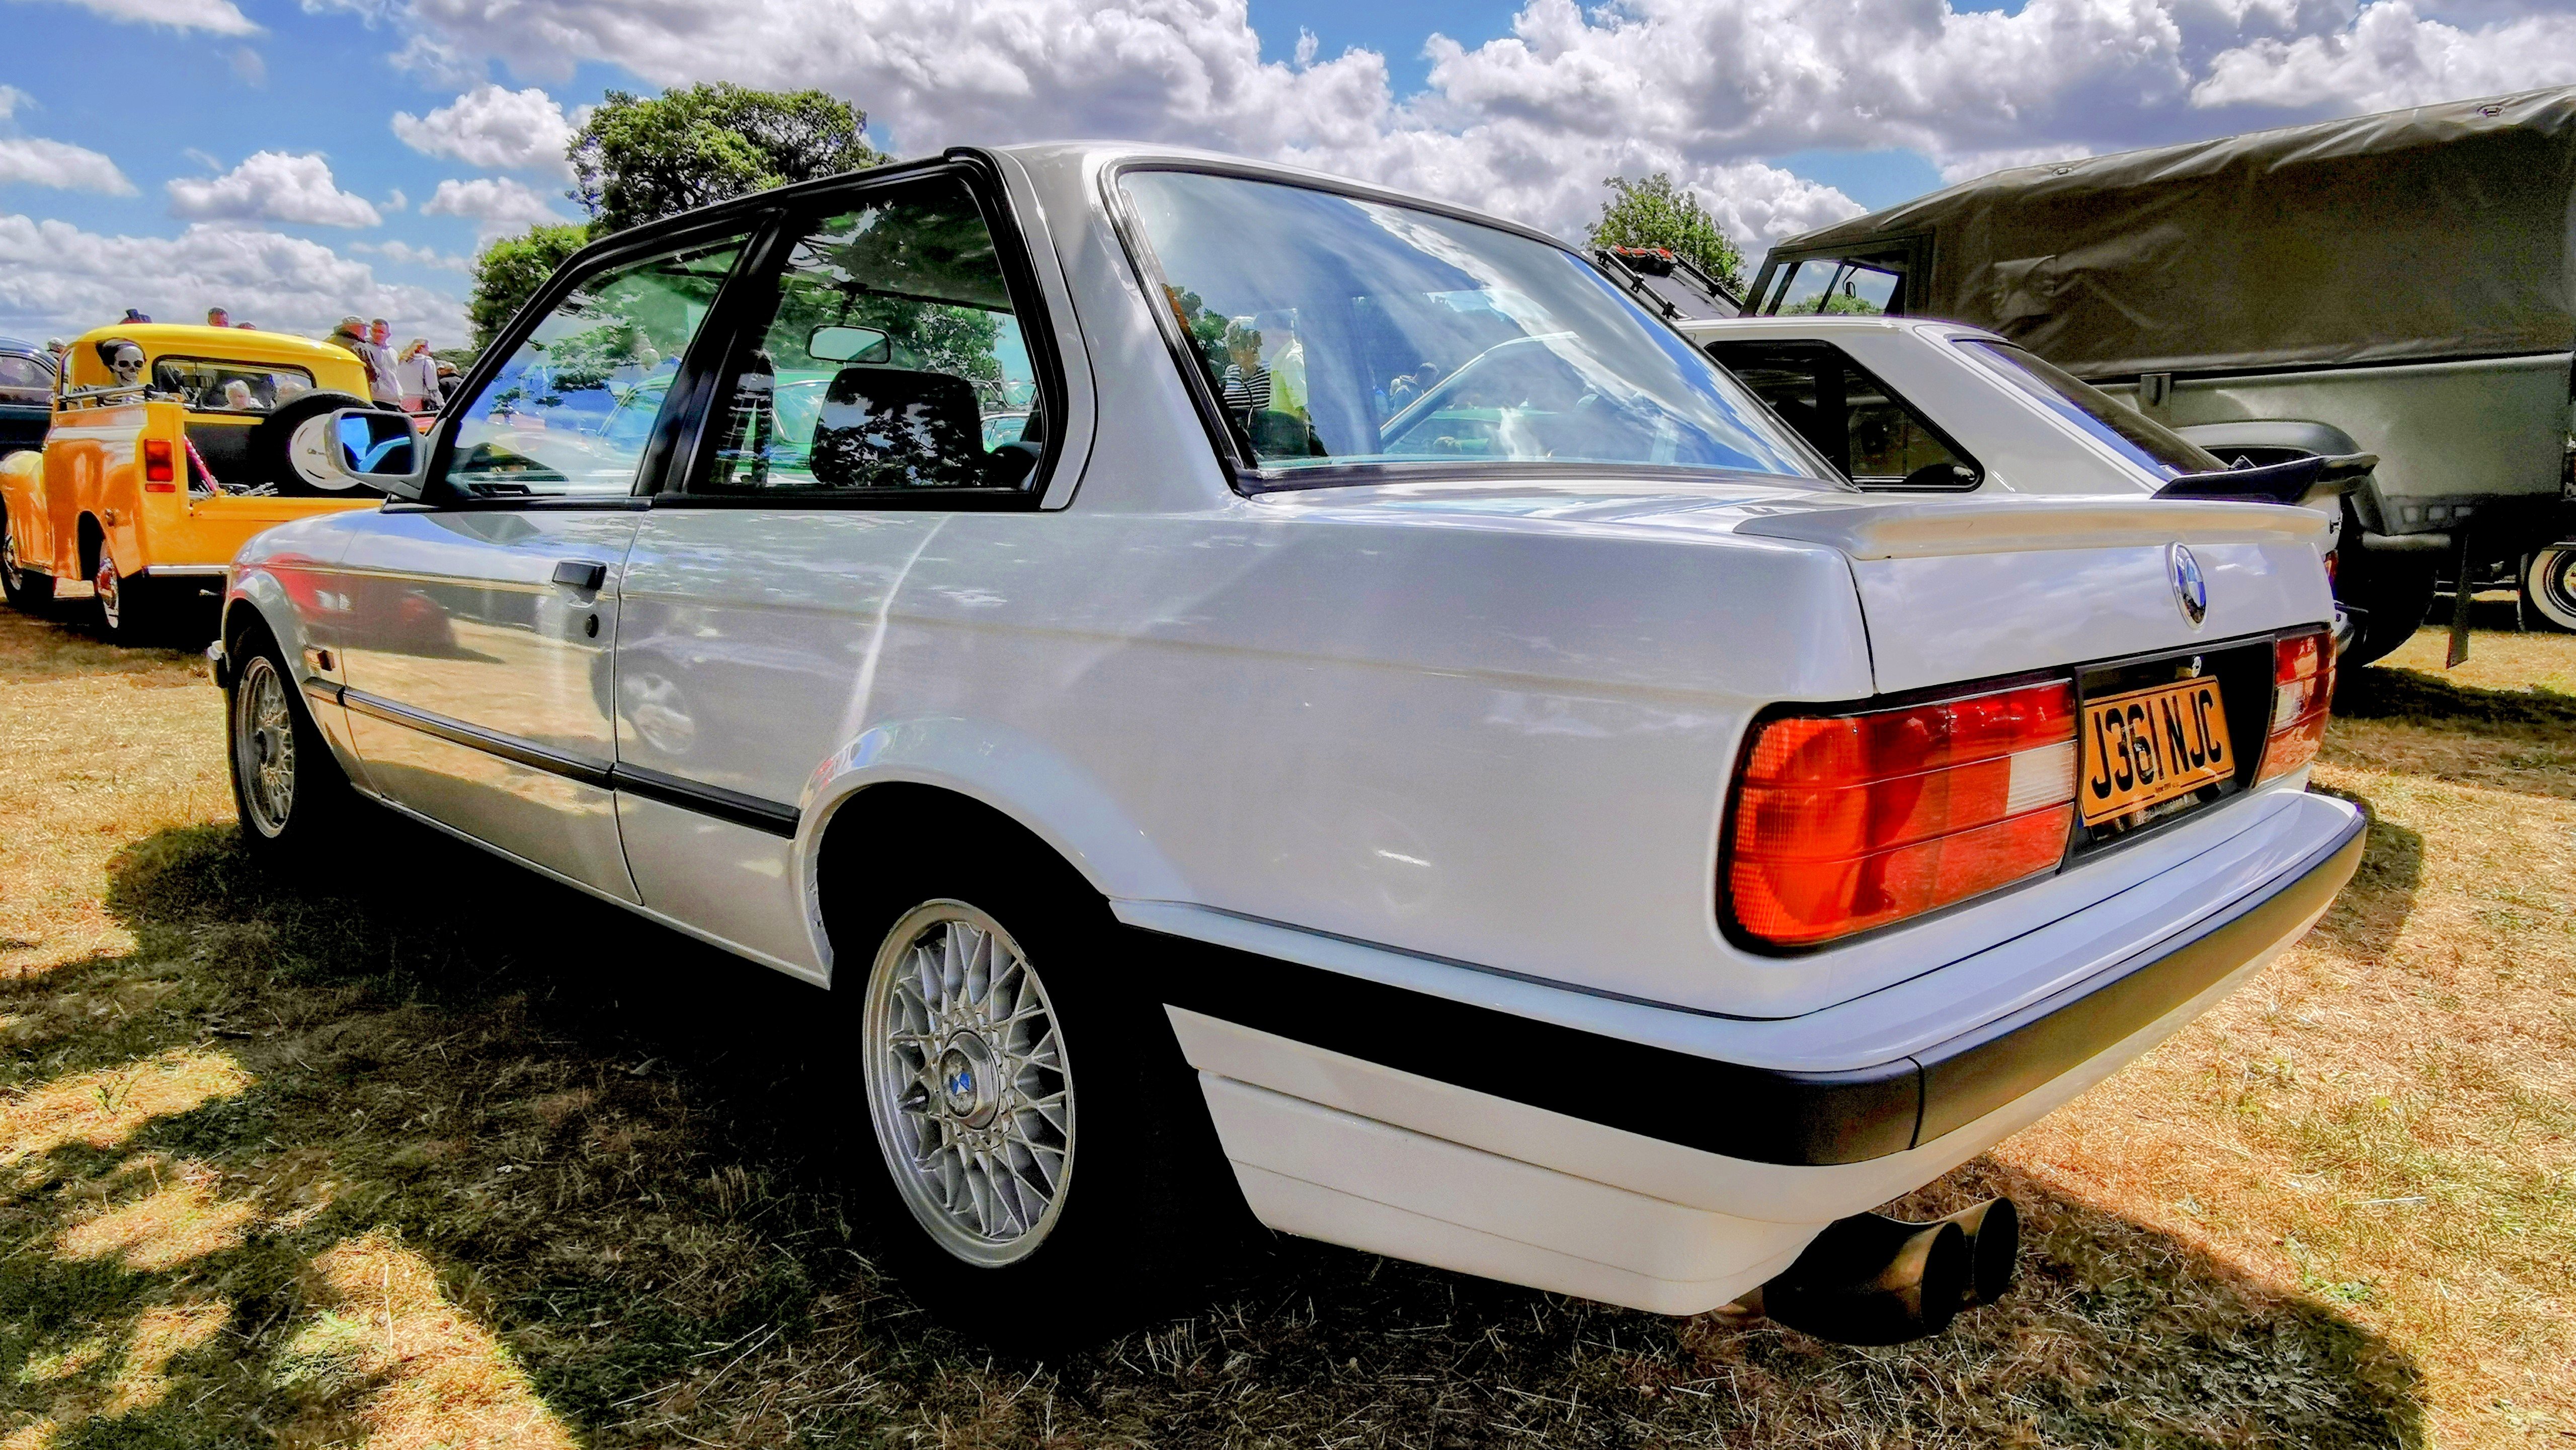
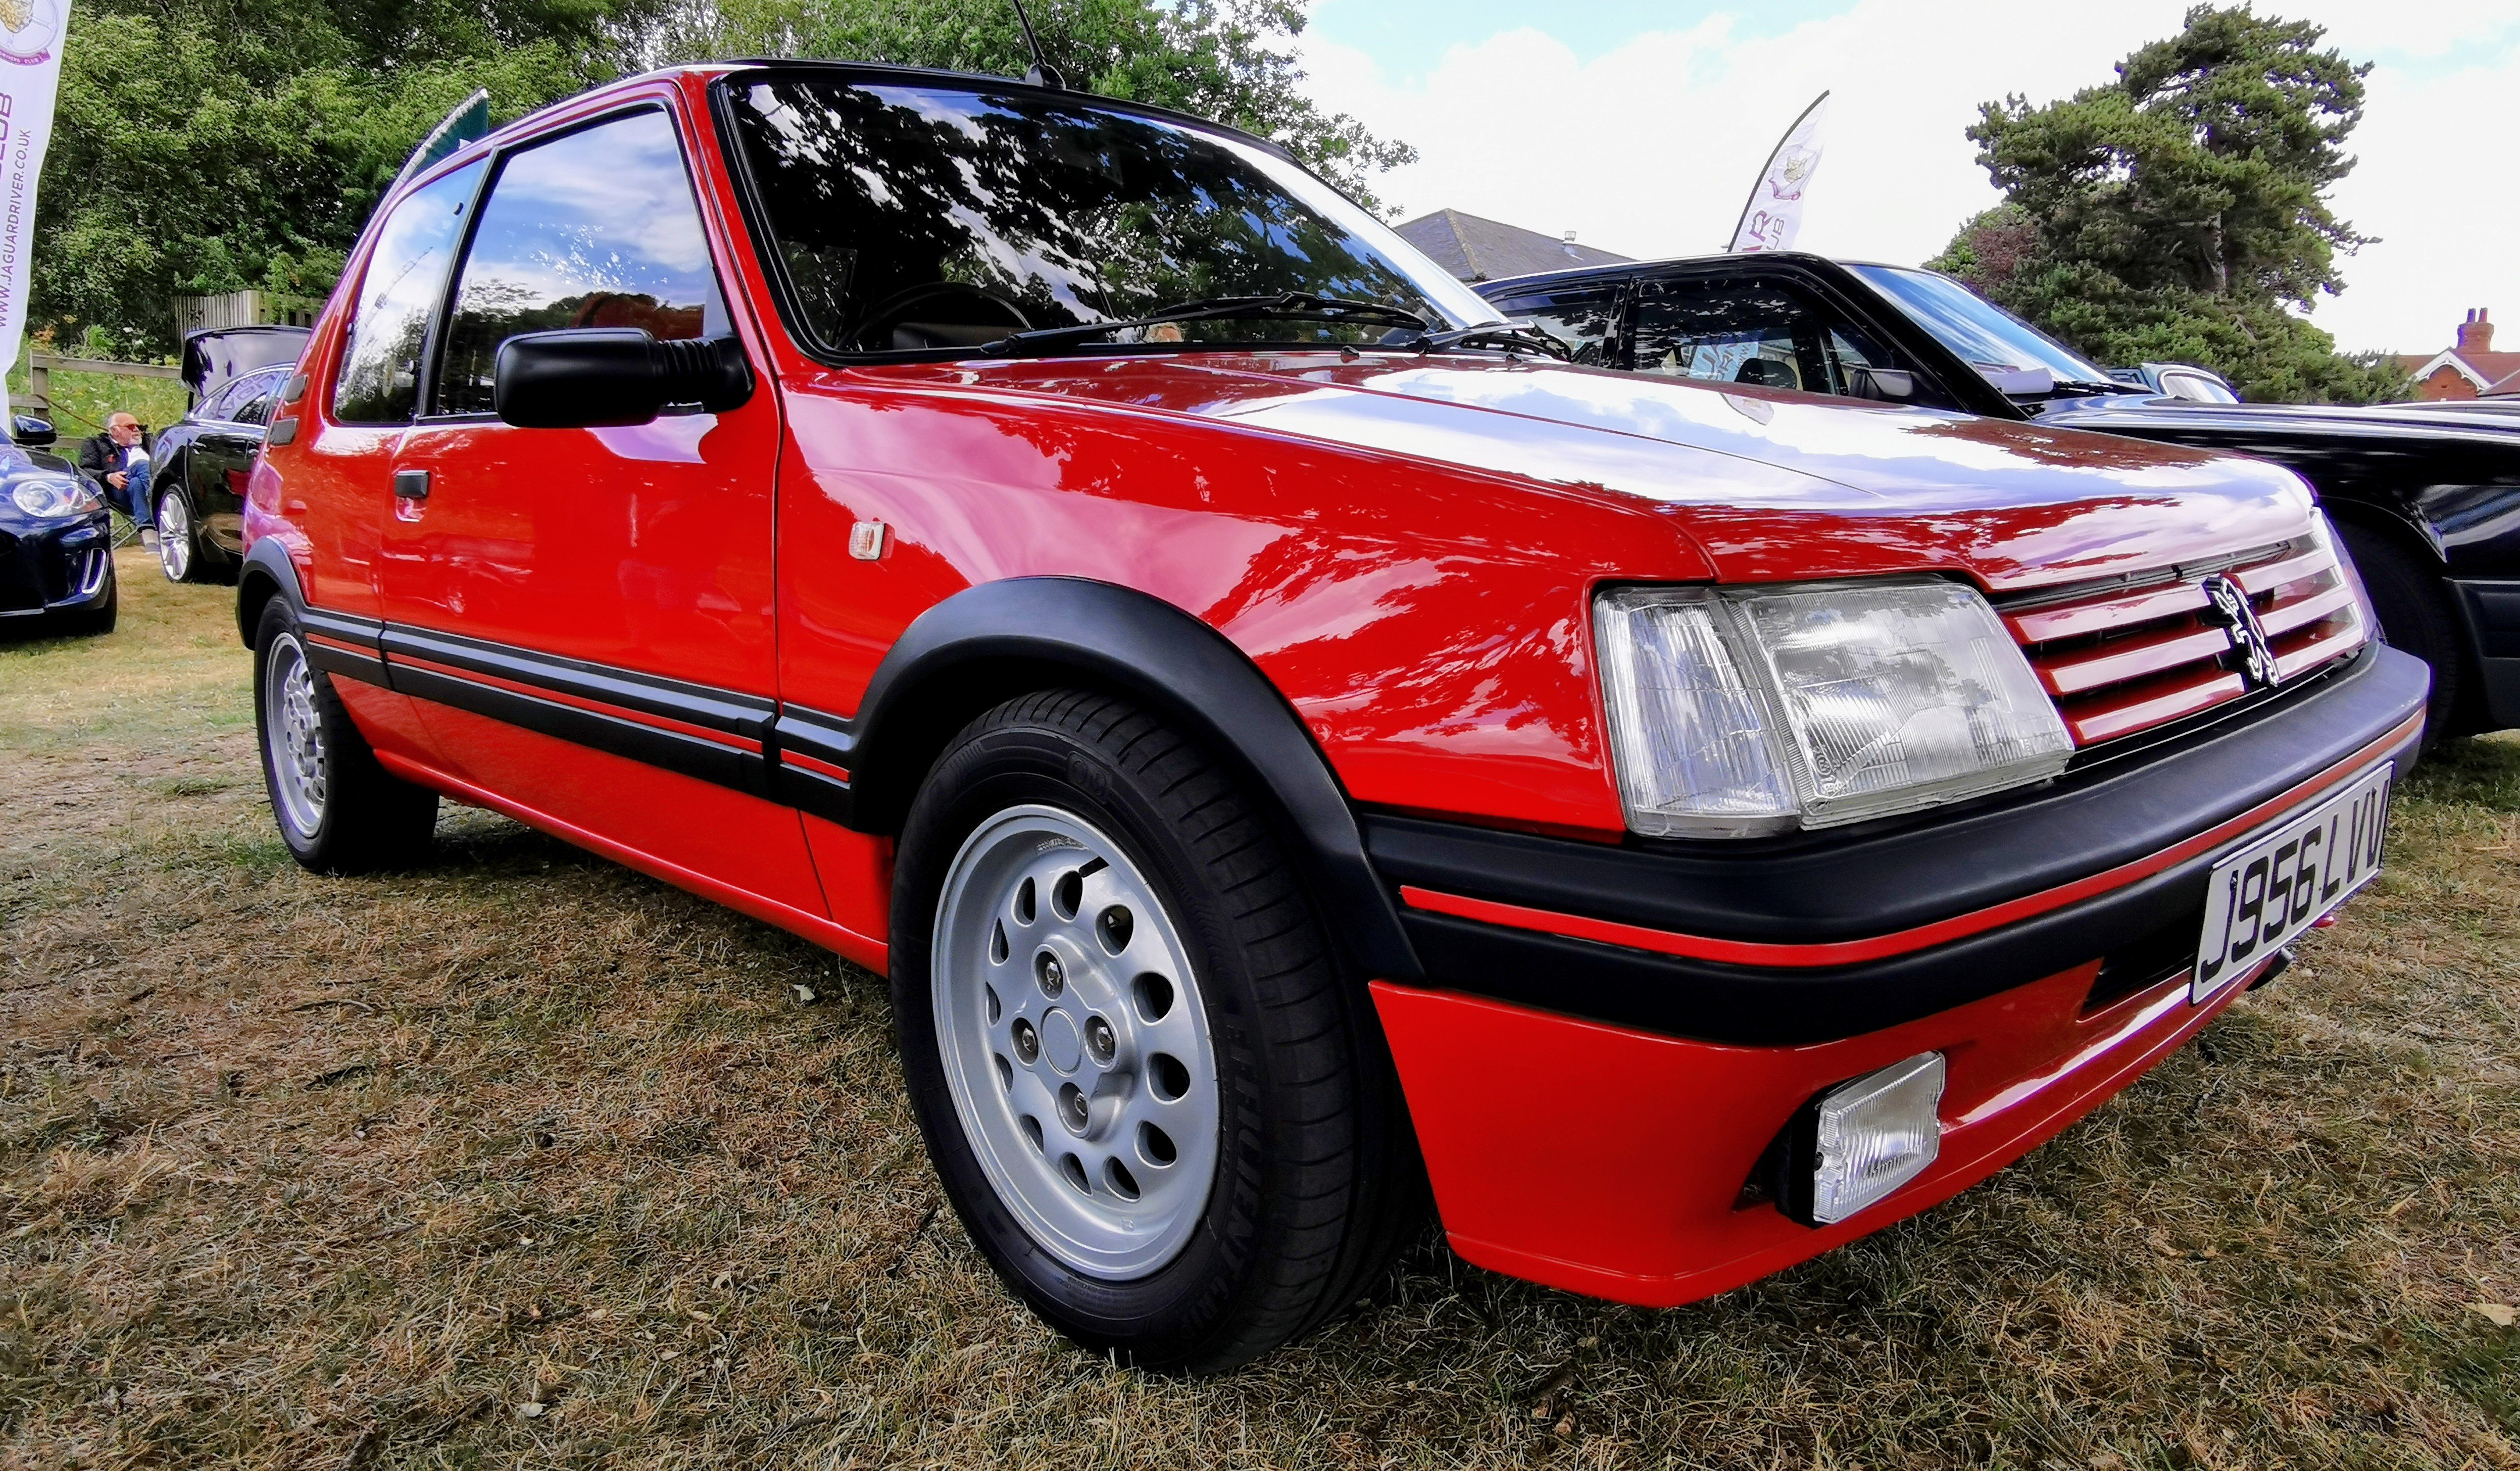
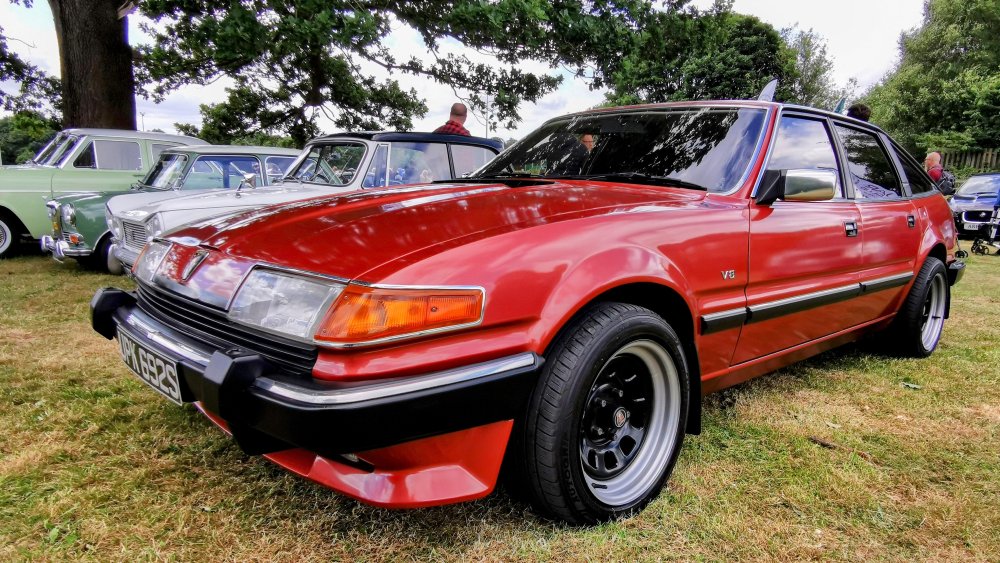
3 pointsA few from a local car show this afternoon. The star of the show for me was the Citroen SM - must have looked like a spaceship in the early 70s!
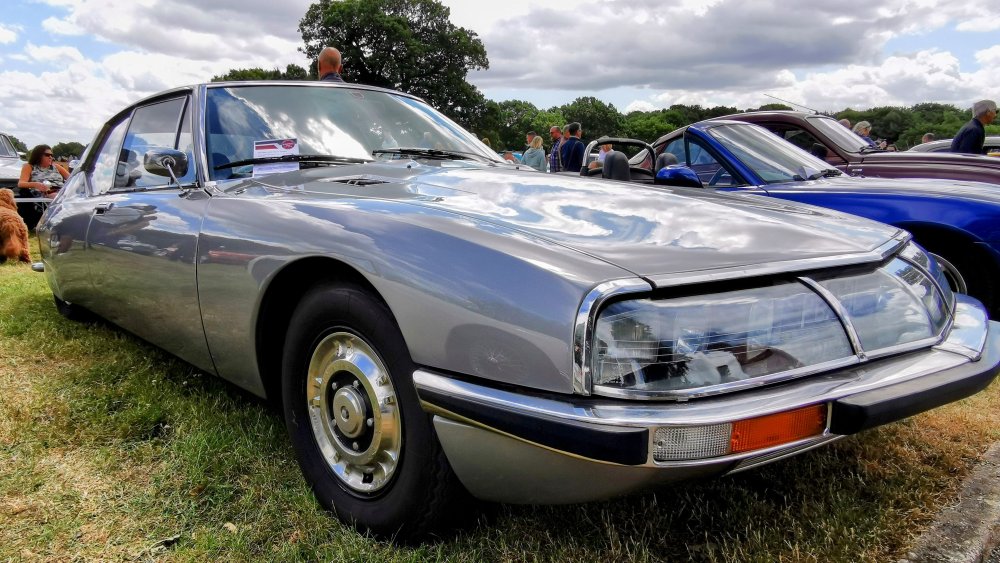
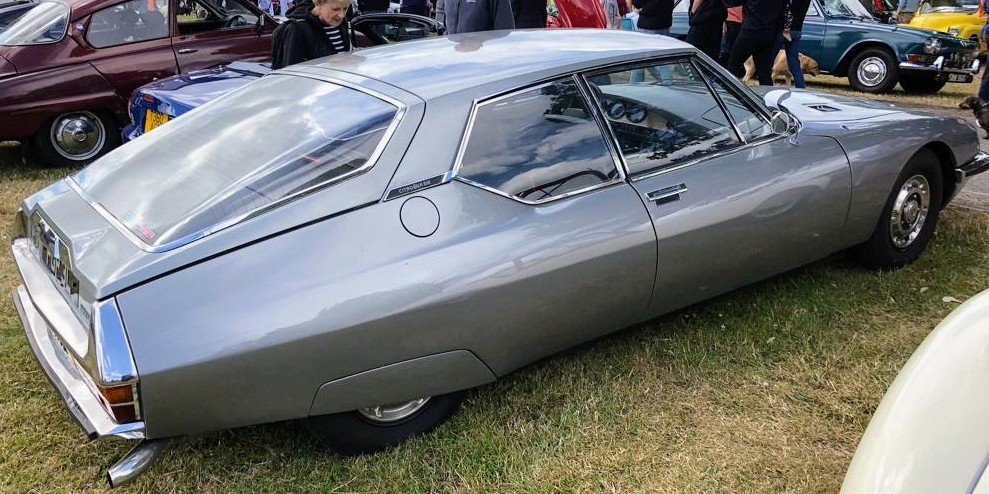


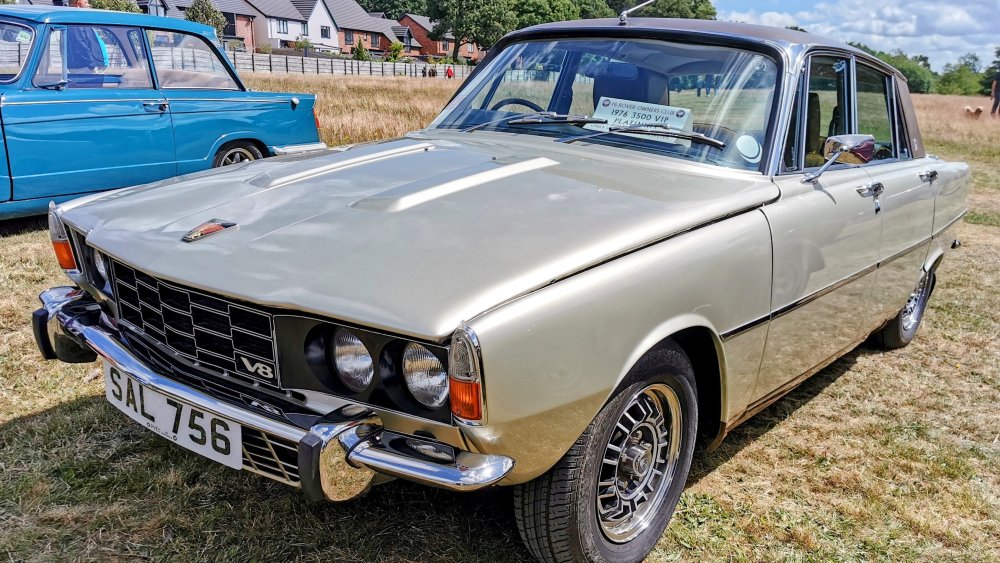

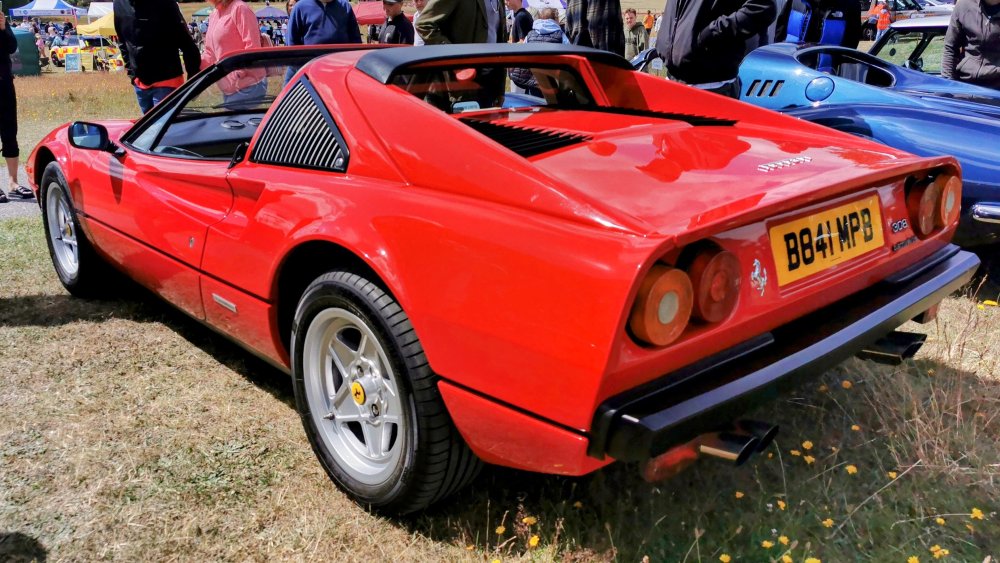
 3 points
 -
2 pointsHi guys I have just purchased a 2018 Superb 1.4tsi SE estate. Great car but nothing fancy as it stands but coming from a background of modified Audi's a few years back I fancy getting my hands dirty again so I have a few mods planned in the short and medium term plus some pipe dreams that may or may not happen. I'm going to keep all my updates in one place and will update as and when I tick things off. Short term: Remap Interior led lights Exterior led/upgraded light Caritsa/VCDS tweaks Hardwired front and rear dashcams Medium term: Window tints Tow bar Usb charging points in rear Pipe dreams: Virtual cockpit Reversing camera I'm sure I will add more to this list as I browse this forum a bit more.
 2 points
 -
2 points
-
2 points
-
2 pointsExactly that... It's a ~1KW PTC heater element that sits in the HVAC system to provide 'some' warmth until the coolant warms up enough. I retrofitted one to a MK2 TDi Octavia and it did make a difference2 points
-
2 pointsI could park my car outside the garage of my house IF I don't mind it being coated with bird poo everyday as it's under trees, two of which aren't in a healthy condition. So that's not happening, also the garage only has a light power connection to the house and the large amount of work to provide a good strong 3ph connection from it to a grade II listed building is going to be hideously if not prohibitively expensive to do for a 15m cable run under paving and avoiding soakaways and sewage pipes. Been told it would be in the range of £5k to have done. So it's not happening. My car is 99% of the time parked on a grass verge at the top of a housing estate about 25m away from home. So no power connection there either, nor are there any at Guildford Station or depot car park facility either, so again it's not happening. Like I said give me a car with decent performance a range of 350-375 miles, fully charges up in 5 minutes and at a reasonable price and has a good spec like my Octavia and I'll have it.2 points
-
2 pointsThis is the thing. Why manufacturers blag their ranges and quote 'oh it charges up to 85% in 30 minutes from 20%'. No, I don't want that. I want to know how long it will take from dead using the worst possible charger and what the range is likely to be in realistic driving conditions. I appreciate the old NEDC mpg values were a little optimistic, but you could at least use the lower figure given as a benchmark. Oh, and just in case anyone comes up with the 'it's better for the environment cobblers, don't forget the vast majority of power stations are fossil fuelled and the amount of energy which is required for the processing of lithium for the batteries. The average motorist doesn't give a thruppenny bit about all what we're talking. They just want a car to go to work, pick the kids up in and go the shops. But in years to come, unless this country doesn't really start to improve the electricity grid, and improve the existing cabling and add charging points here, there and everywhere, there will be one hell of an issue. Which brings me on to another point. Not everyone has the potential for easy access to a charger at home. I've worked in London and there wouldn't be a cat in hell's chance to have chargers for all the cars for people living in flats, tenement blocks and houses converted to flats. There would be cables across pavements on terraced streets, people tripping over, people robbing your cable and you coming out in the morning finding your car dead and the other person has gone on their way. You would have to hope you could charge at work. The list of realistic drawbacks goes on and on. We just need to develop and strengthen the biofuel production and use that to fuel our vehicles. 2040 for the European ban of ICE sales? Pull the other one!!2 points
-
I loved the Quattro (capital Q) as it was an iconic coupe, the more 'normal' quattros (lower case q) with Torsen centre diffs were great, it's taken a while for the Haldex software to catch up with the seamless transition between FWD and AWD that the Torsen provided. My 1999 8L S3 had Haldex and you could really feel the delay and change in handling as it switched between FWD and AWD - a good car but not a great one even after I had it tuned to 285PS.2 points
-
No, it has to be in the first month that comes with the adapter or if more time is paid for, it will look for fault codes but no resets.
 2 points
 -
@gsmdoooh the Quattros were lovely. Somehow had one as a hire car once. I worked in TV back then, so got to drive a lot of different cars, but they were usually Peugeot 205 type level. They must have been busy and it was all they had that week! Made me want to go and throw it around the Forest of Dean though, thinking I was Hannu Mikkola. The Quattro wasn't built to be constrained by tailbacks on the A303 😆2 points
-
2 pointsim sure similar arguments were had back in the day when the first motorcar came along. They were expensive, where would you find fuel, easy to get stranded, you even had to build roads (sound familiar?). Battery storage technology will continue to develop and who knows where it will all end up, but with many countries banning the ICE it looks like EV's are here to stay.2 points
-
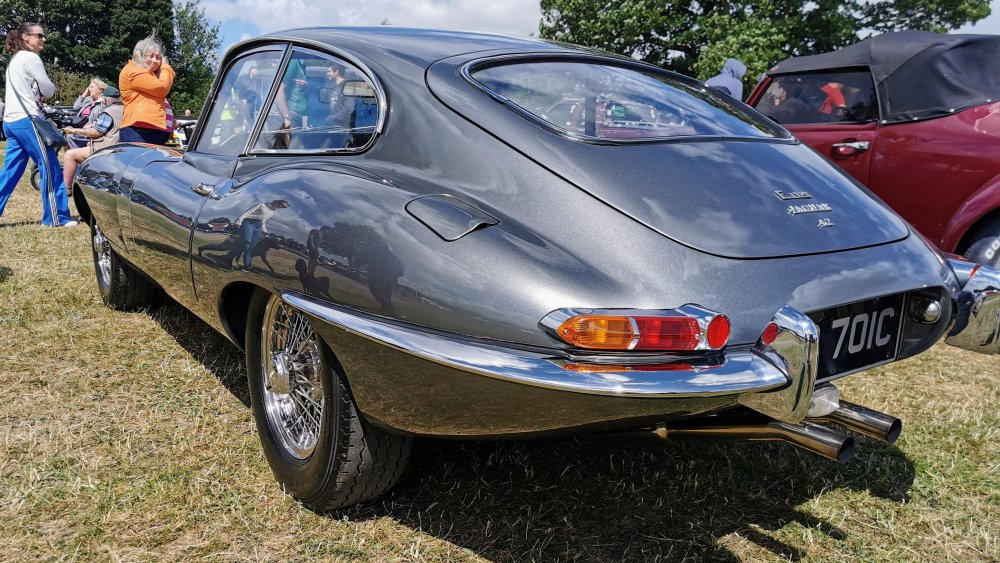
2 pointsAlways nice to see a few 'humdrum' vehicles amongst the classics, although the 2013 fabia I spotted looked a bit out of place (and didn't merit a photograph!)


 2 points
 -
The car I'm fondest of was the red Peugeot 106 I inherited in 1993. It wasn't quick but once you made it up to speed you didn't need to slow down for bends as it cornered like it was on rails. Being more youthful back then I also drove it quite hard (as young 'uns do) and achieved some surprising speeds driving back over the M62 late one night... It was also the car I was driving when I met the missus. We'd first started chatting via IRC (back in the day where it was all 14.4k dial-up; none of this nude selfies lark; and people used LOL and ROFL) and I drove over to her house to dig out her car before we drove down to Wolverhampton for an IRC meet the next day. It lasted up to the point where I gave one of her daughters her first driving lesson. She panicked and hit the accelerator instead of the brake and drove it into a wall 😬. I still have the repair invoice for that and I've threatened to frame it and give it to said daughter for her birthday one year 🙂2 points
-
2 pointsI certainly don't expect free charging but it's nice when you get it. Aldi near us are very generous with free fast chargers. I got 6kWh yesterday while I did a quick shop. People abuse it inevitably...2 points
-
2 points
-
2 pointsNot wishing to be confrontational, just genuinely interested- What gives EV drivers the right to expect free charging? Someone is ultimately paying for it. For example, I was on (volunteer) car park duty at our local theatre which shares a car park with a business premises, the latter having several charging points. When an audience member EV driver expecting to use one saw the notices on the charging points which said they were only for staff and customers of the business, much verbal abuse ensued, aimed at me! (OK, I was wearing a hi-vis jacket, but no jobsworth comments, please!)2 points
-
2 points
-
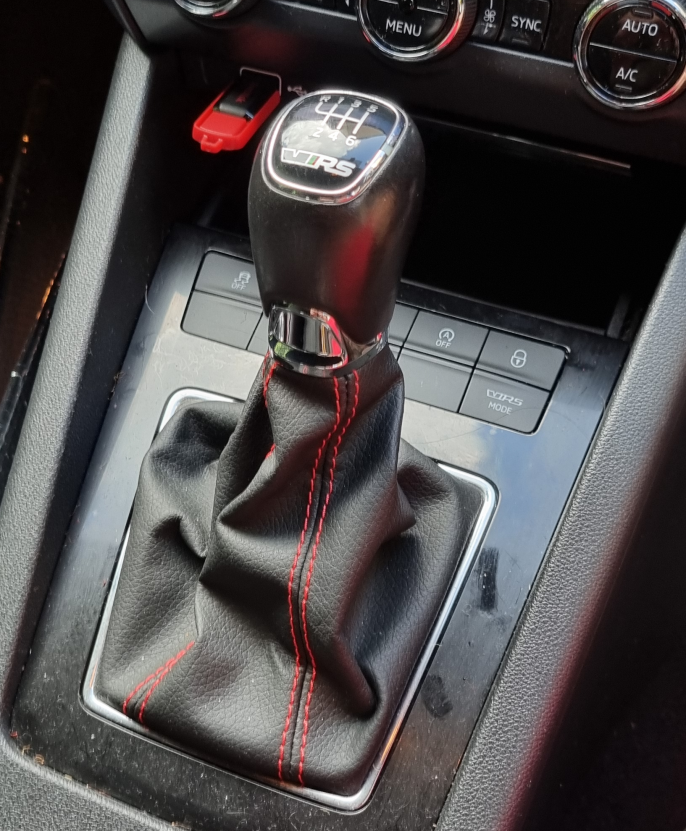
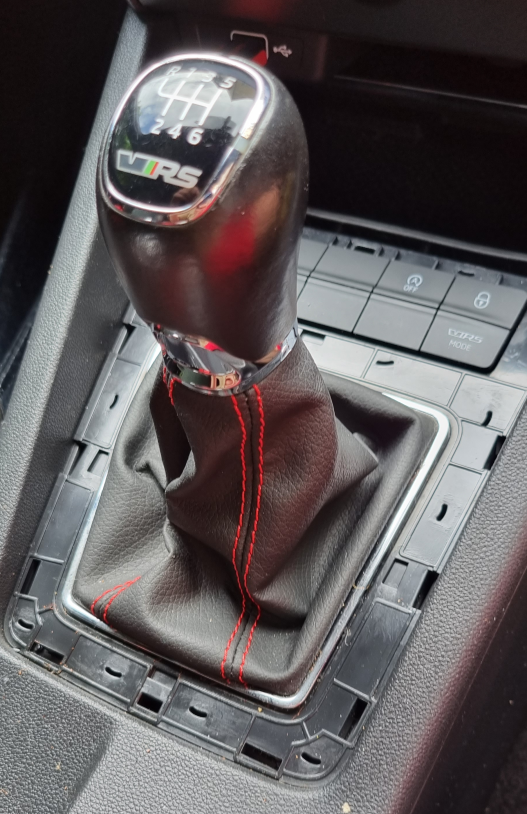
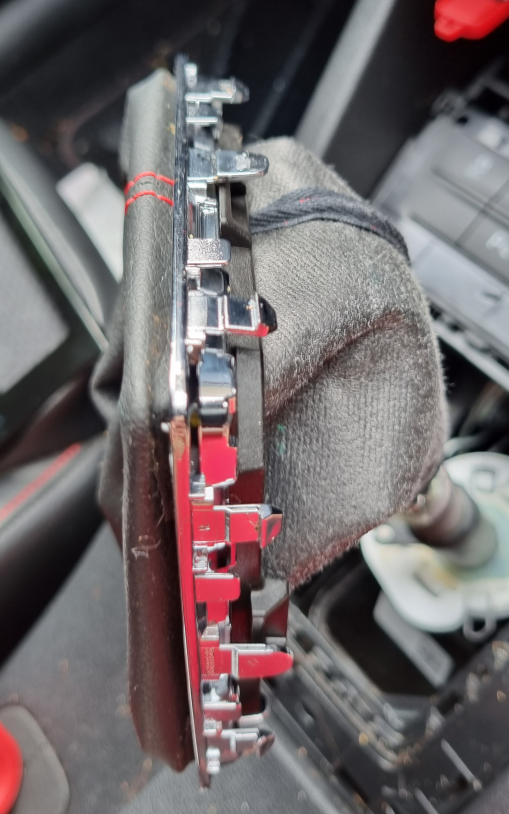
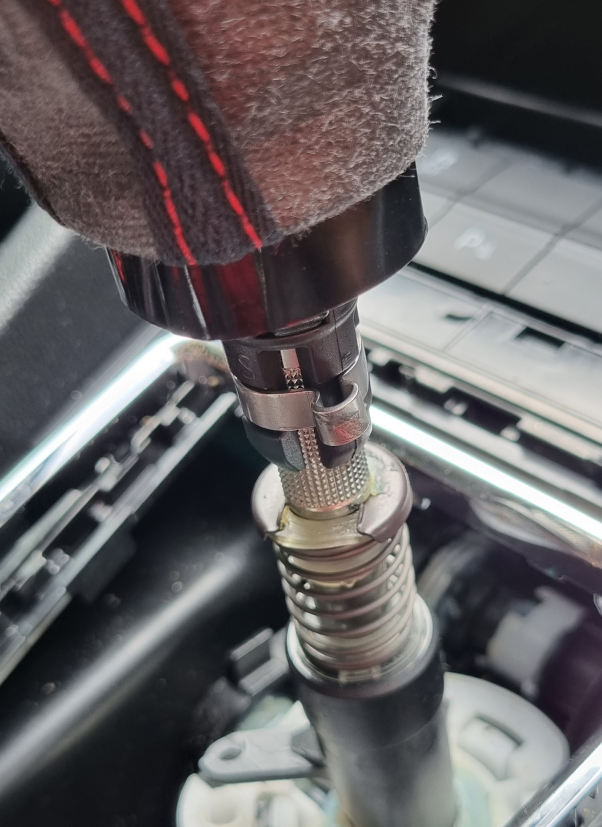
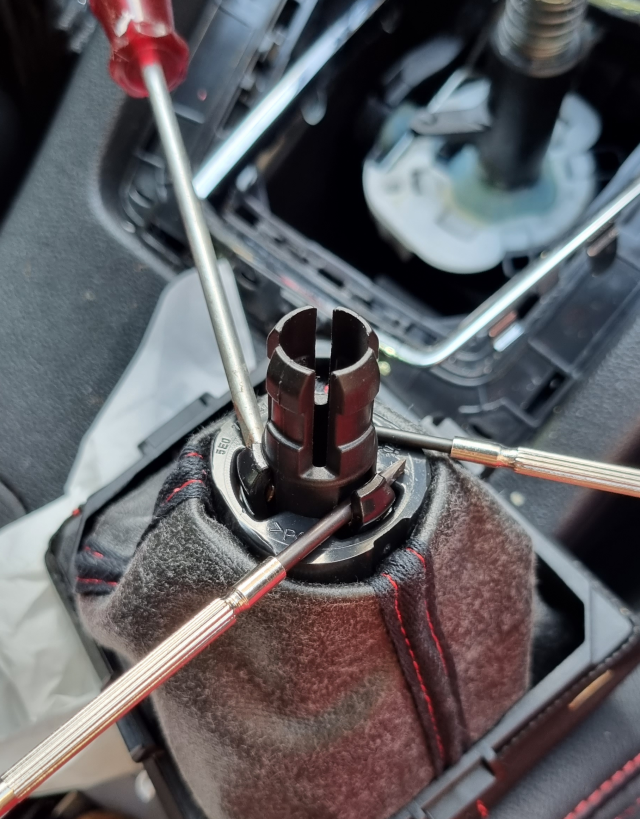
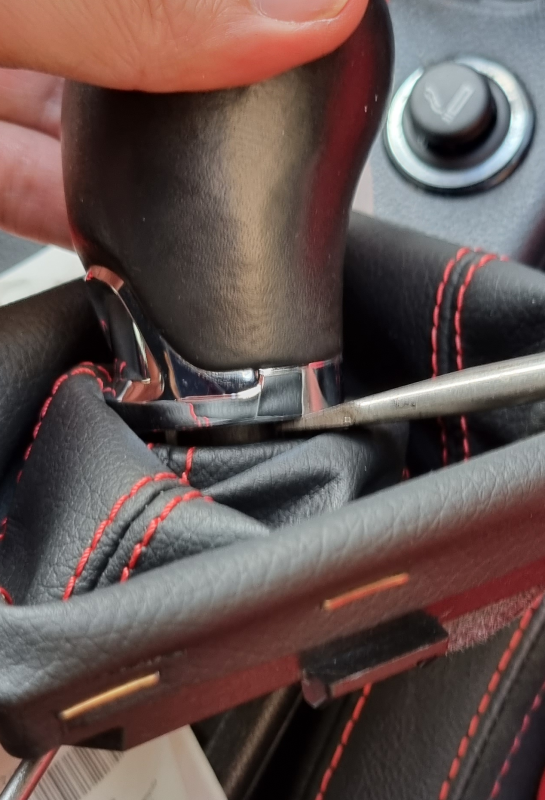
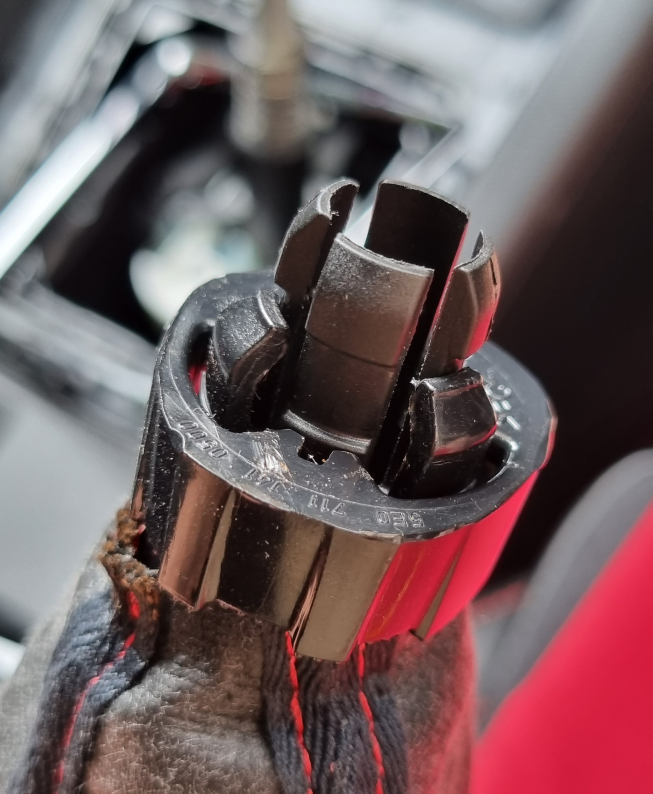
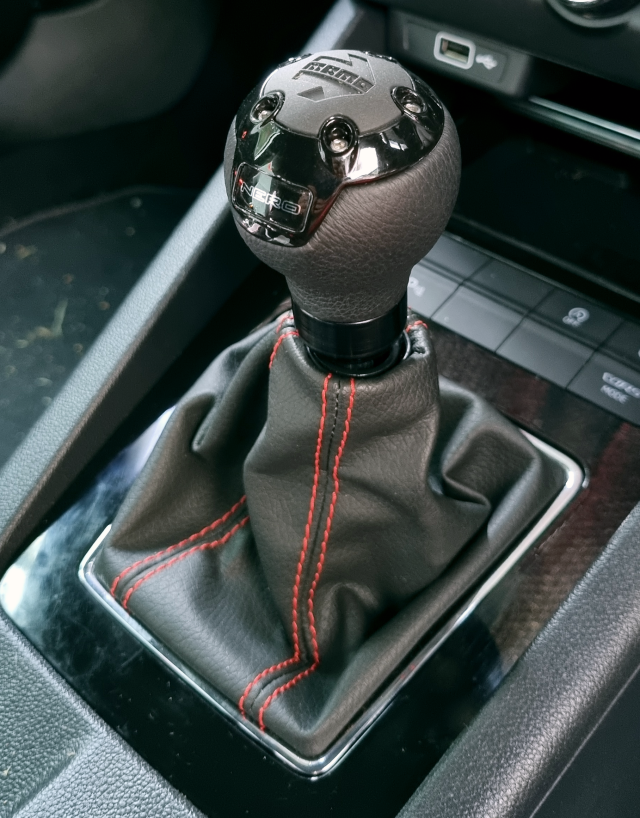
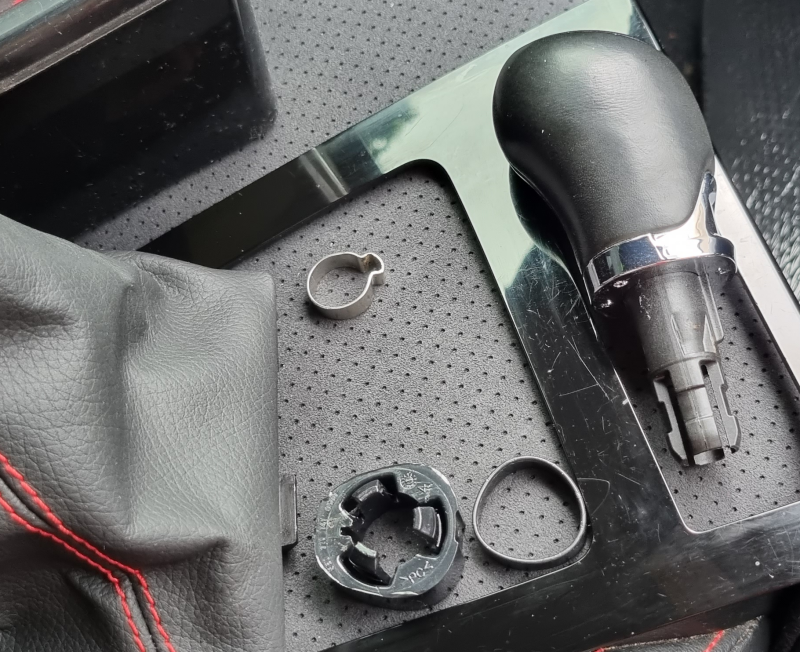
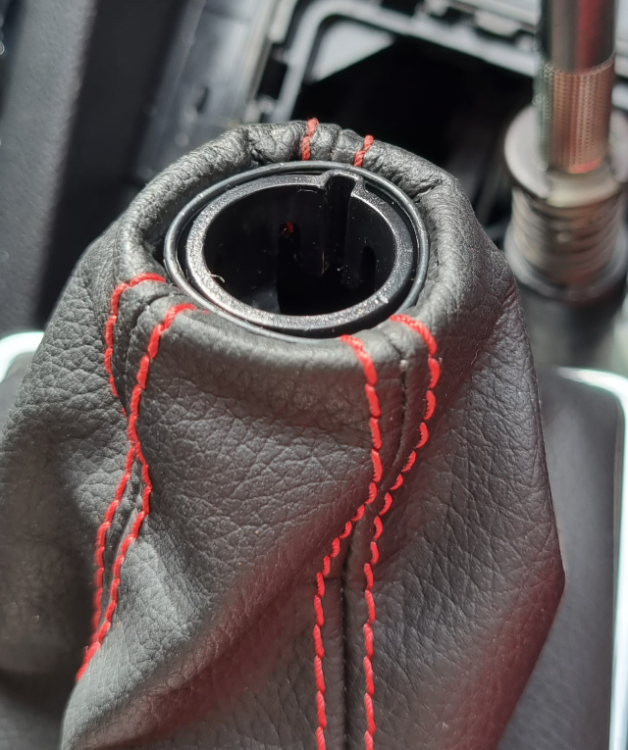
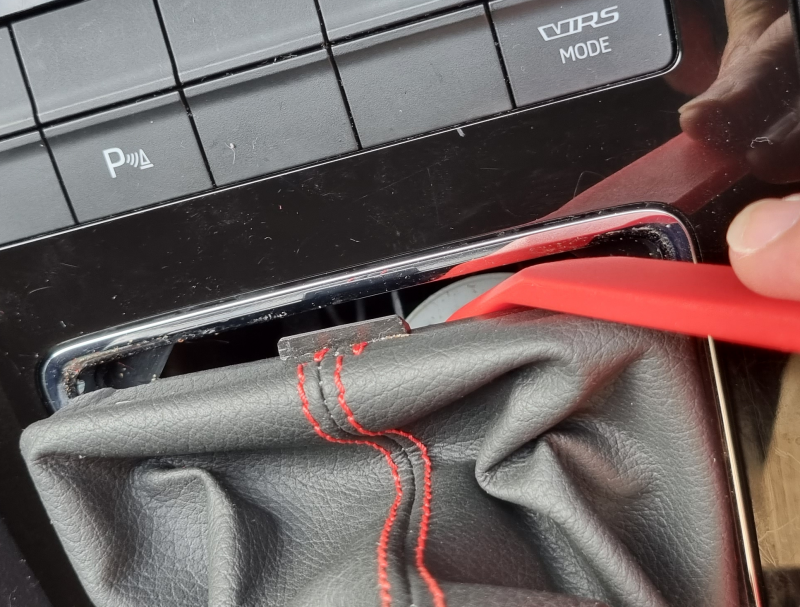
Well this little project turned out to take WAY longer than expected, mostly due to the misinformation I was going by! Most posts here and on fb were pretty light on info (or that it was easy, yea, easy when you know how! Lol), and just linked to youtube vids for golfs, so for prosperity here’s a little write up on – how to remove gear knob on a mk3.5 manual. 1. Removing the boot surround from the console. Every video made it look so simple, but this is where I wasted most of my time, just press down on the boot to find the tabs from the surround and lift it up. Nope, nearly 30min of pressing, twisting and gently prying with pry tools (i know how fragile the chrome is so I didn’t want to put any real force on to it) and I had gotten no where! I even tried removing the top plate surround to get a little more grip on the front side, still didn’t work, finally I took a pry tool and wedged it between the boot material and the chrome surround, the boot side flexed way more than the chrome side which gave the surround enough space to just pop out! I couldn’t believe it! So simple! Looking at the prongs of the chrome surround it was very obvious why no amount of pressing was working – a) the prongs werent long with the “latch” facing backwards like in the golf and b) the support for the boot (black part) was in the way of the chrome surround and about 1cm away! So basically I wasnt pushing on the latch instead, just locking the surround in more lol after that it was mostly the same as the videos. The black surround for the boot is held in by 4 tabs, one on each side 2. Removing the knob and boot. Only one video I found didn’t say to cut the cinch ring that holds the knob on, every other said to cut it. Im all for reusing existing parts so I just took a screwdriver and loosened it a little till the knob could spin, then pulled the whole thing off. Once off, you can squeeze the 4 prongs together and take the ring off. 3. Remove the knob from the boot. The knob is held onto the boot collar by 3 prongs, I flared these out with a few screwdrivers then used another screwdriver on the knob side to pry the two pieces apart. Once you get one prong past the notch you can just grip the collar with your fingers and use your thumbs to push the knob the rest of the way out. 4. Fitting new knob Each aftermarket knob will have its own instructions but all should be pretty straight forward eg. Rubber cap + gear knob + 3 little screws for the universal knobs. I reassembled the collar part on the boot (has just enough friction between the parts to not need glue) to give it more of a stock look, some videos mention using a zip tie but I wasn’t a fan of the pinched off look. Theres enough stiffness in the boot material to keep it prop it up against the bottom of the knob but I’ll be getting a rubber grommet to go on the underside to make sure and also some kind of end cap to tidy up the collar area, even tho its not really visible. (since writing this post, I've found the boot sits up just fine without any extra support so all I've done is add a plastic spacer to tidy the small gap between the boot and the bottom of the knob) And that’s it! I finally appeased the 90s boy racer in me that just HAD to have something MOMO on my car haha 😂 Hopefully this helps someone!


 1 point
 -
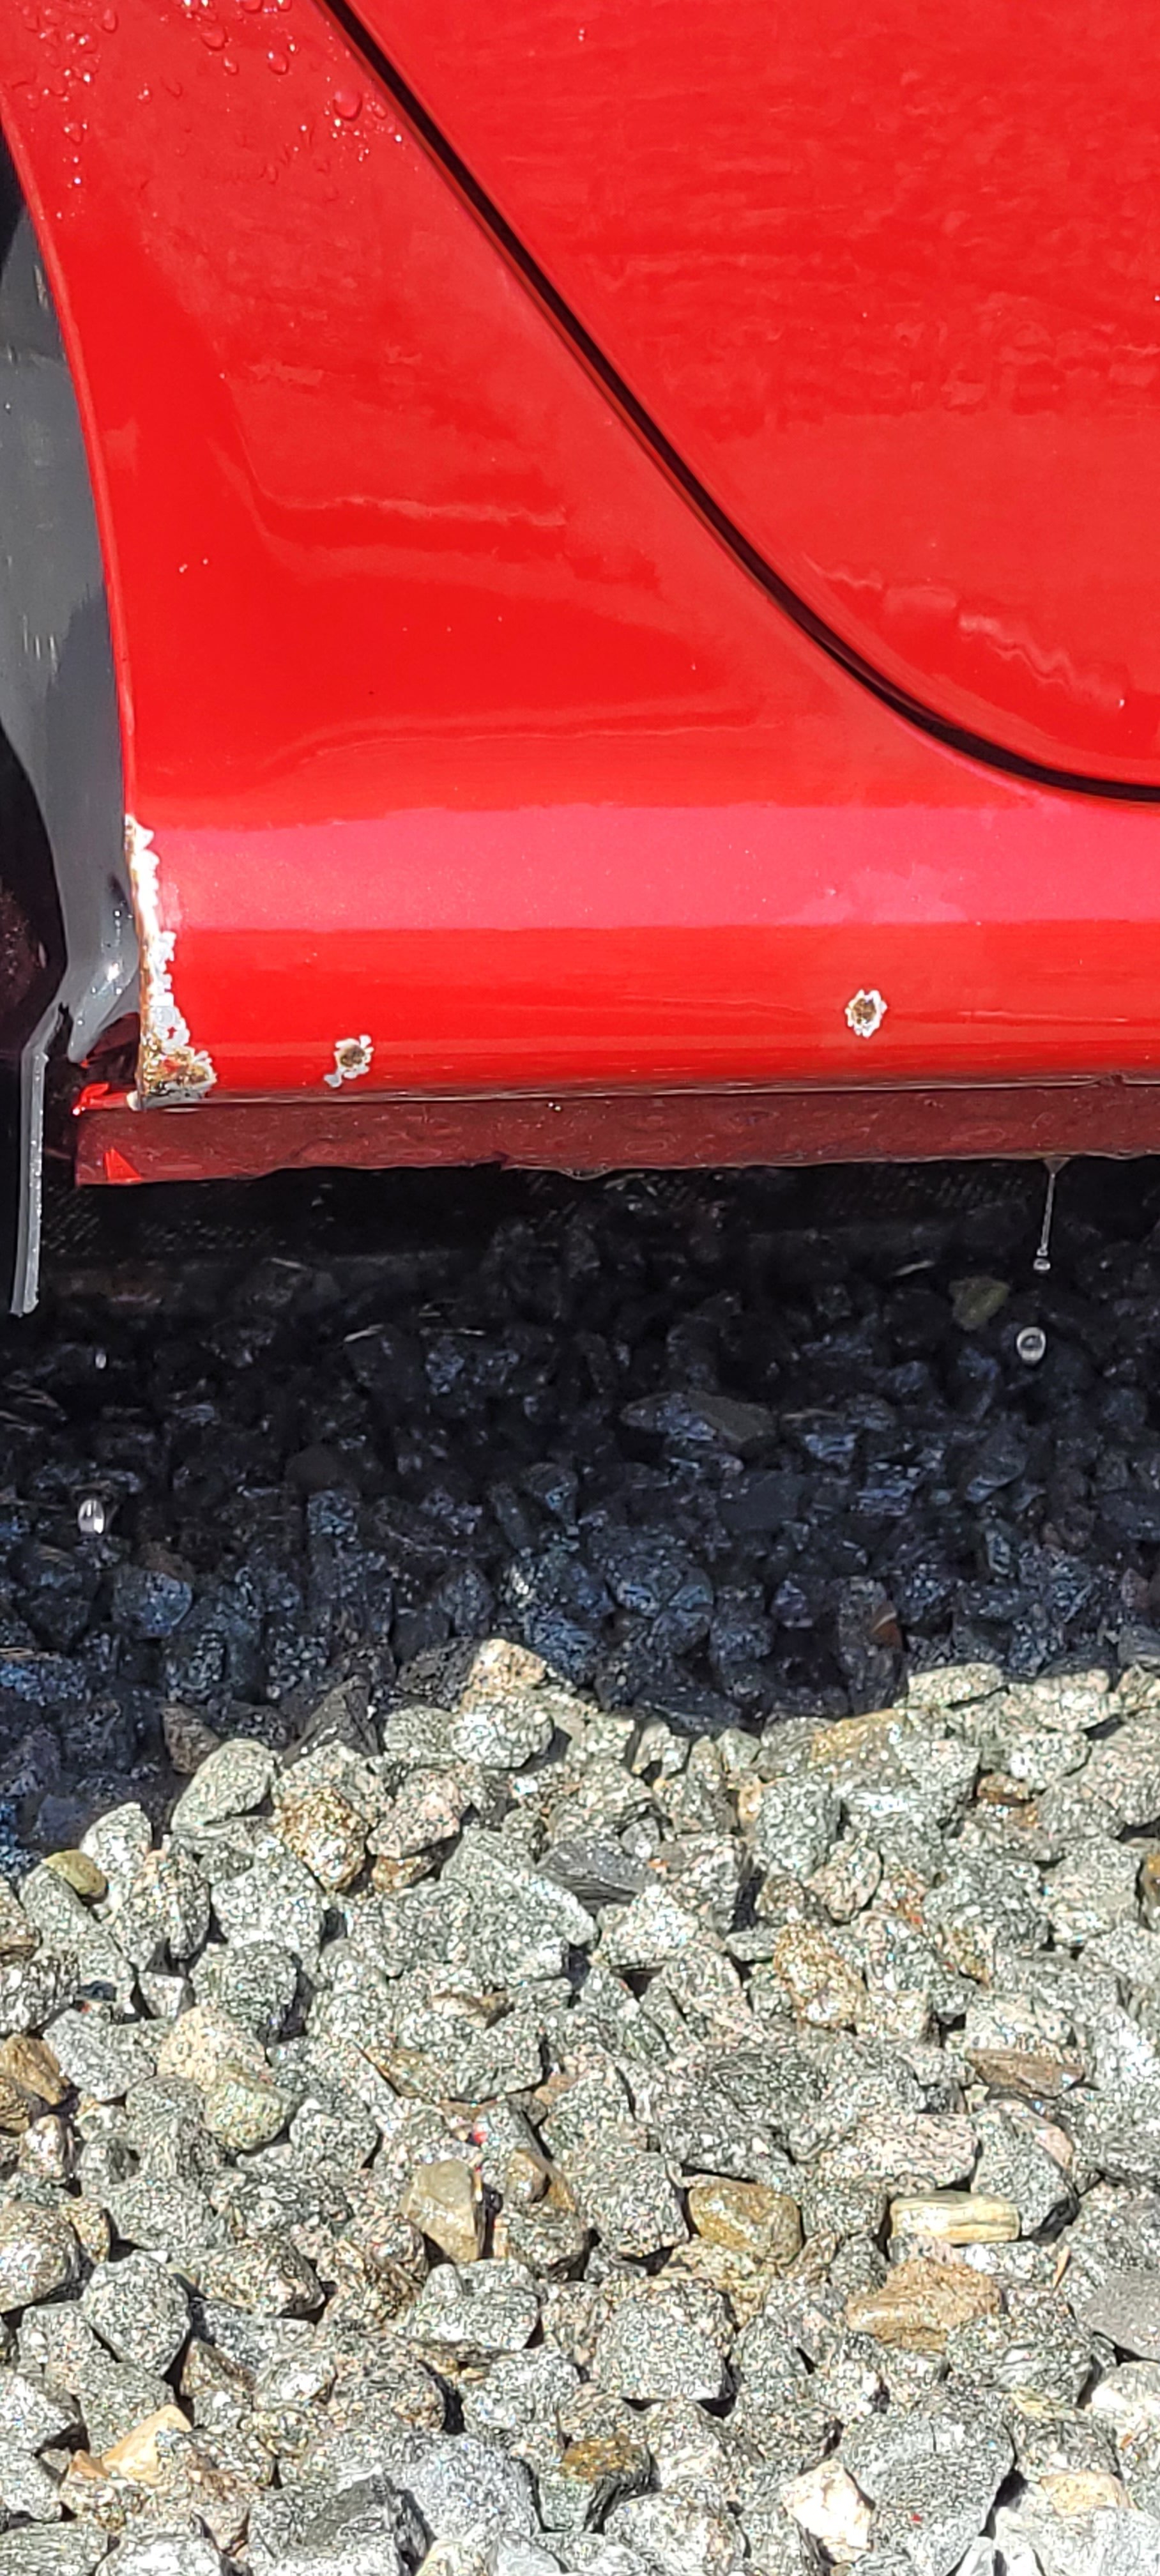
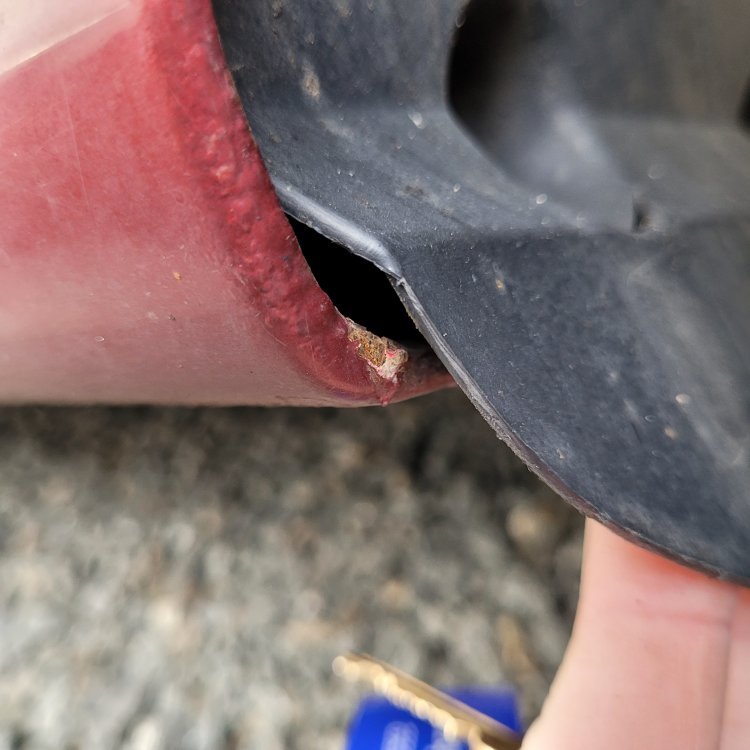
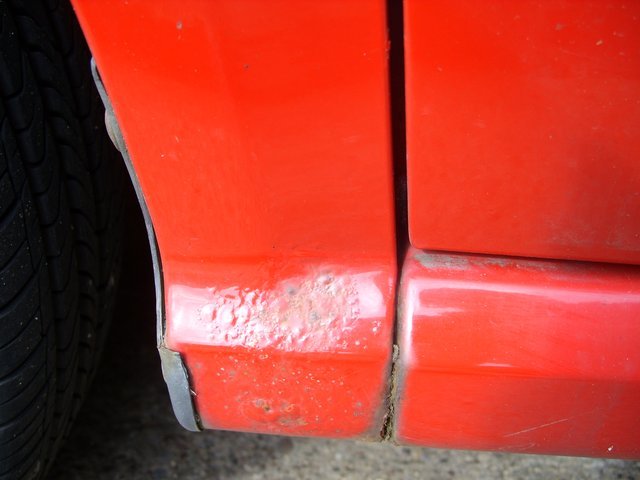
On the back of what @VanhireBoys was saying on another thread, I thought it would be wise to create a thread to document common rust spots for the Mk1 Fabia and how to spot early signs of it. Feel free to share your own images etc as it all helps towards documenting the rot on these cars, particularly as they become a little more... decrepit. One of the areas where I've seen these cars rust most is at the sills, particularly at the rear, or at the base of the front wings. As an example, here's where mine is just beginning to go at the rear, with some surface rust. Mine had been beginning to bubble up at the two points further along the sill, but I may have accidentally blown the paint off with the pressure washer. This is the other side, which isn't as bad, but just beginning to visibly rust. In regards to rusting at the bases of the wings, I'll use the photos that @TMB posted on my project thread... It seems to be that dirt likes to gather in here and rot them out. As a solution (which might be like peeing in the wind), take the arch liners off, and clean in behind there. I've also used the power washer in the gap between the sill and the base of the arch and it has blown a metric **** ton of dirt out.

 1 point
 -
1 pointIf only the boot was big enough to need one 😀 Key for scale..... No sign of a Cat either 🙂1 point
-
1 pointNow sorted found one to fit on ebay https://www.ebay.co.uk/itm/115033366604?ssPageName=STRK%3AMEBIDX%3AIT&_trksid=p2060353.m2749.l2649 He has quite a range of different wheel nut keys if any one else finds they need one. Thanks for all the replies1 point
-
I'm not sure which projector the Yeti headlights use. Most aren't sold to normal consumers but you might find a used example on eBay or something with compatible mounting holes. Otherwise, a damaged RHD Yeti xenon could be a good starting point. Just be careful, headlights of this vintage may be 'perma-sealed' so the standard oven trick might not soften the sealant up enough to split the headlight easily. I don't know enough about the Yeti headlight to say whether splitting is necessary.1 point
-
1 pointHi Derek Nice to have you on board. Always fancied a Yeti myself but Skoda had just stopped making them so I went for a Kamiq. It's a nice car but the Yeti seemed a little taller, more SUV like which I fancied. Enjoy the Club. DavidB1231 point
-
Sasha fitted mine, and is also based it Wales, although North not South. I'm not sure if she's still active on briskoda as she sold her Superb.1 point
-
1 pointFrom what I remember on the estate, it is just a matter of removing the rubber pull-down strap then unclipping the trim all the way round. The hard part is clipping it back into place. Perhaps others on here can provide a guide or a video?1 point
-
I've noticed the earlier cars seem more resistant to tinworm, cars that have lived up norf get salted underneath most winters whereas here in the beautiful sarf they don't.1 point
-
1 pointWhen they can do a decent performance car, with at least a 350-375 mile range on a full charge (and I mean a FULL charge, NOT 80%) at a reasonable price for pcp or lease, I might be interested. But with ridiculous prices for poorly specified cars, compared to ICE vehicles the EVs can stay on the showroom forecourt.1 point
-
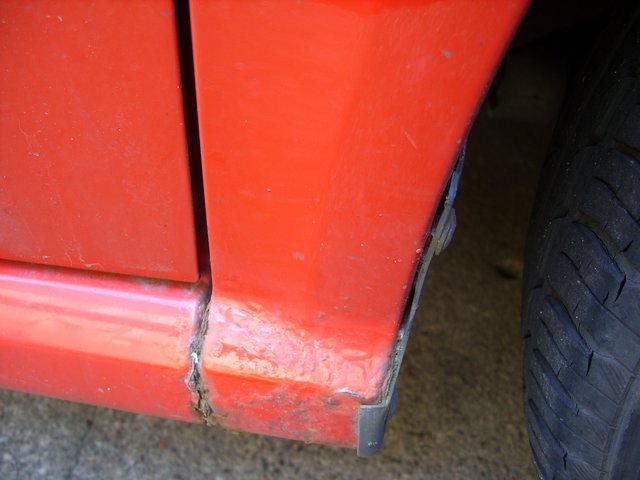
Going back a few years the anti-corrosion warranty was still valid for a lot of these cars and a number of the common spots were reluctantly fixed by the manufacturer. The rust around the number plate lights was the most common to be fixed with little resistance, especially as they could not blame stone chips for the rust in that spot. Now that the corrosion warranty is long gone it's left to owners to fix these issues. Generally the Fabia is well put together and had excellent protection from the factory, however after many years of shall we say less diligent owners, they can fall into disrepair quickly. In essence there are no intrinsic rust traps as long as the car is cleaned properly and chips touched up before they fester. The sills are an issue now as they get battered by stone chips and the rust starts there and creeps unknowingly under the factory applied stone chip, festering away until they go in a hole, just in time for an MOT. Regular checks in these areas are essential and if needs be a proactive approach to remove ALL of the factory stone chip back to bare steel and then treat, and re-apply then repaint will give the car a few more years. Also in these areas are the sill lips themselves. Years of numpties jacking the cars up on the non-reinforced areas of the sill flanges causes them to bend, crack the paint and then water gets in. This affects all cars, and the Fabia is no worse than other cars on the market for this. Rear arches as Ryan pointed out are usually pretty goof and the arch liner themselves can rub the paint of the lower edge, causing a bare spot for rust to start. One thing that would frighten most Fabia owners is to remove the arch liner and look behind at the multitude of spot welds in the inner arch. By now they spot welds will have paint lifting off them so a pre-emptive grinding back and treating is a worthwhile job. At the back of each rear wheel arch, where the rear bumper meets the rear 1/4 panel is another hotbed. The bumper rubs against the 1/4 panel, rubs the paint off and the rust starts there. Eventually it will spread under the bumper and up onto the rear 1/4, again catching it early helps. Front wings suffer with being stuffed with dead leaf matter, mud, dust and crap, from behind the arch liner, again regular removal of the arch liner and cleaning out will prevent most of this. In short, most of the corrosion can be prevented by regular cleaning, looking at and touching up chips when they happen. It's obviously possible as there are cars with 200K miles on with pristine sills and arches.1 point
-
1 pointI have a small luxury car washing business and it is doing quite well so I'm thinking of opening a second location so if anyone has any articles/ blogs i can read on expanding small business that would be a massive help thanks1 point
-
1 pointI've no idea about welding, ask the person who's quoting the job. Nothing wrong with a patch if it's done well but if later more patches are needed it can get more awkward and perhaps proportionally more expensive.1 point
-
I've had good results with https://www.powerenhancer.co.uk/archoil-ar6400-d-max-professional-diesel-engine-turbo-dpf-cat-cleaner-concentrate.html For sticky turbo vanes as it is much more powerful cleaner compared to Redex1 point
-
I thought there was an International Rescue Committee meeting happening and maybe some vehicles from Thinderbirds would attend, or is that the David Miliband headed organisation.1 point
-
1973 GT Beetle. Learned to drive on it (in the late 80s). 1584cc (later 1776) engine with SU carburettors, synchromesh transmission, and steering so heavy I could feel my transverse abs bulking out every time I parked. My Dad’s Saab 900 Turbo. Not as pretty as the 99, but so incredibly smooth and balanced, and the driver’s seat was heated. Such luxury I had never previously encountered. 1973 Morgan +8. So very burbly and understated at tick over and pottering speed. So phenomenally organ-rearranging when you need to take off sharpish. VW TDI transporter, 2l or above, can’t remember exactly, it was a hire van for work. So much oomph. And I did get to drive a few 7.5t trucks. I enjoyed being that high up. Didn’t enjoy that I had to get out of the seat to get enough leverage to brake hard, cos everything was designed for someone considerably bigger than me.1 point
-
1 pointIt’s a long and boring story, that I won’t inflict on people, but I am now without my lovely Octavia, despite it never being planned that way. Instead, I find myself the owner of a Kamiq - a somewhat bemused owner as until ten days ago I hadn’t even heard of them! FFS, who though that was a suitable name for a car? Even worse, having driven diesel for forty years or so, it turns out it’s a bloody petrol! No surprise then that in addition, I’ve gone the whole hog and got a DSG. I need to take time to reflect on the error of my ways, but this post is simply to thank the various people on this forum who over a number of years have added to the enjoyment of Octavia ownership by freely sharing their knowledge, experience and great expertise, all of which has been of considerable help to me and, I know, to many others. Obviously I am now heading off to the Kamiq forum (I’m sure it must be busier than it seems at first sight), but many thanks and best wishes to all here.1 point
-
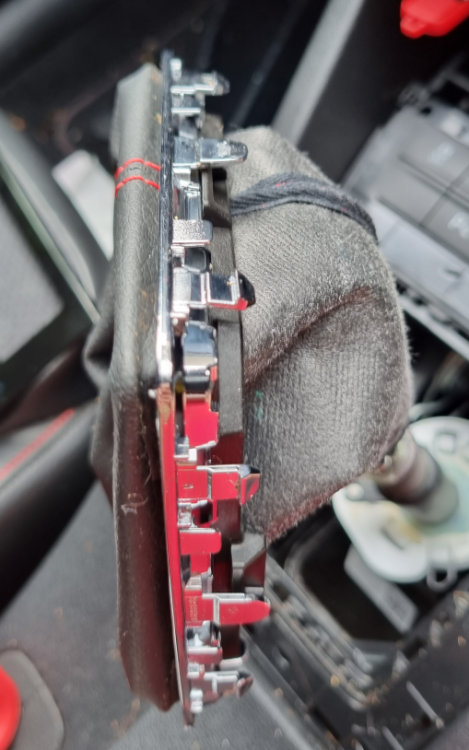
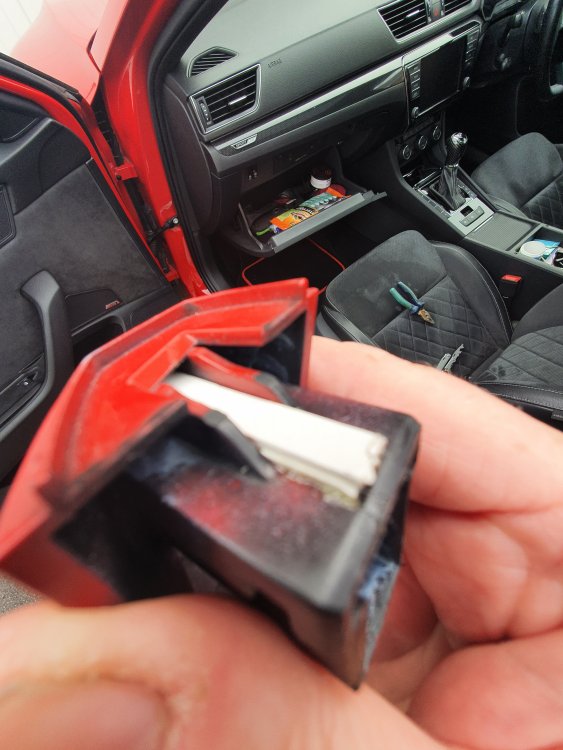
So this is what I did to mine, glued in a strip of plastic to the backplate. This moves the handle slightly forward allowing the hook to grip again. Been 6 months with No issues and helped a few people who did the same on a facebook forum.
 1 point
 -
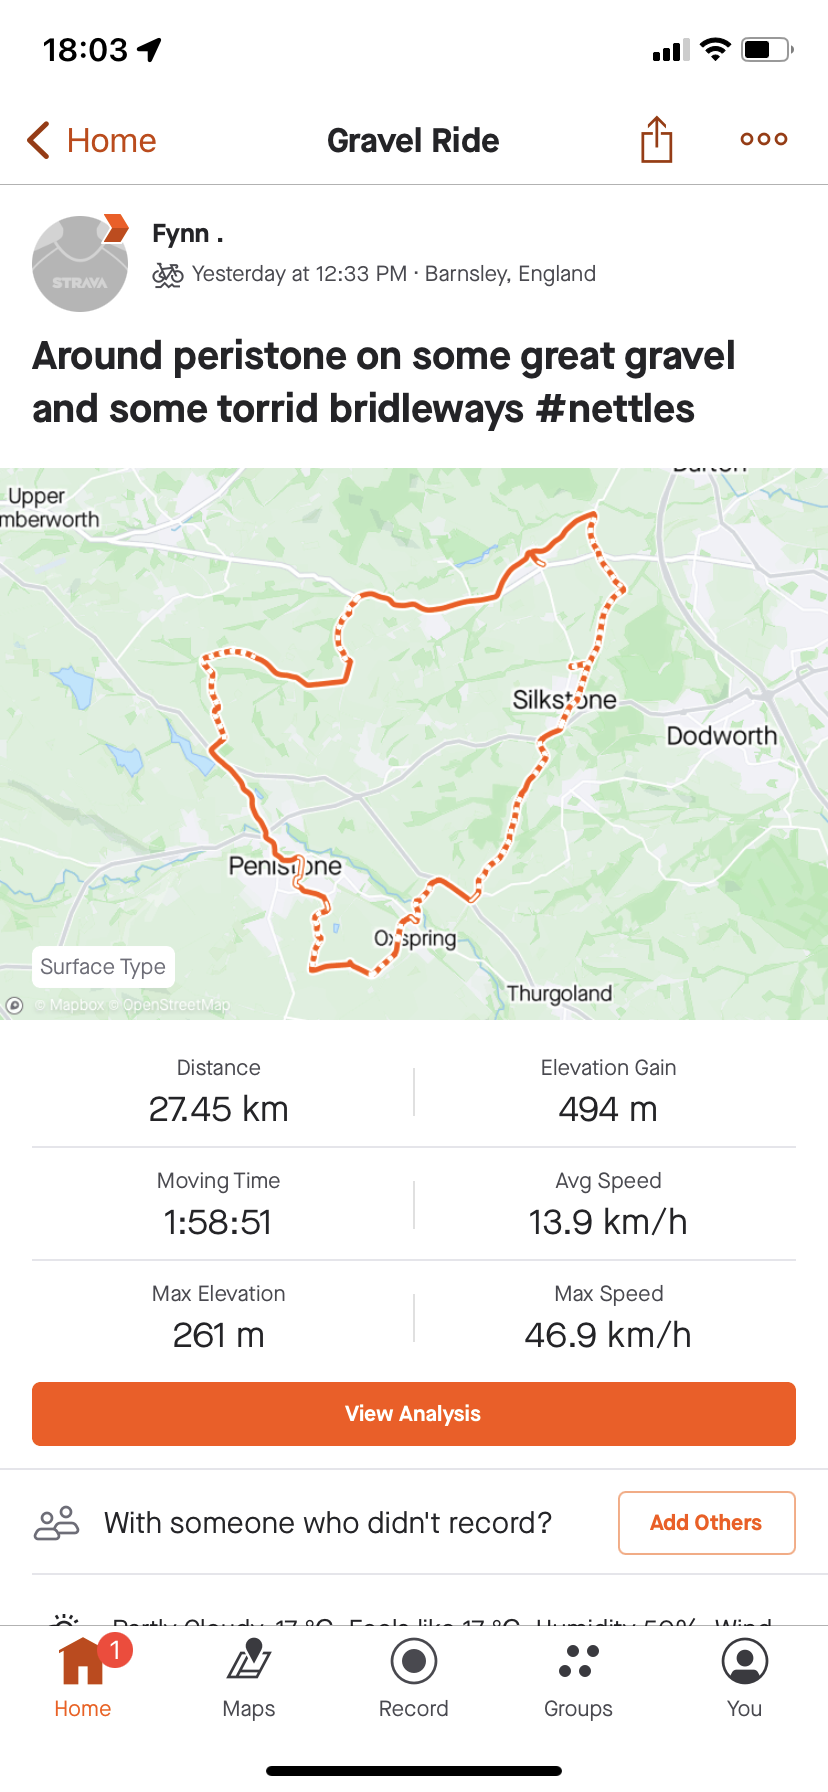
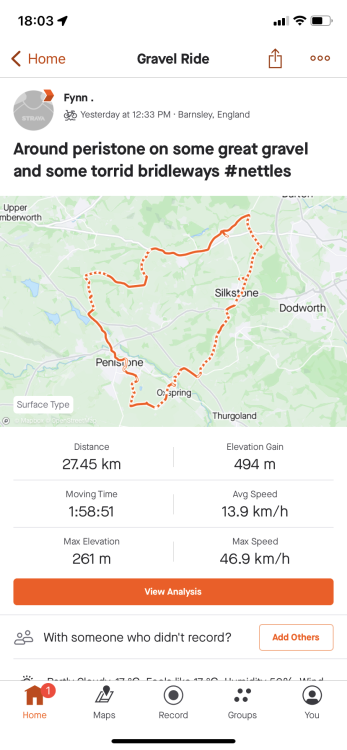
1 pointCan’t wait to get a lovely fresh baguette and good cheese. Off to Switzerland for two weeks climbing… so trying to get some fitness. Going over an old peak mountain biking book, pre-suspension, figure my gravel bike is at least comparable. one down. Some bridleways are seriously overgrown! day 2. never been to langsett on a bike. figured I’d finally do a bit of it. Better coming down I think Man the ride up the “snow road” into todays wind was a downer. The bridleways are deeply rutted, much carrying and walking today 😞. Guy on full Susp bike was impressed I’d come down the woodhead to dam bridleways bit on a gravel bike. My junk definitely wasn’t as impressed with my choice.
 1 point
 -
Chiltern broke the record today thats some flying machine 👍1 point
-
Yes, parking the car in the road where the sun hit's it many hours = very quickly Cold start. Here is the ''next": 10th Gas station pump test: 146,7 Km distance, 14,550 ltr fuel which means 9,91 ltr / 100 km or 28.50 Uk mpg (high temperature city traffic mainly plus some kilometres in mountain route) Yes, i am very happy 😁 and i think the results could be better next time because now the leak was stopped and the air box takes only fresh air.1 point
-
Kilen and Lesjofors recommend 5Q0411105HR front springs and 5Q0511115AM rear springs for the Octavia MK3 Scout 2.0TDI 4x4 with manual gearbox. Kilen and Lesjofors recommend 5Q0411105HS front springs and 5Q0511115AM rear springs for the Octavia MK3 Scout 2.0TDI 4x4 with DSG automatic gearbox. The only rear shock absorber listed on the Skoda parts catalogue for the Octavia MK3 Scout is 5E0513029C. Rear shock absorber 5E0513029C 7 5E0 513 029 C gas shock absorber rear 2 PR-1JB+K8D https://skoda.7zap.com/en/cz/octavia/oct/2016-753/5/511-511010/#7 Kilen online catalogue https://www.kilensprings.com/springs-catalouges/onlinecatalogue.asp Lesjofors online catalogue https://www.lesjofors-automotive.com/springs-catalouges/onlinecatalogue.asp Kilen and Lesjofors are the same springs made in the same factory in Sweden. It may be best to purchase genuine Skoda shock absorbers for the Scout rather than aftermarket ones, as you may have difficulty finding increased ride height aftermarket shock absorbers. This is because aftermarket shock absorbers mainly cater for the standard ride height market.1 point