


Leaderboard
-
MikeTheThinker
FREEDOM9Points8,482Posts -
Aspman
Resident Member7Points21,151Posts -
RobClubley
Honorary6Points14,039Posts -
.jpg.1006585dfe4e2977315b67c3d642e37b.jpg)
Guest_
FREEDOM6Points83,824Posts


Popular Content
Showing content with the highest reputation on 19/04/23 in all areas
-
You need to get the tie-rods adjusted equally but opposite (one lengthened, one shortened) so that the rack is centred while the wheel alignment stays the same. This happens because most garages won't do more than adjust one tie-rod to get the toe-in correct, which leaves the rack off-centre.3 points
-
I find using an old toothbrush works just fine with a mix of mild washing up soap 😉3 points
-
I actually went to the effort of crouching, and took a peek under the car. It turns out that quite a lot of the underbelly is already covered, so I don't need to worry about adding anything aftermarket.2 points
-
2 pointsHi, ive been waiting for a new steering wheel since march. But last week my car had a blackout (completly dead) and have been at the workshop since then. Today i picked it up and was surpriced when they said that both problems was solved by a software update. They cancelled the backorder for the steering wheel and was very confident that it was no need for that any more. I will know after a while...2 points
-
2 pointsI am based in Stockholm so it could very well be the case. I really want to know, in case it returns and how to avoid that it ever does. Also I need closure 😂2 points
-
I have a 2018 Karoq 1.5 petrol, DSG, SE L. 15k miles. DADA engine code. Dealer rang to me to book in service and phrased it "Service, MOT, cam belt and brake fluid change" Shall we book it all in? I instantly didn't like that approach. Bundled all together as though it's some package, no mention of cost. Was £1100 for the cambelt change when I queried. Doesn't seem worth it to me.2 points
-
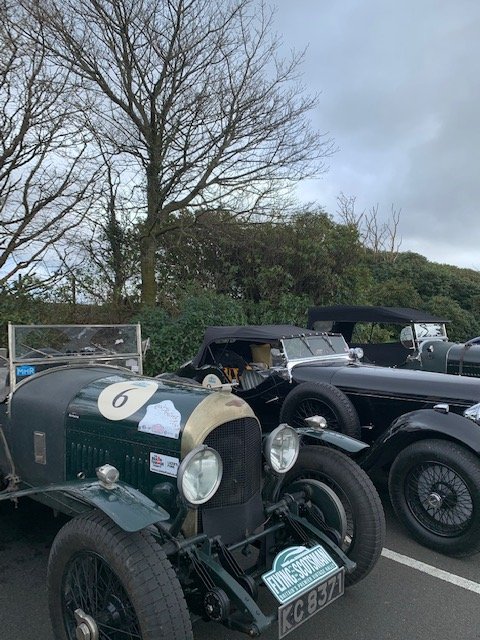
SAw this the other day, no idea what it was until today. thought it was a kitted out mini of some sort but it was a Healy Enigma2 points
-
2 points
-
That would be very worrying to me and was a big concern when I was experiencing the frequent regens. Which reminds me to check my oil level more often now that it is not self diluting! An oil change is imminent but the last one must have been done after the rollback. Your ECU update sounds like a Diselgate fix by stealth, deny the vehicle is affected then quietly modify them before it can be proved that they also cheated emissions. From my experience the fix massively increases the amount of EGR activations and their duration which in turn requires more frequent regens, I stopped my EGR by using an Emulator/Simulatior but the ECU still thinks it is happening so it did not reduce the frequent regens until I had the "fix" rolled back. For me and my engine (EU5 I believe) I think they were both good decisions, they cost probbaly £350 or £400 but I think will save me far more in the long run, just the reduced anxiety os worth the spend, I could not drive a car knowing it was diluting its oil, that I had to extend journeys and drive for no reason other than to let the ECU do its thing and to worry that any long journey might be the one where the EGR cooler gave up of the DPF finally got completely clogged. Having VCDS to monitr things helps. Sorry for any typos2 points
-
On the Superb MK3 the springs and shock absorbers can vary depending on a number of factors such as: 1. Engine version, including engine power. 2. Manual gearbox, or DSG gearbox. 3. Two wheel drive, or four wheel drive. 4. Hatchback, or estate. 5. Standard ride height, or lowered ride height, ie. sports suspension 6. Standard shock absorbers, or electronically adjustable shock absorbers, ie. DCC 7. Factory fitted towbar, or no factory fitted towbar. Notes (a) The 2.0 engine will probably have slightly stiffer front springs than the 1.4 engine, due to the heavier engine weight of the bigger engine. (b) The estate will probably have slightly stiffer rear springs than the hatchback, because of the higher maximum rear axle weight. (c) A car with a factory fitted towbar will probably have slightly stiffer rear springs, to help prevent the rear end sagging too much when towing a caravan, etc.2 points
-
Hi all, After much procrastinating I collected a Superb 280 Sportline Estate at the end of January. I was toying with getting a new Skoda Superb and found the posts on this forum really valuable. I've been on here quite regularly as a guest, reading your experiences, hints and tips and am very thankful for all the useful info. I've only just registered an account so by way of giving something back here are some details of a 2-channel dashcam I've just fitted to my Superb. Hope this helps anyone considering a similar install. I decided I wanted a good quality but discrete 2-channel dashcam system recording front and rear simultaneously and ideally one which would do a little stealth recording whilst parked and switched off. I wasn't worried about a built-in screen as I'd take videos off with a smartphone or simply pull the memory card out when necessary. I've tinkered with car audio in the past and am not afraid of a little wiring if required, but I wouldn't call myself an expert by any means. Enthusiastic amateur if you will... I first looked at the Nextbase Duo (https://www.nextbase.co.uk/dashcams/in-car-cam-duo/) which has a screen, but decided against it due to the fact the Superb estate is such a long beastie, I doubt it would see much out of the rear window. In addition the front and rear cameras do not pivot up and down so once you've set the front angle best to see the road ahead, some people had found the rear camera recording more of the headlining or interior. It was quite a sizable thing and the inclusion of screen made me think I'd feel nervous about leaving it in the car. I decided against. Blackvue models looked good, in particular the DR650S (http://blackvuehd.co.uk/product/blackvue-dr650gw-hd-2ch-2) however for "parking-mode" recording it needed an additional "Power magic" adaptor thing, or a very expensive battery pack which added additional cost and complexity. Definitely looked the best in terms of aftersales support though. After much research I settled on one from Lukas/Qvia. A relatively unknown company I found initally, with very few reviews on the web, but with most of these things being made in China, Taiwan, South Korea etc, being from the latter didn't particularly concern me if there was a knowledgeable UK distributor. TTW were the guys and I found the one I wanted here: https://lukashd.co.uk/product/qvia-ar790-wd-2ch-dash-camera/ I chose the snappily named Qvia AR790-WD. It looked very similar to the Blackvue above, being quite small and with no screen included. It came with a very small front and rear camera and the inclusion of a super-capacitor (rather than a battery) meant it would last better in hot sun / cold weather and because all the power "smarts" were built in, no additional battery packs or adaptors were required. Once fitted, the super-cap charges up and holds some current and the camera has a built-in fail-safe setting to shut down if it detects the car's battery voltage drops below a certain level. The cameras can then be set to record when motion is detected front or rear, or to continually record on a kind of timelapse mode. So far I've opted for the former and it's worked well. Fortunately the only thing it's picked up so far are cars coming and going and the odd late-night wheelie bin deployment by myself and the neighbours. Anyway, on to the install. You can see enough pics of the camera itself at the lukashd link above, so here's how it went for me: First of all, the installation instructions provided are not that great. Enough to give you an idea, but given the breadth of cars out there, clearly not enough for your average novice in a specific vehicle. Proceed with caution and if you're not comfortable pulling bits of trim off your shiny car, get a friend to help or professional to do it for you. The instructions said to mount the front camera first and run the wires behind the headlining. This dashcam has two wires - one to supply power and one to connect the rear dashcam. Both cables would be run across the headlining to the passenger side of the car. The power cable would run down the A-pillar to the fuse box behind the glove compartment and the rear-camera cable would stay at the headlining level, running to the rear of the car. Fortunately the front lip of the Superb's headlining had a nice recess into which cables can be easily tucked (it's like the expect them all to be used as taxis...) What you see behind the rear view mirror - i.e. not very much: (and the eagle-eyed of you will see I took this picture after I'd finished as you can see the rear camera in the mirror) Next task was the remove the front left A-pillar trim. Not complicated, I had some cheap trim removal tools but this one was easy enough to prise away with fingers. Pull outwards away from the pillar at the top edge and continue pulling away from the pillar down the windscreen side. Eventually you can pull upwards slightly away from the dash and it should come free. Behind you can see the airbag and some other wiring. I chose to run the power cable above all this keeping well away from the airbag: Power cable secured with some cable-ties: (I wanted to avoid anything rattling around after all the trim was back in place.) Cable tucked down through the same hole through the foam insulation. Next, open the passenger door and remove the side dashboard trim. No screws, just find a leading edge you can get a trim removal tool under and prise outwards. Note: the trailing cable is still laying ready to be tucked down through the foam insulation at this point (previous pic). Close up of the side panel removed. Get your hand in there and fish out that power cable poking through the foam insulation: Again, once fished through I decided to cable tie to something solid in order to prevent rattles: At this point I removed the glove box, which the manual explains fairly well and I see others have covered in other articles. What comes next depends upon your specific vehicle and the fuse you have. This dashcam requires a permanent 12v supply and a ignition or "accessory" fed supply, along with an earth connection. The dashcam came ready for hardwiring, but I understand a cigarette lighter kit was an option. I opted to use 19x19mm piggy back fuses: https://lukashd.co.uk/product/fuse-holder-adapter-ato-19-x19-mm/ but you might prefer using the mini 11x16mm fuses https://lukashd.co.uk/product/fuse-holder-adapter-mini-111-x16-mm/ The idea with these is that they're a simple way to extend an existing circuit. They come with two slots for fuses - one for the original circuit and one for your new added dashcam circuit. You remove an existing fuse, place the removed fuse into the unoccupied piggy-back holder fuse slot, ensure your 10A dashcam fuse is seated in the other slot and then press the adaptor into the position you removed your vehicle fuse from. I used a tester to find the 12v and accessory feeds, with a little trial and error turning the ignition on and off. Fuse 38 (Trailer electrical socket) was live with the ignition on and Fuse 48 (Blind Spot detection) was a permanent 12v. This is what I ended up with: (Fuse 38 is the top piggy back and Fuse 48 the bottom one) In my case both fuse positions were empty - no fuses present as I have neither of those options on my car. So I had to buy another couple of 10A fuses to complete the circuits. The ground wire was easy to attach, but I didn't take a picture of it. There's a convenient earth screw position just under the glove box to the left hand side. Easy to find. With wires in place it was on to running the cable to the rear camera; by far the most time consuming part of the job. I didn't bother taking pictures of tucking the cable into the headlining across the front left passenger door and rear left passenger door, as it was fairly trivial to feed the cable behind. Just remove a little of the headlining tuck the cable behind and replace. It's very tight around the b-pillar, but again with a bit of help from the trim removal tool, it wasn't too hard. Once you get the cable to the C-pillar that's where the fun starts. In a saloon I guess you have it easy and run straight across the rear headlining. However in the estate (and hatchbacks as well I guess) you get the quandary of how to get the cable through to the rear window properly. Ideally you don't want a loose cable spanning the gap between the headlining and the boot, especially when the hatch opens and closes. This is the cable tucked just into the headlining, optimistically thinking there'd be some easy way to go from here to the boot lid. Nope. The only way to go is through the c-pillar, out through the connecting boot grommets and up into the tailgate. So C-pillar trim needs to come off and cable threaded through into where that top grommet meets the left side of the car. Here's the C-pillar with the trim removed (comes off much like the A-pillar one). The cable needs to come down from the headlining into here: Enter stubby oaf-like finger to tell you where to run the cable. I chose the C-pillar to hold all the surplus cable. Don't do what I did and thread it all through to the tailgate, only to find you there's no room for all the surplus up there. Don't pull it all through to the tailgate like I did, only to have to pull most of it back through again... This was not fun. With one hand poking the cable up through the c-pillar, somehow you have to feed it to the hole where that rubber grommet was. I opted for cable ties and insulating tape. If you can get the cable ties through to your cable, tape the insulating tape to the cable (carefully protecting the metal plug on the end) and pull it carefully through the hole: Now we're on one side of the grommet ducting thing. The cable needs to go through that and there isn't much room in there. Enter the cable-ties again to pull the wire through: Note: those grey plastic bits hold the rubber grommet ends tight to the body panels. They are easy to get off and a right pain to get back on again - especially if you have chubby fingers like me. Deploy the missus or someone with small fingers to help. Now the cable's ready to be threaded into the boot lid. My worst fears - the whole boot interior trim has to come off. Lower section has to come off first, then the upper section around the glass. First of all, pop out the electric boot release button (if you have one) and the two interior lights. Remove the plugs from all three of them and poke the wiring back into the holes inside the boot lid. The lower interior trim section just pulls free now - again like before pop out one section (I started near the very bottom of the boot lid) and work your way carefully around, popping out the trim panel with a trim removal tool. The clips are much harder than the interior trim and I was quite worried about damaging the panels. Everything went OK for me, but go careful! Bottom panel removed: One the lower panel is removed, you can start on the upper panel around the glass. This time I started around the sides near the gas struts. Again, level and pop them out carefully working your way up each side first, then across the top. Once free the whole lot pulls downwards away from the raised boot lid. The upper panel removed and laying in the boot: (just so you can see all the clips) With both trim panels removed, the top edge of the boot lid looked like this: You can see the cable hanging out from the rubber grommet. Use the cable-ties again, threading one through from the left hole in the boot lid above to the grommet hole. Tape the camera cable to the cable tie again and pull through. This whole part took me a couple of hours to do tidily and safely but it was worth it. The camera can then be mounted where you choose on the rear window and the cables will be tucked safely out of harm's way. I wrapped the cable in a little extra insulating tape to protect it where it passes under the rear trim. Up to you. Test the camera, make sure everything works OK then refit all your trim panels. Here's the rear cam. There's a little raising of the interior boot lid panel, which I guess could be solved by cutting a small notch into it. However it doesn't bother me that much. The rear camera cable would've been better with a right-angle plug in my opinion, but again, not the end of the world. Hope this helps. Any questions, feel free! Roy.1 point
-
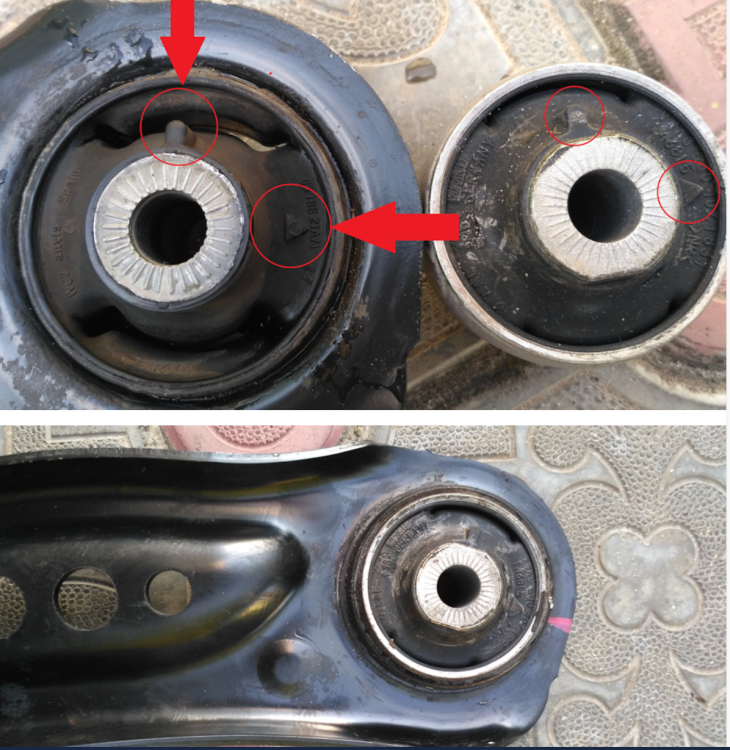
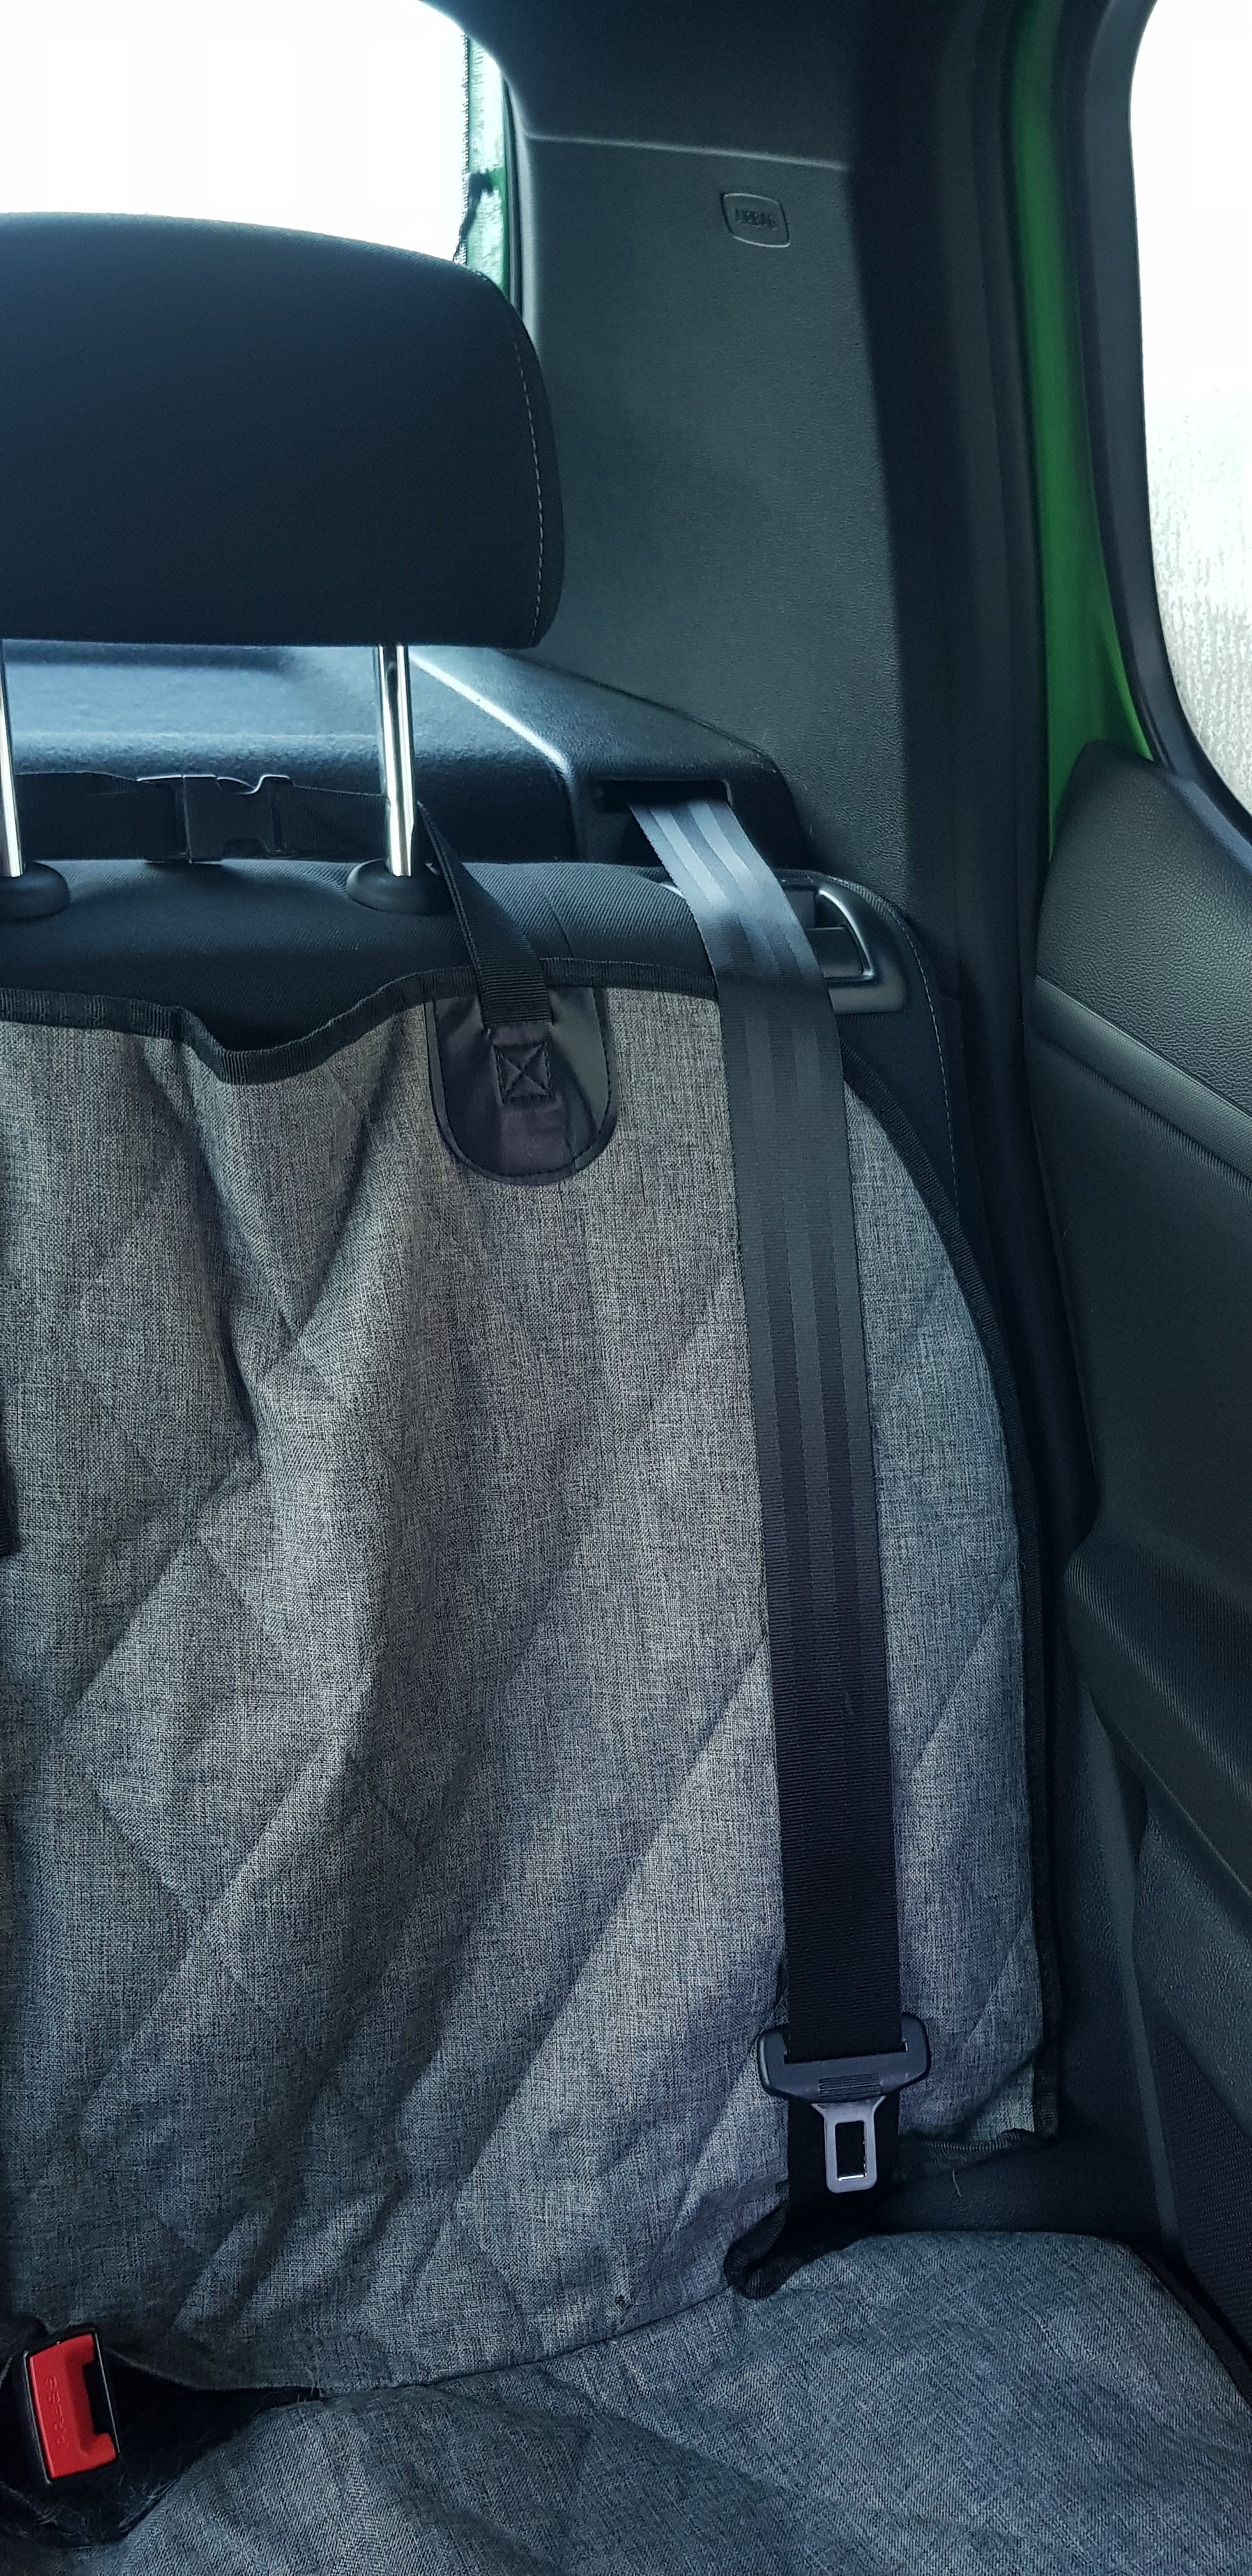
I found theese beefier control arm bushes and I'm very interested to replace the stock ones,I found them soft and the reason car tracks with the road inclination too easy. They should fix the noise also. Part number 5Q0 407 183 F
 1 point
 -
I have largely done nothing to/with this car. The Fabia has sooked up any remaining time. In tha meantime, the car, which was already known to 'car spotters' (like myself) due to its rarity, has made it on the interweb courtesy of someone that isn't me! It looks better here, less grim, if you will.1 point
-
1 pointThe insurance market is not very honest. Your car will be auctioned off, repaired and back on the road. That is what happened to my son.1 point
-
Right so the culprit does appear to have been a perished O ring as there was only half left on the drain plug 😂 (picture below). As far as I can tell I have no more leaking! Thanks for the help. This forum has come to my rescue yet again!
 1 point
 -
Thanks. Getting a little grumpy at my creaking joints. then I get in the car and it’s joining in.1 point
-
1 pointI searched these many years ago, usually were in CZ stores but now can be found in other e-stores. Here is an example: https://www.ebay.com/itm/123114442820 https://www.ebay.com/itm/123114442334?hash=item1caa314e5e:g:1IMAAOSwG4xa7CC9 I remember that i had searched also for these fancy chrome-look "rings" around those gauges. I stopped when other users informed me that they had problem with sun reflections while driving in sunny days.1 point
-
@Seasider the DSG you have is a 7 speed dry clutch so a DQ200. That means no servicing / oil changes required. They have 2 oils in them which is different from wet clutch ones were it is one oil in the box and in the MCU.1 point
-
Excellent result from a simple procedure! If only other problems were so easy to solve. Not sure why you feel the need to find the source though. Are you now missing it after having to live with it for so long? Is this a variation of 'Stockholm syndrome'? 🤣1 point
-
I get the same issue, but it's only algae, and comes off with soap, warm water and a decent brush. I've tried mould and mildew removers before, but some can have a detrimental effect on surrounding areas if they're strong solutions. Replacing the rubber will of course delay its return, but return it will if the conditions remain the same. Replacing an otherwise functioning and intact rubber is harder (IMO) than giving it a good wash. Gaz1 point
-
It's NOT possible to update SW from SD. I will send you link via PM.1 point
-
1 point
-
Yes - press SETUP for couple of seconds and then System Information (assuming it is listed - in old SW versions it is not). Nope, only from CD-R / DVD-R (CD-R recommended).1 point
-
I must admit that’s what I did, I would’ve been happy to complete the sale via Carwow but in the end one of the dealers reluctantly beat the other 😂1 point
-
You shouldn't need brake upgrades on a stock car, but what's your choice once you get twice as much power? Ford calipers are tried and tested solution - they are basically same Girling model as ones used by Felicia. Only thing that varies is source of brake discs.1 point
-
Ethereum, this approach was exactly our experience as well. I do not know what our engine code is, but it is a 1.5 petrol with ACT and DSG transmission. Again we were quoted £1100, as we had a free service due this must (surely) have been just for the belt change. It was at this point we challenged and negotiated with the dealer. The outcome, although I’m not suggesting everyone will reach it, was a written quote of £550 give or take, along with a courtesy car for duration of job, probably 3 days because we live a fair distance from dealer doing the work. Challenge, hunt around see what you can get, I just don’t want to worrying about snapping belts, dropped valves, all you’re basic nightmares…. Good luck.1 point
-
Welcome. You will see lots of posts in the Octavia Mk3 section re Cambelt. Skoda UK / Main Dealers will say Cambelt & Water Pump at 5 years. Read the threads on the 'Tea Bag' in the coolant bottle and people removing that if they have a car with that. The Haldex service is at 3 years / 30,000 miles and needs done properly, not just an oil change. So due the 2nd service of it on a 2017 car. Brake fluid changed @ 3 years then each 2. So done at least once is really how it should show as. Fuel Filter @ 5 years. etc etc. Expect these sort of costs now. Cheaper maybe at an Independent.
.jpg.0b06f1d5d5d159b07d3d237fd672b0c1.thumb.jpg.b1b6b41a67b6de334df3aa7e87241fe5.jpg) 1 point
1 point -
Hi Skoda guys. I'm very interested in this current thread re RDS TMC live traffic. I've owned a Fiat 124 Spider for 5 years and always had TMC live traffic. About one month ago the service just stopped for no apparent reason. I have a valid Connected Services subscription so that is not the issue. Two weeks ago I took a trip to France/Belgium..... Live Traffic worked perfectly !!! On return to the UK to Live Traffic stopped working once again. I don't belive the problem is car/model specific, nor is it a subscription issue or car settings etc. It seems to me that it's the RDS TMC broadcast service in the UK that has failed/stopped. I'll update as and when I find out more information...... please do likewise. All the best. Arthur1241 point
-
1 pointEV charging seems so haphazard. So many non functioning charging posts and ones from the big oil companies exorbitant rates of payment required. I thought I heard that all hydrocarbon fuel stations above a certain size, unless the site was so constricted that the EV charging station could not be safely put on site ie be far enough away from the HC fuel pumps, had to plan to add EV charging. Good to see that Tokheim/ Dover Fuel solution, a branch of is in Dundee, (the city of EVs is it not), is getting to integrating the EV charge points in to its HC pump offering as an integrated refuel station offering as described here and pictured below............. https://www.doverfuelingsolutions.com/dxpower1 point
-
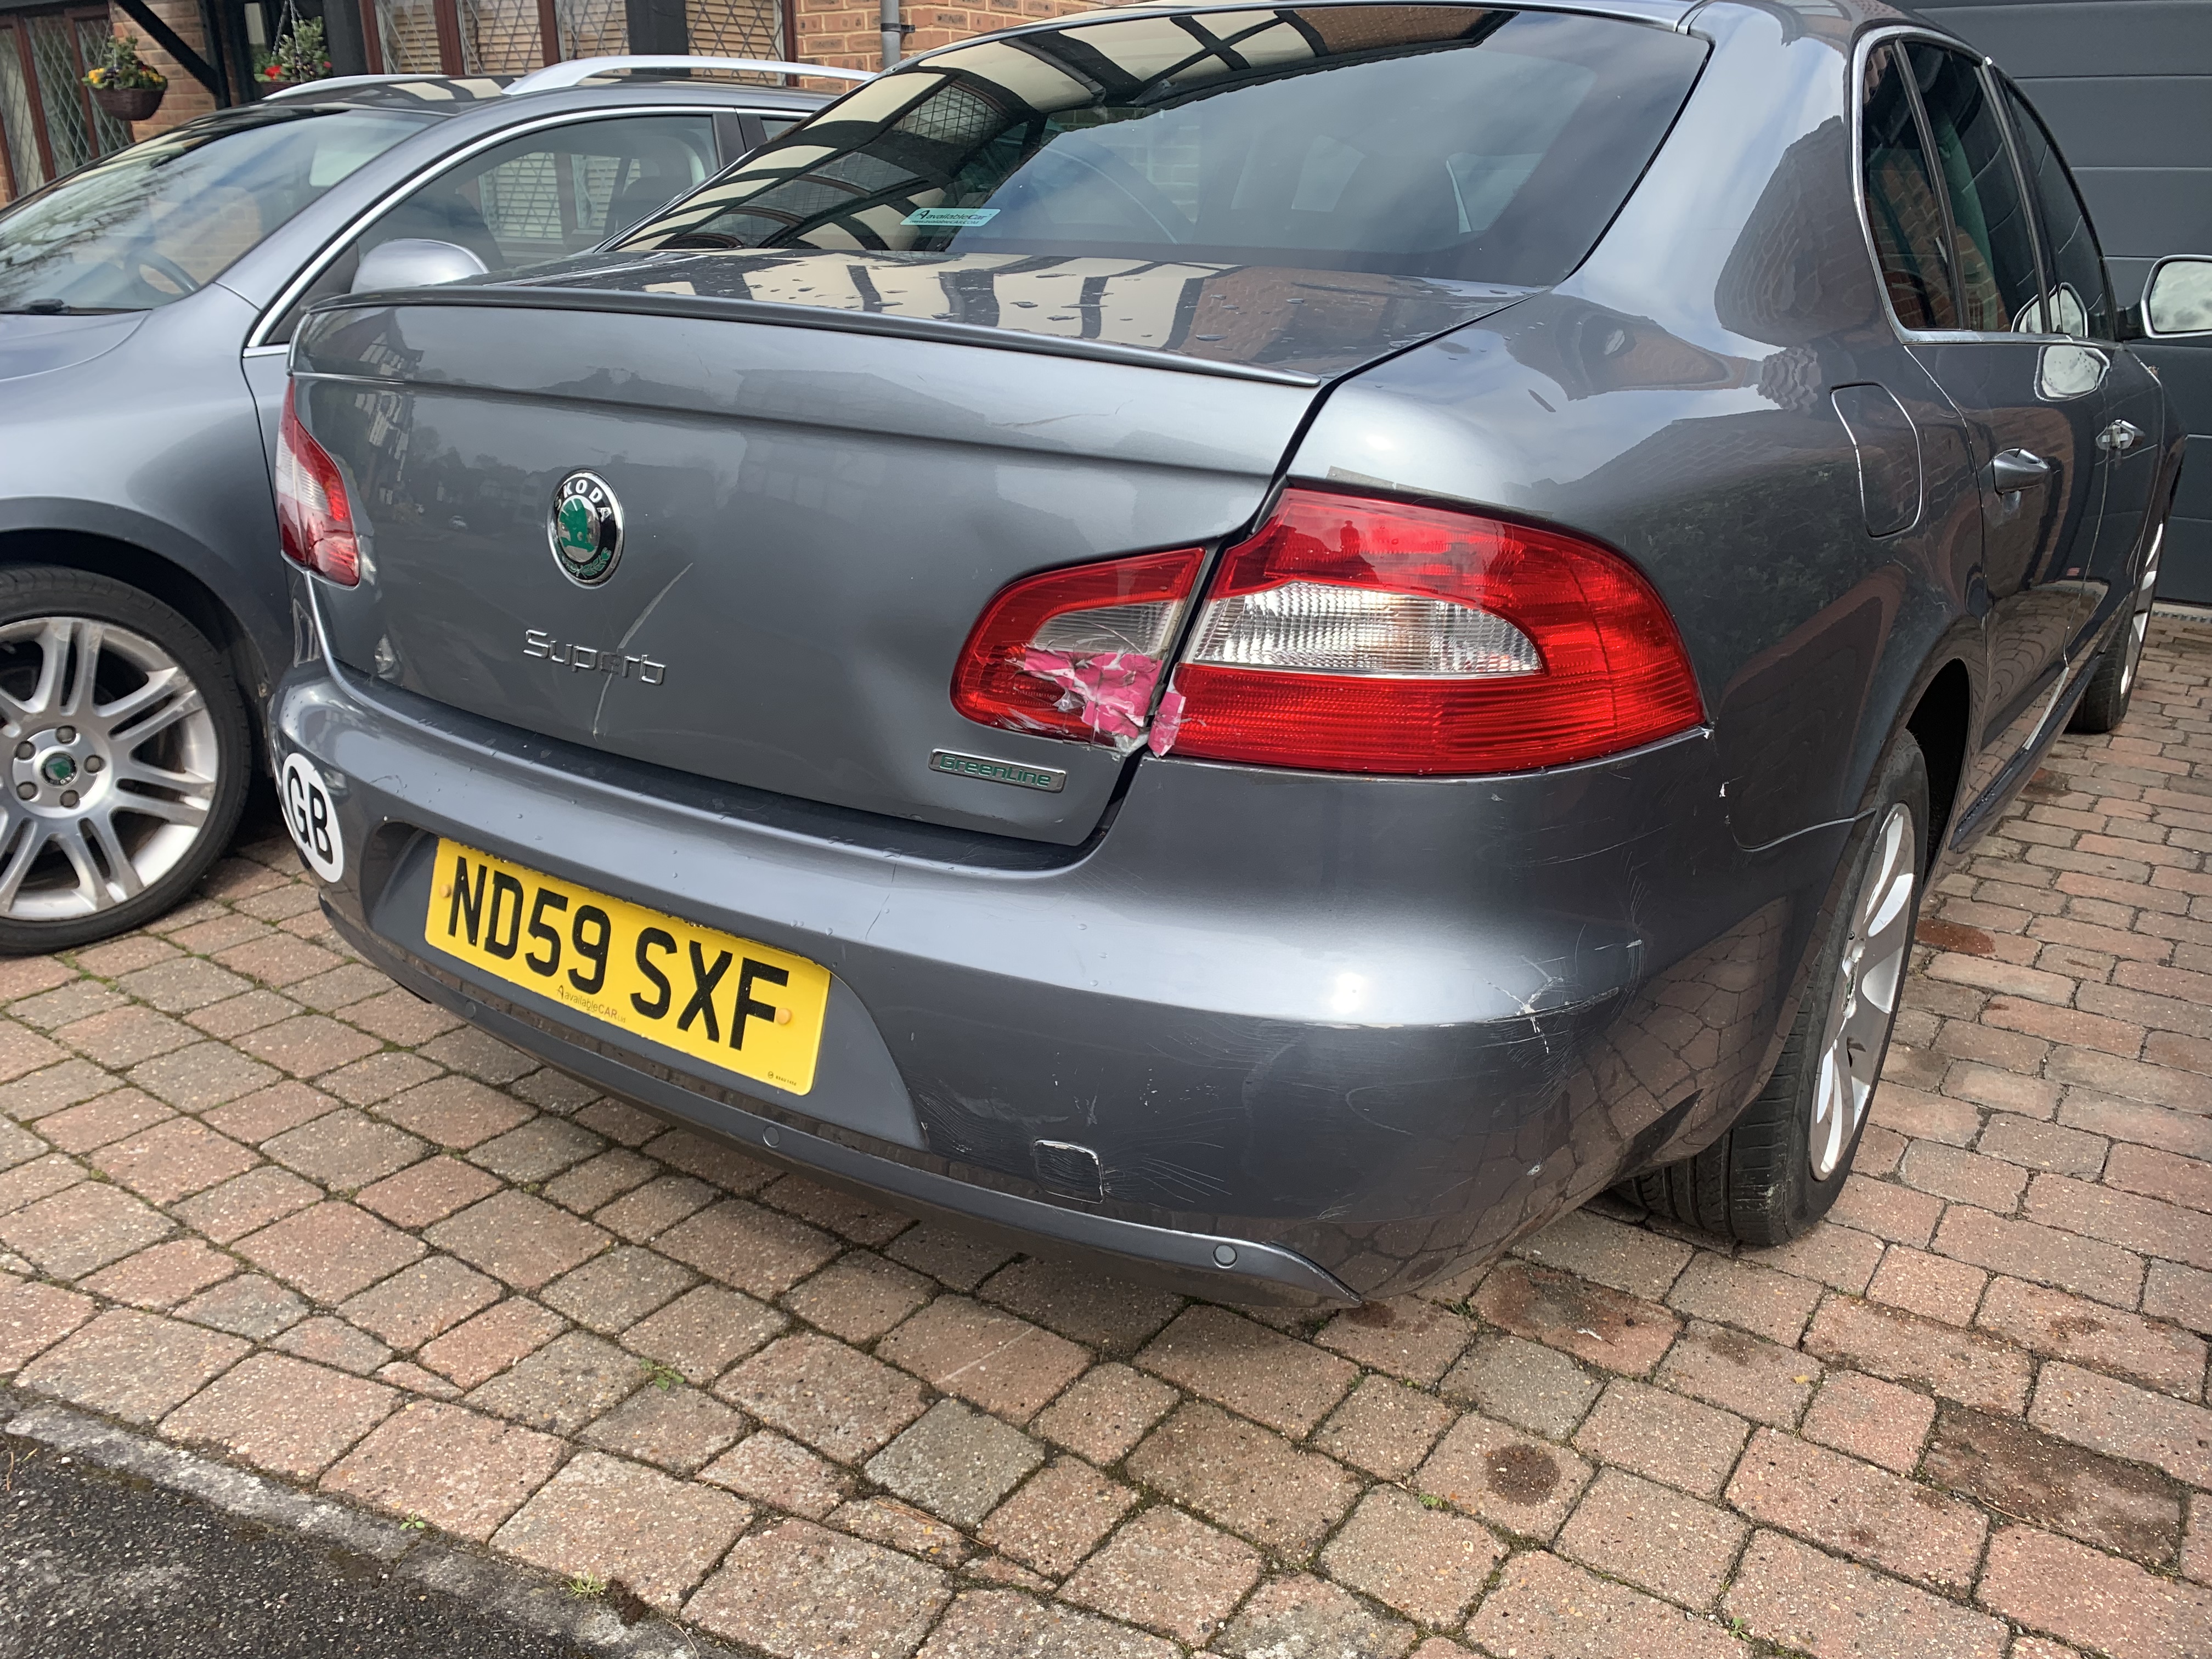
1 point1 point1 point1 point1 pointAh yeah I forgot that part too. always get to know the local glow plug/injector removal guy and have his number on speed dial. good thing about the v6 tdi is the injectors like to remove themselves when the bolts snap off!1 pointInteresting... especially since I don't think the TMC system uses satellites. Perhaps they were confusing it with GPS which obviously does use satellites. I'm waiting on a dealer getting back to me, hopefully they can escalate the issue.1 pointTo complete my tale… ordered mid-January, built late Feb/early March, delivered mid-April after three weeks delay on German dockside and almost a week for the lorry to bring it from the UK port of arrival to my dealer in Cardiff. Looks fine: only very, very slight surprise is that the small storage area at the front of the gearstick does not have a sliding cover to it as all my Octavias did, but apart from that, all looks good. Accumulation of dog fur in it commences tomorrow. Oh well…1 point1 pointJack up the front left wheel and see if the wheel turns freely by hand. You could also start the engine to get the power assisted brakes working and press the front brake pedal firmly, and then release the front brake pedal. Now see if the front left wheel turns freely by hand. It sounds like you might have a sticking brake caliper on that wheel.1 pointDoes it do with the car not moving and the revs at 2000?1 pointMy current “project” car is a cat N Superb because of the damage in the pictures. A full set of secondhand rear lights is £100, rear bumper £100, possibly less if I shop around, to fix the two small dents, paint the boot lid and bumper £300, total £500 to repair. The pre accident value of the car would have been about £2.5k, I paid £800 for the salvage. There are huge savings to be made against computerised bodyshop quoting systems.
 1 point1 pointTest drive both to make sure what your preference is. The 272/280 Superbs are real gentlemen's rockets, but their day-to-day MPG can be challenging, if fuel economy is any concern to you. The vRS 245 Octavia is much more "sporty" and the handling and ride reflect this. They're cars with very different characteristics, so it's worth trying both. That Superb with the dodgy MOT history is definitely one to avoid. It sounds like it's a right lemon.1 point1 pointMy cars getting a new steering wheel soon and I've a long list of other faults to be looked at while it's in - I'll add the wheel corrosion to it lol1 pointI'll grant you that, but it is easier for the layman to consider it as a form of storage rather than Pb and H2SO4 doing magic.1 point1 pointFor those new to the forum here there is spreadsheet for tracking Skoda Octavia Mk orders and deliveries. Feel free to add new orders. This spreadsheet gives a good idea of what is actually happening. https://docs.google.com/spreadsheets/d/17h4myLSMpZ3dohgDJX25mkOhKLbyepEaeEeYcA3AqFY/edit#gid=01 pointNot visually my cars of the day because i never managed to get to see them but got sent the pics.


 1 point1 point1 pointHere's a video of a guy changing his expansion tank. Even with the tank removed, he can't see the silica bag, but it can be heard (he says) when he shakes the removed bottle. Doesn't look like a big job to simply remove the tank, replace with e new tank and top it up with fresh coolant if needed, with a plan to replace the coolant for G12evo (if applicable for your engine) in due course. This thrifty guy reused his coolant from the old tank, which he'd drawn out before removing the tank. Cost was just the tank.1 point1 pointStill cannot believe that it is true, but it is! Delivery date: 2023/04/07 (order date 2021/09/13)
 1 point1 pointIf I get around 55mpg from the 2.0tdi VRs I will be happy I also tow a small caravan and having the diesel torque helps Due to collect the car sometime this week came off the boat at Grimsby so I have a nice 300mile drive home to south west Scotland 🏴 with the car
 1 point1 point1 point1 point1 point1 point@Jamster330 I imagine that those remapping intend to give them welly at some point and are not just doing it to improve the economy. Sadly VW Group appear not to have learned, but maybe they will reduce the service interval eventually and include the filter, and maybe even put a decent warranty on them. You maybe need to look in other sections of this forum. http://briskoda.net/forums/topic/508475-gearbox-dq381-in-emergency-mode These are AWD's but the issues are not only with them. http://briskoda.net/forums/topic/509581-7-gear-4x4-dsg-gearbox-error-codes-for-a-2018-tsi-kodiaq http://briskoda.net/forums/topic/509101-dsg-in-emergency-mode-in-the-cold http://briskoda.net/forums/topic/502781-gearbox-in-emergency-mode-no-reverse-gear http://briskoda.net/forums/topic/505394-gearbox-oil-leak http://briskoda.net/forums/topic/510461-what-dsg-box-do-i-have
.webp.9128b094da4a8f59032a7328ef1b42c6.webp) 1 point
1 point


.jpg.0b06f1d5d5d159b07d3d237fd672b0c1.jpg.e616965e93c0f85fd592a2b892323e05.jpg)


Important Information
Welcome to BRISKODA. Please note the following important links Terms of Use. We have a comprehensive Privacy Policy. We have placed cookies on your device to help make this website better. You can adjust your cookie settings, otherwise we'll assume you're okay to continue.
Account
Navigation
Configure browser push notifications
Chrome (Android)
- Tap the lock icon next to the address bar.
- Tap Permissions → Notifications.
- Adjust your preference.
Chrome (Desktop)
- Click the padlock icon in the address bar.
- Select Site settings.
- Find Notifications and adjust your preference.
Safari (iOS 16.4+)
- Ensure the site is installed via Add to Home Screen.
- Open Settings App → Notifications.
- Find your app name and adjust your preference.
Safari (macOS)
- Go to Safari → Preferences.
- Click the Websites tab.
- Select Notifications in the sidebar.
- Find this website and adjust your preference.
Edge (Android)
- Tap the lock icon next to the address bar.
- Tap Permissions.
- Find Notifications and adjust your preference.
Edge (Desktop)
- Click the padlock icon in the address bar.
- Click Permissions for this site.
- Find Notifications and adjust your preference.
Firefox (Android)
- Go to Settings → Site permissions.
- Tap Notifications.
- Find this site in the list and adjust your preference.
Firefox (Desktop)
- Open Firefox Settings.
- Search for Notifications.
- Find this site in the list and adjust your preference.