Leaderboard
-
MikeTheThinker
FREEDOM20Points8,484Posts -
.jpg.1006585dfe4e2977315b67c3d642e37b.jpg)
Guest_
FREEDOM19Points83,824Posts -
Winston_Woof
Members13Points1,096Posts -

Kenny R
FREEDOM13Points4,778Posts


Popular Content
Showing content with the highest reputation on 10/03/24 in all areas
-
overtook a world record speedboat travelling down the M6 as we returned from a week in Scotland coming back down the M6 today from a week away up near Oban we spotted this beauty travelling down the M6 https://www.bbc.co.uk/news/uk-england-684896547 points
-
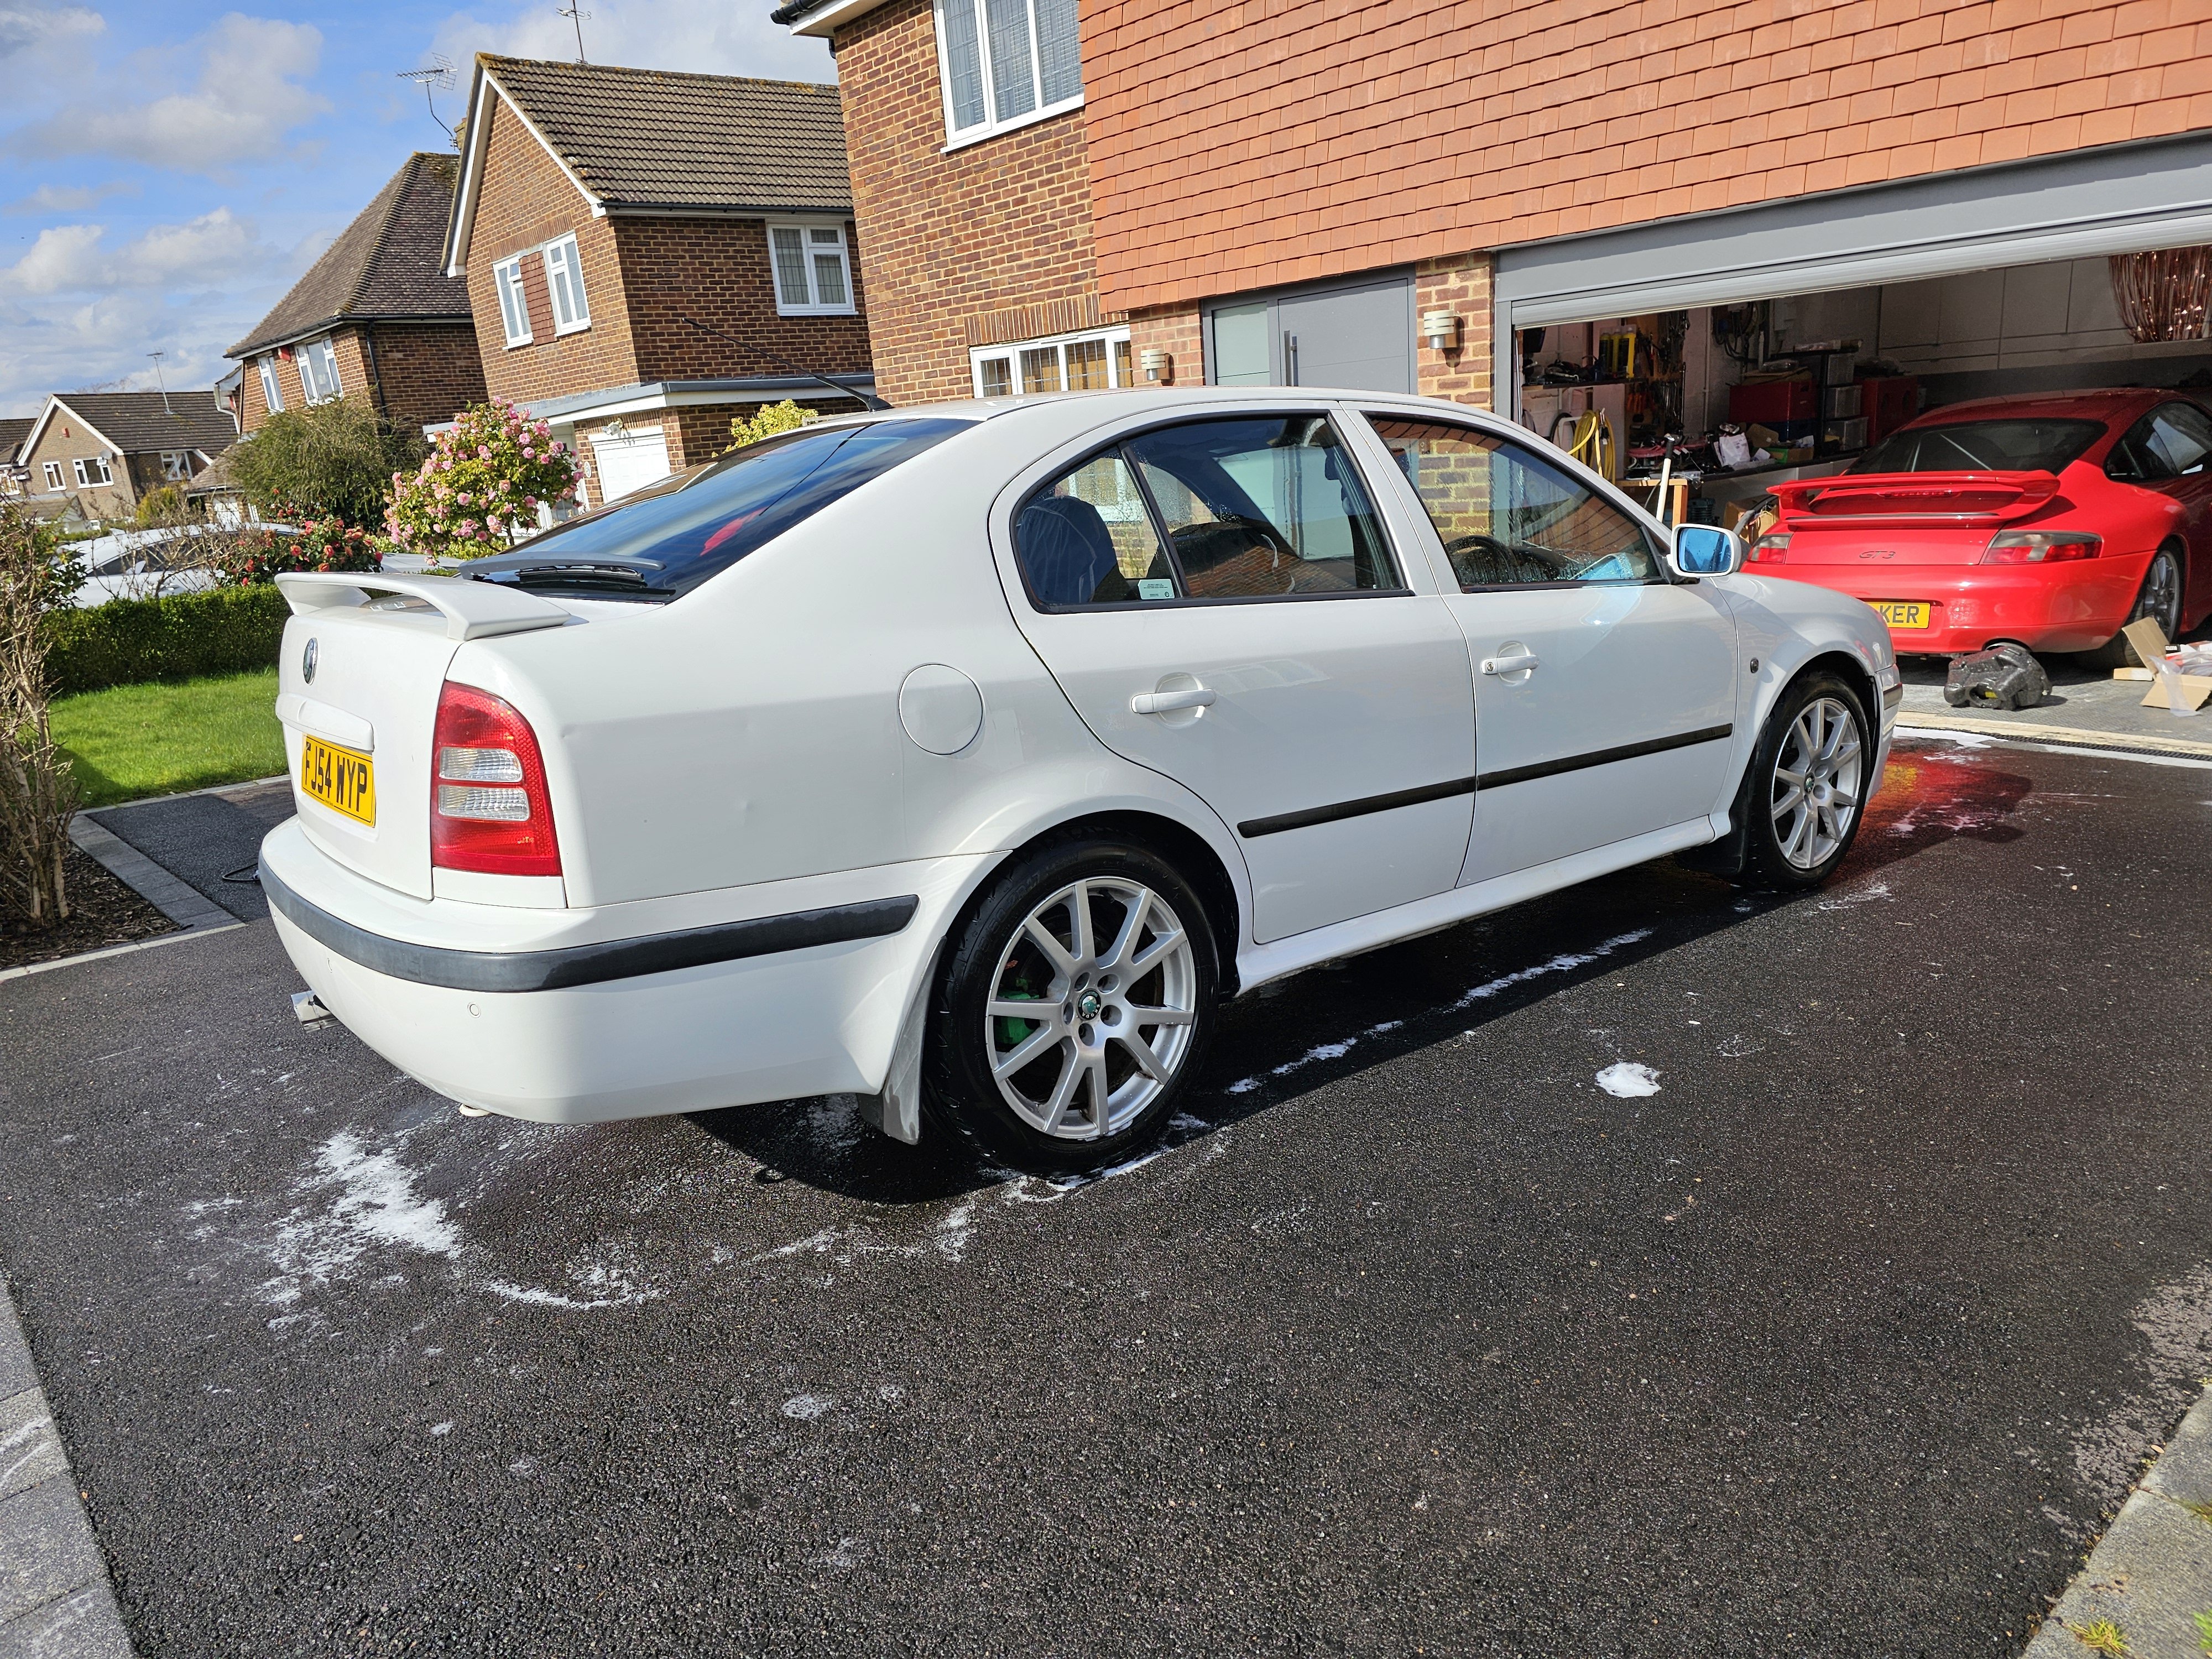
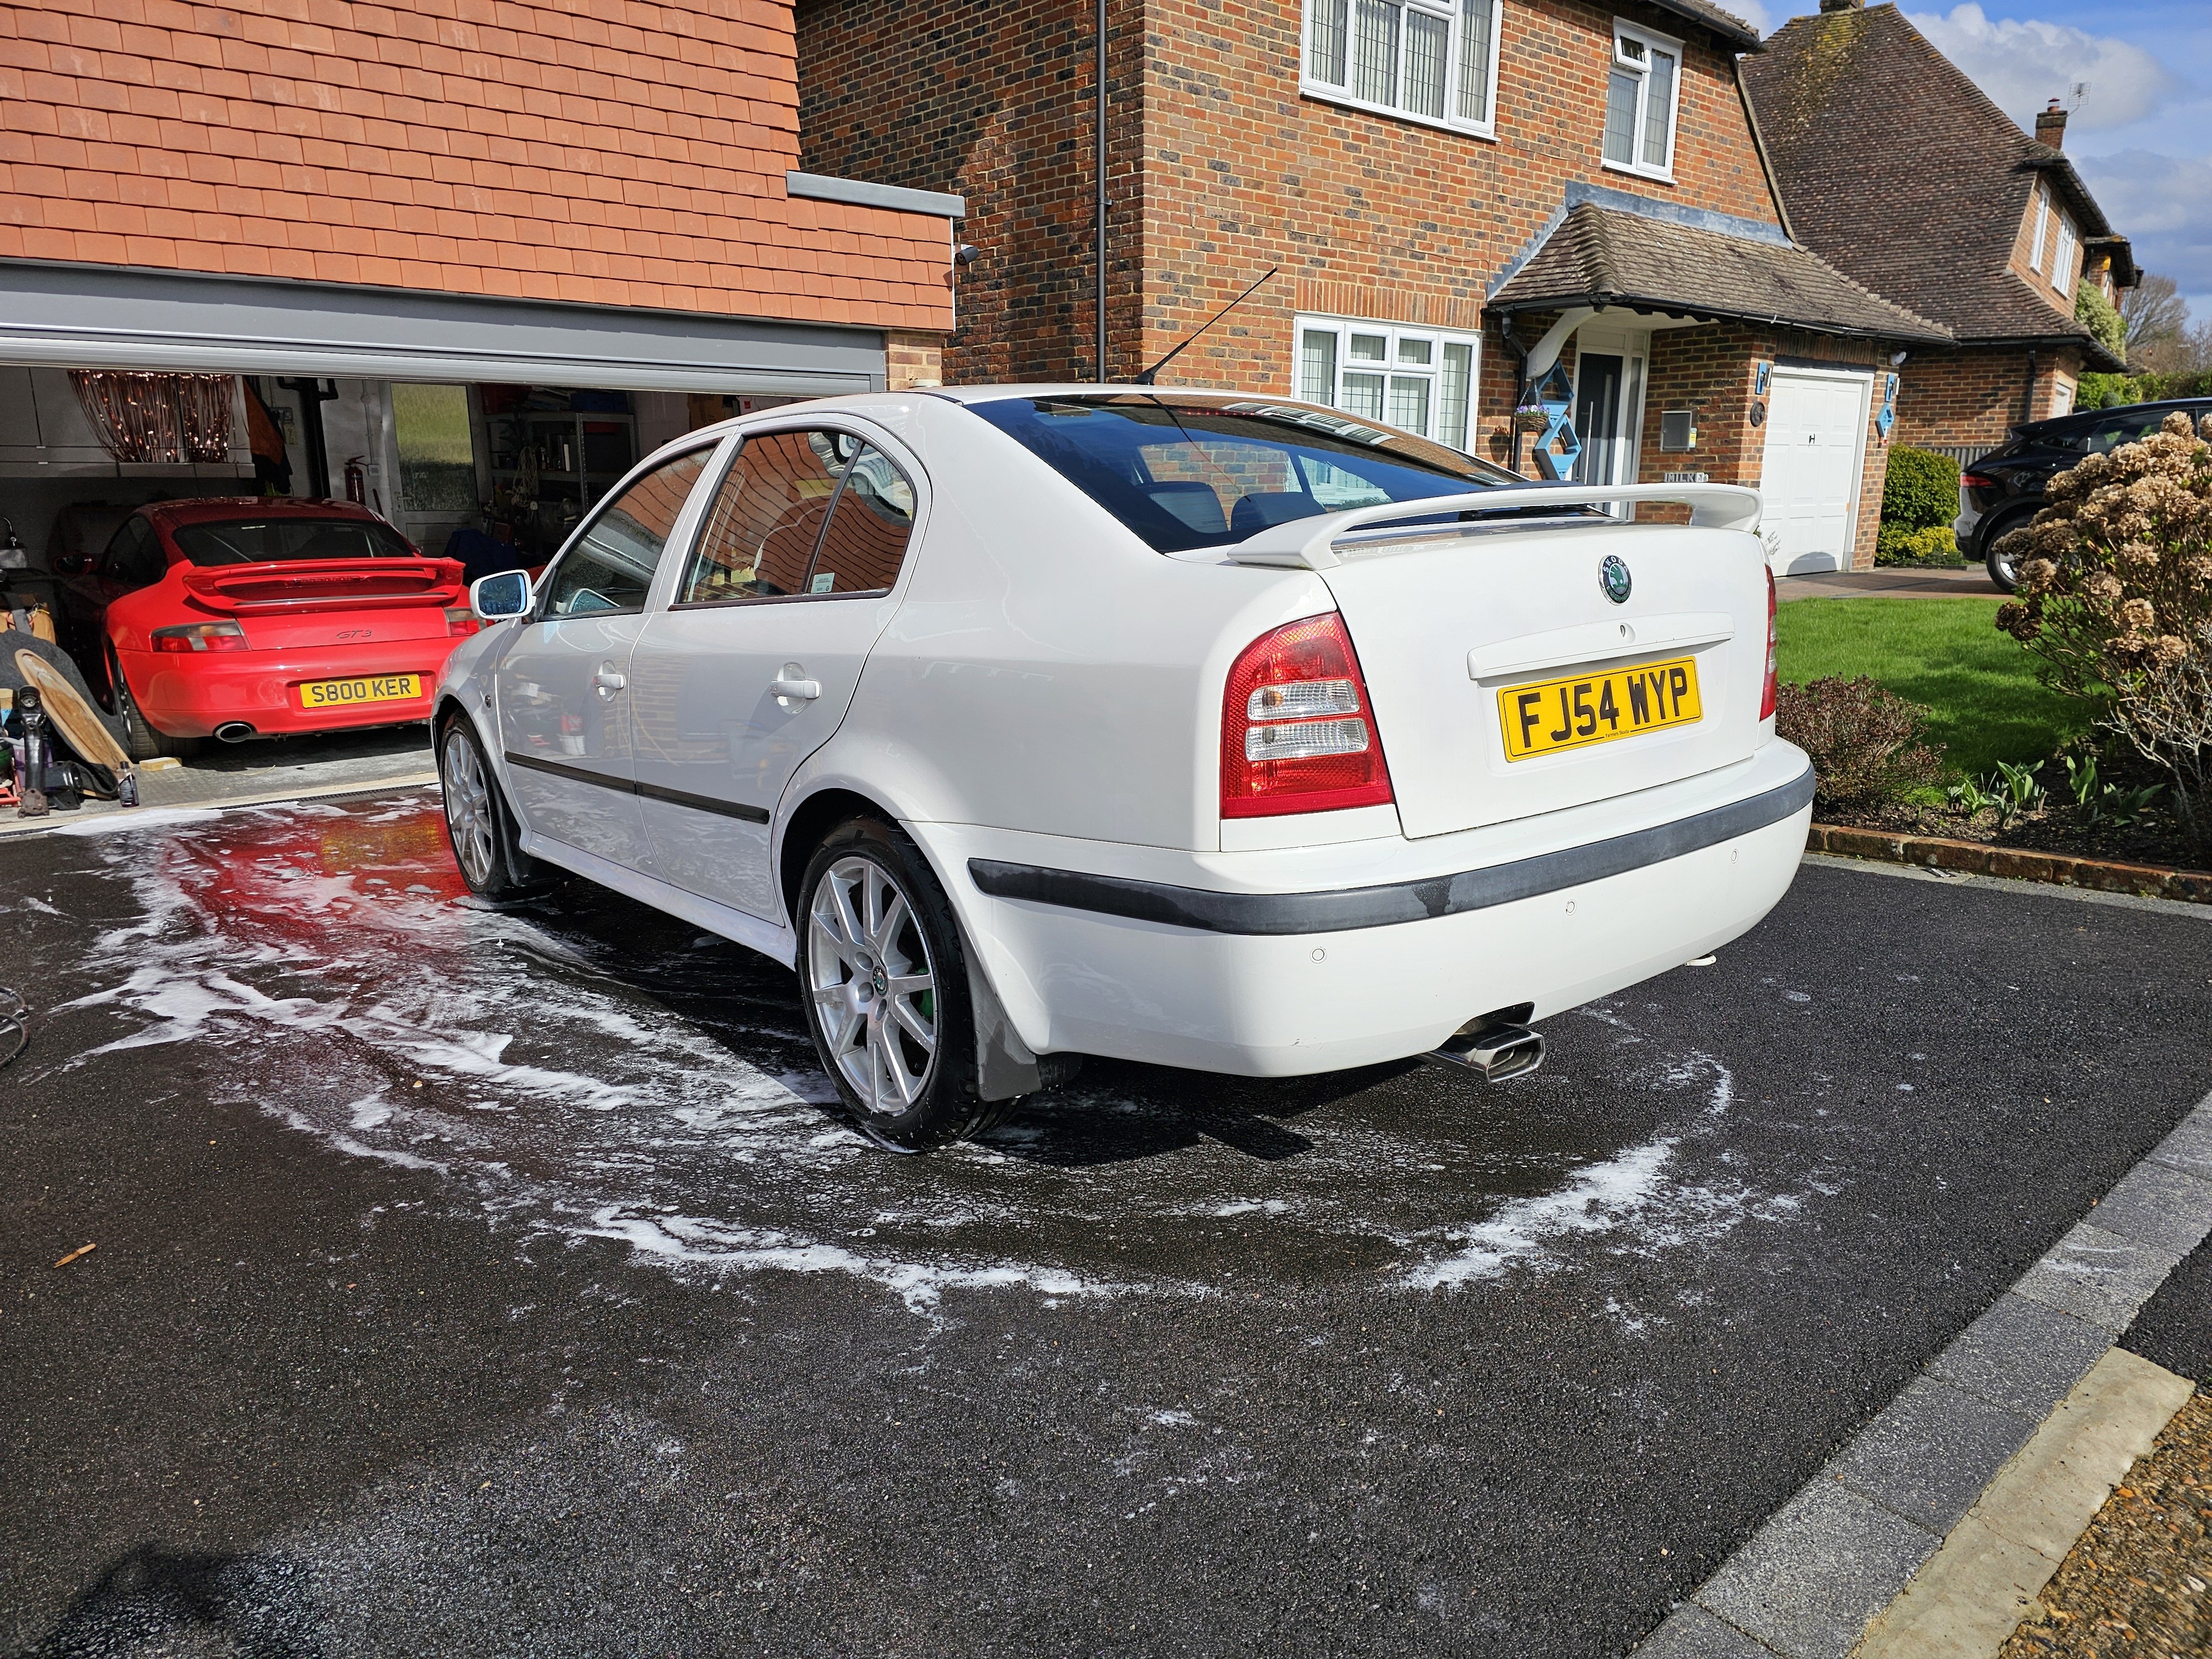
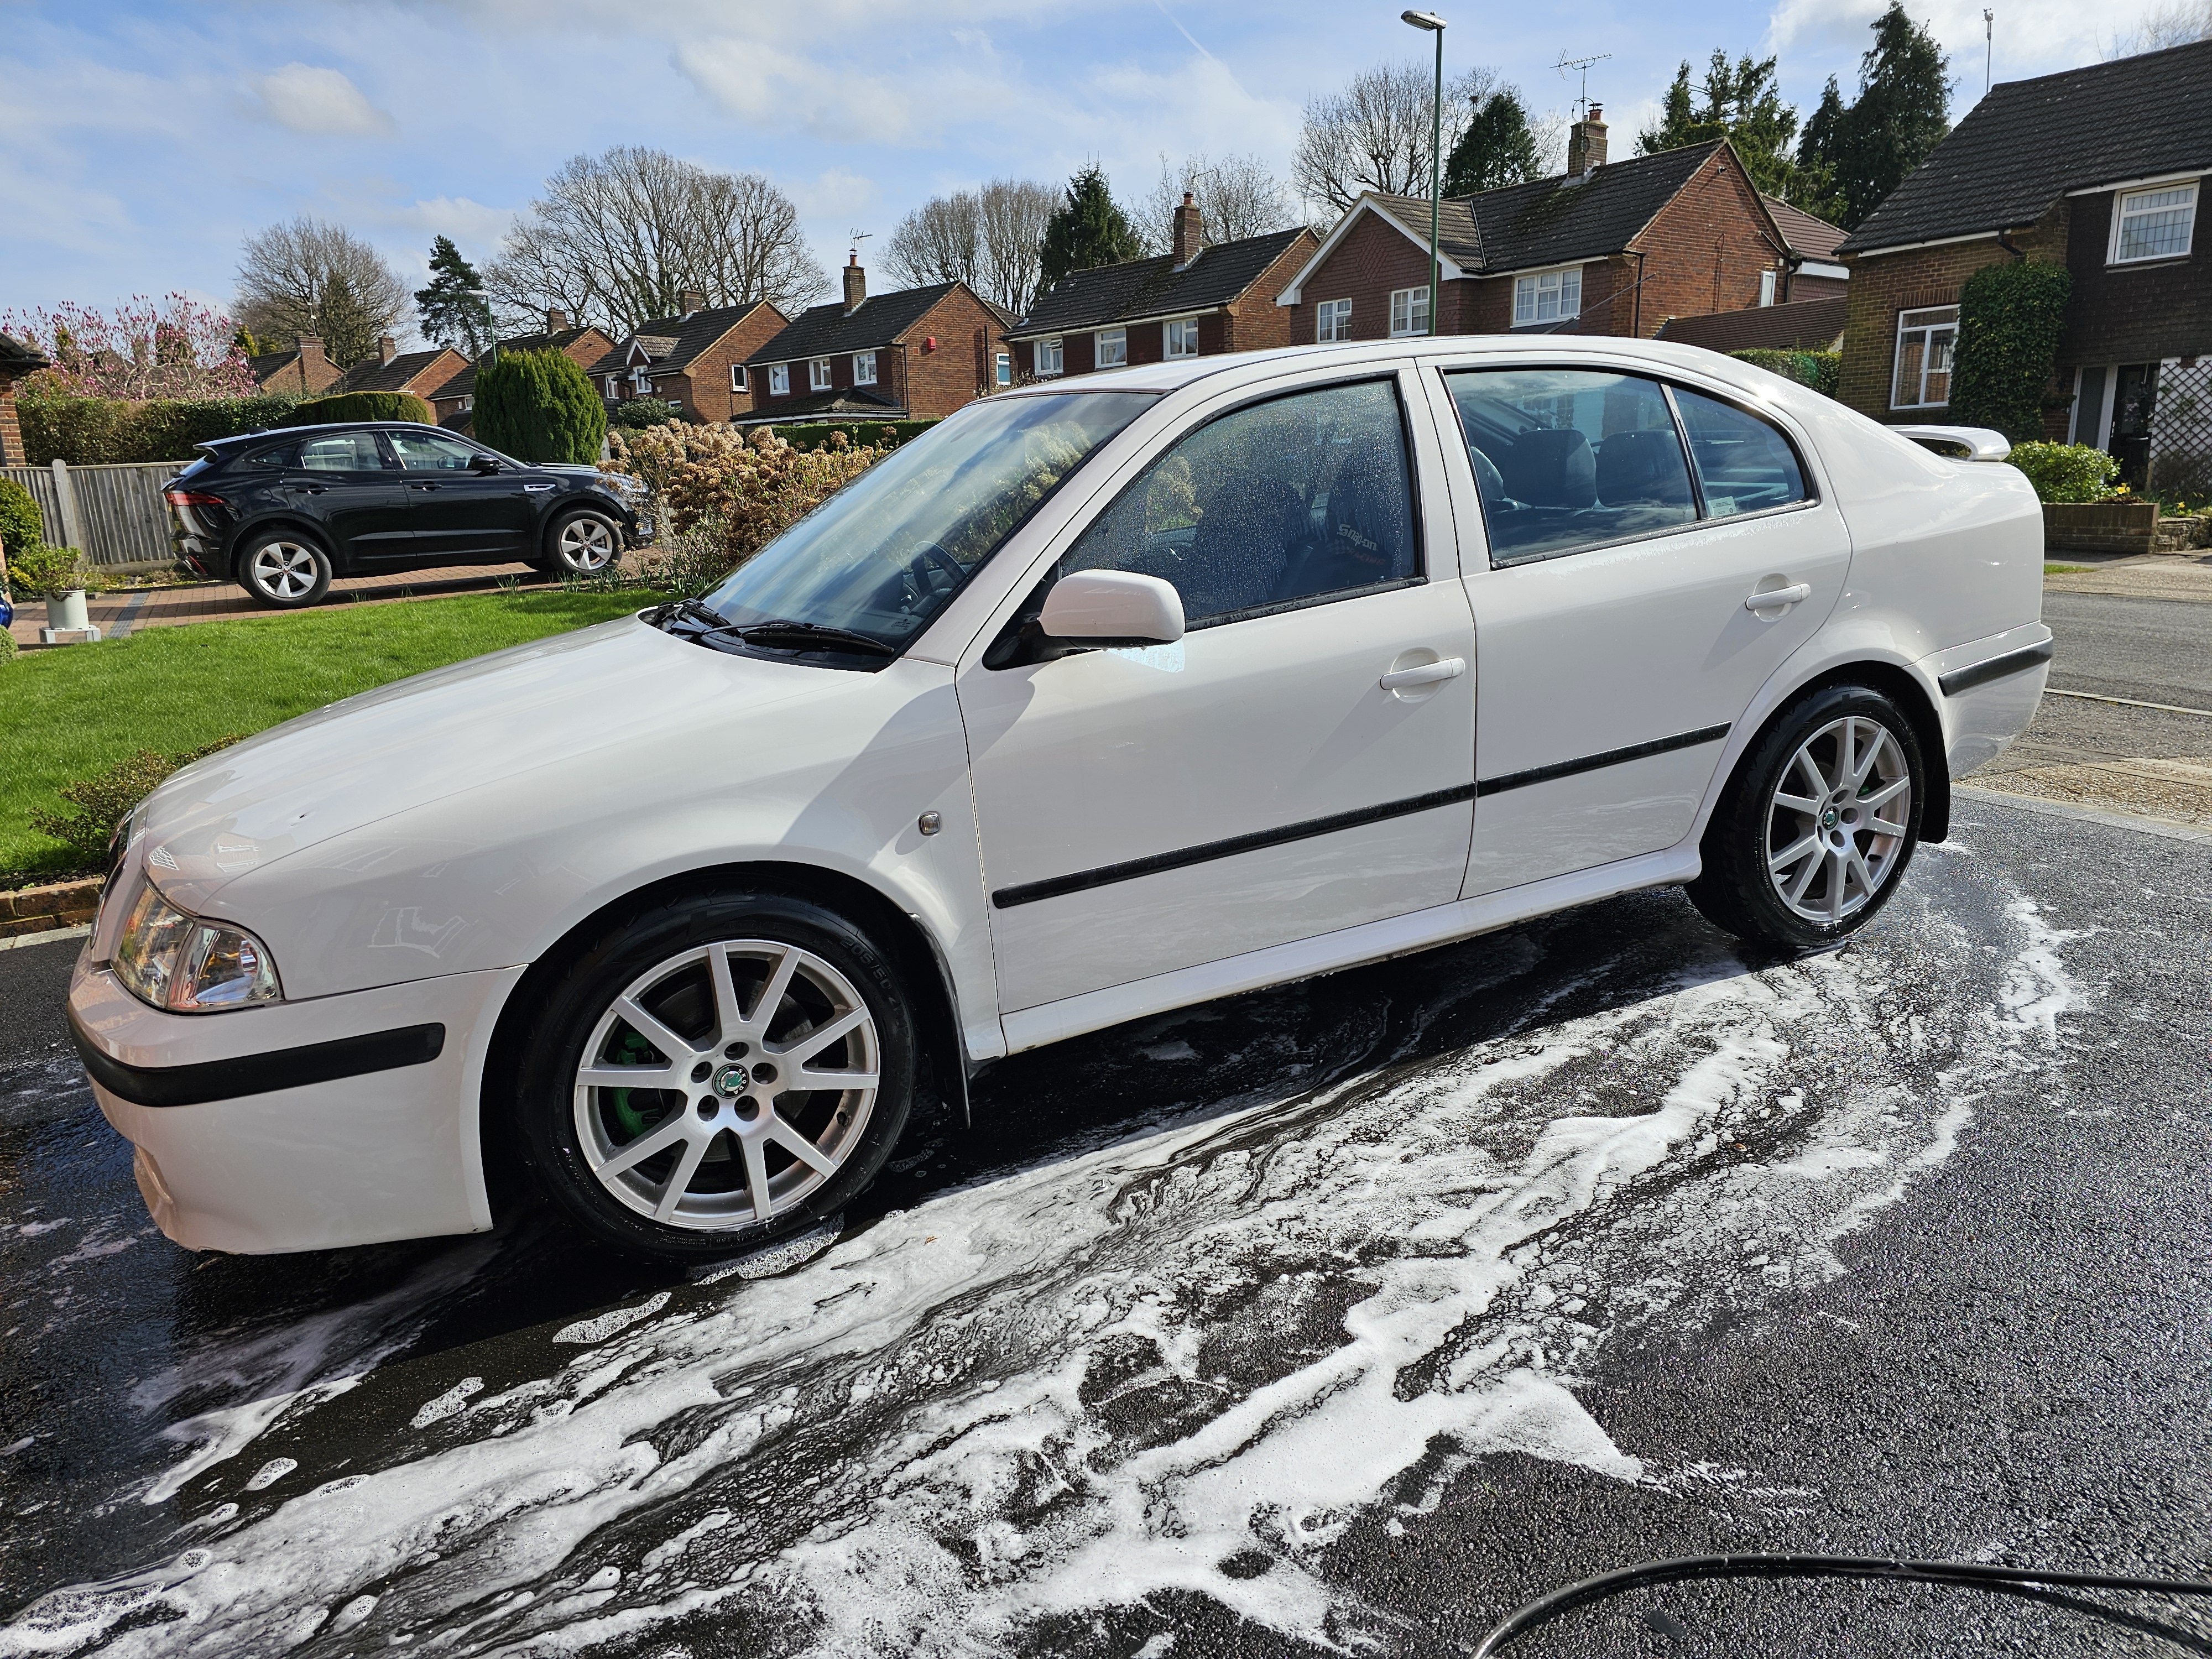
It's mot time again. Just a quick wash down and fingers crossed it passes.
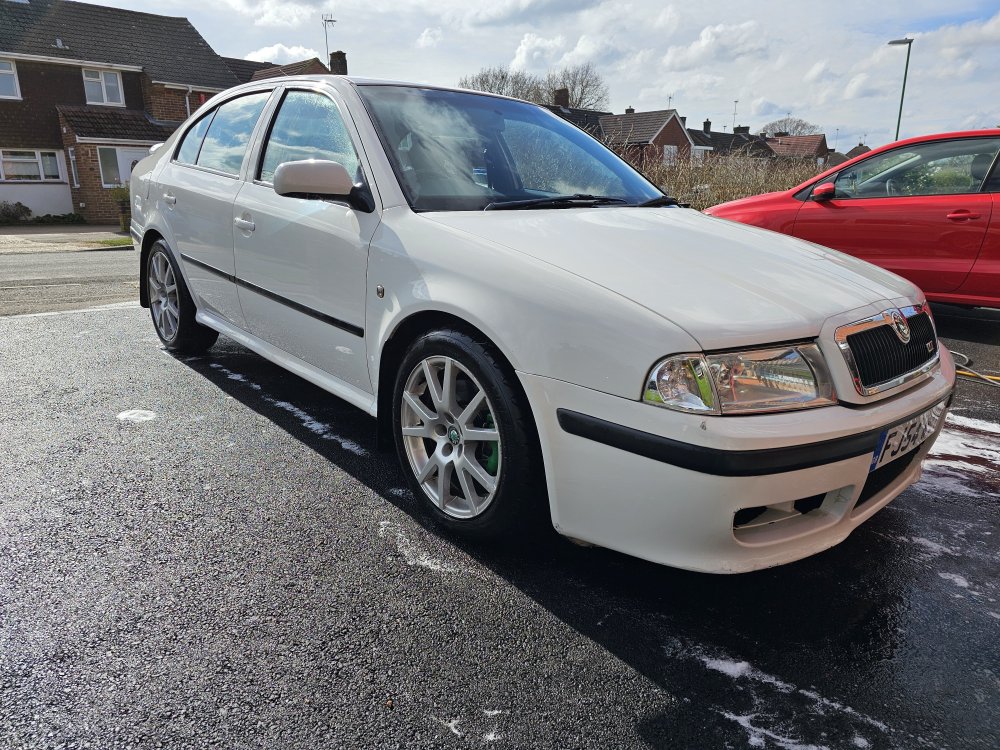

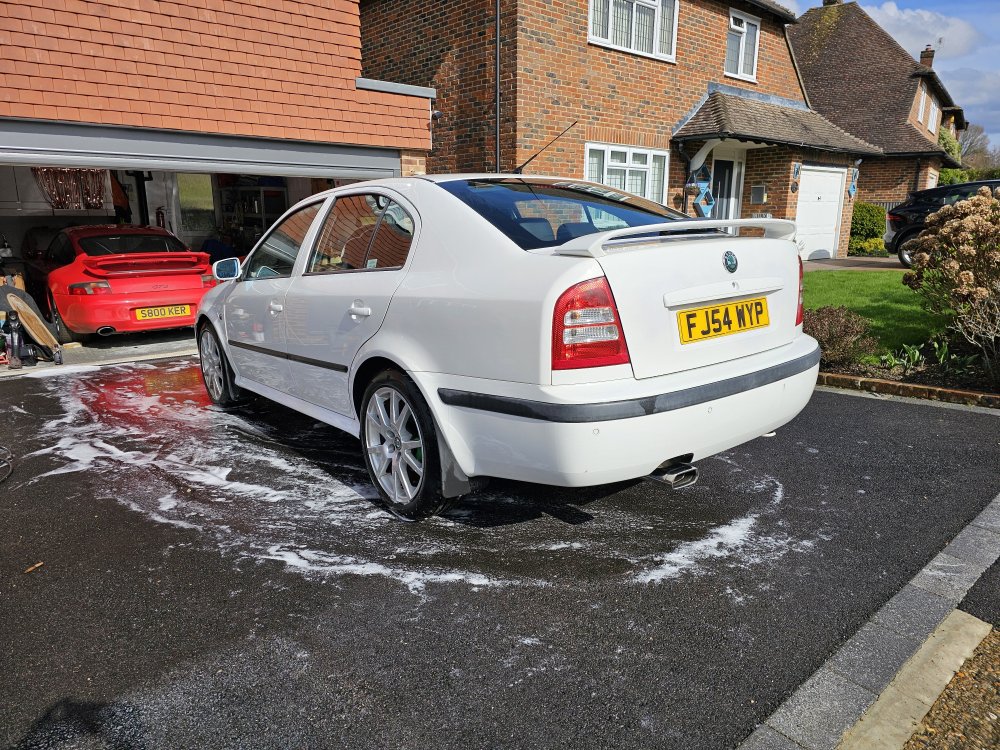
 5 points
 -
3 pointsAn awful lot of people are quite sensitive to criticism, so can be hesitant to respond to what they think might be a contentious issue. Doesn't mean they aren't listening. Do not feel bad towards the people who ignore you or disagree with you, your real enemies are the people who try and silence you.3 points
-
3 pointsDrums on the rears of RWD or AWD BEV,s is something simply clever. Servicing and Maintenance is required even if Consumables are not required. ICE Vehicles now on SERVICE PLANS might well get nothing done to the brakes in 3-5 years. Not even the wheels taken off, brakes serviced just a visual inspection, no brake fluid checks, H20 content or anything. At least the BEV thing which is common is the Brake Fluid change at 2 years. Well that is getting missed as well, but that is what the UK Motor Trade is like. More interested in telling owners the AC service is due at 2 years than the safety stuff.3 points
-
3 pointsThe BEV / PHEV Garage / Workshop and conversion trade is developing. The Technical Colleges and Vehicle Colleges are running the coarse,s and getting on with what is needed into the future. Somehow people seem to think that Companies and Businesses, Manufacturers and others are all mumpties and mumping on about EV,s is going to halt the future from happening. Their business plans are set now and their financing etc. Some will fall by the way side, there will be new developments. Back 51 years ago in 1973 when Mobile Phones were a novelty or a joke who would have believed that there would be homes without Land Line phones.3 points
-
3 pointsHmmm £0 spent on brakes? Maybe that's why they've had problems stopping them on motorways lol3 points
-
2 pointsI have one but to date have only refuelled my enemies cars from it!2 points
-
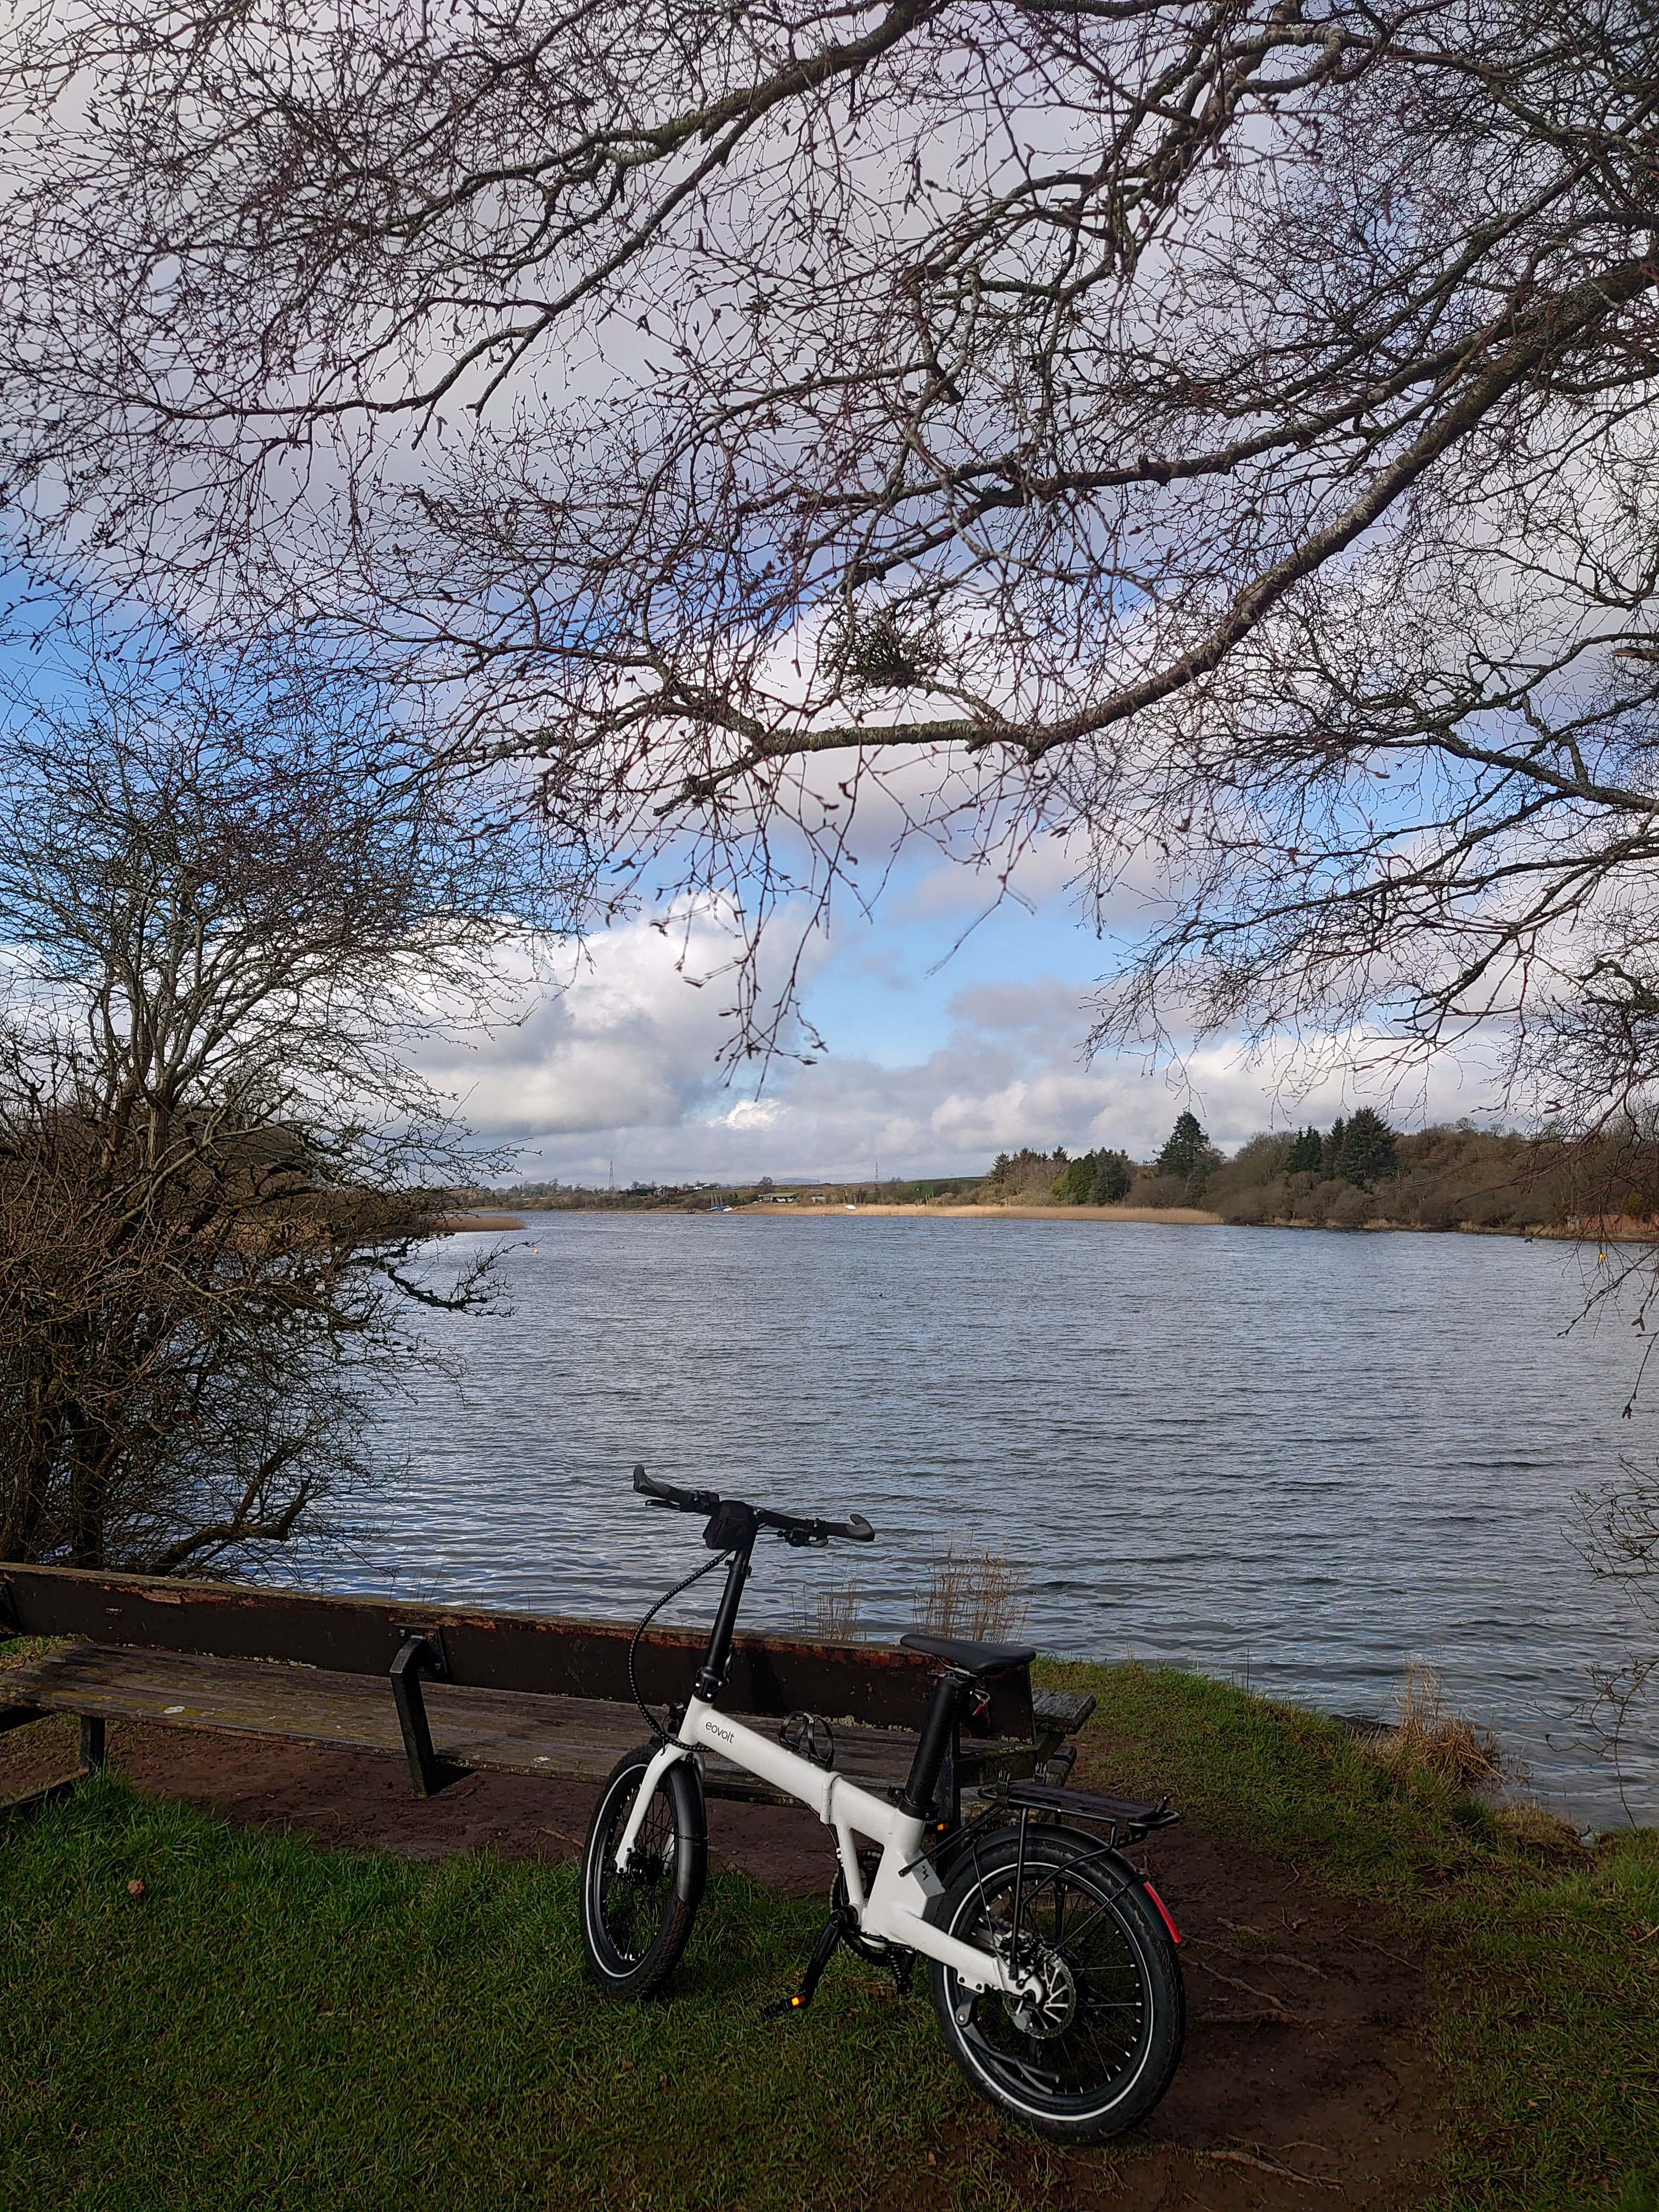
2 pointsI wanted a folding e-bike i could take in the MINI Electric if using a slow charger rather than staying with the car at Rapids for up to 40 minutes so tried a few recently but today tried one of these and it was just what i was after and ordered one.

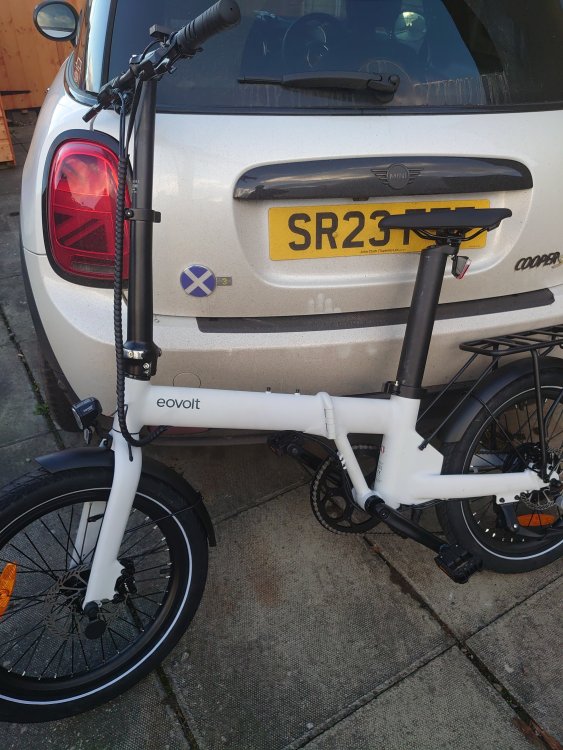
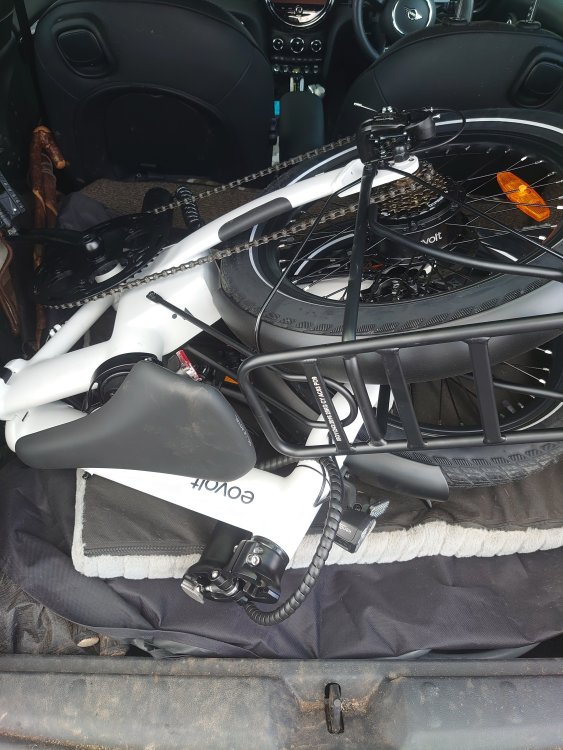
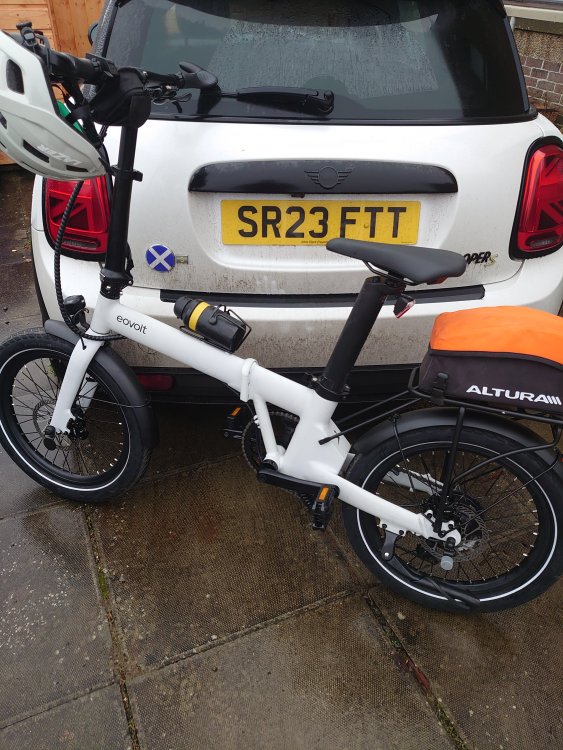
 2 points
 -
2 points@EnterNameWell you need to fire up coal occasionally because you might not have enough to make the tea. EDF has a nuclear power station in Scotland that can power 75% of the homes but does not as the electricity is not required often. England needs those small Modular Nuclear Reactors, and the Diesel Farms, & Coal and still pays more importing from overseas than it will to get Electricity from Scotland just incase that Scotland might split away. The Southern part of the UK and where the most live need to realize just how supported they are from others. Lovely having wealth to buy goods and imports, but as it is maybe time you have some of your own food, energy etc available. Energy and food security.2 points
-
2 pointsSince the UK is an Island Nation or 4 and the Poo & Pish needs processed to go back on the land or to the sea why is the technology already available not used for all off it to produce energy? Because the Oil & Gas and Nuclear & Coal want to take the p!ss is why. Just like the Water & Sewage companies. Take the profits, sh!t all done for the environment. PS Problem with Growing Crops for Fuel is that England can not feed it,s self. The waste from Crops can produce Gas, the rubbish tips can, that can produce electric. It does local to me. There are Farms now putting Gas into the Grid, and places with Battery Storage being built near these places and near the solar & wind farms. Once England stops thinking and blocking the technology already available then you might advance to net zero, but sadly the issue is the Government & Oil & Gas & overseas Wealth Funds. & some MP,s and Peers with their investments in the old technologies.2 points
-
2 pointswould you refer to a petrol station as "public refuelling" ?? probably not ;o) Whilst it is undoubtedly true that the cost per unit may be higher than on your home tariff at charging points away from home whats the difference ? Aren't these (most of the time) privately owned chargers selling a service/product at a profit?2 points
-
2 points@J.R. look at SSE Energy Solutions. Look at other electric generation companies and renewables / wind farm and solar is Scotland that are in the business of selling electricity and now in partnerships with EV Charging providers. Scotland is not England and the real issue in Scotland is not enough storage for the electricity that can be produced or the customers taking it since not all is connected to the national grid. Electricity is not free but it can be damn cheap in some communities producing it with turbines they own and that the initial investments are paid back on.2 points
-
2 pointsWhich research including Cost savings EV versus ice across different models based on efficiency and charging costs https://www.which.co.uk/reviews/new-and-used-cars/article/electric-car-charging-guide/how-much-does-it-cost-to-charge-an-electric-car-a8f4g1o7JzXj2 points
-
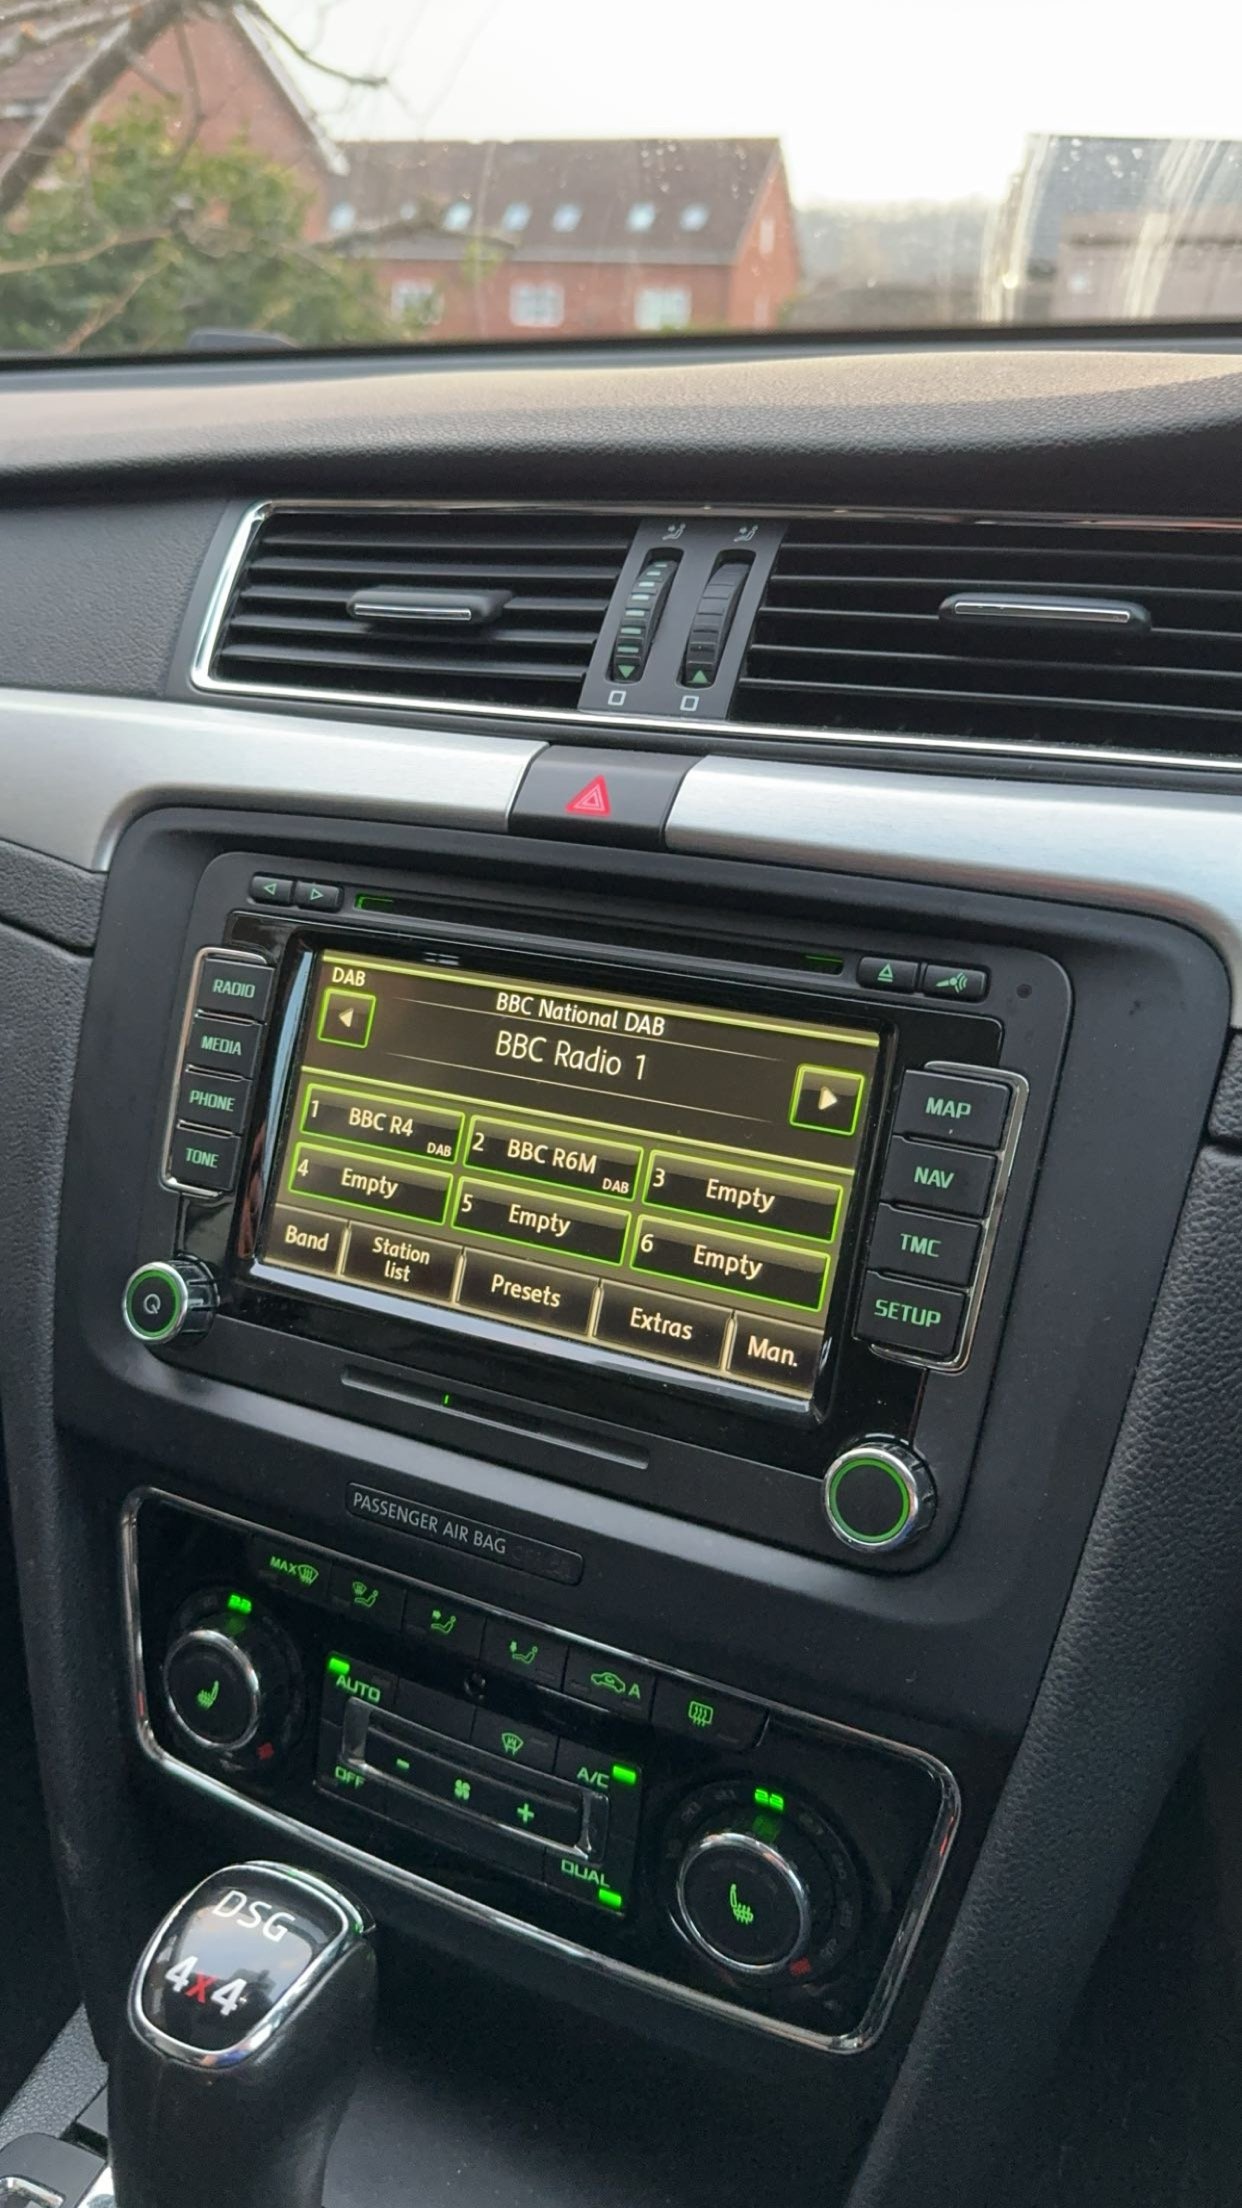
2 pointsIt is done. Plugged in VCDS and gave the unit a scan. It was running 6270. One (albeit Russian) forum search later, and it working again on 6276 perfectly. £5 on some CD's + trial and error, all sorted, can't complain!
 2 points
 -
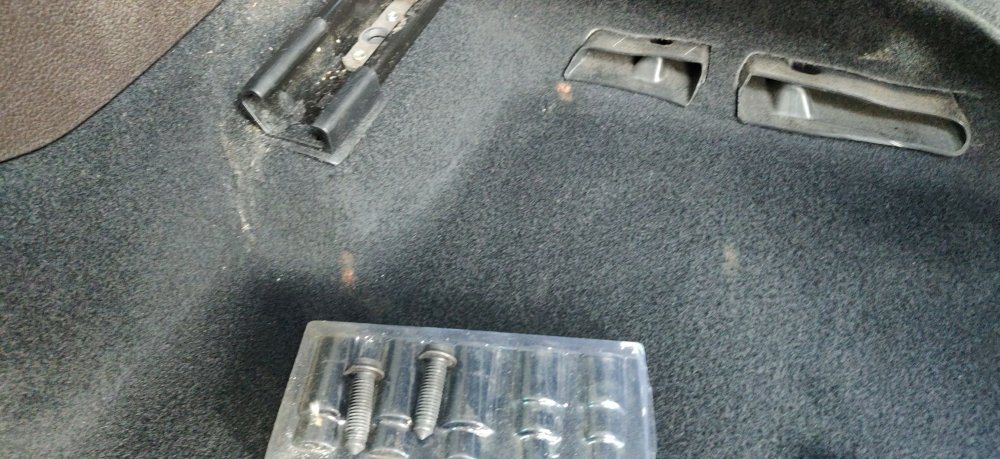
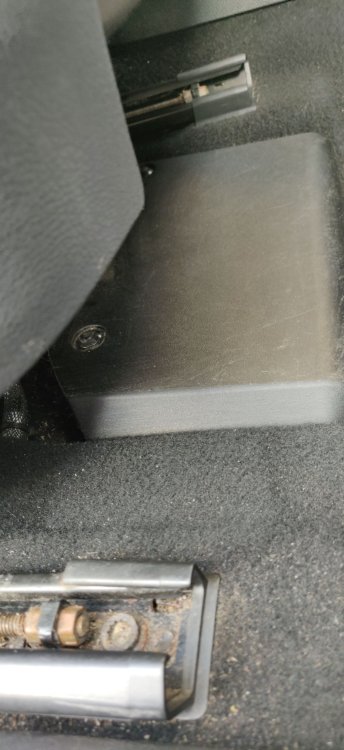
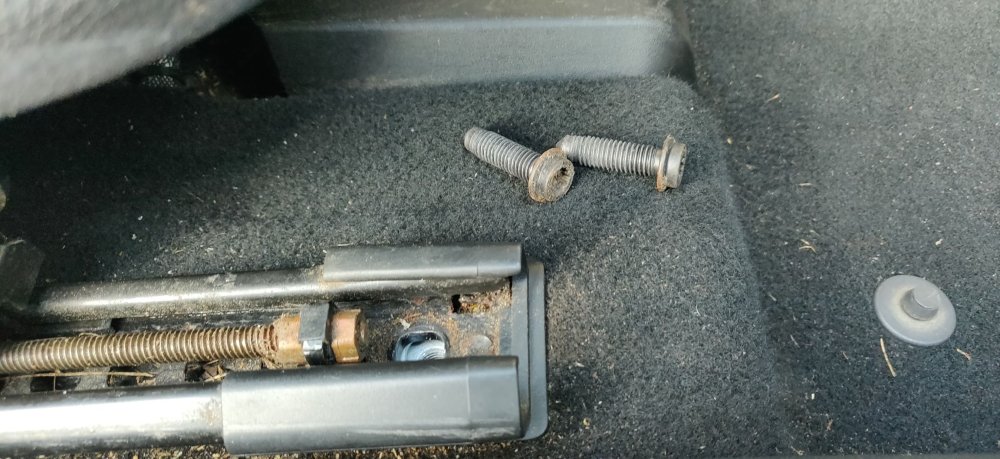
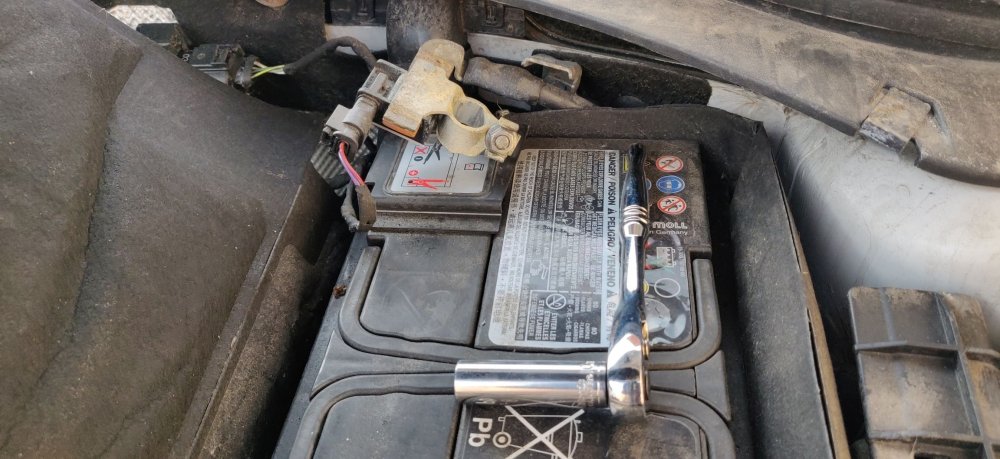
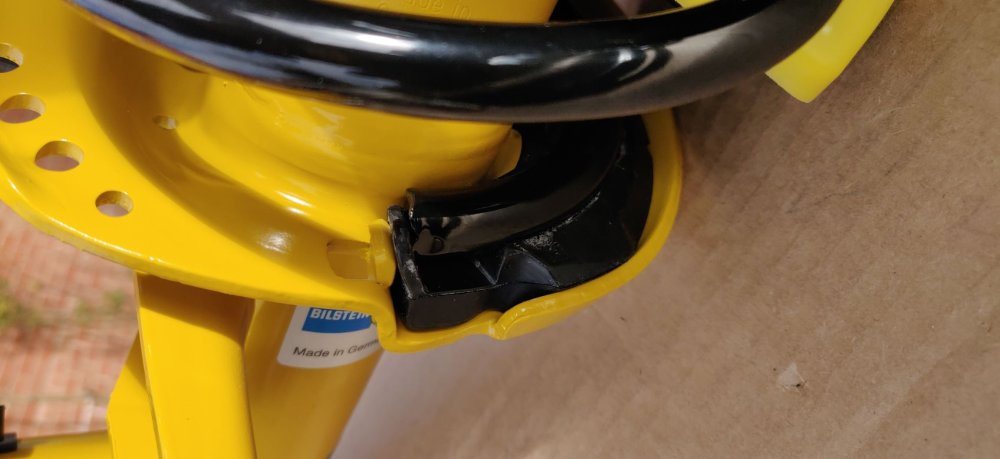
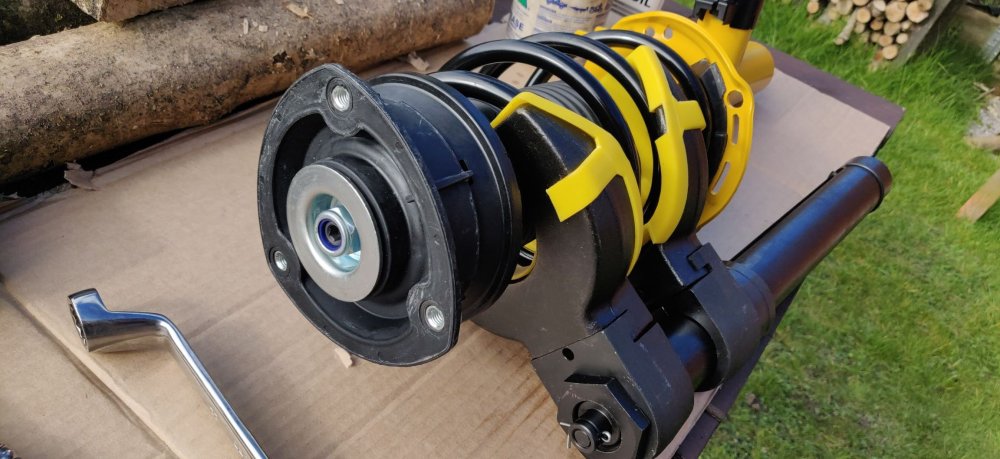
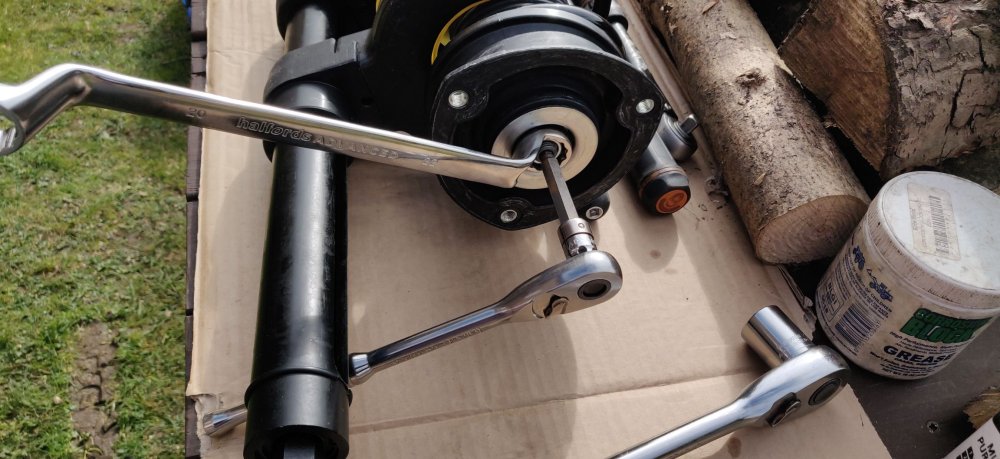
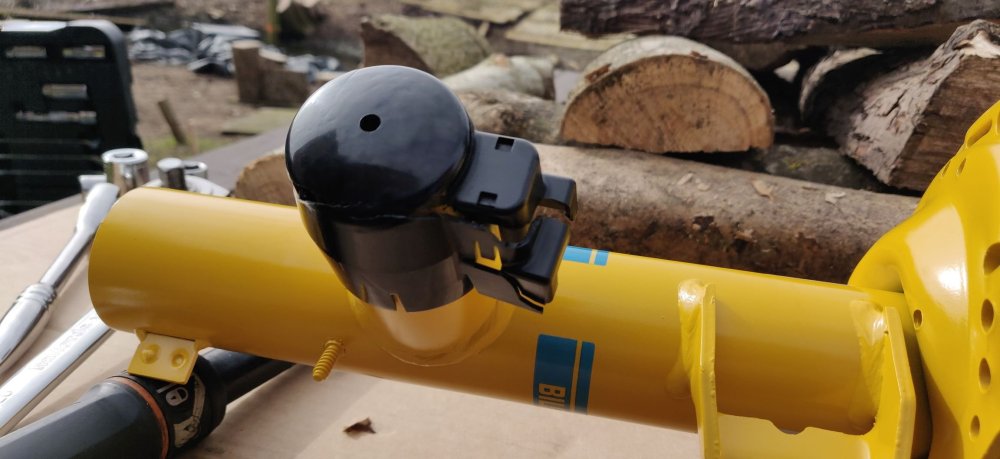
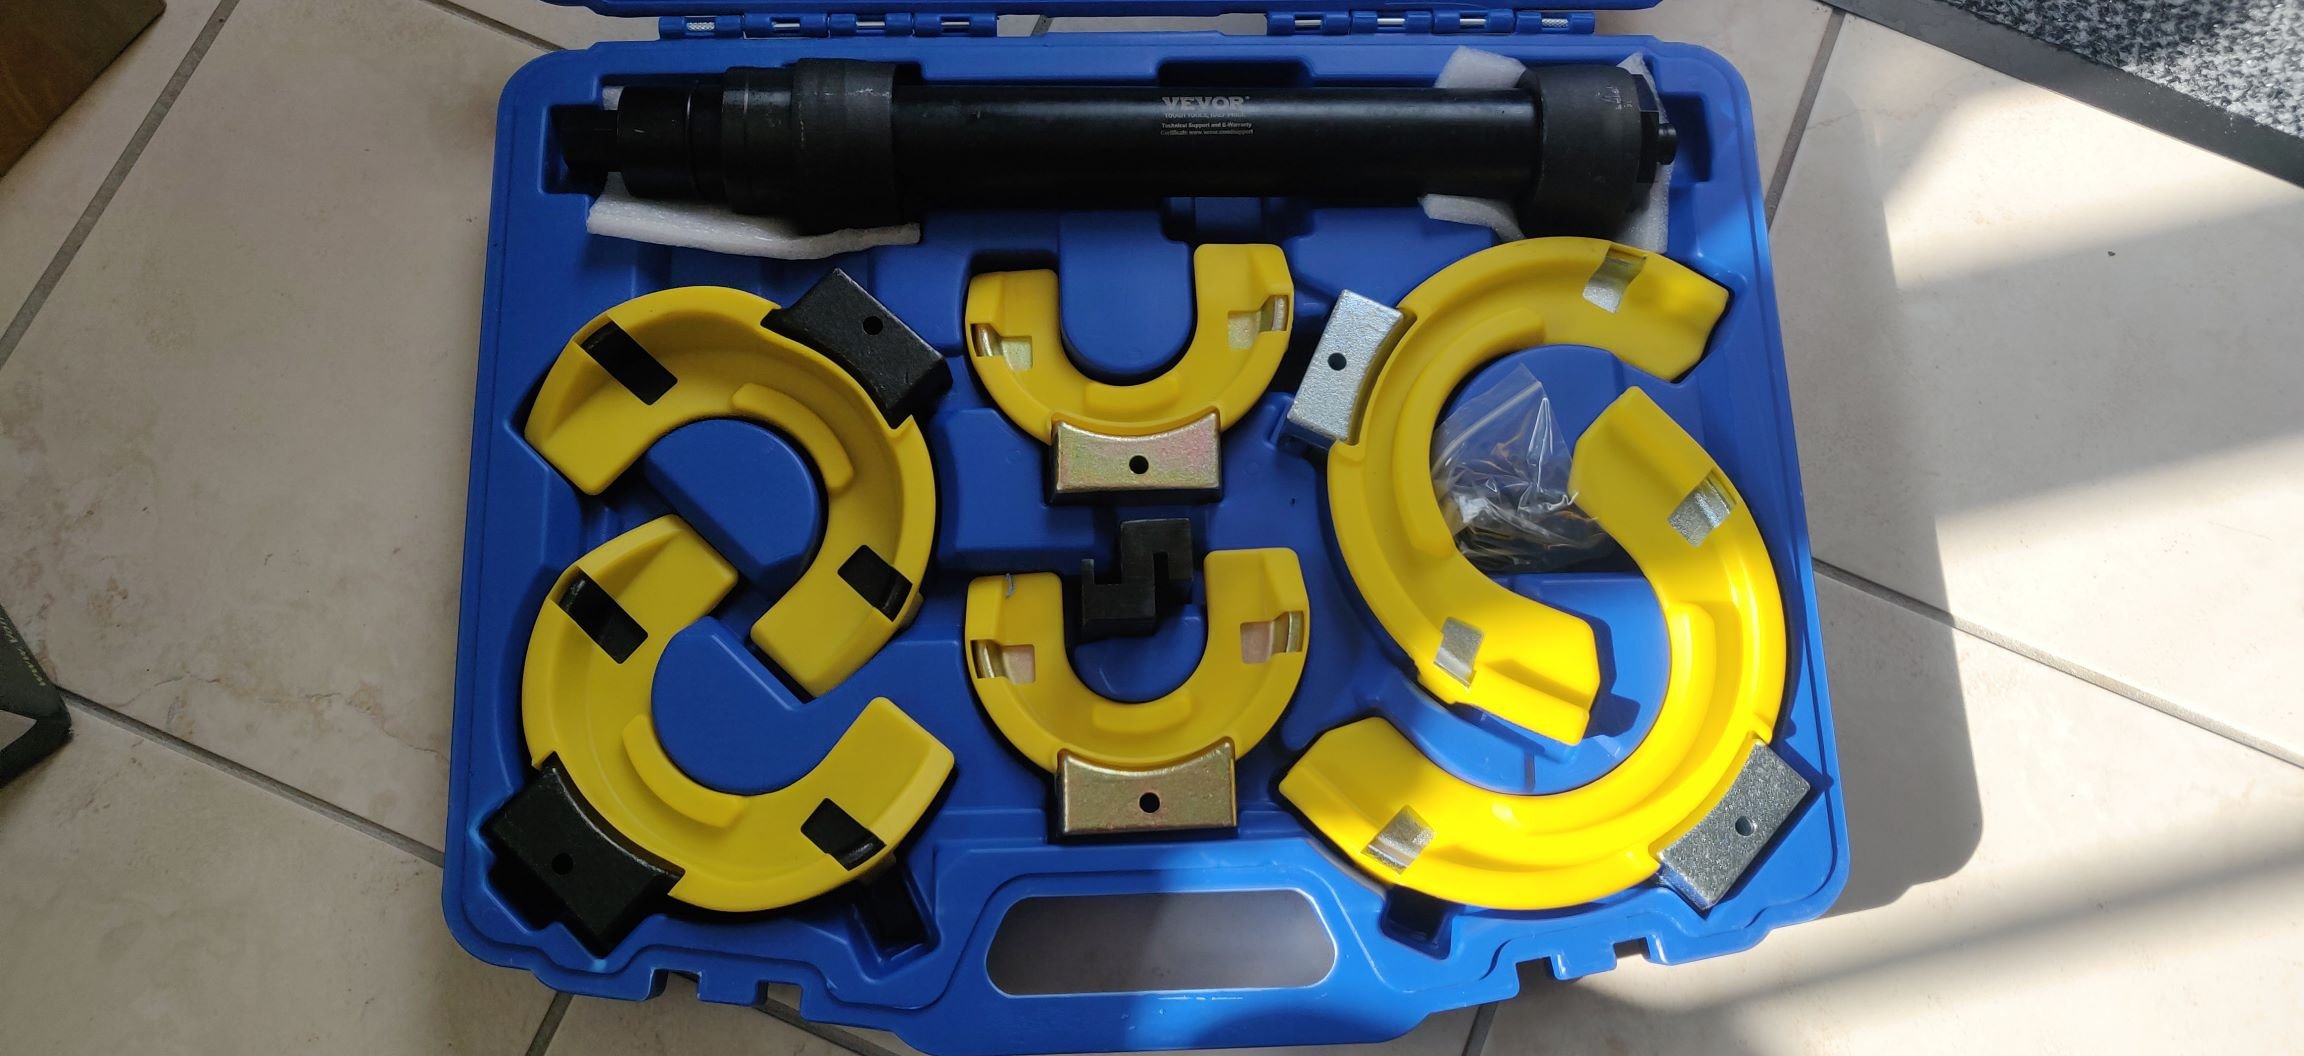
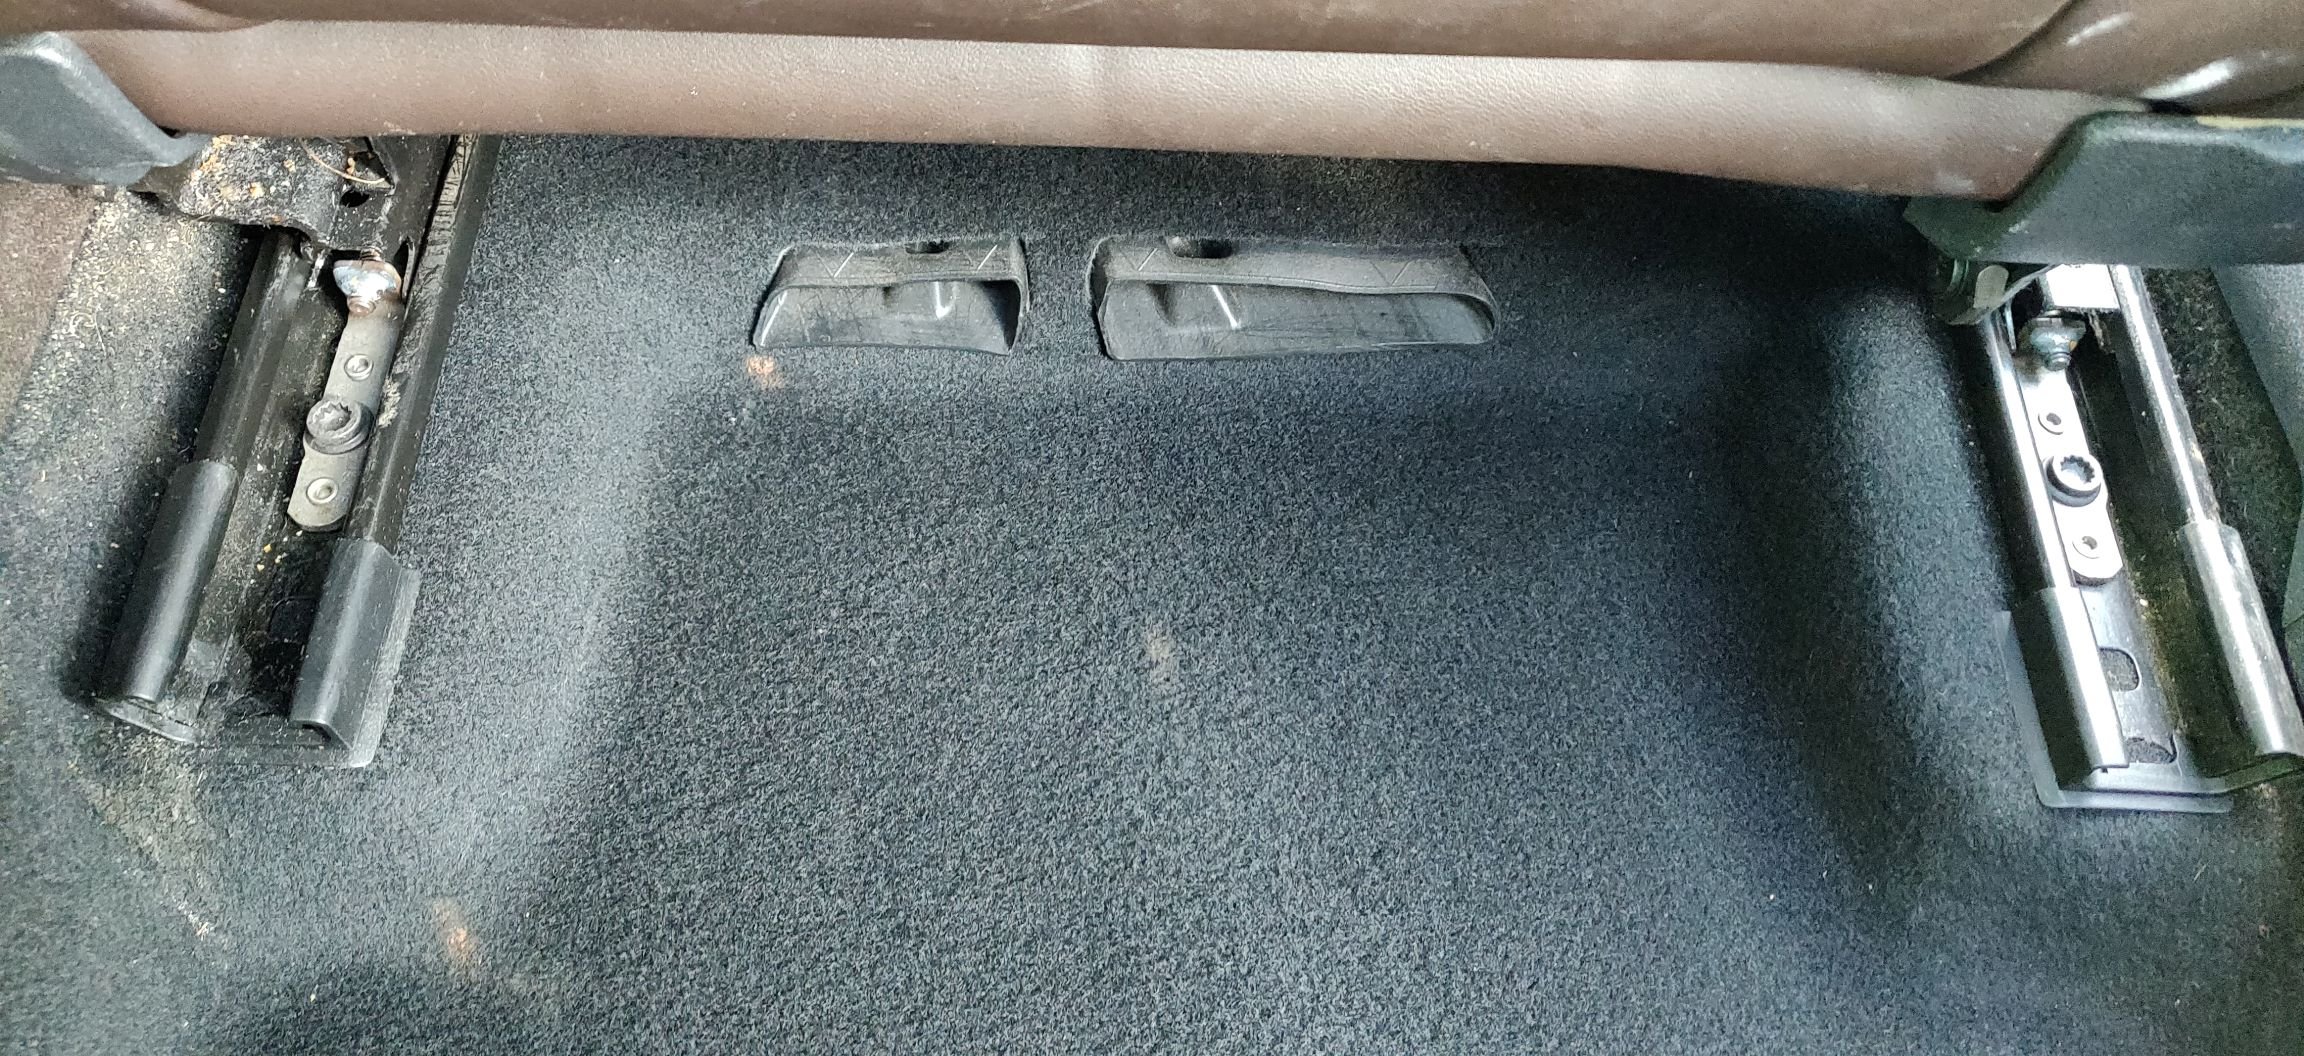
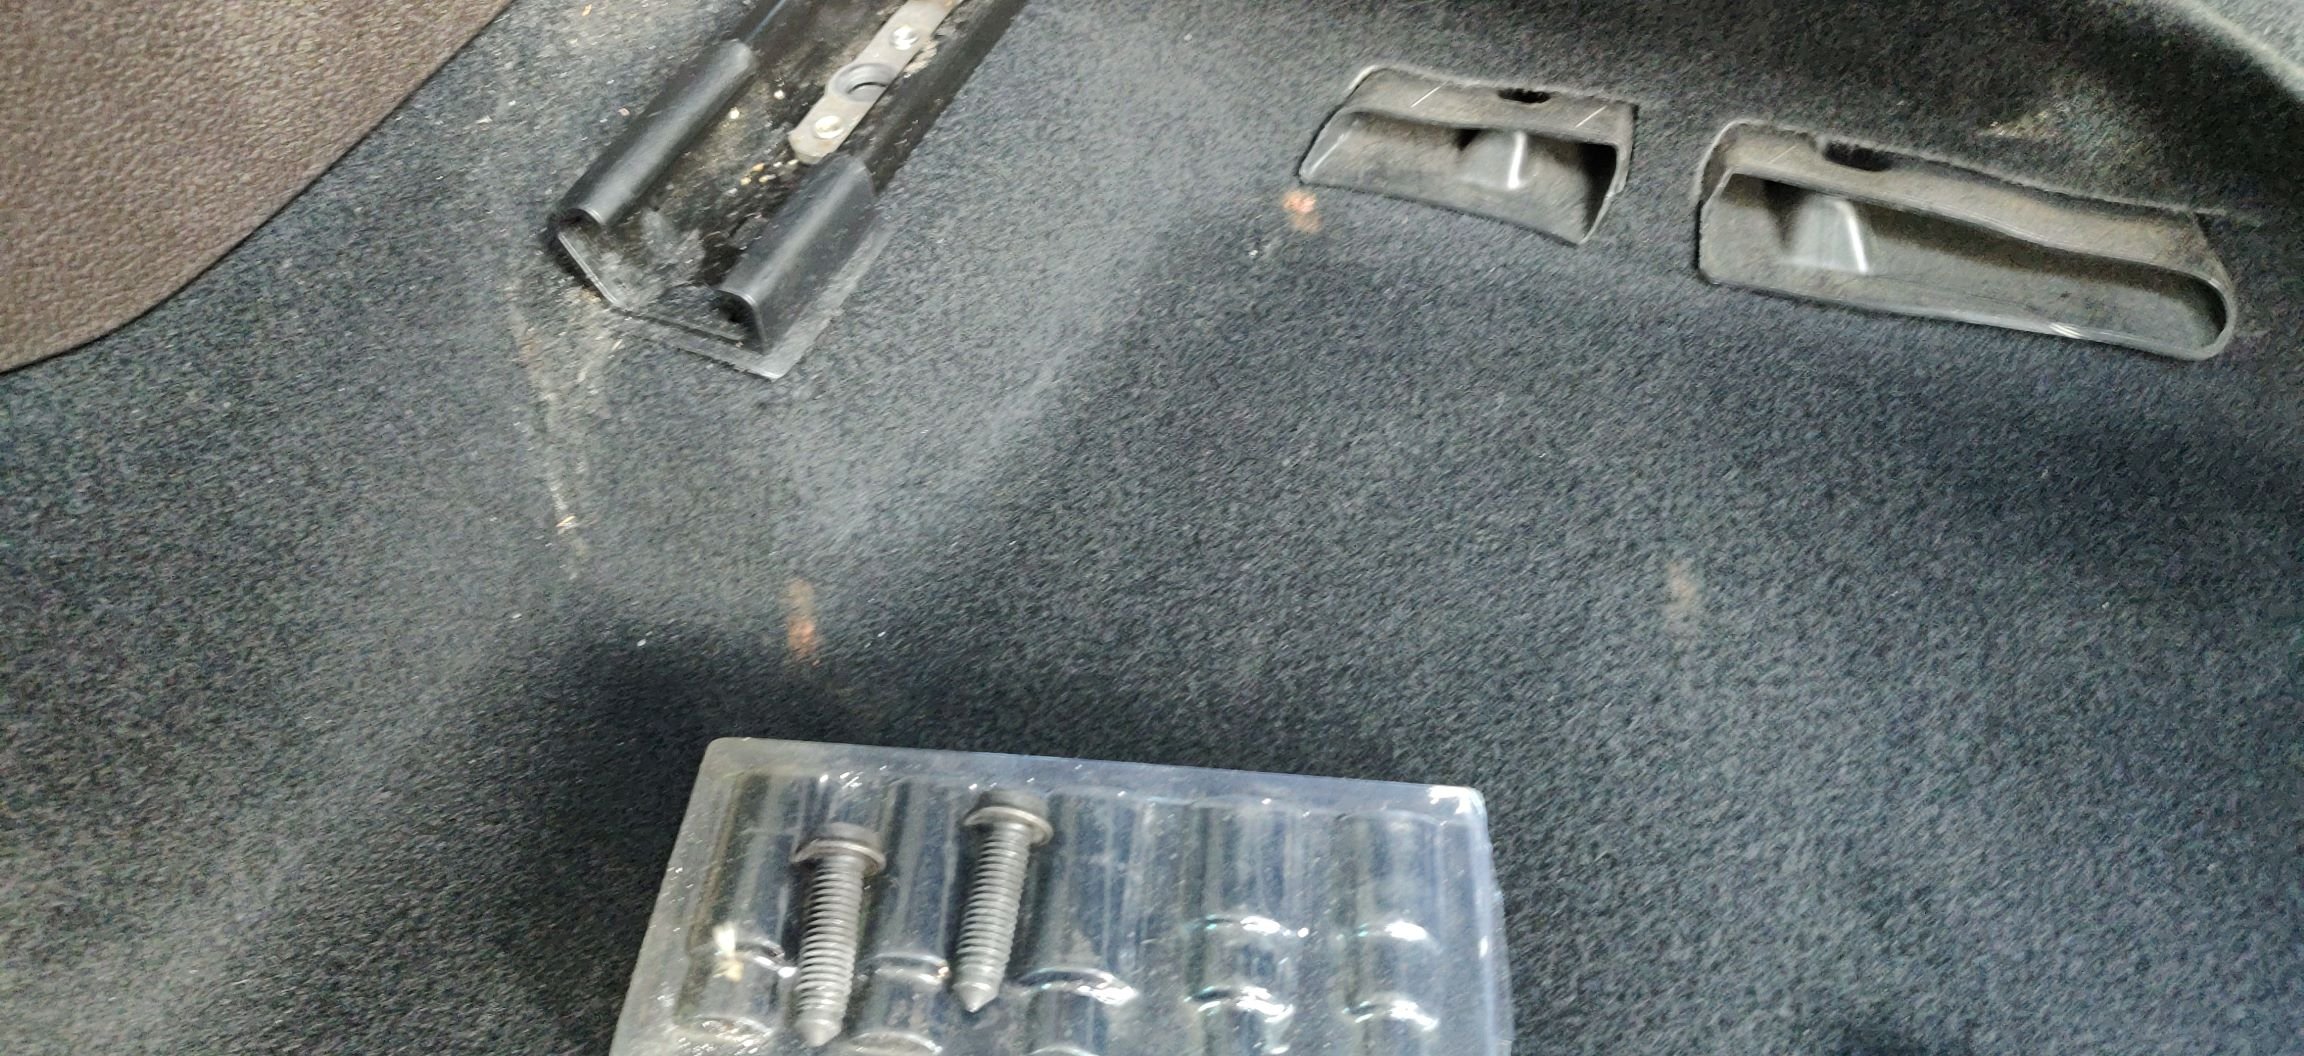
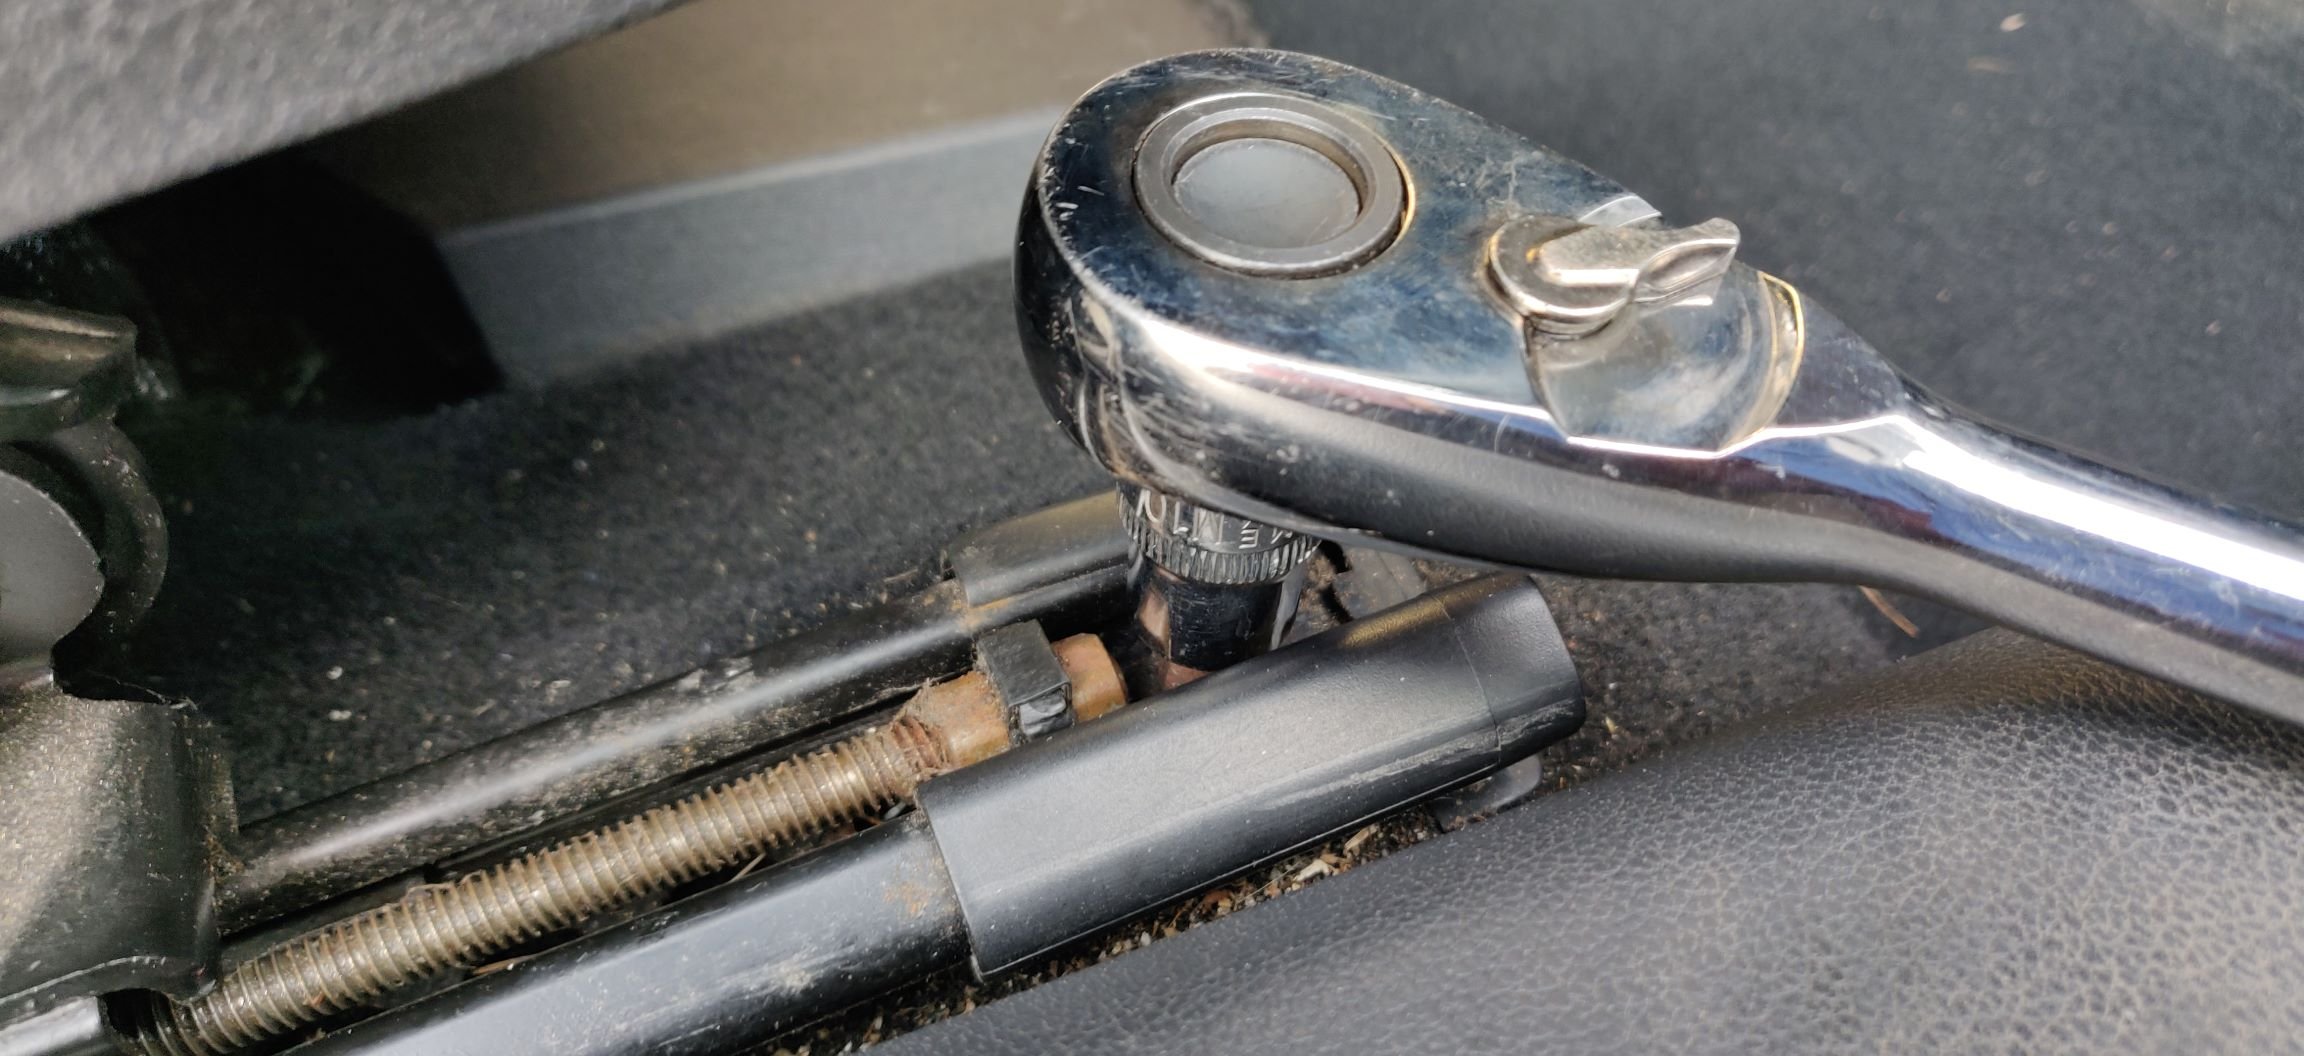
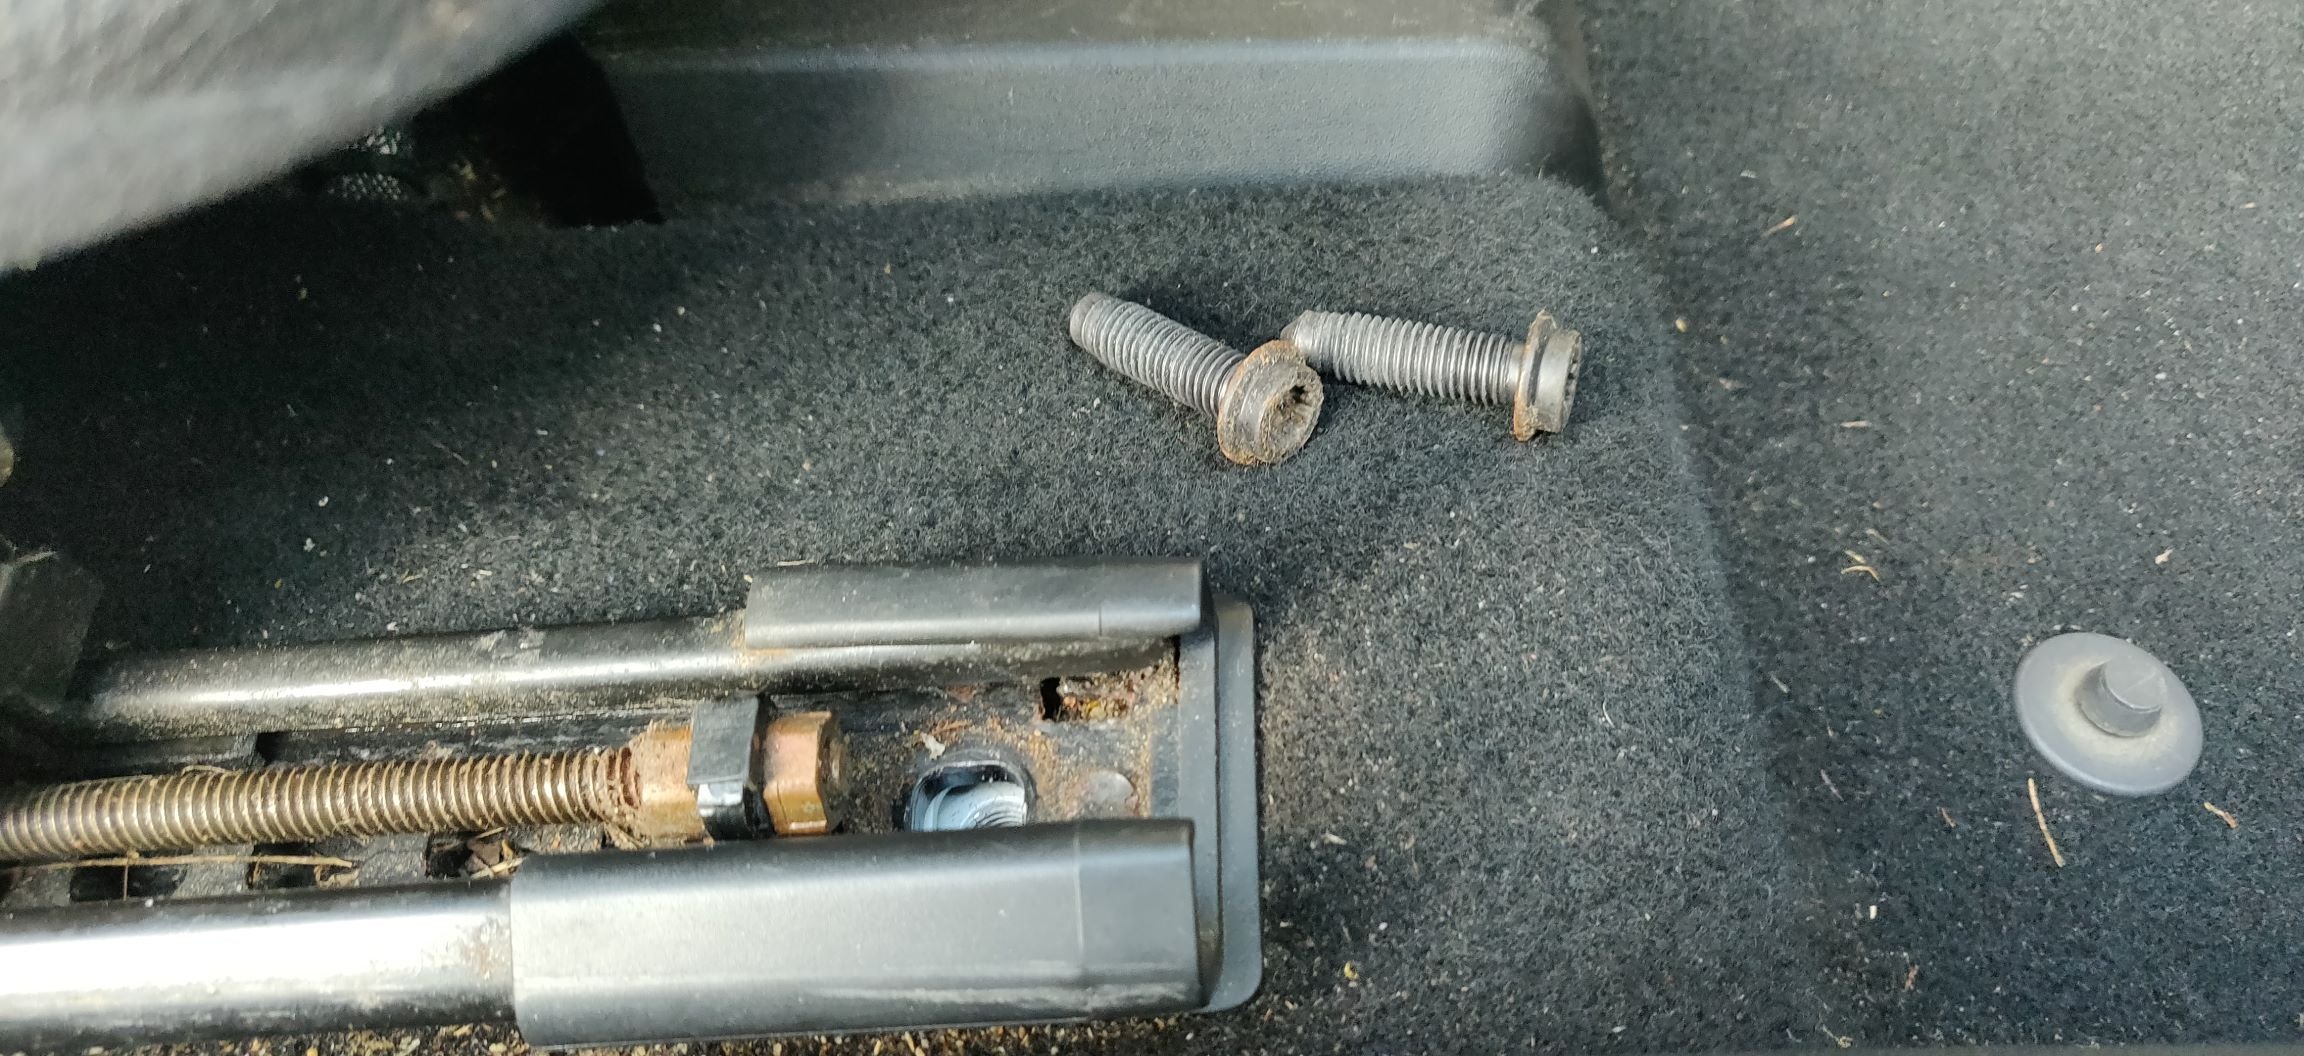
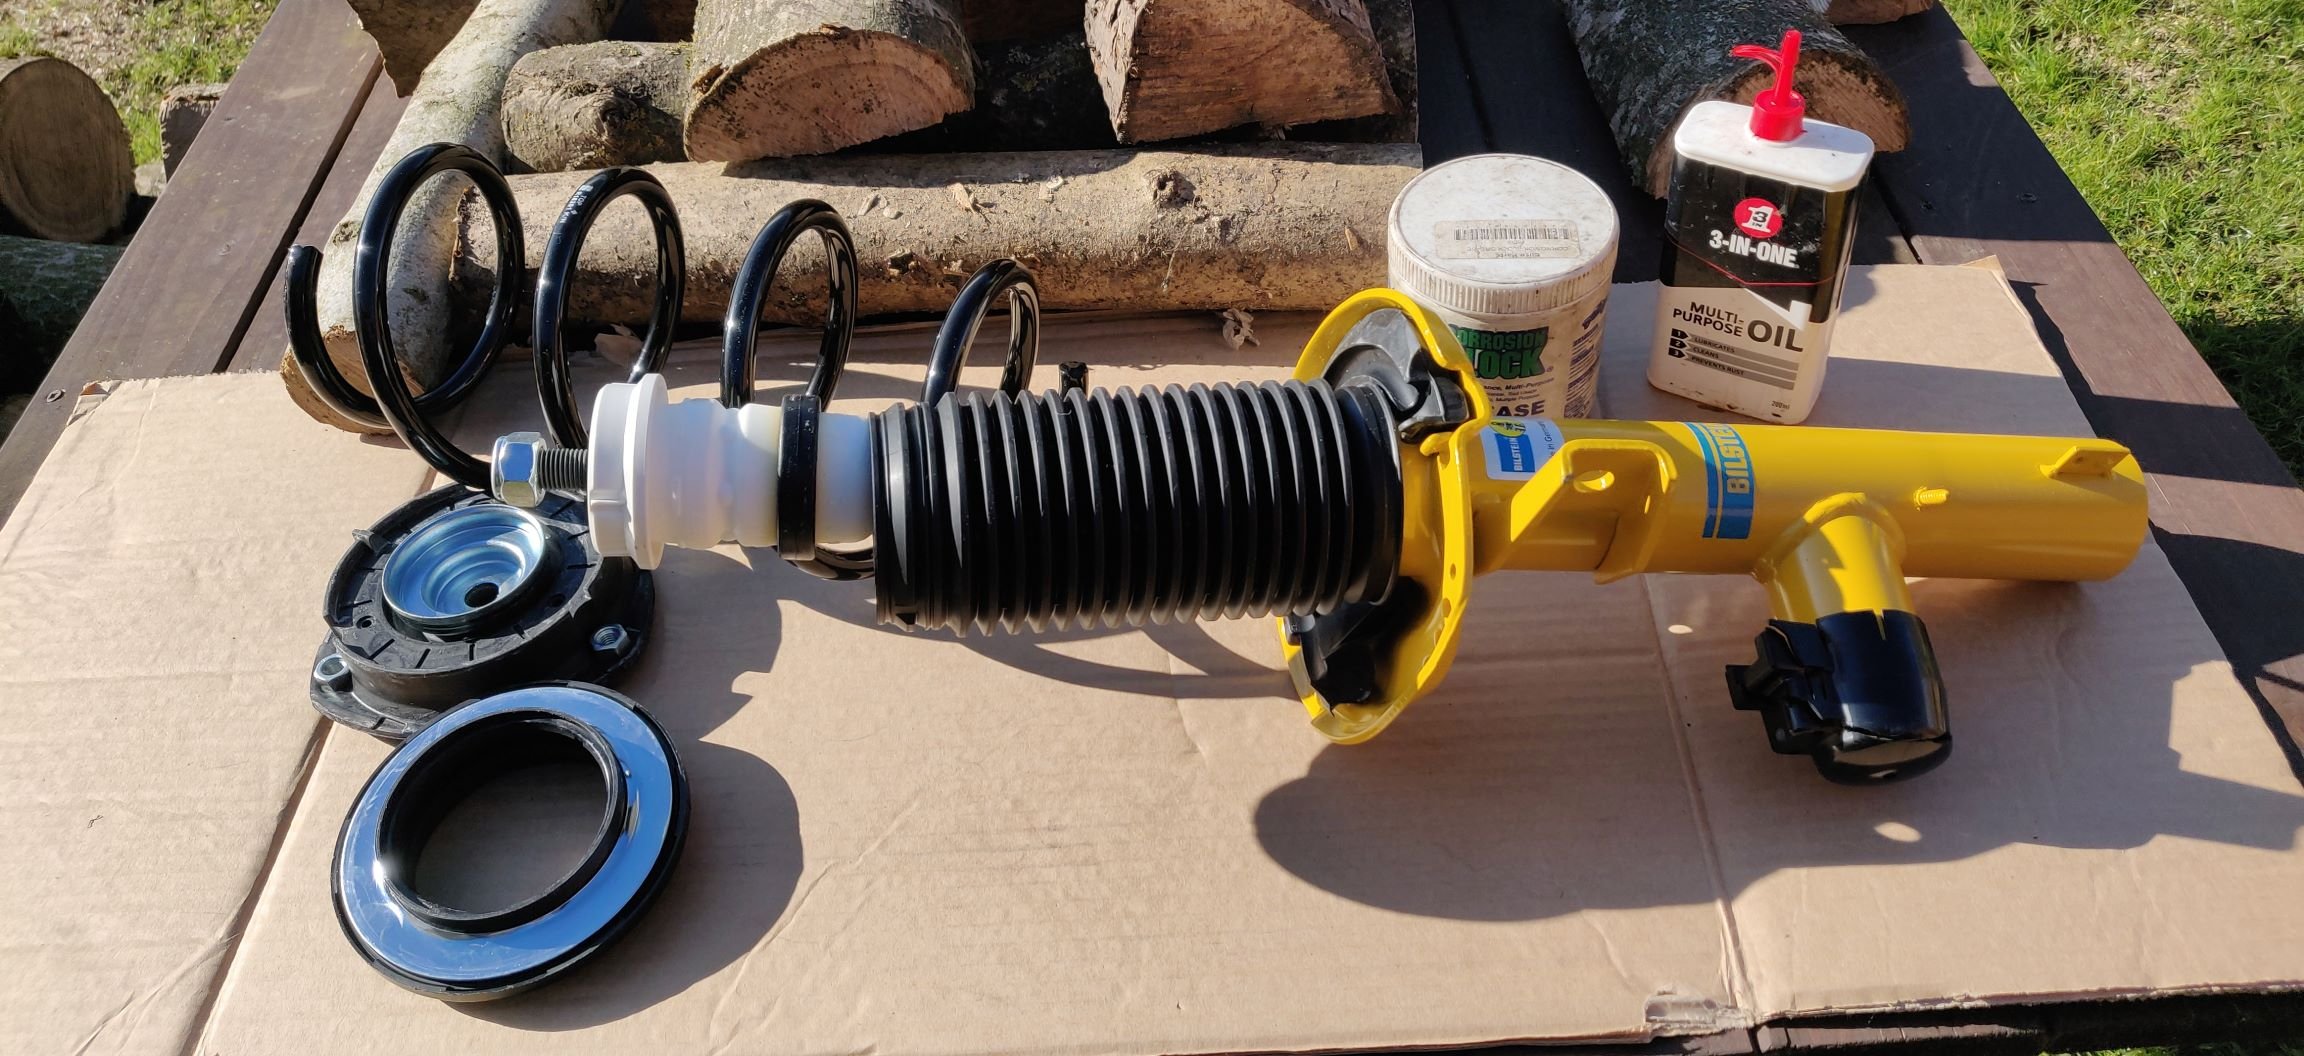
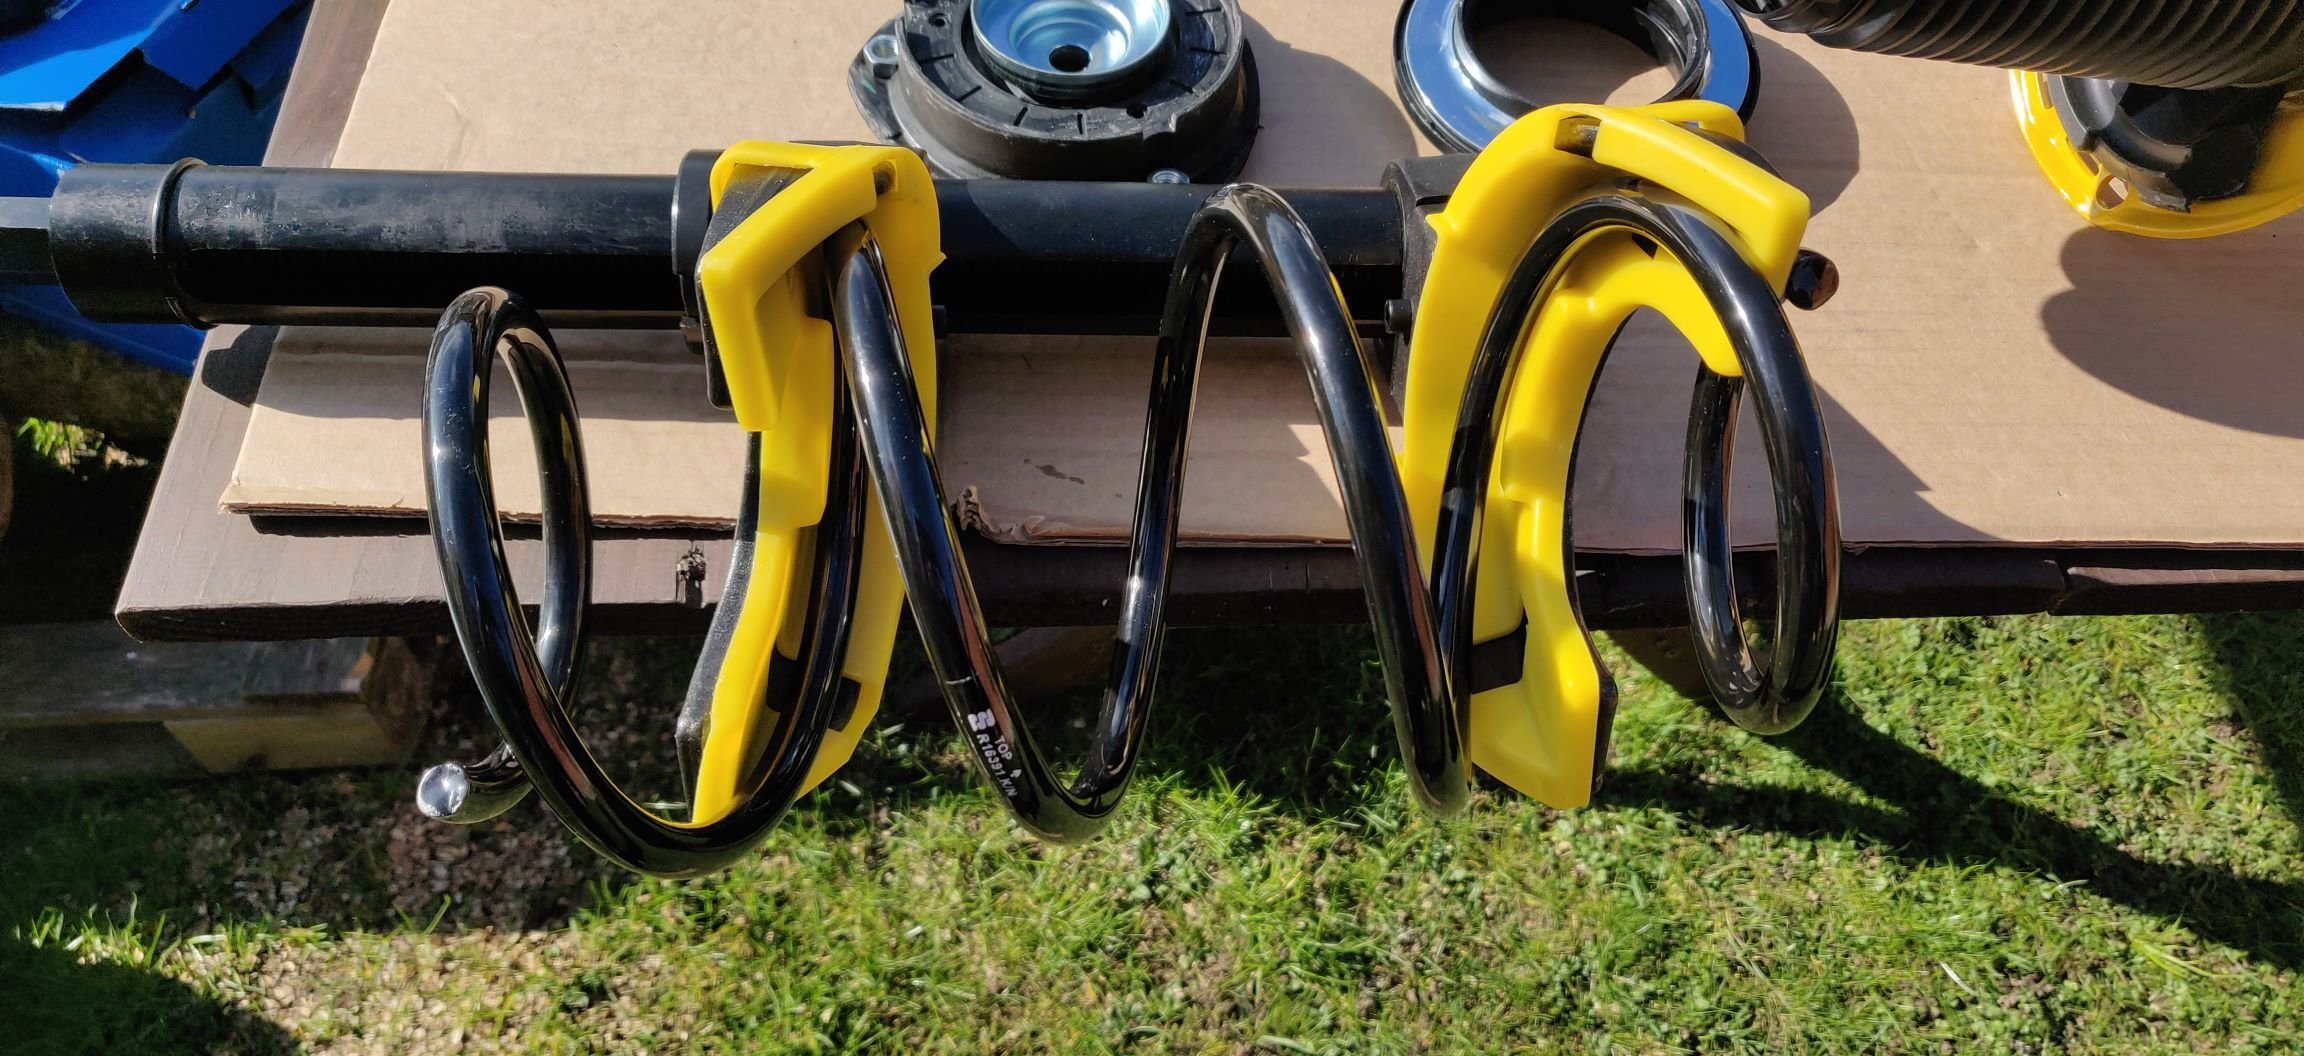
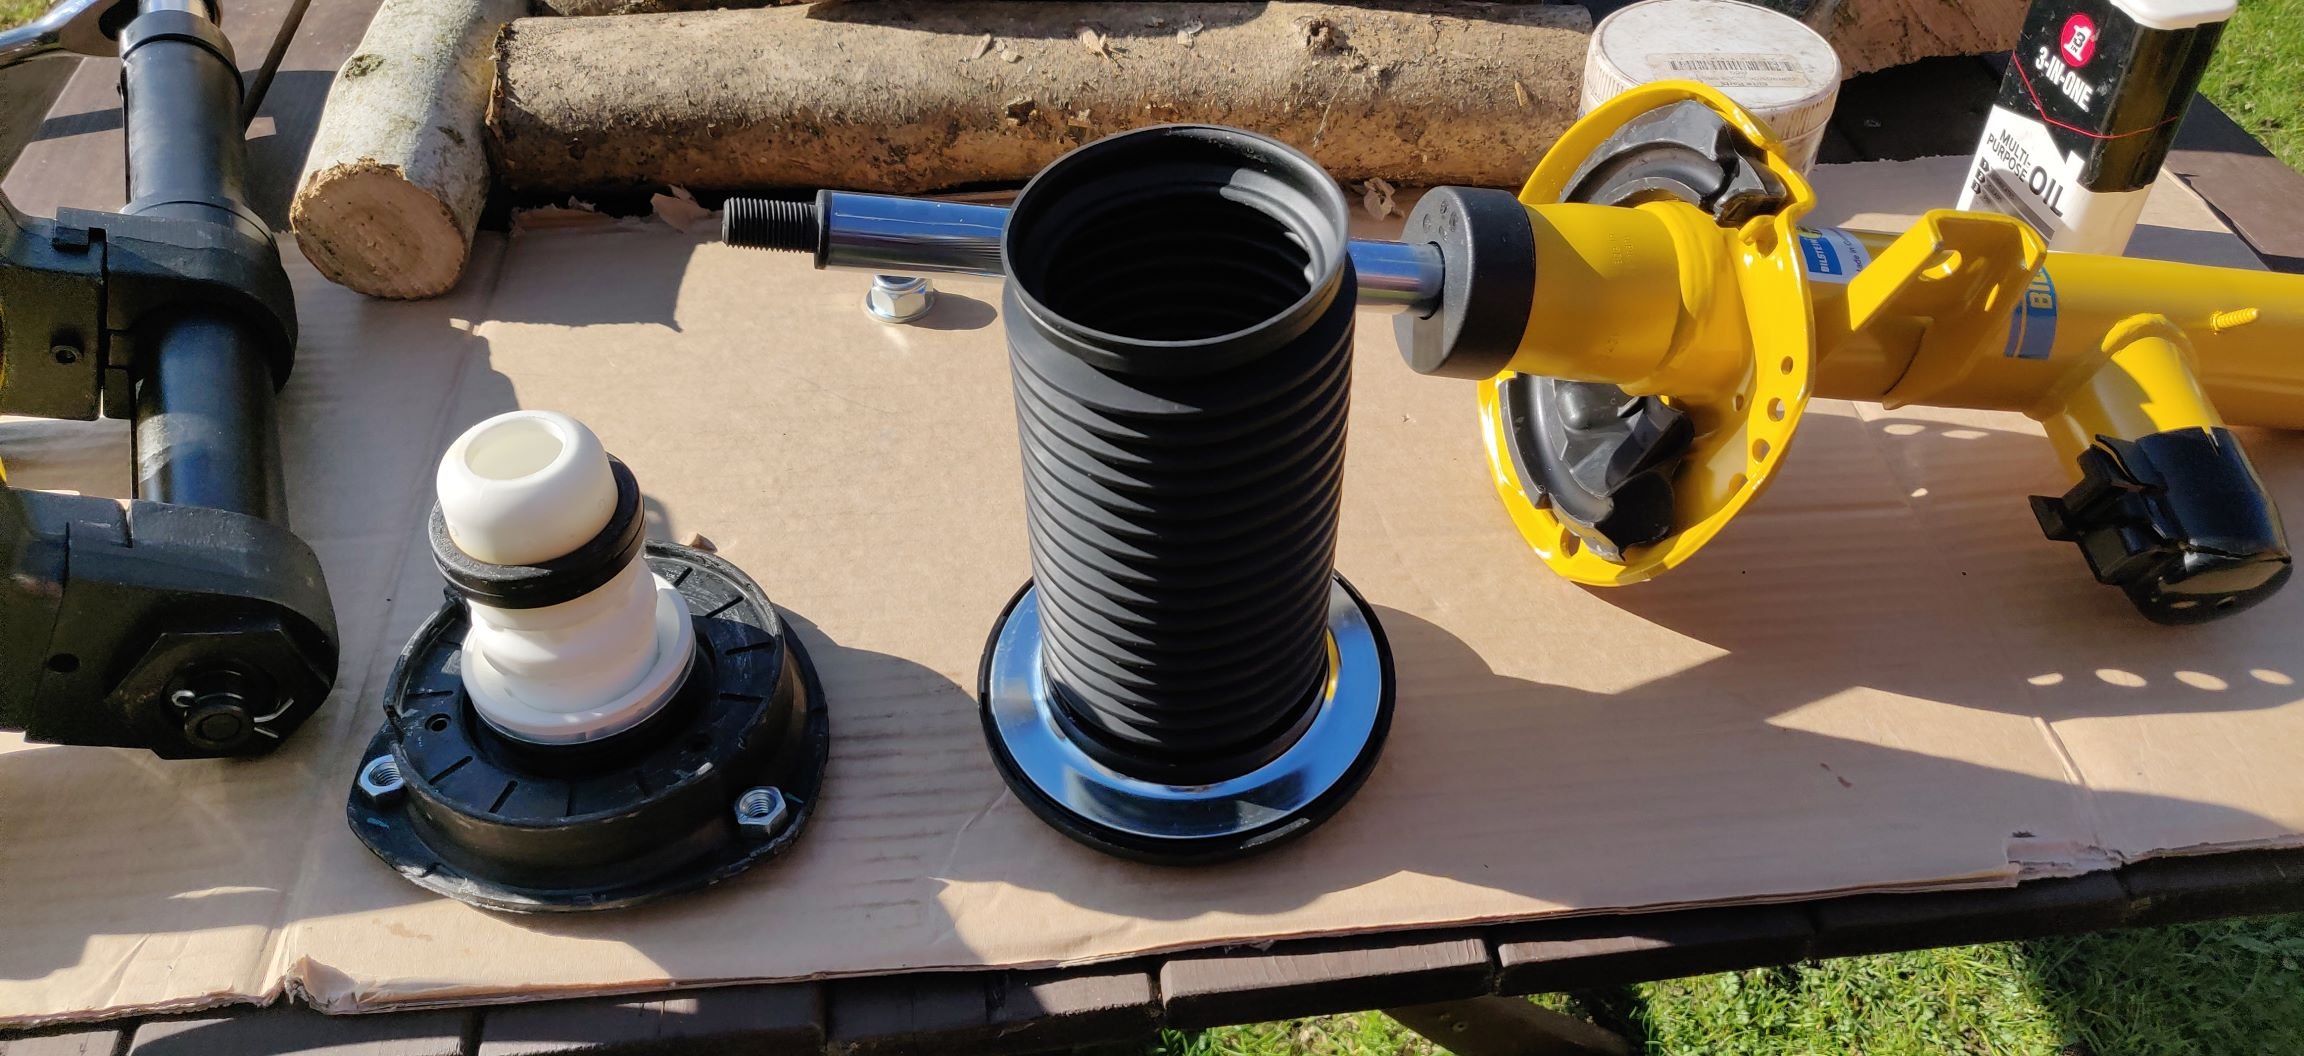
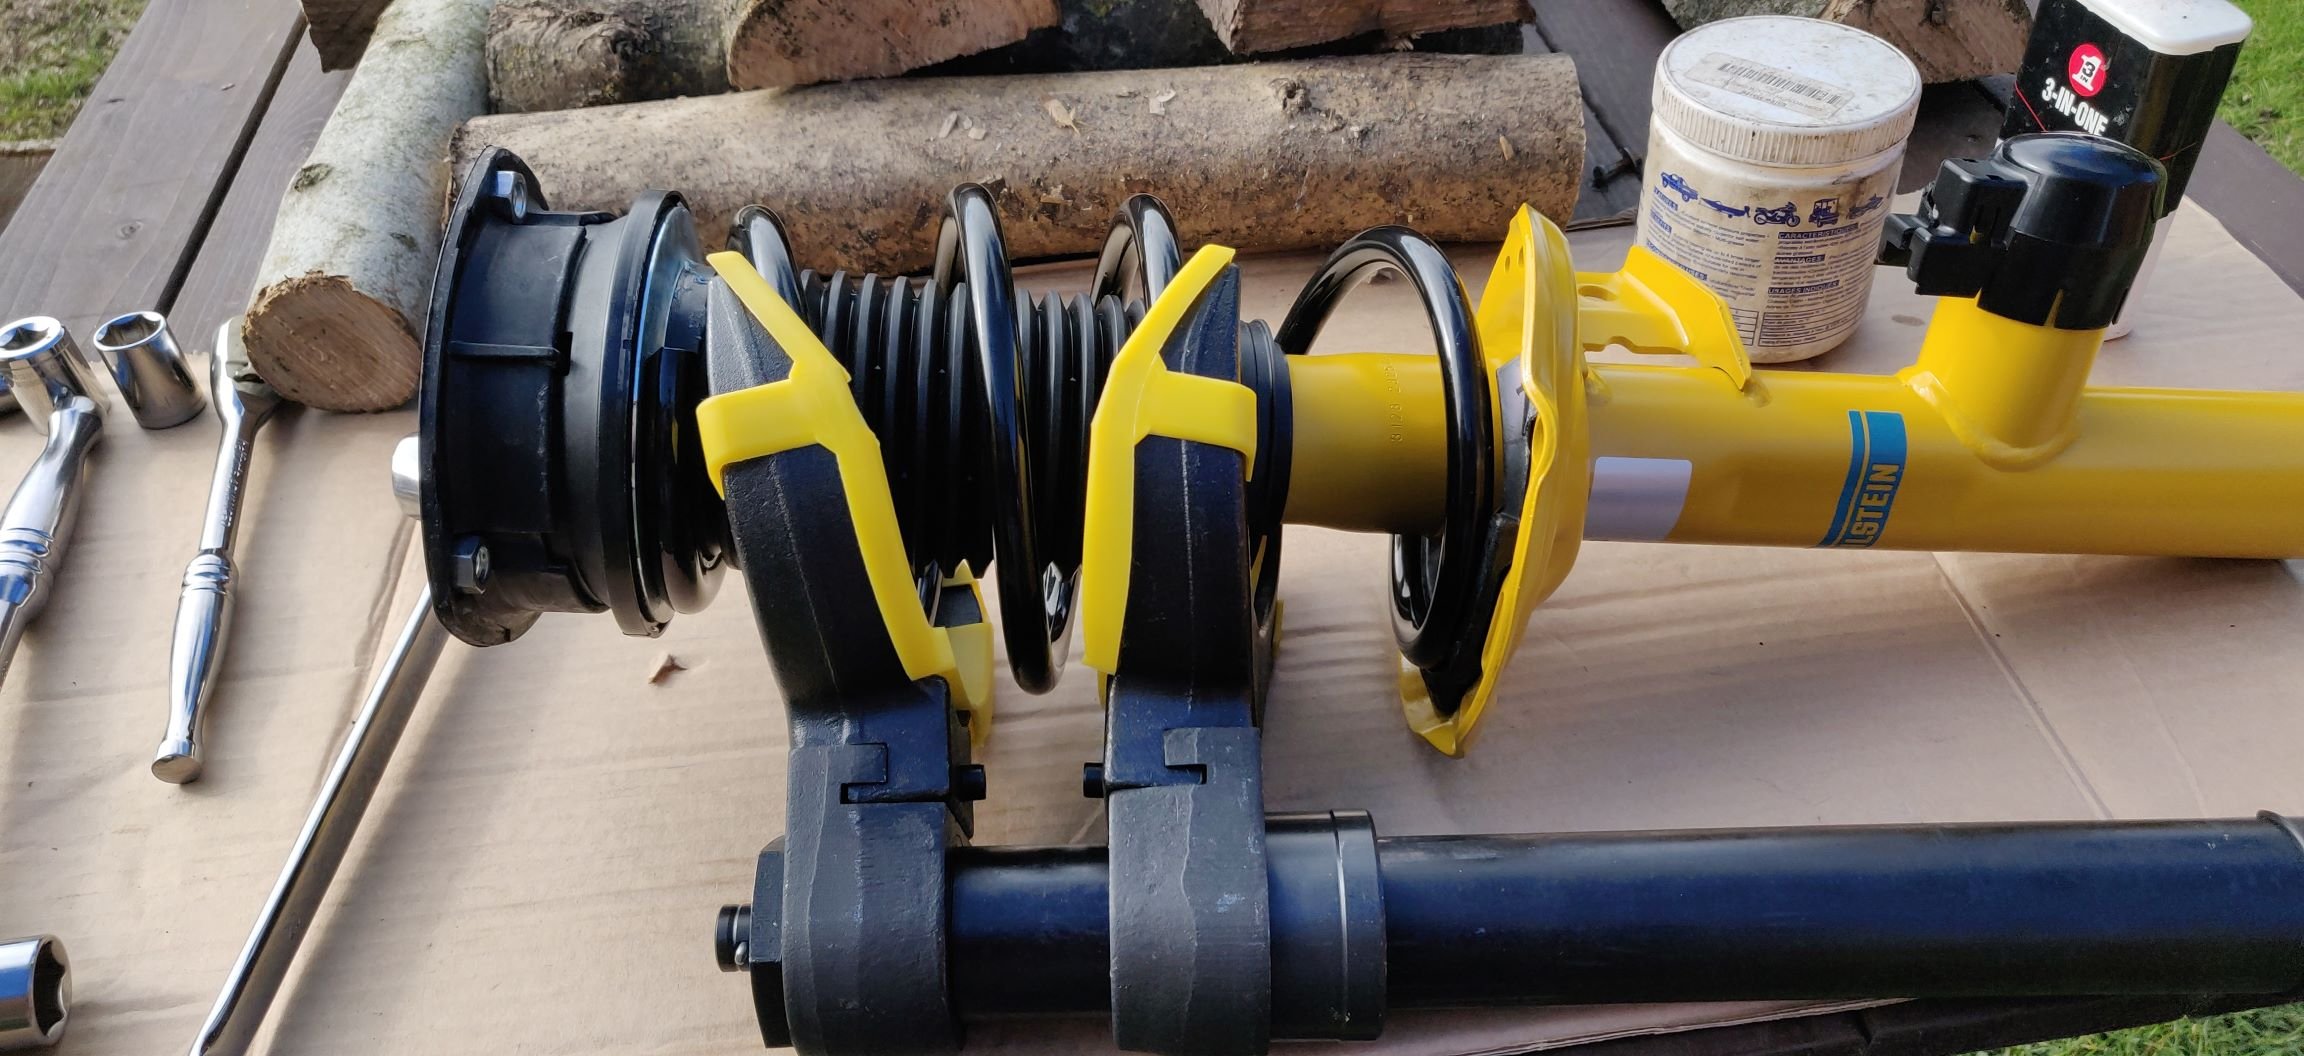
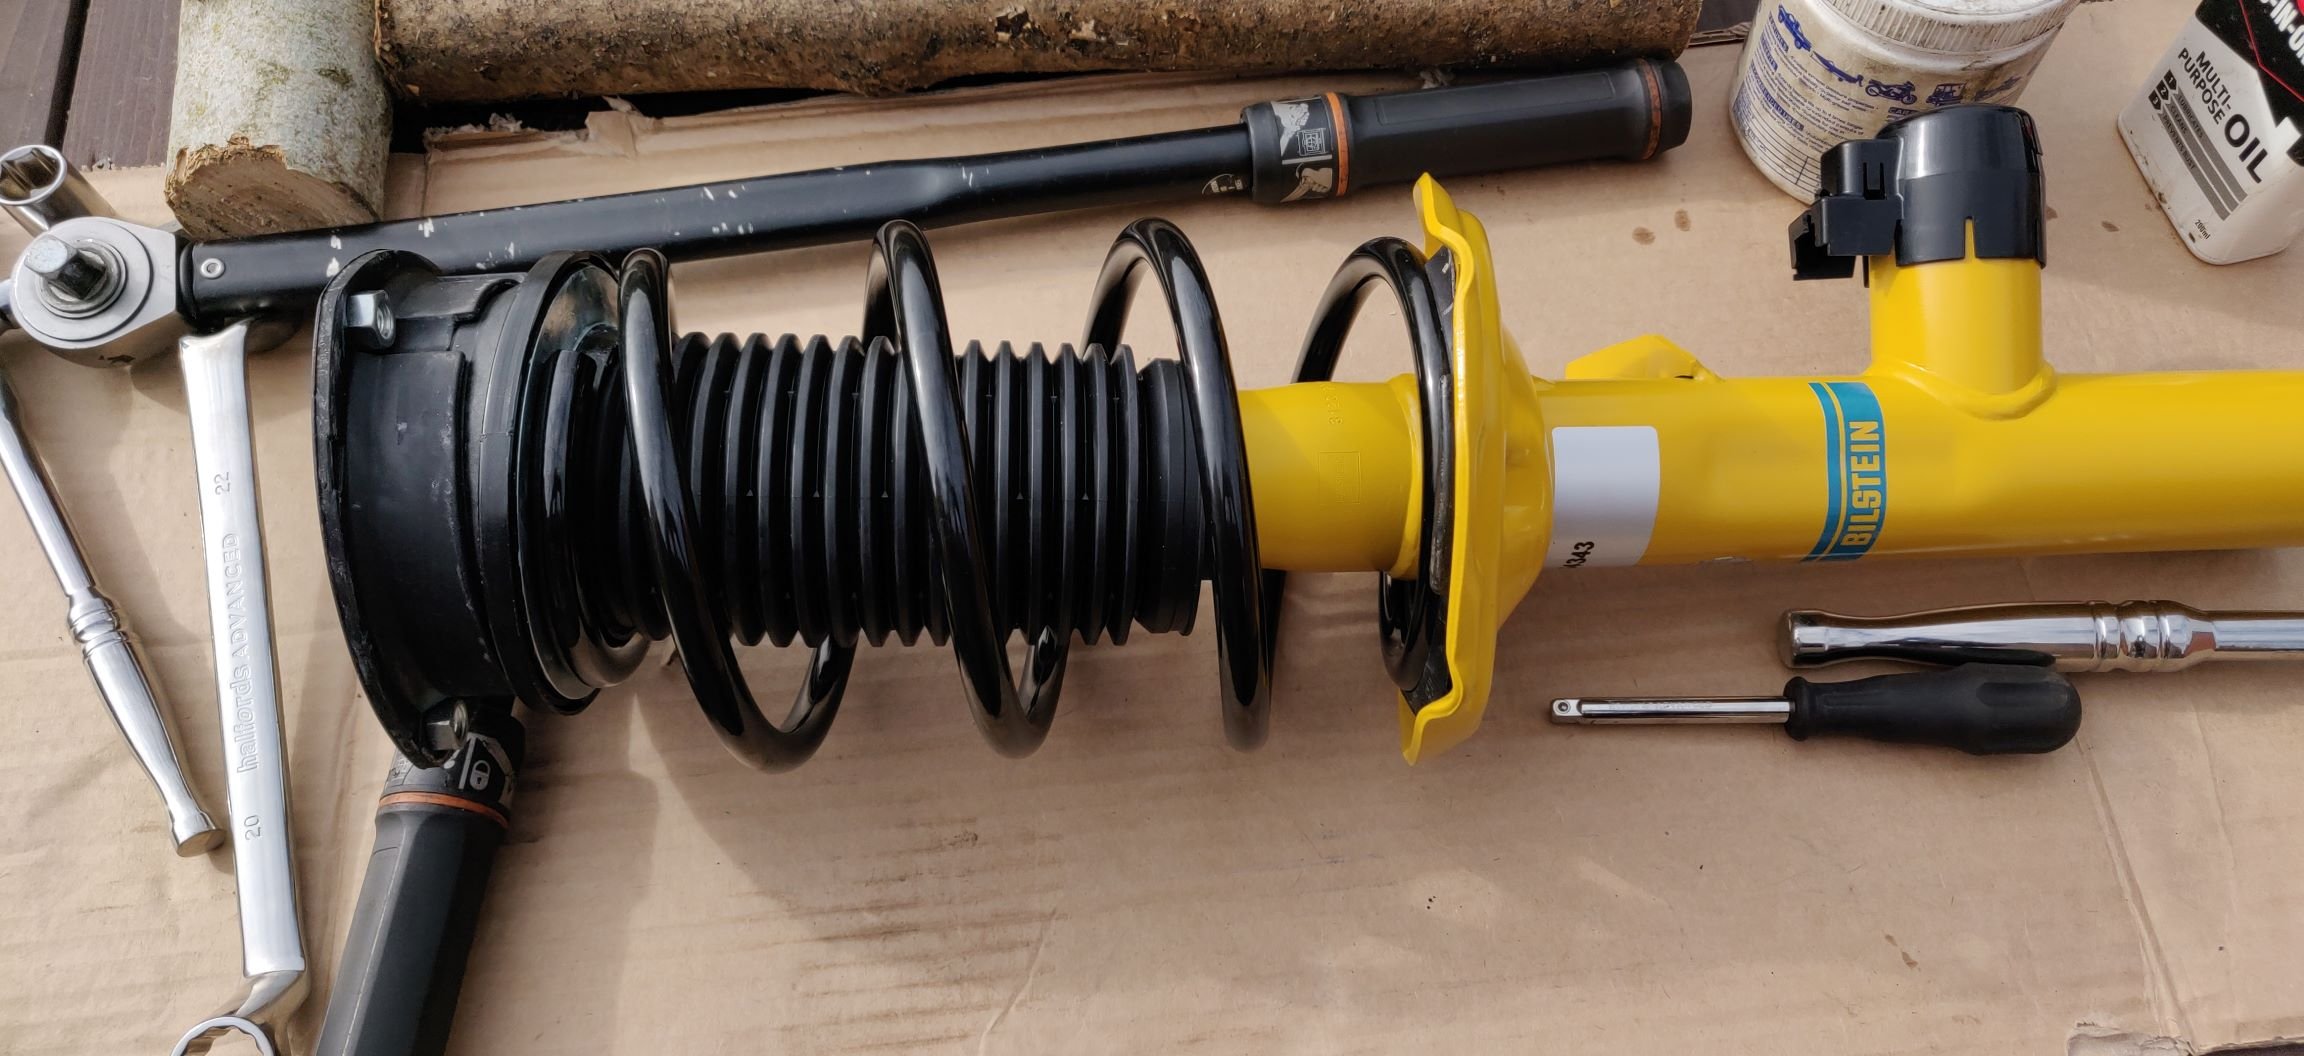
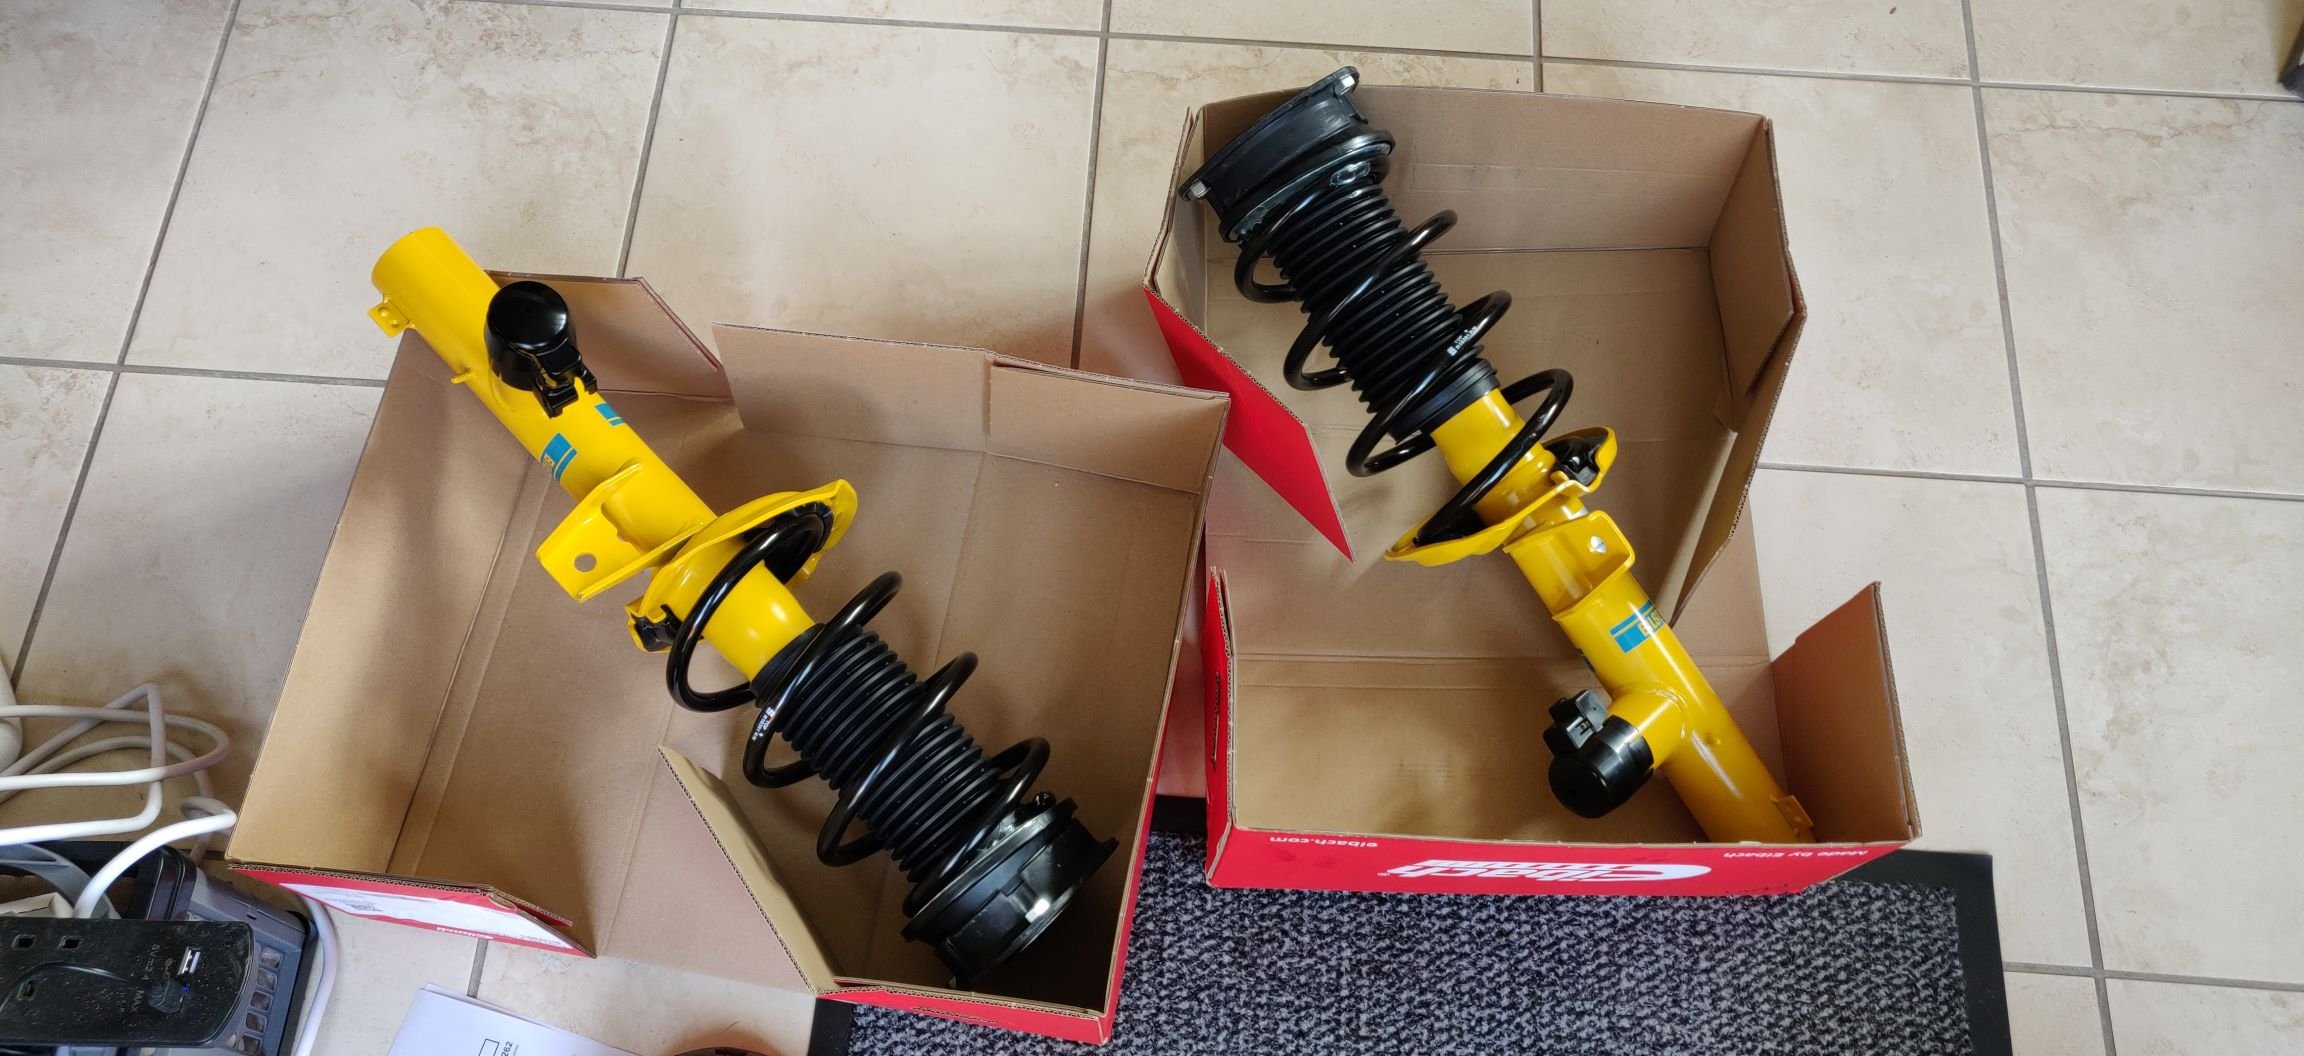
Last night, I did some dry runs of the suspension assembly. As I also received this: Although I have a pair of spring compressors which have served me well over the last decade, the workshop manual implies the rear springs could well require compressing to get free, and I suspect I won't have enough ground clearance off the driveway to get the lower arm down enough to free them without one. This particular compressor also has plastic covers which would help in reducing scratches, and also, only one tool is required to tighten or loosen the spring rather than going from one side to the other, and then finding out it fouls the strut or something. This thing was £86.44 from eBay, but given its a very generic spring compressor tool, I won't tally it up in the miscellaneous section, as it isn't really Skoda/VW group specific. Anyways, had to play around with the components just to keep in mind the right ordering, so the upperpart of the strut bearing has a slot that the bump stop plonks into: The dust cover also slots into the centre, with a bit of fettling: The lower part then slides on, the above shows a notch on the right side, which slots into a cut out in the lower part: The result can then slide over the strut: So it would be a case of the spring goes on, then the strut bearing with the attached bits, then the bolt on the top tightened up. So this morning, back to the original task of removing the seats. In every other car where I've removed the seats, its been a case of 4 bolts, slide forward for the rear, slide backwards from the front. The steps are the same, but with the notable difference of being electric. So slowly slide the seats forward: So the bolts are revealed, which are M10 spline bits, akin to the type attaching the steering wheel onto the column: So remove those: Then proceed to move the seat backwards, I did it just enough to get access to the front screws: So undo those: So the seat is now able to be freed: Repeat for the other side. Before I proceeded, I then disconnected the battery: I would suspect this car is modern enough to have airbags in the seat, so this is to remove power and to make sure any remaining current and what not is drained (I don't actually know if capacitors are involved in airbags, probably). So instead of waiting around, decided to assemble the front suspension, as it was quite a sunny day. So here's my makeshift workbench: Just a garden table (with some seasoning wood moved aside). I then assembled the spring compressor, took some deep breaths, and began the process of mounting the spring onto the compressor: The compressor has a 21mm socket on the end, so got my ratchet spanner onto it and began tightening. It goes without saying, please WEAR EYE PROTECTION, and also be absolutely sure that whatever is to the left and to the right of the spring is something you don't mind putting a potential hole in if things go awry. As per yesterday, I assembled the remaining bits ready for quick putting together: One thing I also did was to apply corrosion block grease on the shiny part of the lower strut bearing. The spring appears to sit on this part, but in general seems exposed to the elements, so a thing layer of the grease hopefully keeps it from rusting too badly. I also did the same for the spring, as the springs appear to have a tiny nick on the finish. The compressor needs to compress the spring it quite a bit, and it certainly gets tighter as you do so. The compressor is either then following the springs orientation, or its bending. To be honest, the compressor is a solid lump, a good 12kg of metal, so it was probably better than it looked. So once sufficiently compressed, I then try to dry fit it: Basically, once the thread of the strut goes through the strut bearing with what looks like enough thread for the nut, then you're nearly there. Basically, put the nut on and after a few turns, breath a sigh of relief. Just also make sure the spring is aligned appropriately to the bottom seat insulator and the strut seat: Here's the nut attached on, so the spring compressor is essentially ready to be removed: So undo the spring compressor, and eventually it'll loosen enough to free itself from the spring: So that's pretty much it. The workshop manual says to tighten the top bolt to 60nm. I don't really have a specialist tool to allow for torque tightening, maybe something I might invest in, but for now, just used a swan neck spanner and a hex bit. I believe it was a 22mm nut and a 7mm hex socket. I just did it until I couldn't really tighten it anymore. As I did a final inspection, I noticed a booboo: I guess as I was turning the strut around when aligning it to the spring and the seat and so on, I must have turned it and put weight on it in such a way that cracked the cover for the connector for the Damptronic/DCC bits. I'll remain optimistic that I can just use the ones on the existing struts, but if not, I'll either source a replacement, or just duct tape this back in shape. So I think the first strut took 45 minutes, and the other 30, primarily because I'm super scared of spring compressors when I'm using it, so I'm always checking and double checking every step of the way: So that's the front struts. I'll put a stop on this post and return back to the seats. Maintenance: £1344.91 Upgrades: £337.06 Miscellaneous: £584.95


 2 points
 -
Looks good in the begging but later not so. I have thought about it many times but i hesitate. Looks modern and convenient but must have a very good alarm first.1 point
-
1 point
-
https://th-pettersson.com/cgi-bin/ibutik/AIR_ibutik.fcgi?funk=visa_artikel&artnr=116-2009-29822-1 £211 https://www.larkspeed.com/hr-lowering-springs-1355184/?aditem=1355184 £209.00 https://inter-rally.pl/product-eng-32563-H-R-Lowering-springs-Skoda-Favorit.html 256,19 € The Koni you can rebuild them with original parts and 1 year warranty. @Thefeliciahacker another one like with me with Lowering Springs, we are growing in numbers ! 😁1 point
-
Koni Street (orange) but also Bilstein (black) Sachs can do the task.1 point
-
I think you're talking about the cornering lights. At night when turning the steering wheel left or right, the corresponding fog light comes on an acts as a cornering light, until the steering wheel is straightened again.1 point
-
If your crank shells were toast you'd hear the rumble but you can check by removing the sump and one of the main bearing caps to visually inspect the half shell. Although I'd expect the sump to be full of glitter.1 point
-
1 pointHi there. It should be on the code sheet on the first page of your service book. Or in your spare wheel well in your boot. If I remember rightly.1 point
-
You don't have space to remove the bulb without removing the whole headlight. I allready tried everything and the only solution was to remove the whole headlight...1 point
-
Did you include the 20p credit for the find under the seat?😆1 point
-
1 pointWhat you're describing sounds very reminiscent of the noise the EA888's make as they build oil pressure on startup. My GTI does it, as did my 220 vRS before it (Both EA888 G3's). Mrs Gaz's Polo GTI (1.8TSI) also does it. Gaz1 point
-
1 pointIt turns out that McDonalds create their own bio diesel from their used cooking oils. Do McDonald's use recycled cooking oil to fuel your own delivery vehicles? (mcdonalds.com)1 point
-
1 pointEven those who are thinking how easy it is for them to charge at home will start having reservations when they have teenage kids with an ev each who all want to be charged by morning. I doubt doing more than two on 7kw chargers overnight will be even possible on a domestic supply when gas is banned from new builds for heating.1 point
-
1 pointIt's impossible to gauge 'town' as everyone will encounter different conditions. Our Karoq was almost exlusively used for driving around town, a one-way trip of 4 miles. It was hardly ever done in heavy traffic, but the average speed would have been around 15mph. ( it wouldn't have taken me much longer on the bicycle ! ). I wasn't the main driver of that car but what I found was outside temp. had a big influence on the 1.5 ( ours was a DSG ). At this time of year, the mpg would be low 30's. During the height of summer it'd be around 40mpg. But as I say, that's just those short trips. On the odd occasion I drove the car which was always longer runs, I'd see low 40's in winter and over 50mpg in the height of summer. We changed the car last year as the main driver wanted something smaller. We bought a small Toyota hybrid. Economy has improved by around 10mpg over winter months but the overall running costs ( not including the cost to change ) is actually higher so in the long run, buying something that was more economical doesn't necessarily mean it's a cheaper car to run.1 point
-
It doesn't sound unreasonable to me, given that a lot of the things needing doing are not DIY.1 point
-
1 pointOPs mileage is not even half of yours so his engine is barely warming up, I'd expect it to be low from what he says.1 point
-
1 pointWelcome to the forum. I think your current high fuel consumption will be due to your very short trips - 1-4 miles per day will mean that most of your mileage is with a cold engine, the fuel injection set 'rich' and cabin heating struggling to get to requested temperature.1 point
-
1 pointThanks for that, from the lack of response I was beginning to think maybe I had missed a massive elephant in the room and nobody was telling me.1 point
-
1 pointAberdeen wants to be a Hydrogen City and is spending many millions. Plenty Electricity produced nearby sand Hydrogen can be. & brought by Interconnectors from the Northern Islands. What a pity they can not heat the Public Swimming Pools, Leisure centers of freeze the Ice Rink. They back the Electric Bike loan, hire, lease schemes, last minute deliveries etc. What a pity about how often the weather is pretty crap.1 point
-
1 pointI have an earlier one with the badge on the back and I prefer that although it's a very minor thing. I find my sat navigation is fine, subject to it not knowing newly made roads, streets etc. I love the car, but its drives slightly better on still 18 inch wheels but slightly wider ones on 235/50×18 instead of the 215/50×18 horrid bridgestones it came on. Its one of the comfiest, best quality vehicles I have ever driven. Mine is a 1.6tdi dsg, it does near 50mpg everywhere, and 30mpg towing the caravan. Great car.1 point
-
1 pointAir Products, world's largest hydrogen producer, is putting a hydrogen plant in the Humber estuary using some of that lovely car cheap North Sea wind energy to produce hydrogen for U.K. and other countries.1 point
-
1 pointRegarding the sat nav, it was fixed mapping until the models went online. There are ways to download new maps, copy over the registration file etc (other threads have process). However any map is offline (no live traffic updates) unless you subscribe so most people just plug in phone and use google maps or Waze etc SE-L spec had vast list of cost options, so need to check spec properly if there is something you can't do without. Some car adverts just cut and paste standard spec which makes checking ads online rather unreliable for exact spec. Spec has slightly changed over time, but in reality unless you are prepared to search vast area online then your budget will be main determinant. But do initial research on autotrader, and other sites (some places only subscribe to cheaper websites so might not be on biggest), Skoda used website is not best by long way for quick comparison.1 point
-
1 pointTotal crap on the Corsa Electric brakes. The one i drove needed 2 sets of discs and because i did not use the brakes much and for the new owner at 3 years they will have needed to replace them again. Just rusty rusty messes. 2 sets of drop links. They are crap. 6 weeks off the road with faults in 3 years. ........................ Vintage and classic cars exist we know that, but they are from then and this is now. So talk about the ICE Vehicles produced from 10 years ago and those at 50 or 100 years old and the BEV.s That is comparing like for like, not vehicles fro the really 1900,s on.1 point
-
1 point@TDIMachoMan Read again. @Carlstonis talking about 235/40 not 235/45. The superb wheels should fit just fine. They will stick out a bit more and actually be further from the suspension so no issues mechanically.1 point
-
1 point
-
1 pointDon't fit 235/35R18 tyres. It's such a rare size, that mytyres aren't listing a single tyre in that size. It also has an outside diameter 2.4% smaller than the standard 225/40R18 tyre size. It's even more prone to pothole damage than 225/40R18 due to less sidewall height. The speedometer will massively over-read. At an indicated 70mph, your actual speed might only be around 65mph. Outside diameter of tyres 225/40R18 637.2mm 235/35R18 621.7mm (2.4% smaller outside diameter compared to 225/40R18) Sidewall height 225/40R18 90mm 235/35R18 82.25mm (8.6% less sidewall height compared to 225/40R18)1 point
-
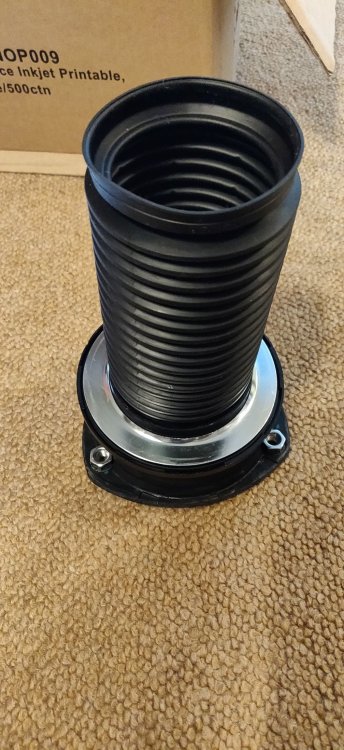
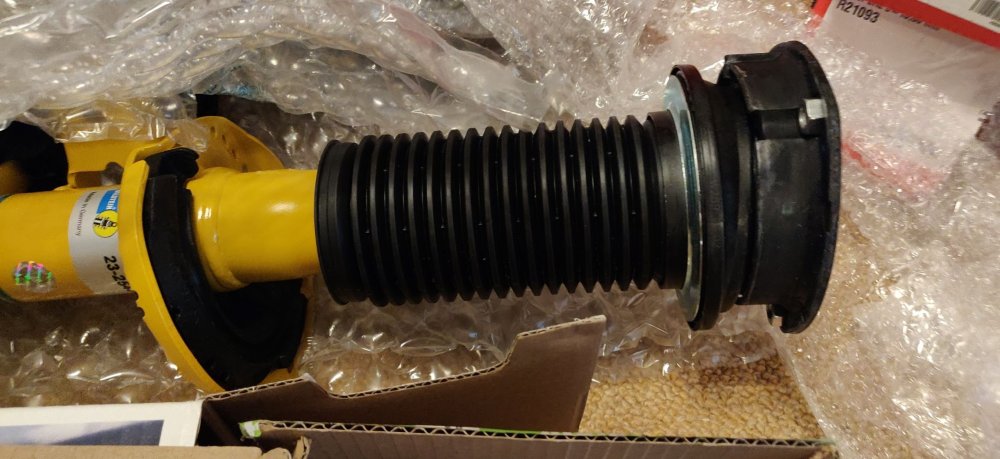
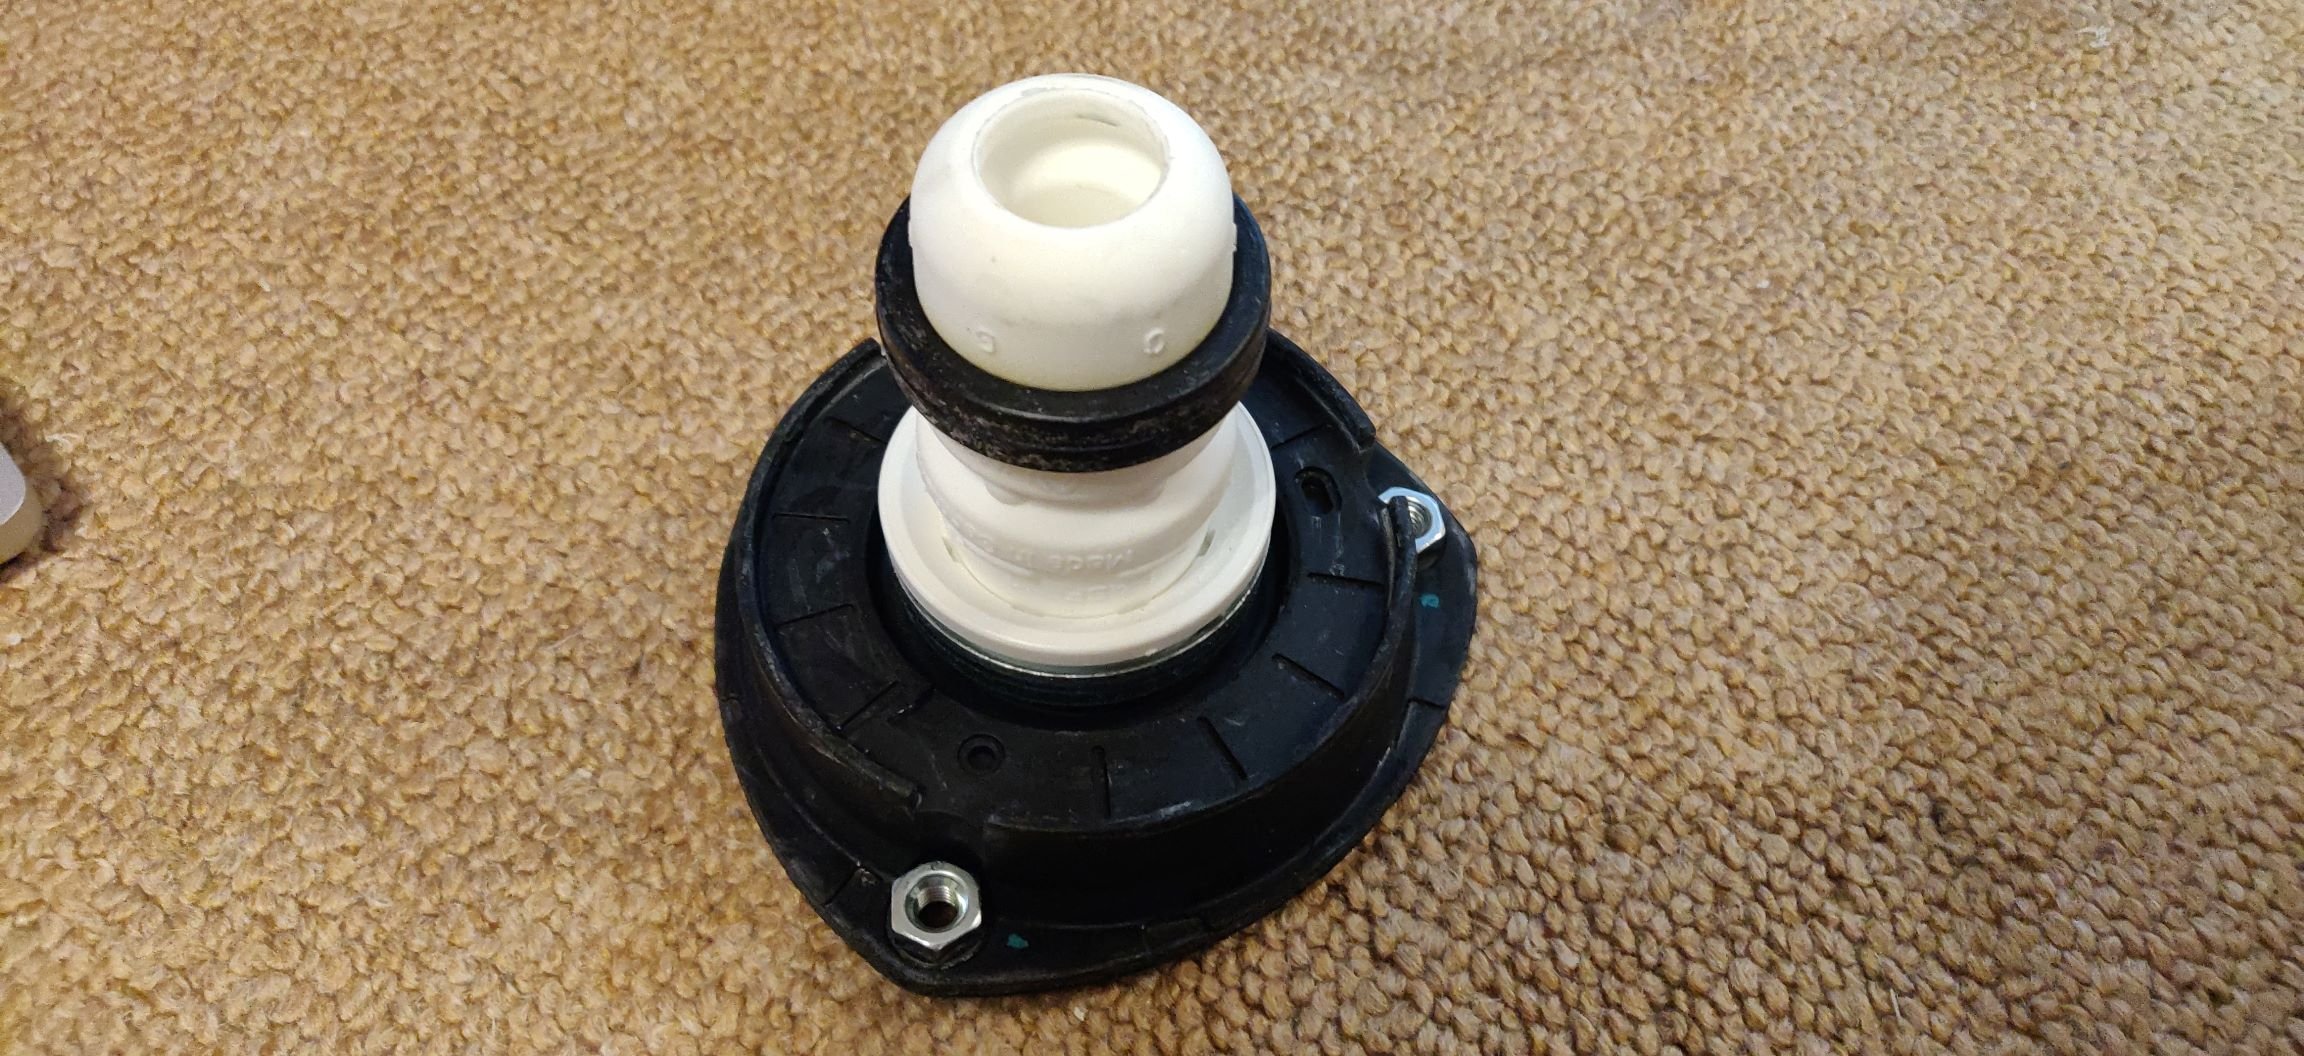
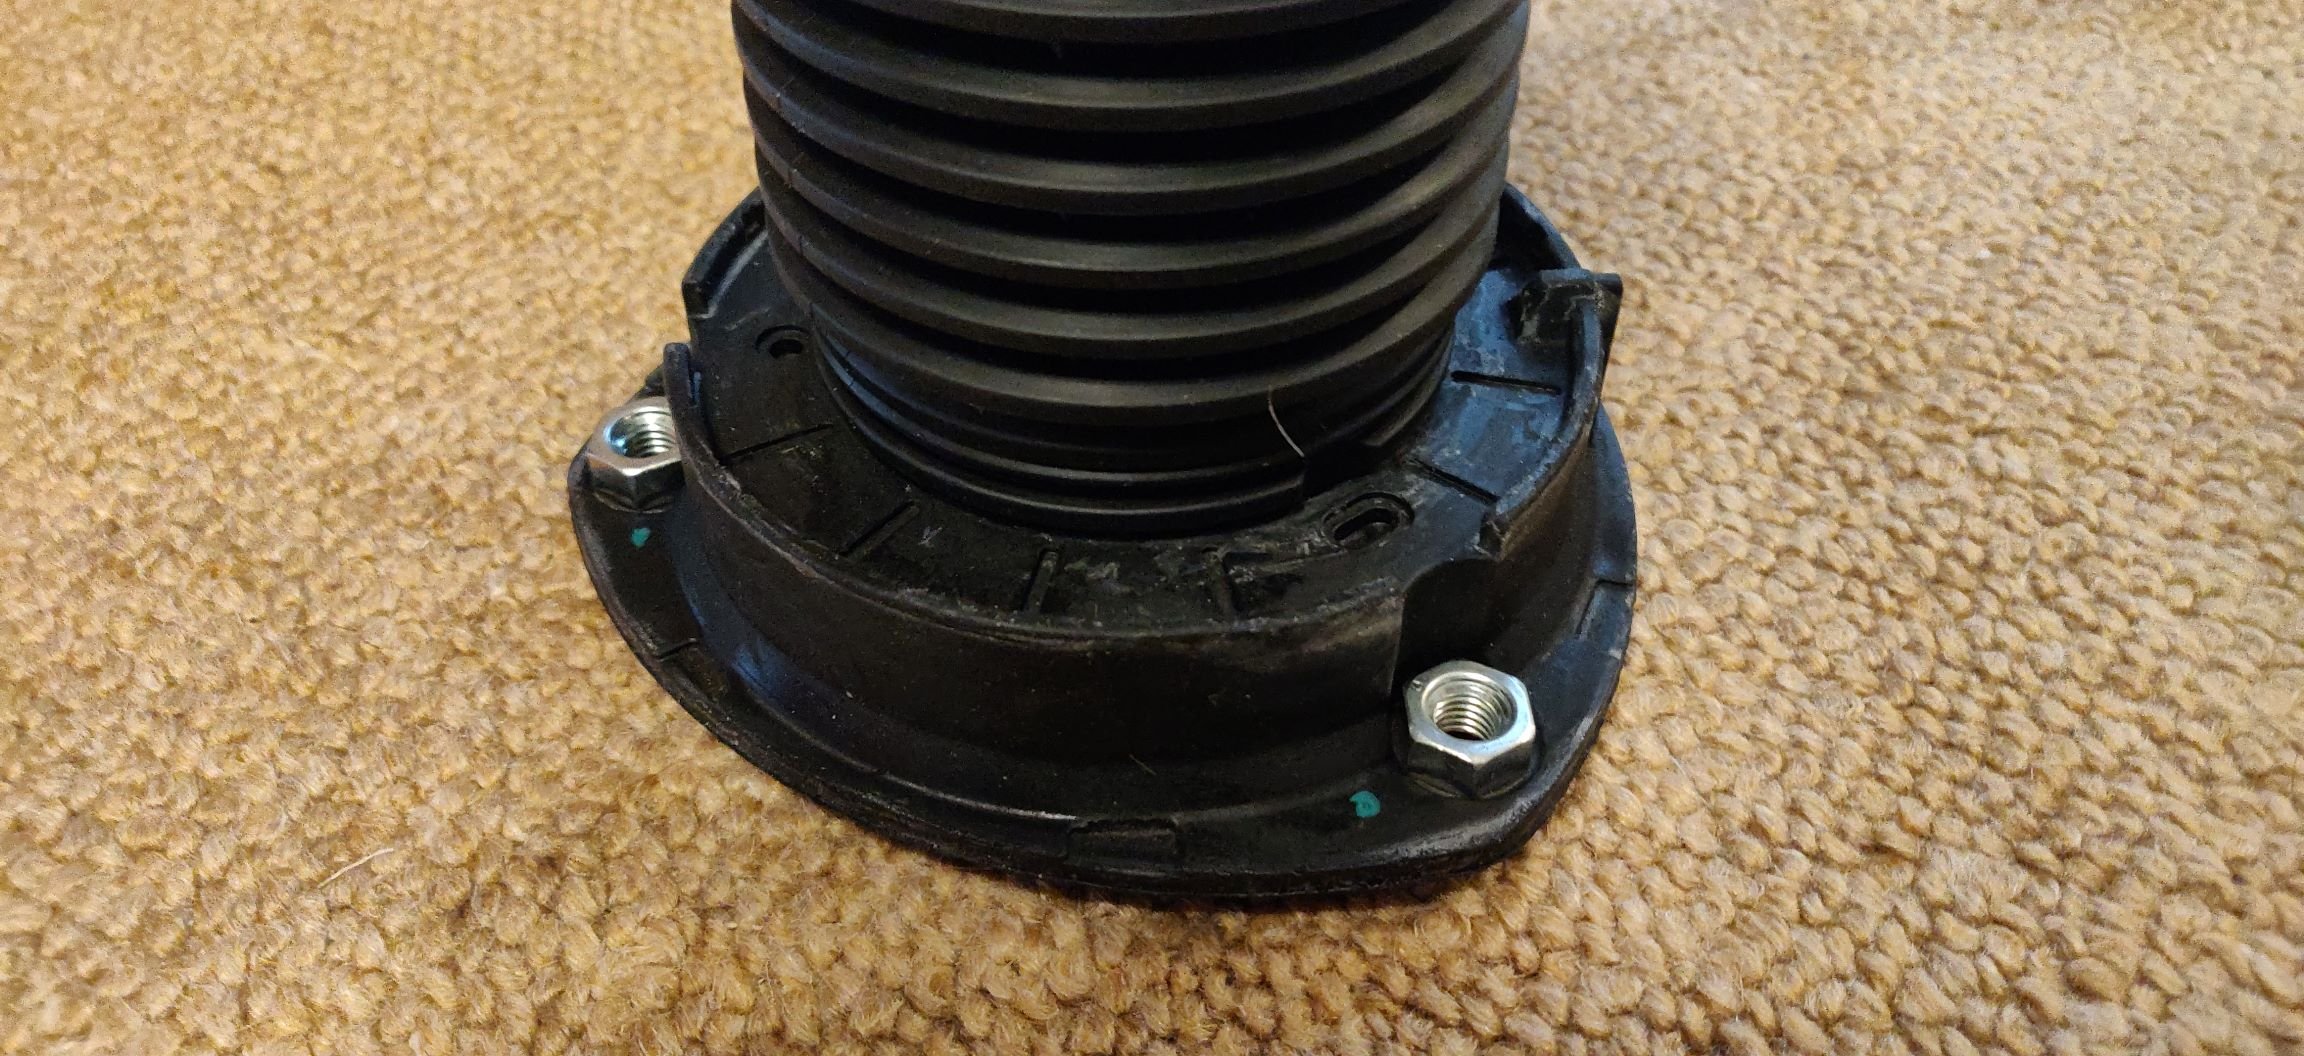
Aftermarket parts are often not the same as OEM parts. The part in your first pic will sit on the underside of the one in your second photo. As long as the bolt holes are in the same place and the top rubber piece sits in the correct place on the car, all is well.1 point
-
1 pointSome people think "free" means at no cost to anyone. It very rarely does. Use of the word "free" should come with a trigger warning.1 point
-
1 pointThe facilities that I described, have seemingly t'd off from the incoming feed to the water park. I certainly didn't see any tree trunk cables being laid during installation, so the cost of the installation wouldn't be that great, all things considered. The chargers themselves may be expensive, but apart from safety checks, they have virtually no moving parts and should be built to last a reasonable while, certainly I expect them to last longer than a petrol pump before needing maintenance. The 'fuel' itself has no transportation cost, is totally on demand (no storage fees) and the car parking at the water park has always been free. My take is a lot of people are seeing the whole EV thing as an opportunity to make easy money and as we are being asked to go electric to save the planet, being screwed financially by big companies to do so, appears to be extraordinarily cynical. Hopefully the next government will do something about it (Disclaimer: regardless who that government is)1 point
-
1 pointOne thing I don't miss is people pulling up at a pump, putting in 20 quids worth of fuel, then going inside to do what seems like a weeks shop whilst they leave their car at the pump.1 point
-
1 pointStill not gone yet, few bits and pieces on the for sale site but might close them down as most of them on ebay and that's where most have sold. But still helping people, even upto now. It's one of the best sites going. 👍1 point
-
I know it's resurrecting an old thread. But I found the part number on my (64 Plate Superb Mk2) felt still clearly etched in the fabric today, should anyone require it? The part number is 03L 103 660 C and it is called an Oil Pan Cover or Lid: https://www.lllparts.co.uk/product/vw-audi-oil-pan-cover-genuine-vw-audi-03l103660c/id/469315 Or https://www.skoda-parts.com/spare-part/03l103660c-oil-pan-lid-skoda-19610.html They're some serious money, 3 figures worth in pounds alone. However, the previous workshops didn't know how to do an oil change without saturating it in old engine oil! So I'm going to be learning how to degrease this felt properly with soda crystals, orange concentrate degreaser and another proprietary degreaser, whilst trying not to destroy it with a Karcher pressure washer! Thankfully I do my own servicing, so I won't be coating it in anymore oil now!1 point
-
Apparently the Disc is best as the baddies just cut the steering wheel into pieces to remove the hooked on or over varieties.1 point
-
1 pointWot a surprise. It would still have needed interpreting and cross-checking. Perhaps you might have someone near you that could give you a report for nothing or a beer token. - Briskoda VCDS Owners Map (click me)1 point
-
1 pointDon't know if it still works, but do people use CarWow or DriveTheDeal these days? I used DriveTheDeal for our latest car. Any seller being some distance away can have it's downside but you have to factor that against the savings. Due to several delays in delivery ( not the dealer's fault ) I cancelled that order without issue and received a full refund of my deposit. Had been looking around relatively locally for an alternative, didn't see anything, one dealer said they had a car I'd wanted on it's way, the price was £3000 more than DTD, I mentioned DTD price and said I'd just re-order and put up with the wait. Next thing I know, he price matched them !!! An extra £3000 of his already discounted price, just like that. I hate dealers., much prefer Carwow or DTD not just because of potential savings, but because there's no negotiating.1 point
-
Yes, I will ask them to fix the ECU map then. This was also suspicious for me. They refuse this as a source of the problem but will force them to look into it as it occurred directly after the process mentioned... Regarding the legality of DPF removal... - Looking at the thousands of electric cars burning worldwide, - how poluttant are battery factories, - disposing perfectly good cars because of silly Ulez, - Regenerating DPF with tons of chemicals once in a while - Producing new and disposing old used DPF... Everything is contributing to false Eco world so I couldn't care less about legality of DPF removal.1 point


.thumb.jpg.9dd3f612ba7f13d10be5c518d3c8d255.jpg)