Leaderboard
-
Monkhai
Moderators26Points31,996Posts -
MikeTheThinker
FREEDOM18Points8,509Posts -

Lee01
FREEDOM14Points36,414Posts -
Aspman
Resident Member14Points21,204Posts


.thumb.jpg.9dd3f612ba7f13d10be5c518d3c8d255.jpg)

Popular Content
Showing content with the highest reputation on 23/12/25 in all areas
-
3 pointsThe realistic answer to your question is "No". A GOOGLE-search using the search-term "brake" "insane" "sensitive" will retrieve plenty of online discussions about hyper-sensitive brakes on modern-ish cars generally, not just on VW Group vehicles (eg. Skoda cars). It's sometimes suggested that the sensitivity (at low speed) results from the 'profile' of the ABS (Anti-lock Braking System) and that the coding of the ABS control module might be modifiable to lessen the brakes' initial bite. However (as far as I can make out) when ABS coding is carried out, the task always relates to matching a replacement ABS control module to a car and not to altering an existing control module's settings to change the manner in which the car brakes. (I've also come across more radical ideas like grafting some sort of smart pressure bleed-valve into the brake-servo, but nobody has said they've actually done this!) Just in case there were an easy non-invasive 'fix' that would help your mum with her Fabia (and that a Skoda dealership might be prepared to apply) I contacted a local independent garage that specialises in servicing/modifying German-built cars and has the VW Group's ODIS diagnostic tool. They said they were quite often asked about 'sharp' low-speed braking on VW/Seat/Skoda vehicles and had to tell the owners that this characteristic could not be altered 'electronically'.3 points
-
3 pointsI've got one in the UK. Probably the only one. I know it was brought in by Skoda in 2020 and registered in 2021 as a Superb Sportline Plus 280 it's had the arch spats and bumpers replaced with the more usual Superb ones but retains the black plastic door bottom protectors. Scout badges on the wings and dash, embroidered seats, Scout logo on the screen on start up, 6 selectable driving modes (off-road is the extra one). Rear window blinds in the doors, heated front and rear seats, Canton and the sunroof. Raised suspension 15mm taller than standard Sportline. There's probably more differences that I've still to find out about but the only missing stuff is the removable boot torch and DAB radio. I'm the second owner and have taken it from 16,500 miles up to 30,000. Brilliant car, apologies for the thread resurrection! Guy3 points
-
The shark fin is the GPS antenna. Configured for a completely different frequency.2 points
-
2 pointsMerlin purple vibes. Looks fabulous. Drive in good health.2 points
-
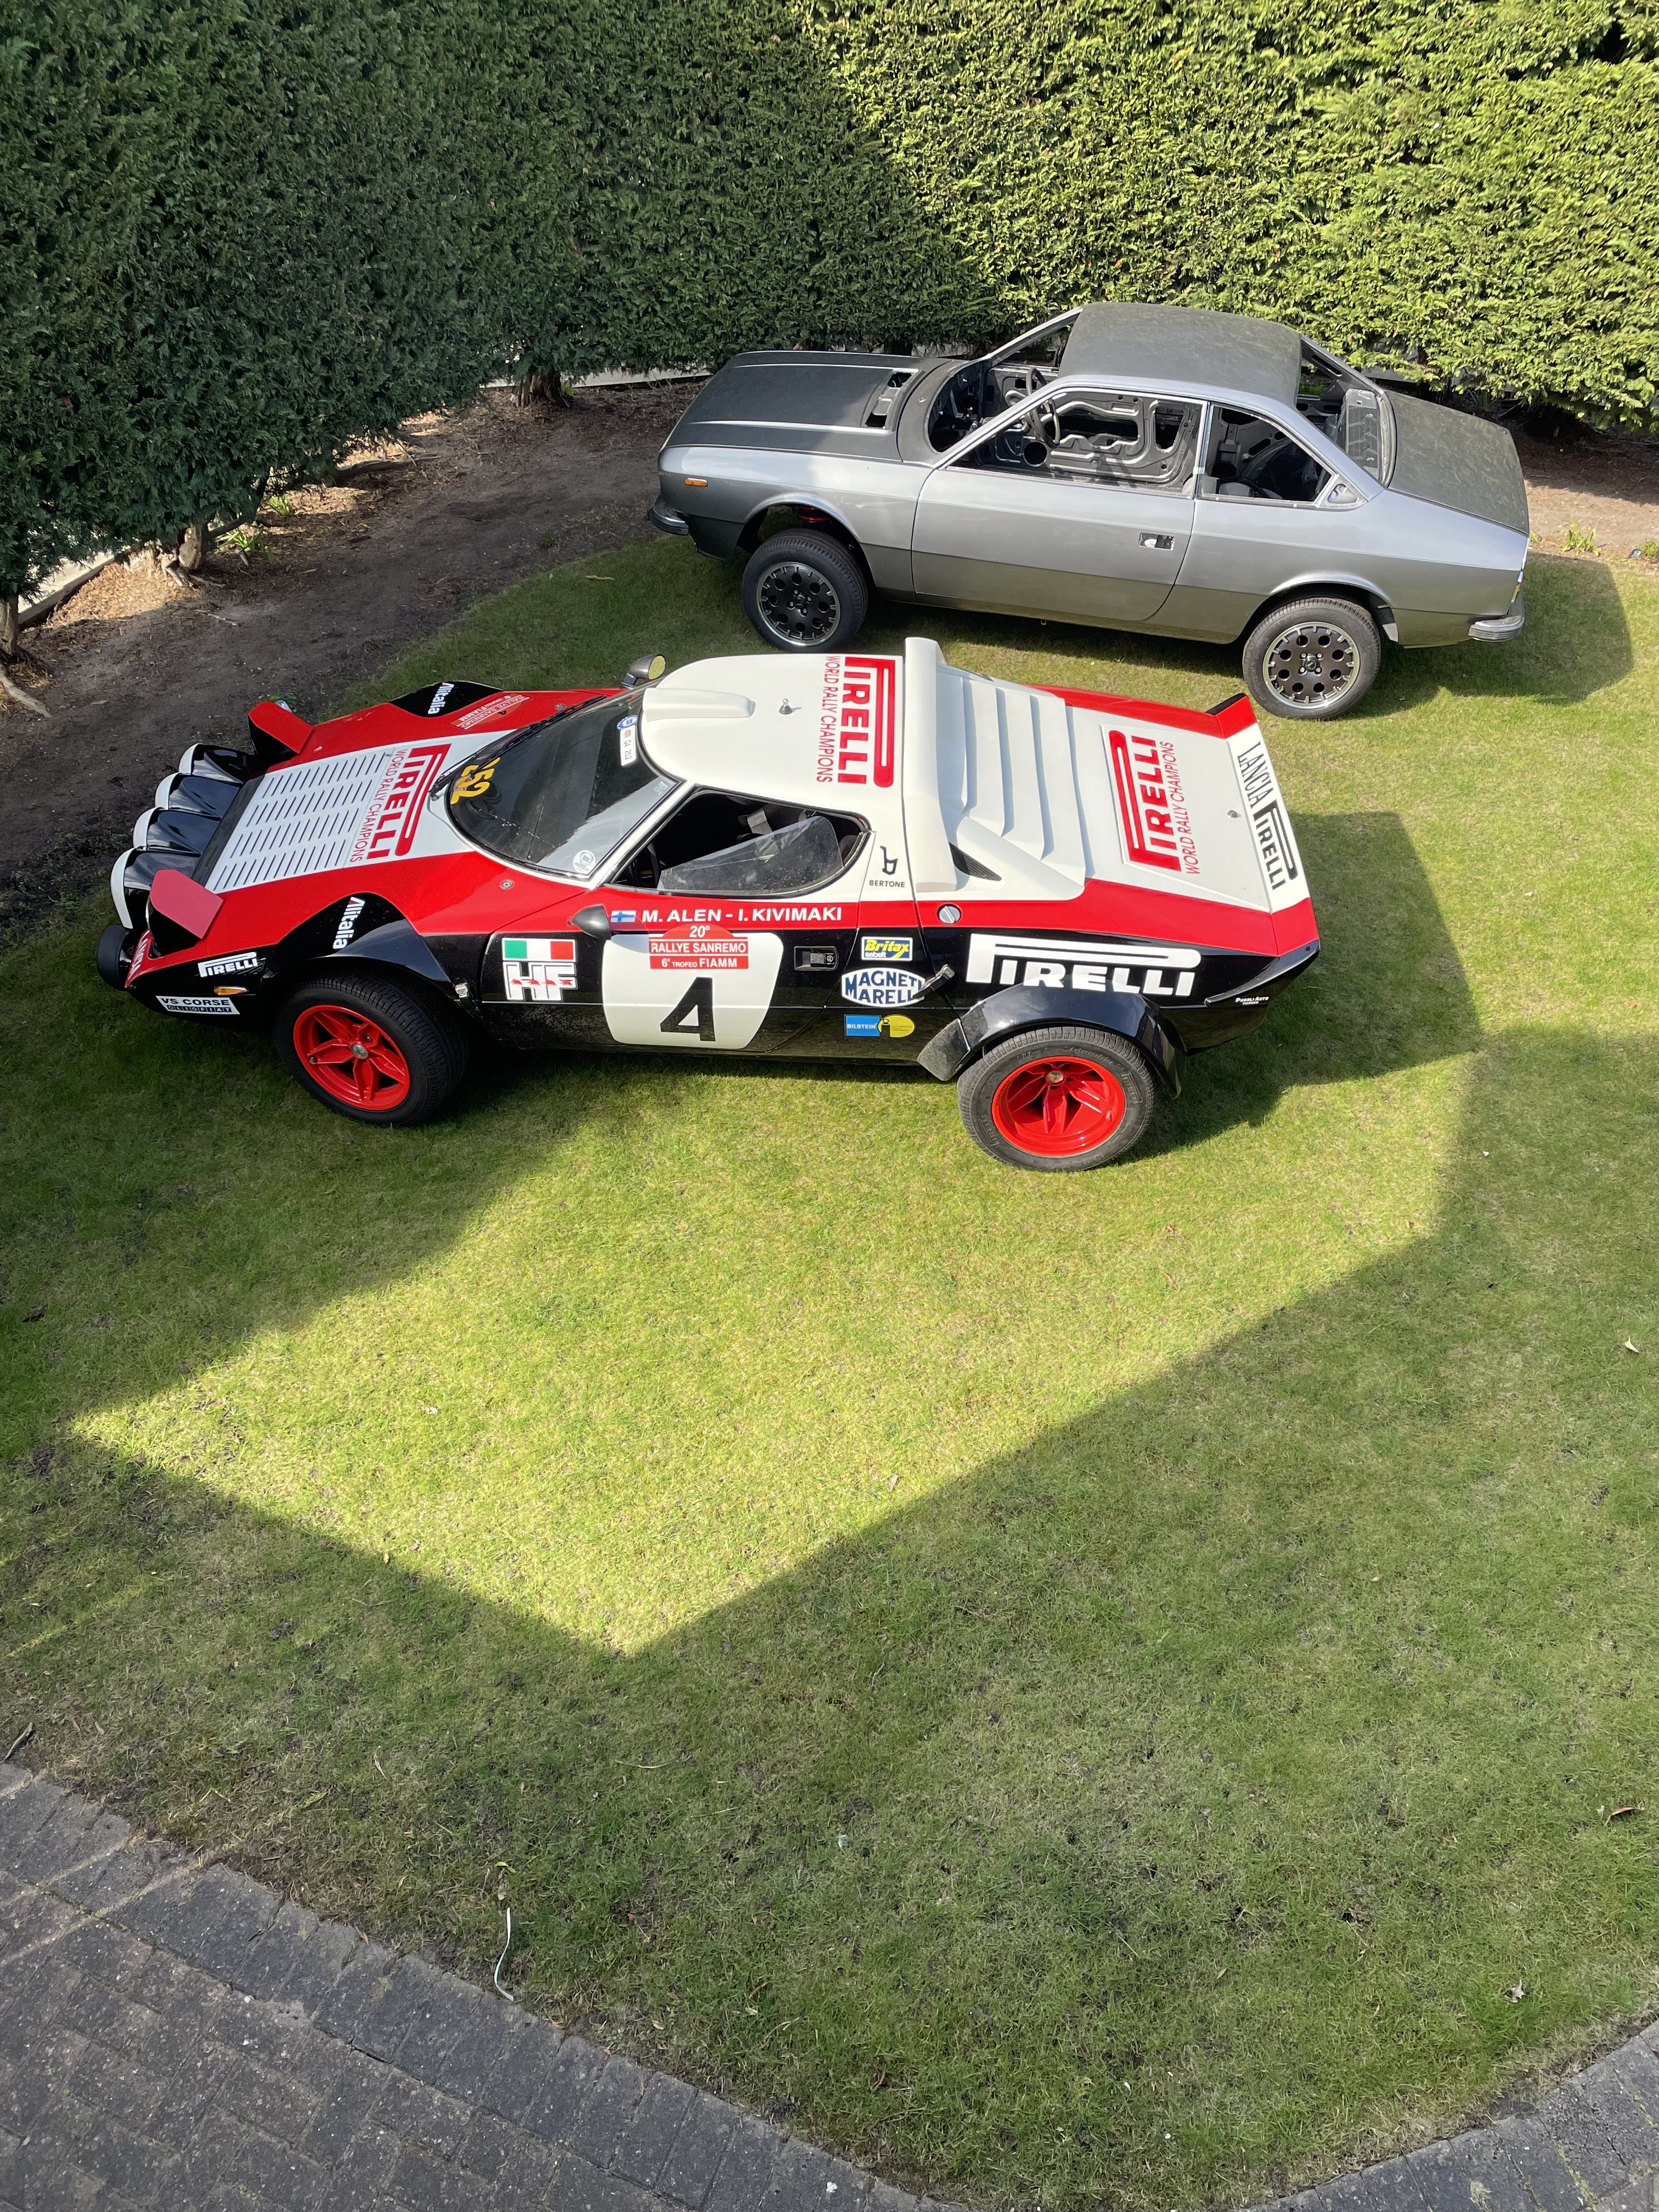
2 pointsAnd it’s a Hawk Stratos with an Alfa Romeo 3.0 V6, 220bhp, half the weight of the Superb and 345*35*15 rear tyres. Can’t launch over 5000rpm or it shreds the tyres…..
 2 points
 -
2 pointsThese are some examples from my MPG. https://www.briskoda.net/forums/topic/512393-cooling-system-problem-again-in-my-felicia/page/3/#findComment-5946337 https://www.briskoda.net/forums/topic/512393-cooling-system-problem-again-in-my-felicia/page/3/#findComment-5945839 https://www.briskoda.net/forums/topic/512393-cooling-system-problem-again-in-my-felicia/page/5/#findComment-5955158 https://www.briskoda.net/forums/topic/512393-cooling-system-problem-again-in-my-felicia/page/6/#findComment-5959014 https://www.briskoda.net/forums/topic/512393-cooling-system-problem-again-in-my-felicia/page/6/#findComment-5959514 https://www.briskoda.net/forums/topic/512393-cooling-system-problem-again-in-my-felicia/page/6/#findComment-5960293 In the past i had even 14,7 / 100 km or 19.22 British MPG which was a terrible result and took me at least a year to find the solution and was not only 1, was a heaps of faults (small or even less) which all together made my Felicia spend more fuel than it should be.2 points
-
2 pointsIf the headlamps are that fragile then they haven't been designed to meet the conditions in the real world such as potholes and speed bumps.2 points
-
2 pointsFFS, Council chargers in Scotland. I have been in 4 council regions this past week and 50 kW CCS chargers only put out 26 or 30 kW max from low percentage of the battery. It is not the car because i put it on a TESLA and a MFG Ultra Supercharger when over a 50% to see & got 52 kW showing & still charging at 30 then 20 kW right up from 80% then 90 % til at 99%. 65, 70 & 75 pence a kW on Council Public chargers & 55 & 79 on the Ultra Rapids. Damn right on going ICE when you are paying money from your own income and even on a State pension plus you are still being taxed & paying this much public charging. Not interested in the Cheapness of home or work charging, or others paying for it. That is their kettle of 'Much cheapness'. Retired, Social, domestic, leisure, recreational, WORLD IS YOUR OYSTER. Cheaper by petrol or diesel. Even if you 'Just got a Tesla'. Because you are not always charging Offpeak hours or even maybe near Superchargers.2 points
-
2 pointsDoes look fantastic. My 2021 L&K has passenger memory so it must be that trim basically. Certainly looks it from the spec you put in the original although if it’s an official import and demo it may well have had options. Interesting it’s 200kw in 2021. That would mean it was the EA888.3 GPF model (DNUA engine code). Are you sure that’s the case? By 2021 they should have changed over to the EA888.4 but different models and markets may have had a different changeover date. Easiest way if not sure is pop the bonnet and look at the engine cover.2 points
-
2 pointsWhy apologizing? IMHO, it’s much more relevant to enrich an existant thread (even an old one) than creating a nth one on the same subject, which in the end dilutes all the knowledge. What you´ve done is simply a ´best practice’. Thus, Thank you very much! 🙂2 points
-
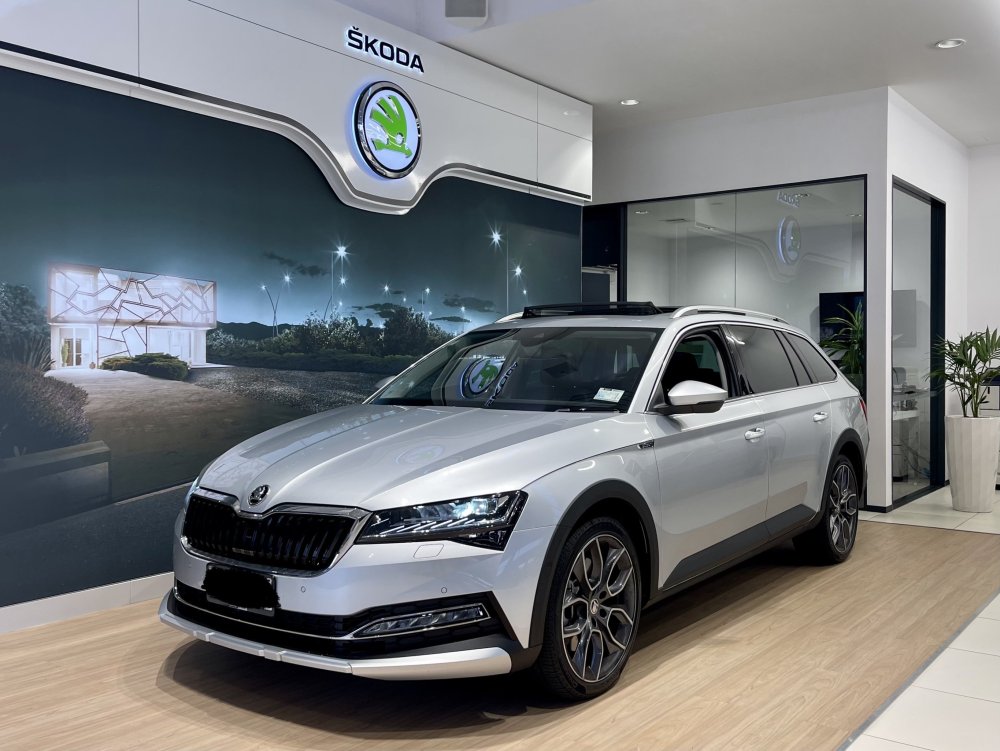
1 pointAfter just under 6 years I am trading in my trusty Octavia Wagon vRS mk3 for a new (well, ex-demo) 2021 Superb Scout Wagon. I really enjoyed my Octavia overall and whilst I had a few technical niggles, it never once left me in the lurch and my dealer experience here in Auckland was very positive, so I am staying on board the Skoda train for another lap. My new car is the 2021 200kw spec (lost a few hp due to the ppf!) with 7 speed DSG & AWD and is well kitted in Brilliant Silver with Matrix LED, Columbus 9”, Canton, heated front, back and steering wheel, digital dash, park assist etc. Looking forward to collecting next week and saying farewell to the Octy!
 1 point
 -
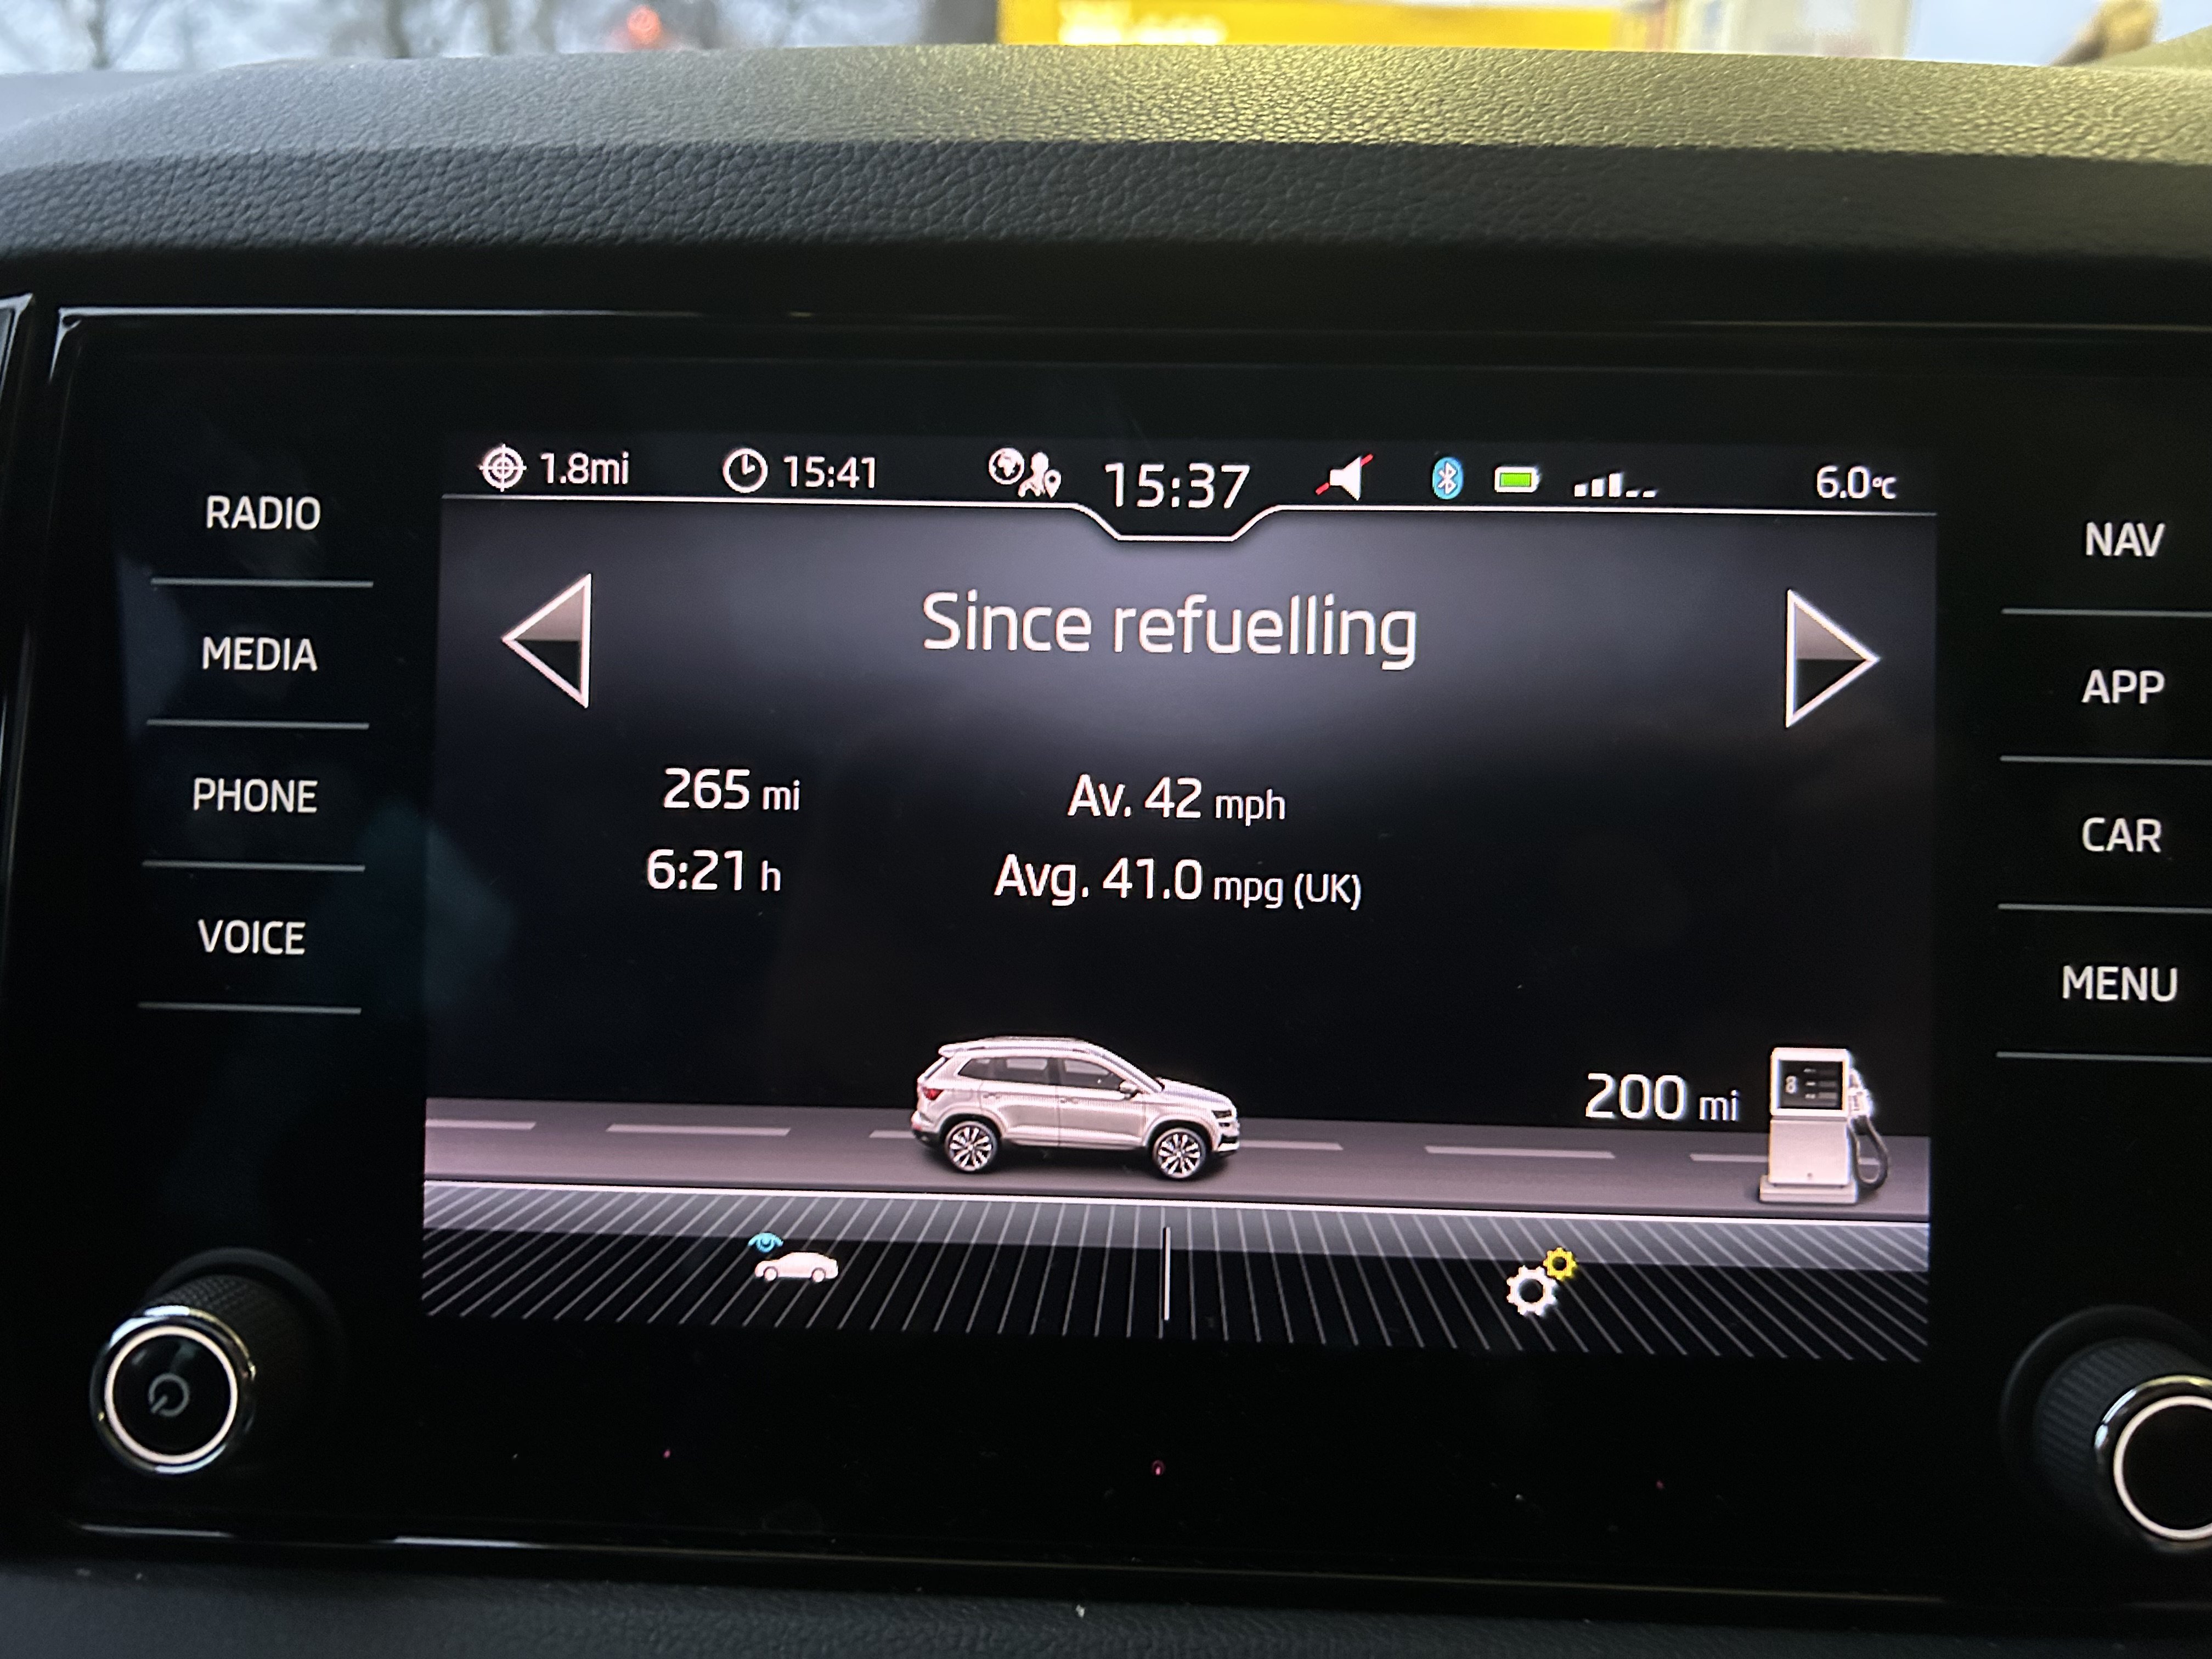
1 pointl’ve often wondered how accurate the Driving Data stats for fuel consumption were on my Karoq. This week I have been able to calibrate with brim to brim refuellings. As the image below shows 41 mpg on a 265 mile round trip to Bristol today. Refuelled when I got back 30 litres for 265 miles is 40.1 mpg, so I reckon that’s close enough to rely on. My previous car it was always about 4-5 mpg optimistic, although I believe VCDS could be used to adjust it to be more accurate.
 1 point
 -
1 pointHi all, Just wondered if there's anything I can do with my dipped headlights which just never seem to be bright enough (main beam is fine). My lights always seem to feel drowned out by oncoming cars and I need some lights to get through country lanes safely. Are there LED bulbs that can be used? Vehicle is a 2004 L&K estate with standard xenons Cheers Vijay1 point
-
1 point
-
Placed an order on ebay yesterday morning for a set of CI X1698 ignition leads from Motor World Direct, a Tetrosyl company, with an estimated delivery date of 29th Dec and was amazed that they got delivered today by Evri. 15% off with code WINTERDEAL15. All fitted and car started first time. No problems on a short test drive.1 point
-
1 pointNice, thanks for sharing. Colours is one of the ways that Skoda is showing up the other VAG brands.1 point
-
Often forgotten or ignored If your HT leads are very old also consider replacing them as they're not expensive for a set - but don't buy inexpensive Chinese, or elsewhere, crap made ones.1 point
-
Issue seems to have been found, a misfire, so need a new coilpack 😵💫So time to tuck it away till new years, thank you everyone for your help & suggestions! Would have preferred it to be a sensor though..1 point
-
1 pointHello Nigel You've cleared up something else for me. I wanted to download the owner's manual and so I entered my car's VIN as requested. I didn't see any option to download the manual and I can only look at one section of the manual online at a time. I would have preferred the downloaded PDF version. It's too dark outside now to have a go and so I'll try tomorrow. I'll let you know how I get on Thanks again, Steve1 point
-
1 pointOften this means the window is so stiff that the motor current reaches the limit and stops, so worth checking that the window is not too tight in the runners.1 point
-
1 pointFor anyone who suffers the same fate, it appears that the latch dropped slightly when the bonnet was slammed and that locked it up. No amount of pulling on the cable was going to shift it. In the end I took it to a local garage and we managed to get it open by removing the latch bolts in situ. The bonnet could then be opened with the latch still attached. It was extremely fiddly and took a couple of hours but worked in the end with minimal damage. Most likely victim is the wiring to the bonnet sensor.1 point
-
1 pointA great response which answers my query. Appreciated. Have a Merry Xmas.1 point
-
1 pointHi This is my 4th Octavia , 2 Estates (Company Cars) , 2 Hatchbacks 1.4 TSI Sport I purchased an Octavia VRS Auto DRS Hatch in March in Royal Green. Reliability is sound , absolutely outstanding to drive , goes like **** off a shovel (warp factor 9), had more comments about the colour than all my other cars put together. Usually get about 45 - 50 mpg on a good motorway run. About 35 mpg when pottering about. Packages , I went for the Winter package , heated front screen and steering wheel and seats ....Lush !!! Also spare wheel , don't like the gunk crap. rear wiper, wheels look great without the tacky plastic bits on them (which are easily removable) . Mine came with lane assist, cruise control, auto dip headlights etc. Didn't go for the other stuff as I didn't think it would be relevant for me IMHO. Infotainment sometimes goes weird, but the good old reboot cures that. Android Auto is great with Waze as Sat nav (sorts out where the Rozzers are 🙂) Ordered in Sept 2024, build date was early March 2025, picked up early April 2025. Its the best car I've had in 40 years of driving. Can't think of anything else , I just love it 🙂 Cheers Dave1 point
-
1 point
-
1 pointAt around £100 per dealer diagnostic session, it soon pays for itself. BTW if you have a clone/rip-off copy then don't expect any help either from Ross-Tech or on here - we only support the "real deal".1 point
-
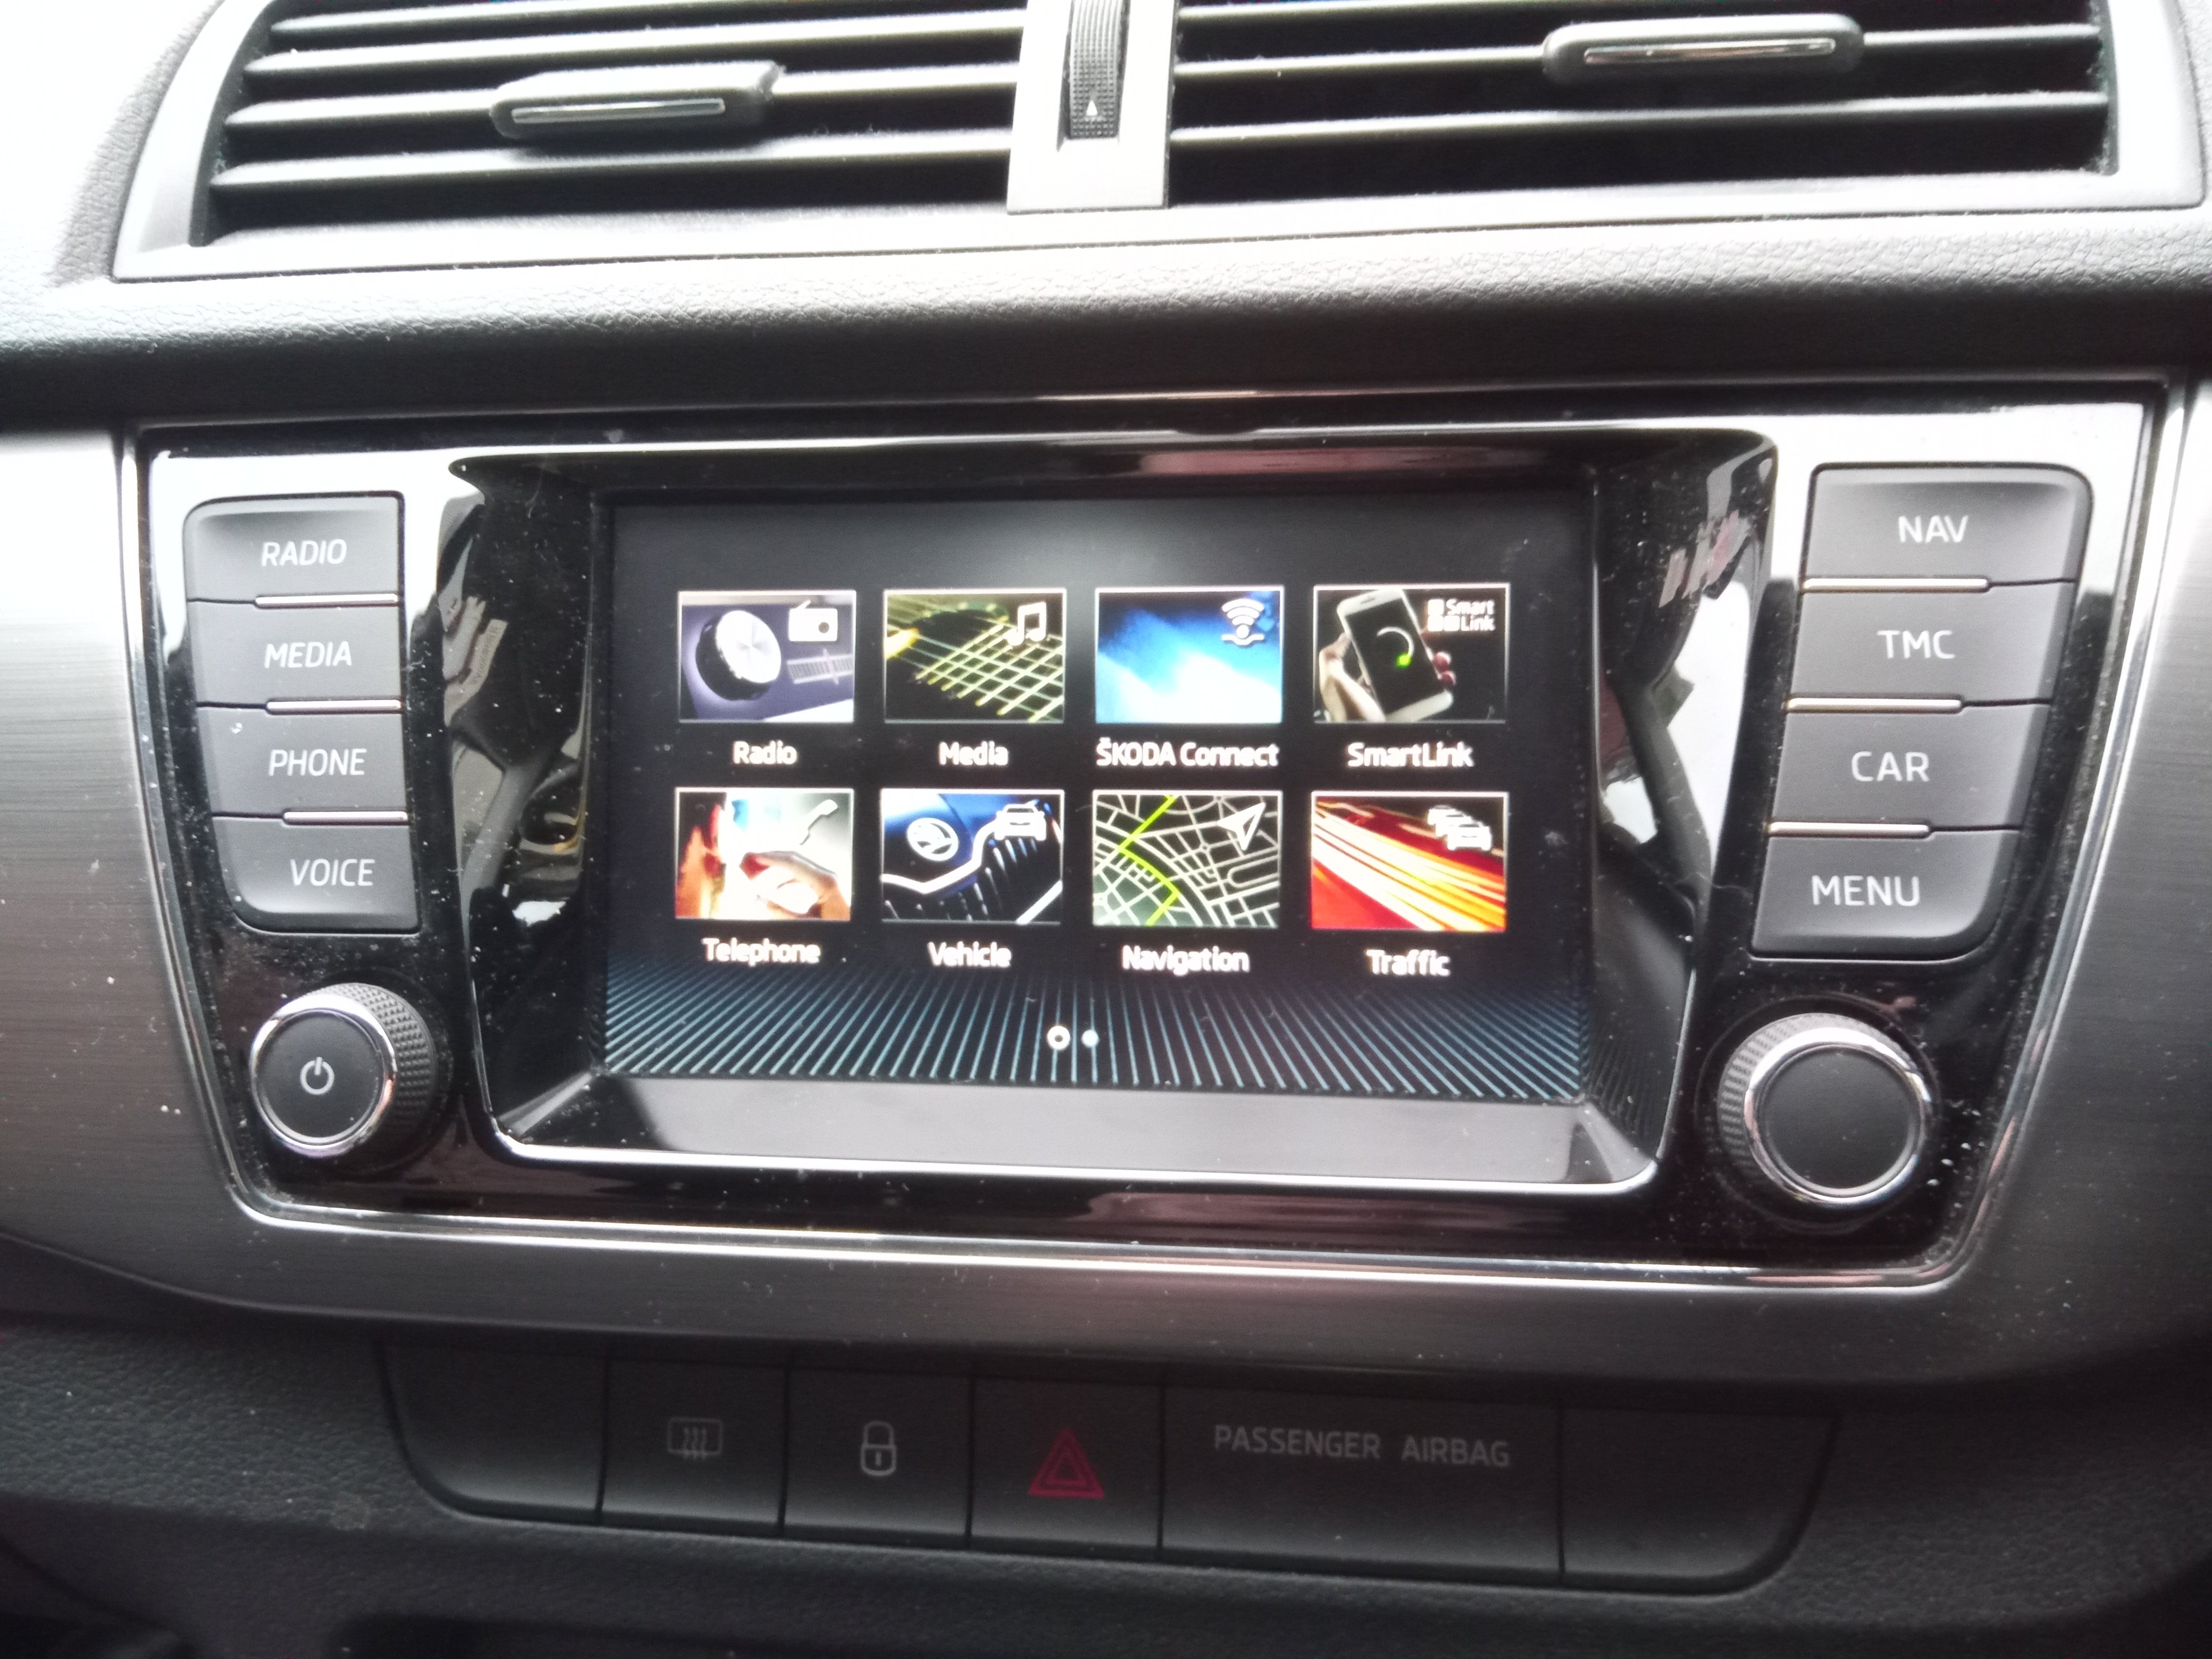
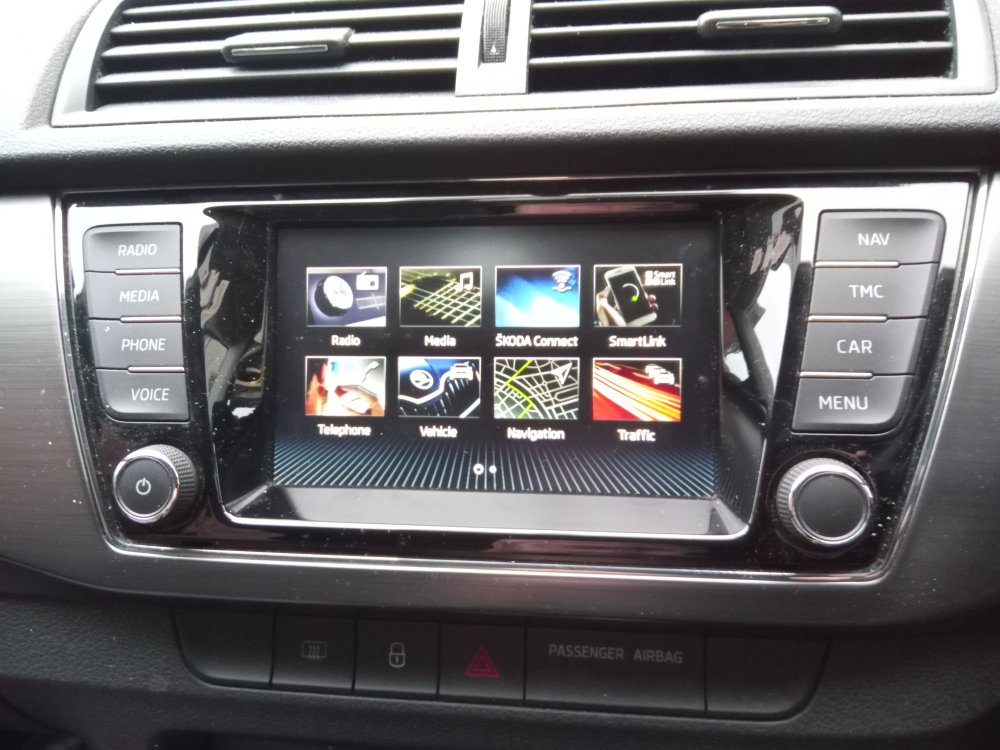
1 pointThanks again Nigel, Sorry about the delay in replying to you but my wife insisted on dragging me out for some last minute Christmas shopping! Thanks for your very useful advice and tips. My car is a Fabia Mk3 manufactured March 2021 I'm attaching a photo of the Menu screen of my infotainment display. Hopefully, you might be able to identify the version enabling me to have a go at setting 2 phones up without cocking things up. Thanks Steve
 1 point
 -
1 pointHi Lee - The Skoda data tells me it's a SUP.COM.SCO TS200/2.0A7A with a DNUA engine code. It's very quick, it could almost keep up with the Stratos replica!1 point
-
1 pointI'd be inclined to try a harder brake pad before ging to the expense of changing calipers and discs. I've used EBC pads with some sucess on my Volvo Amazon historic rally car (now sadly gone) and my BMW 740 Sport. They make pads for different degrees of lunacy (!) but I've found the basic Greenstuff ones adequate so far. They are often available from Euro Car Parts and I'll be switching to these on my Octavia vRS at the next service. One advantage of Greenstuff pads is that you don't get that 'orrible black dust on your wheels because they don't contain copper......1 point
-
I just fixed this issue on my Scout. I used an endoscope to look at the flap motors (you might be able to squeeze around the pedals to see it, but it's just easier to use the tool) - for me, there were no issues, and they were moving around fine. The coolant in my expansion tank was a brown, muddy/scummy colour - not the lovely pink it should be. I then purchased: 1x New coolant tank without the silica bag - metalcaucho 03344 from Autodoc - you can use the old tank's lid 1x New heater matrix (double check part numbers before you buy, as there are a few different fitments) 1x 5L concentrate of G12evo (successor to the rubbish G13 coolant) 1x set of hose clamps (amtech 3 piece set) 5x 5L Distilled water 1x Bottle of coolant flush chemical Tools I already had, which you may need to buy if you don't have: Spanners, sockets, screwdrivers, big set of pliers, tin snips, torx bits, a 1 meter rubber hose with an internal diameter matching the outer diameter of the coolant return hose that feeds into the top of the expansion tank, a small victoria clamp to fit around the aforementioned hose, the garden hose connected to the tap (ideally with an adjustable and lockable sprayer on the end), a rubbish towel I don't mind ruining, plastic sheeting to go under the towel, a few buckets, and a tupperware container the wife hopefully won't notice going missing. I started by warming the engine up to operating temp, you can do this by driving around or just idling. Once at temperature, I disconnected the coolant return hose, put it into the rubber hose and secured the victoria clamp to prevent it from leaking - I then ran the rubber hose into a buckets, and let the engine run. The old coolant ran into the bucket, and I topped up the expansion tank with the garden hose, occasionally changing which bucket the hose emptied into so I could monitor the colour of the water coming out of the car. Be aware that if the water level in the expansion tank falls below the sensor, the car will sound an error on the dashboard. You don't have to worry about this as long as there's always liquid above the feed hole at the bottom of the tank. Once the worst of the discoloured water had stopped draining, I then reconnected the return hose to the tank and added the coolant flush - I let this run through for 20-30 mins. Whilst the coolant flush is doing its thing, it's a good time to prepare the heater matrix for replacement by removing the glovebox, footwell vent, centre console side panels and heater matrix retaining clip. BodriG has a good video on this, along with the rest of the heater matrix replacement steps: https://youtu.be/oHfQ_27dDRM?si=Rnah_XBRDNAvrNV5 Once the coolant flush had done its thing, I reconnected the return hose to the rubber drain hose and continued draining the coolant into a bucket and topping up the coolant tank with tap water. After the coolant had started to run clear again, I turned off the car and installed the new coolant tank and heater matrix. Once I had replaced both items, I then continued the flushing process, except this time topping up the tank with distilled water. I kept 1 bottle of distilled water to the side for mixing with the coolant, and once I'd used up the fourth bottle of distilled water, I then used the coolant concentrate to top up the tank - using 4 litres from the 5 litre bottle. Once I'd put 4 litres of coolant into the car, I reconnected the return hose to the coolant tank, reattached all hose fixings, and all was done! I also poured the remaining distilled water into the remaining coolant concentrate, such that I now have a bottle of readymix coolant to top the car up if required (I used a bit of this readymix to top the tank up to its correct level after I reconnected the hoses) Cleaned up all the mess I had made, and now my car's heating is lovely and toasty warm on both sides. There are videos on YouTube which run through the processes as well.1 point
-
1 pointUpdate for anyone who is interested. I replaced the rear shocks with Bilstein B6's and it was clear the previous shock absorbers had gone. A very easy job and now the handling is much better. I have still got the front ones to do.1 point
-
1 pointA lot of garages do rely on diagnostics. My old one (sadly retired) took cars out for a spin as well as scanning. He always said theres still a lot of mechanical bits on a car that scanners cant check plus you get a better idea of what might be wrong especially if its a sporadic fault with no codes. Hope they send a decent mechanic out with it. Alasdair1 point
-
Glad you solved problem. I have seen a few diesel cars with rad cover. Used to have one on my old landrover as it took about 45mins plus to reach temp when cold in winter. Main reason was non electric fan Alasdair1 point
-
1 pointDont drop bonnet from high, use slov closing. High droping causes cracks on light.1 point
-
1 pointRemember these lights are over 20 years old now, and comparing to new lights now, they’ll always look dim. You can try and get some brighter ds2’s, but not LED’s if you’re in the UK as it will fail MOT. Orsam or Philips seem to be quite good. Also ensure the lights are clean, inside too. There is a guide somewhere on how to clean the inside but you must take care.1 point
-
1 pointVelvet Red is a good shade but costs extra here in NZ (along with the Orange), making it a rare choice. I have a Mk4 is this shade and it has stopped passers by commenting on the sharp looks when kept clean. We don't seem to have Space Violet yet as an option but I guess it will come through later. Just be careful that it may not prove popular as a used car choice, so resale value could be slightly impacted. As for options, the pano roof is recommended as the interior can be too dark for some tastes with a black headliner. Winter pack definitely (I presume your country spec is for heated front and rear seating and steering wheel?). DCC - do a test drive with the normal set up and see if you can live with it as the Mk4.5 sits a little lower and rides 19" wheels as standard. I've got it and swapped out the dealer opted 19" rims when they specced the car from the factory for the 18" Comets and the ride is less jarring over potholed streets. 35 - 40 mpg is definitelt doable in mixed driving - I get anything between 12 - 14 km/l. Enjoy your new ride.1 point
-
I have replaced my DSG thermostat this weekend and it has resolved my issues. I also got a grille cover as suggested by @Karpov and it's a perfect fit. I know we don't have arctic temperatures here, but every little helps.1 point
-
1 pointThat describes exactly what mine does. Another item for the warranty claim now.1 point
-
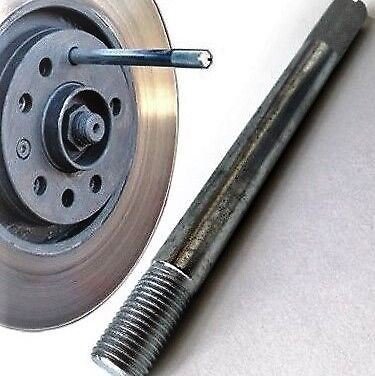
1 pointI've just remembered, VW use bloody silly wheel bolts, instead of wheel studs, five of them, so they can literally be a pian in the back (as well as a PITA, bloody stupid design) so I strongly suggest keeping in the boot and using guide/holding pin tool, well two of them is best, what Aldi, sorry, Audi, call an alignment tool. I got a set of (generic) two as per bottom photo from eBay, more expensive than some others available but seemed better made and material to me
 1 point
 -
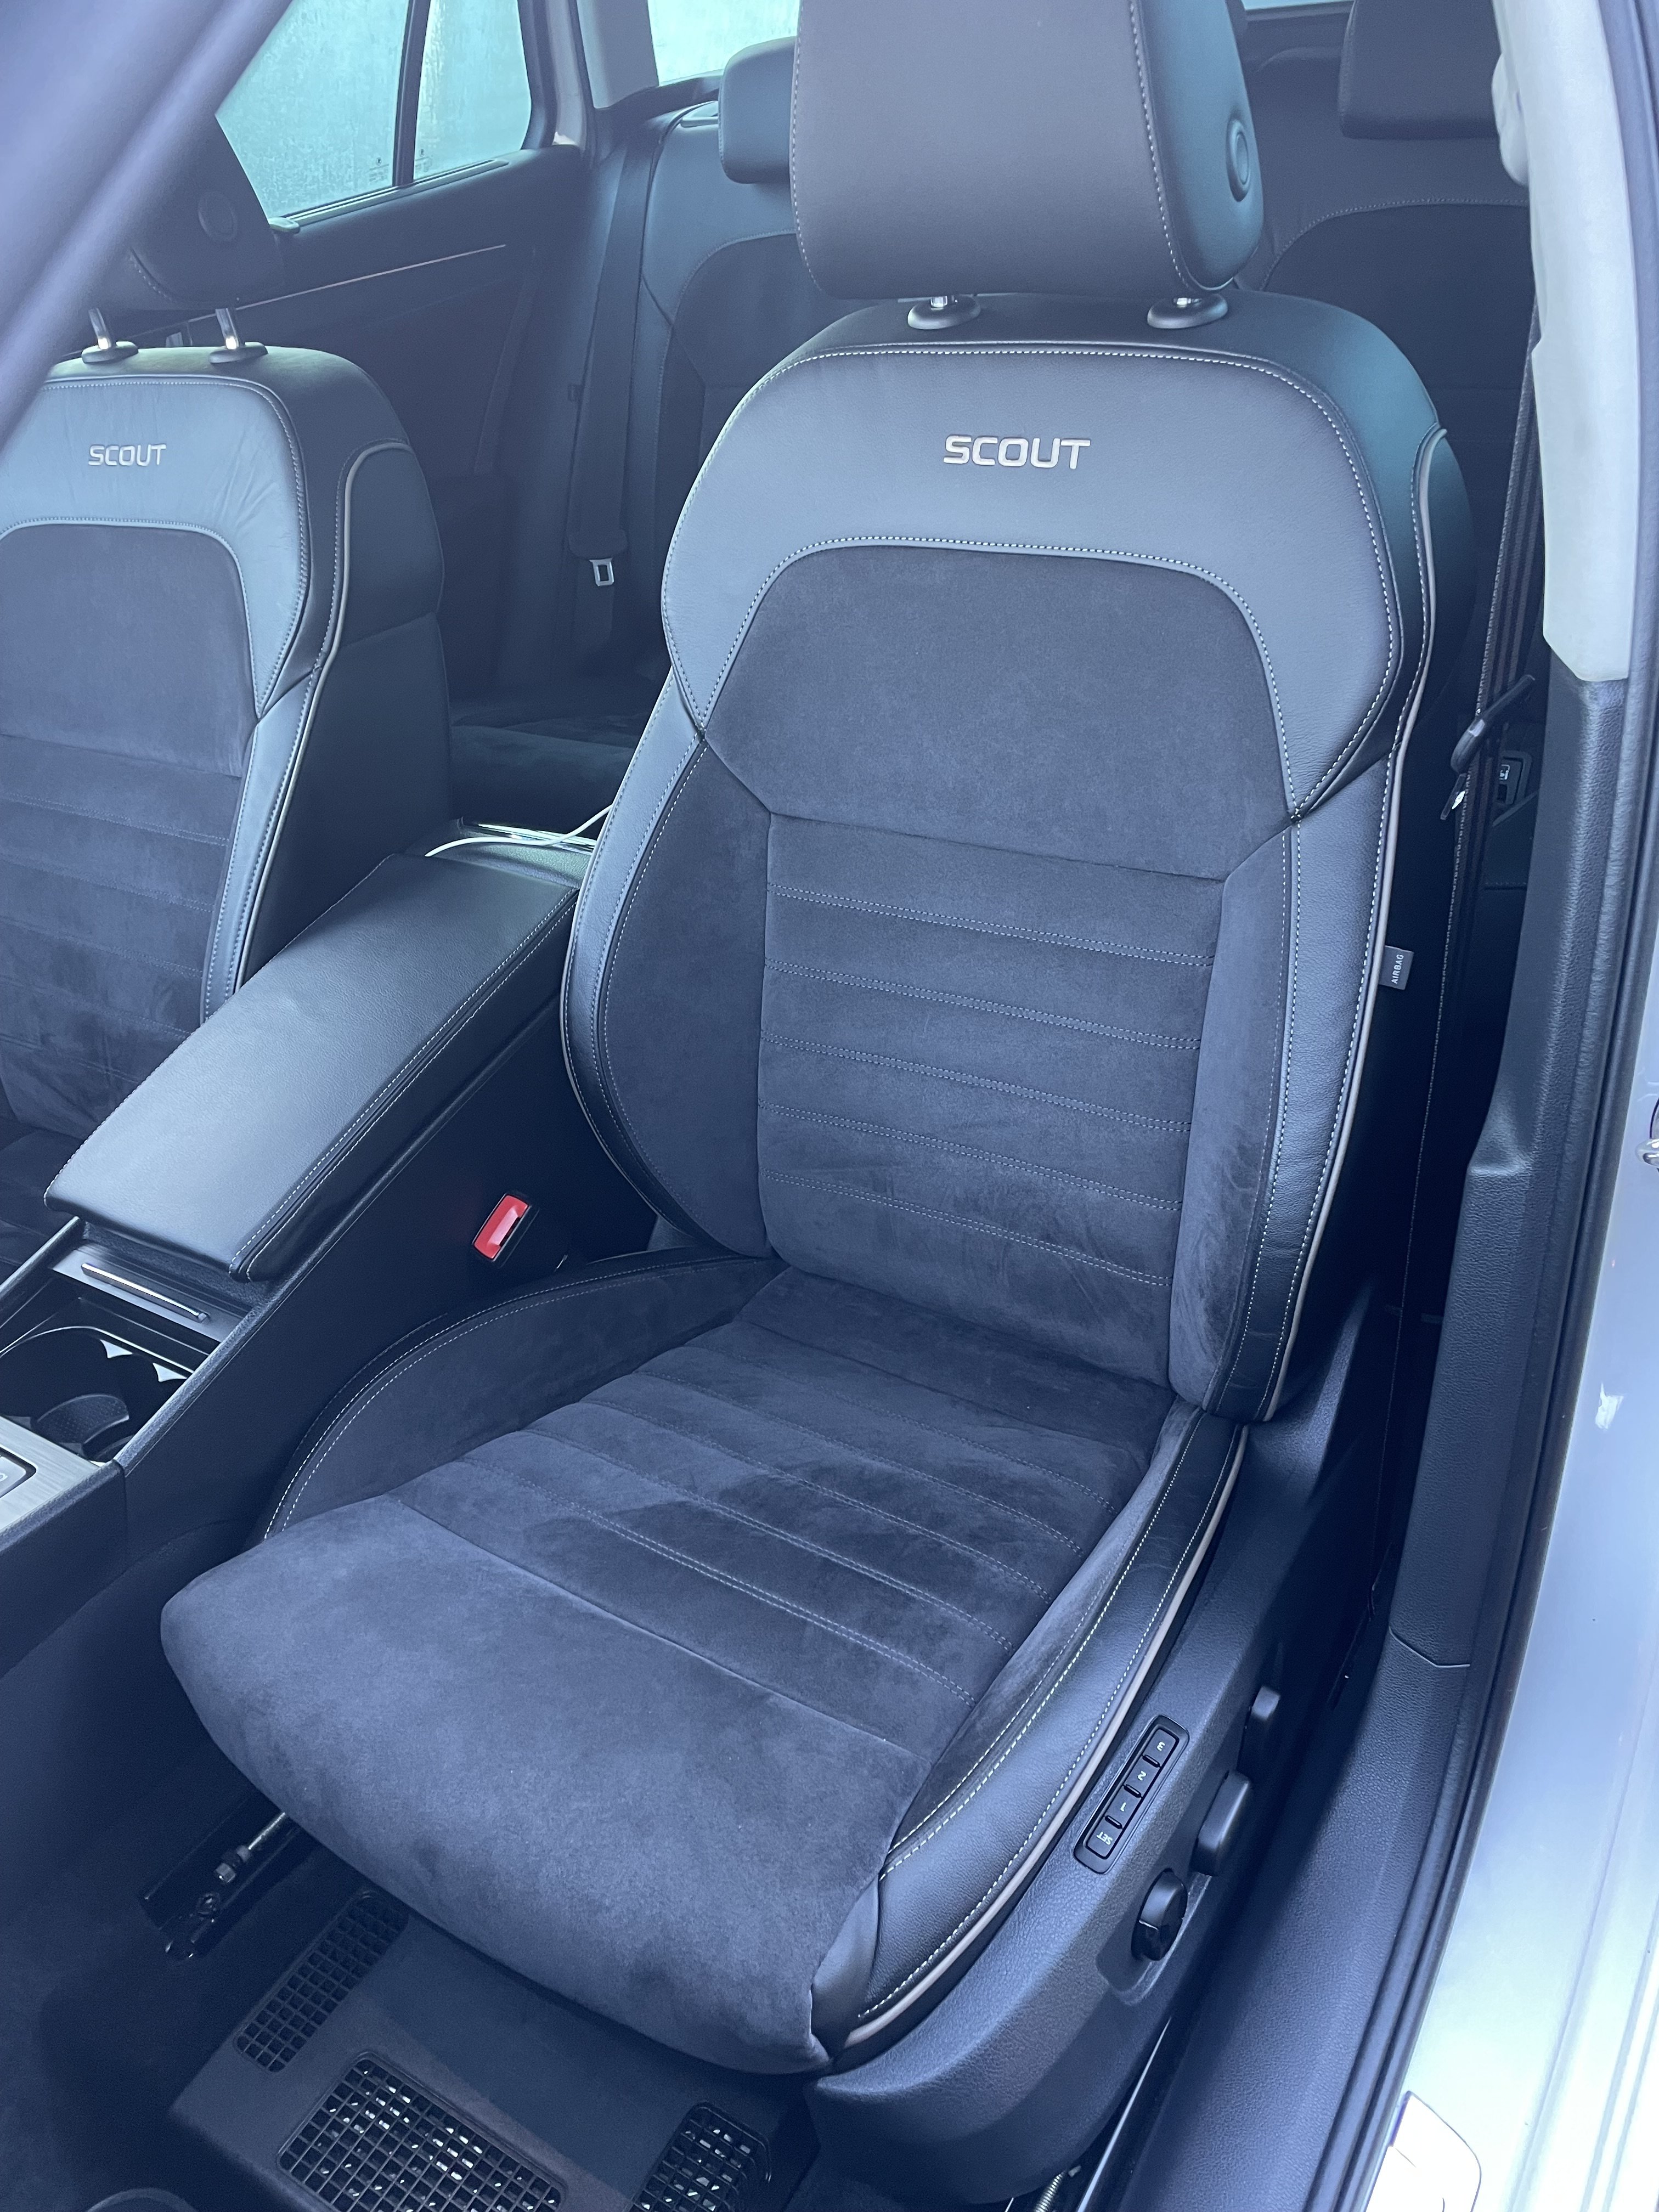
1 pointAnd here’s a better pic of the Scout specific passenger seat with electric memory.
 1 point
 -
1 pointVery nice! I like a lot the way the Scout looks, pity choices for interior and options made not possible for me to find a nice car. My L&K is loaded as I want it, and that it is. This said, I would not mind the extra ride height, topic upon which I will ponder shocks' replacement time, either by misting or when I will get fed up of the undersprung suspension. And I seriously envy the 'wood' Scout interior trim, instead of the awful cheap plasticky "piano black" trim on the L&K. That is another crazy mod idea ...1 point
-
1 pointMy mums fabia 4 one litre tsi (year 2024) skoda she bought from new. The brakes are so sensitive its insane. Can skoda reduce the sensitivity?1 point
-
1 pointEY's press release on 2026 on car sales in general. Think they have the trend wrong but an interesting opinion.... A response by EVangilist, as MacMaster would say, a strongly worded response and veiled accusations referencing Toyota etc , his vid below the EY extract. Be interest to hear what my Alma Mater "pwc" as well as Deloittes and KPMG are saying on the subject as well...... Half of global car buyers plan to choose internal combustion engines, a 13-point jump as electric vehicle demand softens Range anxiety, charging gaps and geopolitics fuel growing hesitation towards battery electric vehicles (BEV) Consumers prioritize essential connected features, with nearly four in ten citing high service costs as a barrier Global car buyers are putting the brakes on adoption of electric vehicles, with many shifting back to internal combustion engines (ICEs) and reassessing electric vehicle ownership, according to the new EY Mobility Consumer Index (MCI), a global survey examining sentiment and buying intent across major automotive markets. Global consumers driven back to ICE vehicles as EV enthus...LONDON, 9 DECEMBER 2025. Global car buyers are putting the brakes on adoption of electric vehicles, with many shifting back to internal combustion engines (ICEs) and reassessing electric vehicle owner1 point
-
1 pointI dunno, but I’d say it may have more to do with a certain “B” word leading to government decisions on trying to keep foreign procurement within the EU Zone. I know it’s caused us several pains in the arse with tendering for equipment and services that get awarded to UK suppliers. Even down to stupid stuff like the D&A urine test kits our CMO and random/post incident screening service use. Ended up with dozens of us having to be recalled for repeat testing because the samples being held in storage while a paperwork snafu - who’s paying the customs, us or the supplier? (Ultimately us, but directly or via the supplier on a re-charge..) - went on so long the samples were deemed compromised.1 point
-
1 pointI confirm that Fabia’s mk4 brakes (mine has rear disc brakes but don’t believe that it matters) in 1st contact it surprises with how hard and sharp brakes with barely reasonable/usual force on the pedal. Of course after a while you get used to it but in first contact or when you drive it after another car you always notice it and it takes a little driving time to adapt. I don't consider it a “problem” but it is something observable without me knowing or having bothered to find out what is causing it. Seems to me more like a choice of the vw engineers than anything else.1 point
-
1 pointMy 2024 Skoda Fabia SE L has drum rear brakes, but my 2009 Skoda Roomster has rear disc brakes. At low speed (walking pace) both cars will decelerate savagely if the brake pedal is depressed abruptly, but at higher speed the braking effect is reasonably linear and progressive. This seems perfectly reasonable to me and, as I'm picky about getting a comfortable and efficient driving position when I drive a vehicle (and don't drive wearing wellingtons or hob-nail boots) I have no difficulty braking gently in either car at low speeds. It's to be expected that the low speed braking abruptness will be accentuated if the car has stood for a while and surface rust has formed on the discs. As mentioned above, this should improve when the car has been driven for a while and the rust rubbed off. I'm very doubtful that replacing a Fabia mk4's front discs and/or brake pads on a like-for-like basis would tame down the abrupt low-speed braking. 'Track day' braking parts are available, but these are intended to cope with heavy braking from high speed, rather than alter low speed braking behaviour. I owned two VW Golf GTi Mk 1 cars that had appalling brakes. I replaced the pads and front brake discs (the rear brakes were drum-type) with 'competition' parts but to no avail. The lousy brakes were universally criticised by UK owners and were a consequence of VW's LHD to RHD conversion. The 'cure' came when a UK Golf specialist offered a conversion that moved the brake-servo from the car's left to the right. My wife's VW Polo Formel E also had brakes that required a very heavy brake-pedal pressure to stop the car quickly. This was because, when VW marketed RHD polos, they just dispensed with the brake servo!1 point
-
1 pointthanks both. yes lights go up and down on the igingition and I think without the sensor conncected up they would have rested in the right position but the MOT tester was insisting it wouldn't pass without it all working as it's supposed to. Thanks to Mike I got the sensor delivered from Czech. Friendly parts guy at Lookers Guildford confirmed the part number for the rod 1J0941285C and advised that the last one in the country is at Johnsons Stafford in case anyone else finds this post in the future and needs one they could try there. I ended up buying a 1J0941285D . new old stock from ebay which seems to be identical. We now have a MOT! 🎉1 point
-
Agree with @SteveTheElder that they were a bit of a mixed bunch, looking through the forums it appears to me that there were more issues with UK market cars than anywhere else for some reason. I know they are slightly different spec to the cars we get down at this end of the world, though a lot of the electronics are shared. Might just be perception vs reality though.... FWIW my vRS was new in early 2021 and apart from the occasional glitch with infotainment, usually something like a parking sensor warning that always goes away on restart it has been trouble free and a lovely car all round. I guess some glitching is to be expected as there are so many computers/modules that all have to talk to each other at some stage you're going to get a 'computer says no' situation. This is not exclusive to Skoda or VAG cars either to be fair, seems nearly all late model cars have the odd problem, just the nature of the beast IMO, just like every now and again your PC or phone will do something weird, but nearly always solved by turning it off and on again. I was watching Top Guns: Inside the RAF on TV last night and they had a situation where two Typhoons were scrambled to intercept some Russian planes straying to close to NATO airspace, and one of the Typhoons wouldn't power up, so the pilot had to leave it and use a spare jet. The RAF mechanics ended up resetting what they called a "flying computer" after the glitch which was an altitude mode dropout (fairly serious!), resolving the issue by simply "turning it off and on again". And this is a circa 100 million GBP aircraft.....1 point
-
Hi Joel, Thanks you made me laugh 😂 Never having to deal with Skoda, I can’t yet comment (and hope never to have the need to comment) on their Warranty. I can’t yet only hope it’s a pain free experience. Unfortunately after reading a couple of hundred posts on Superb’s, others don’t seem to think so 😳 However, as I normally treat all my goods and chattels well, I hope my experience will be smooth and long lasting 👍🏻 I am of course, not making any comment or criticism of anyone who has had issues 🤦♂️ John1 point
-
Thanks Xman, I will have a fresh look at it in early January. I might remove the rocker cover and drill a 10 mm hole bang in the centre of the oil filler neck obstruction so that a normal sized funnel would fit. That would solve the problem I think or use my electric oil pump and refill through the dip stick hole. I'll let you all know how I get on and I'll include a few pics for you. I'm working in Dubdee today so I'm going to pop into the VW workshop and ask the techs there how they do it. I'm working at Mazda which is right next door and oddly Mazda and VW share the same workshop. I will report back later this evening hopefully with news....1 point
-
1 pointCouple hundred bucks for registration and warrant is all. My one belonged to the “Brand Ambassador” as a demo car and has 6500km on the clock. I got it in this fully loaded spec for NZ$73k which is GB38k, so not sure how that compares? The new list price with the extras was NZ$83k The Scout has a *very* slight lift, some additional under-body protection and an “off road” mode in the drive select which is good for NZ roads. It also has the 7 speed wet-clutch DSG so I think is faster 0-60 than the equivalent year sportline which has the older 6 speed here.
 1 point


.thumb.jpg.f83a46b9b3c0d976b9dbffbb523c9874.jpg)