


Leaderboard
-
.jpg.1006585dfe4e2977315b67c3d642e37b.jpg)
Guest_
FREEDOM14Points83,824Posts -

Lee01
FREEDOM10Points36,160Posts -
MikeTheThinker
FREEDOM9Points8,481Posts -
Dupont
Finding my way9Points26Posts

.thumb.jpg.9dd3f612ba7f13d10be5c518d3c8d255.jpg)


Popular Content
Showing content with the highest reputation on 27/07/22 in all areas
-
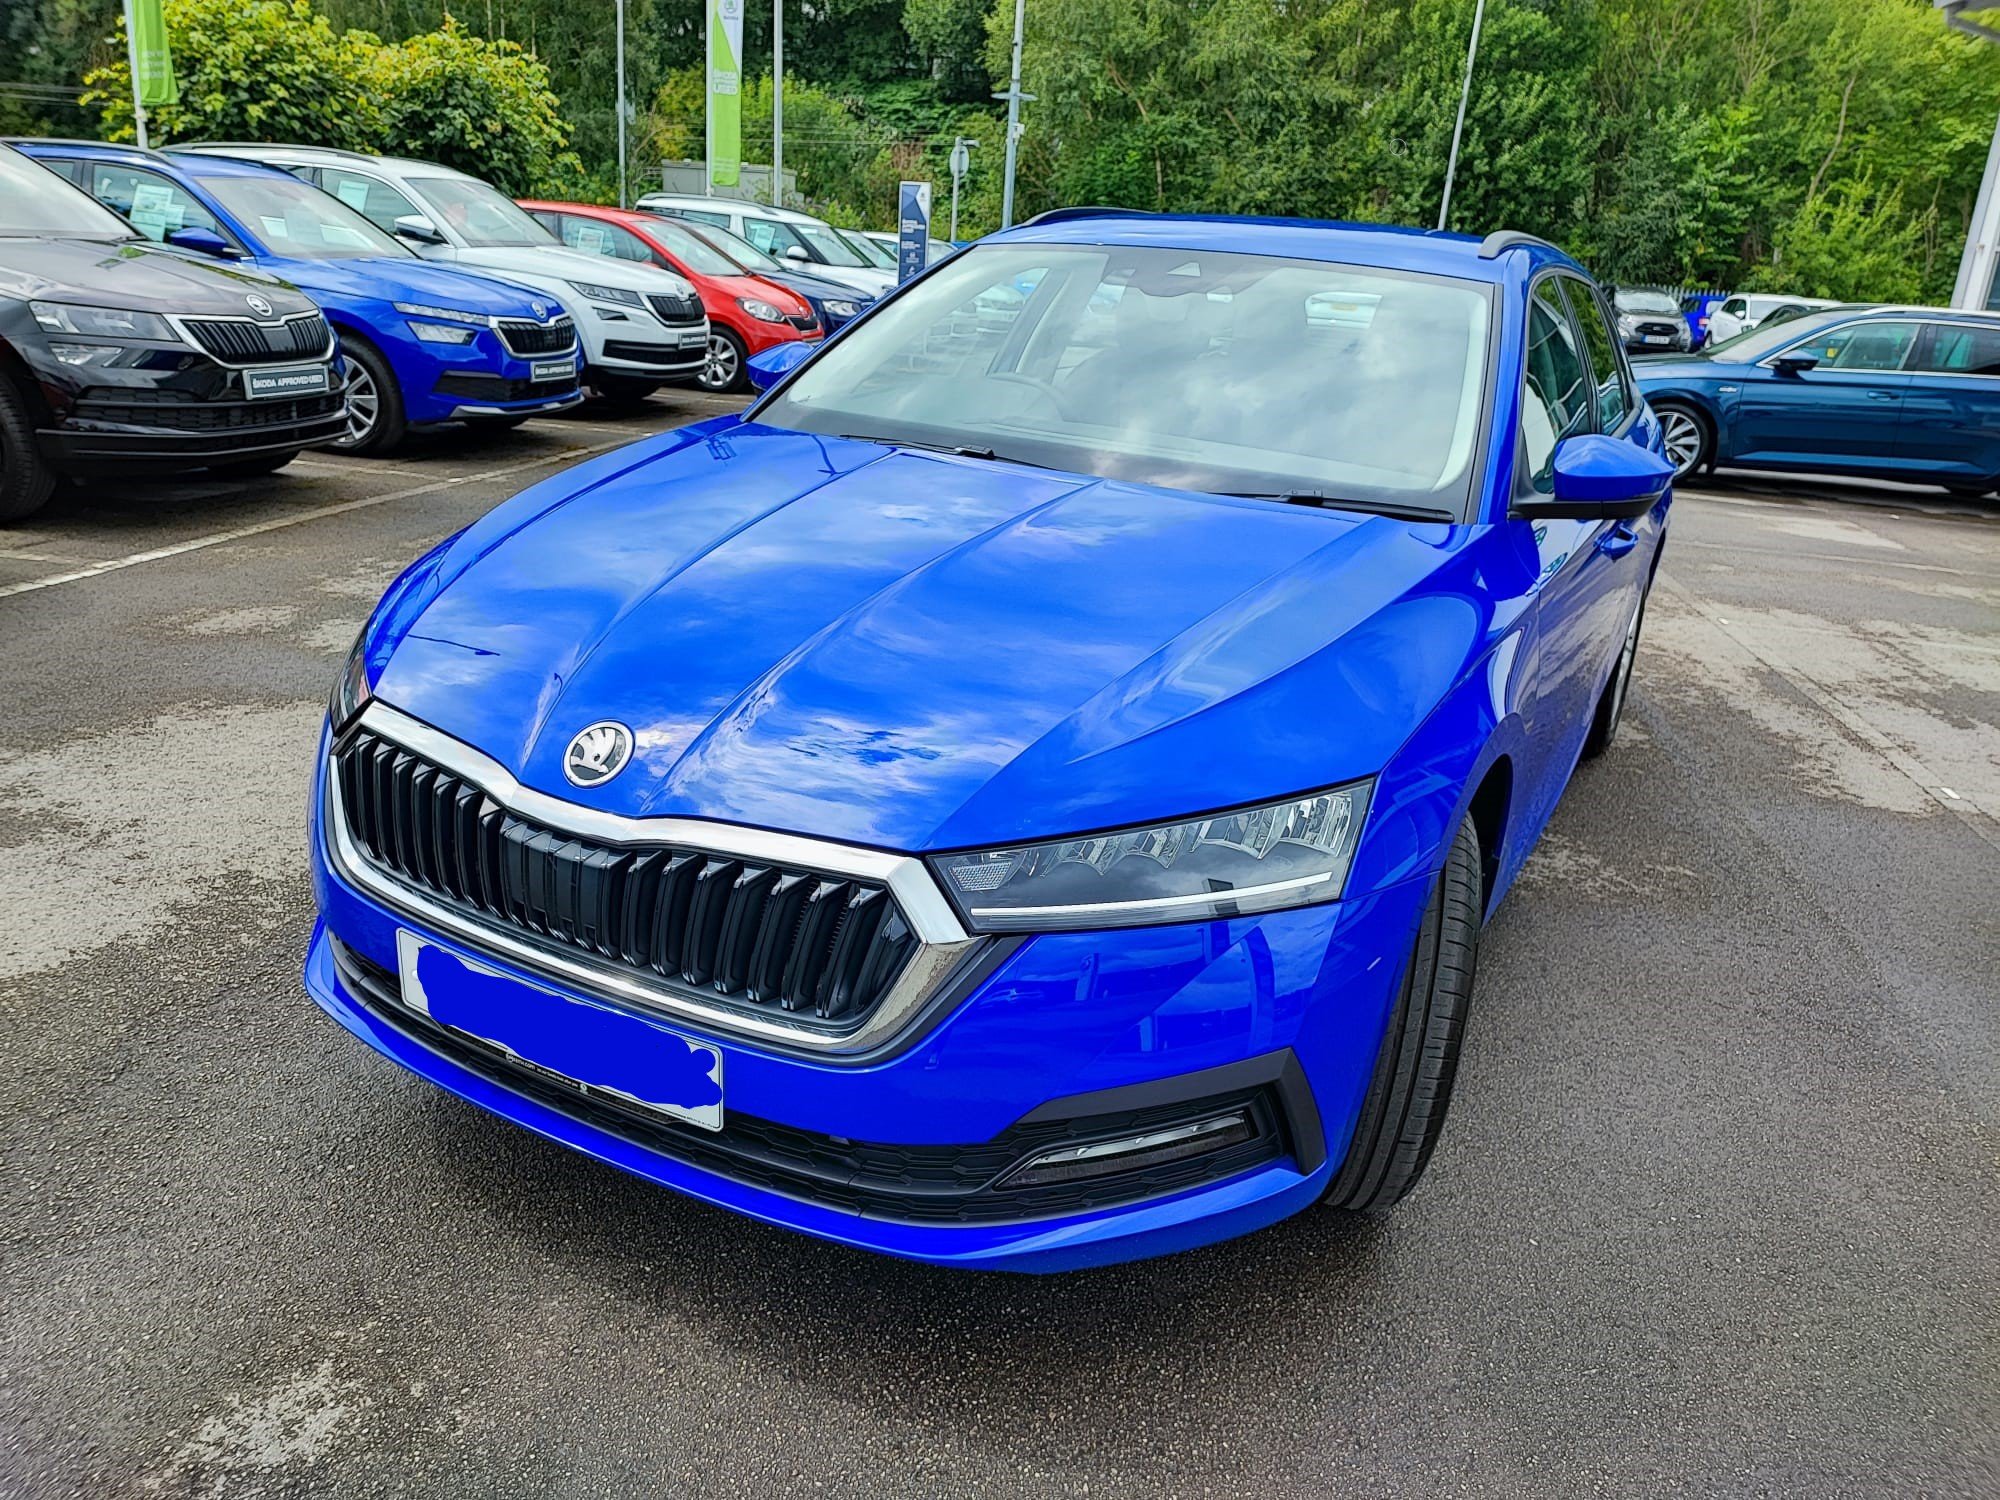
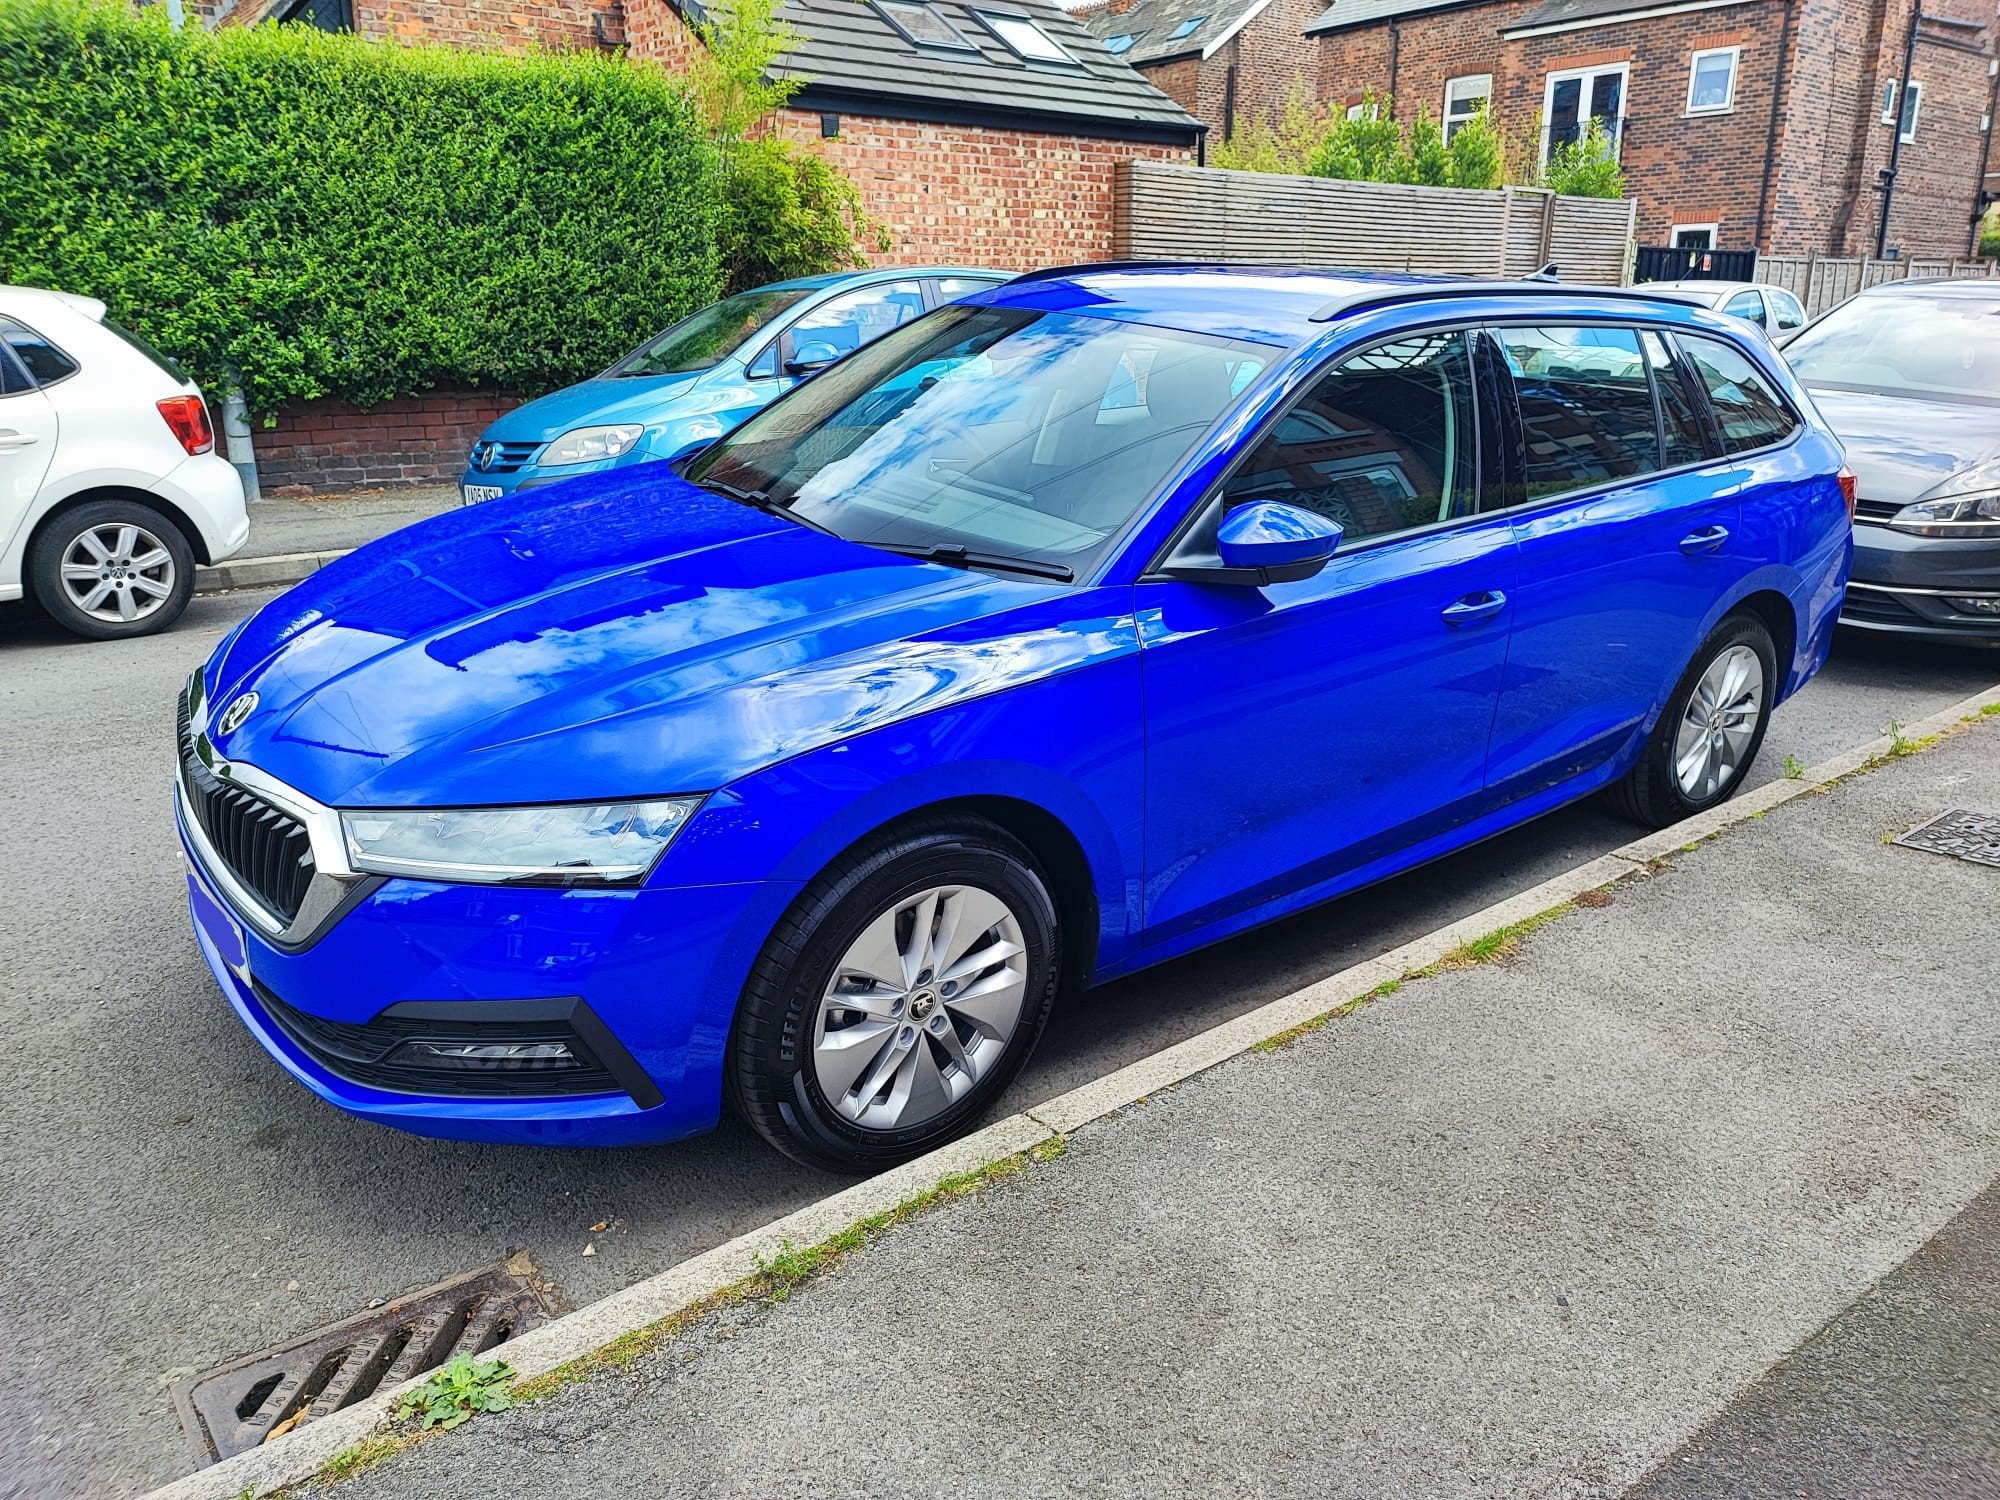
5 pointsCollected today and love it, love it, love it! I'll post in the pictures thread soon 🙂5 points
-
4 pointsSo funny for me seeing so many reek spec yokes not being able to keep up with my standard (ish) monte. So many 316d "M PERFORMANCE" around here with **** exhausts acting like they have M3s.4 points
-
4 pointsGot news today. My vRS iV has arrived at my country. Guestimate is that i might have it in two weeks.4 points
-
4 pointsgot my car today and done a 30 mile run on motorways and side roads with no problems at all.touch wood.now going to trawl through everything to get the settings i want.no dubt i will be asking how to do certain these because i am not up to speed with all of this high tech stuff.4 points
-
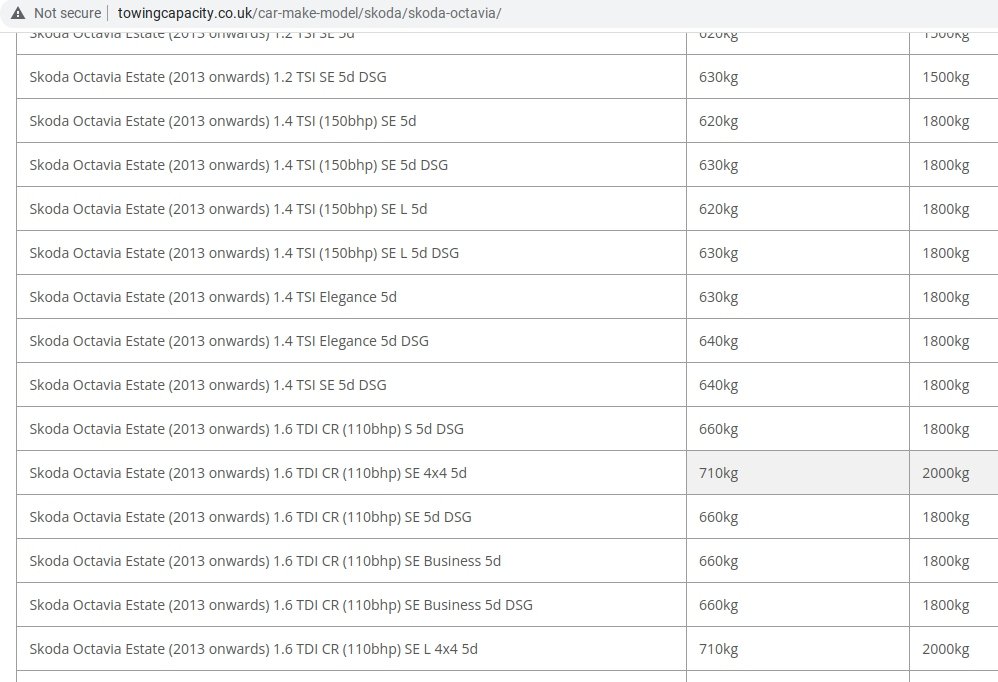
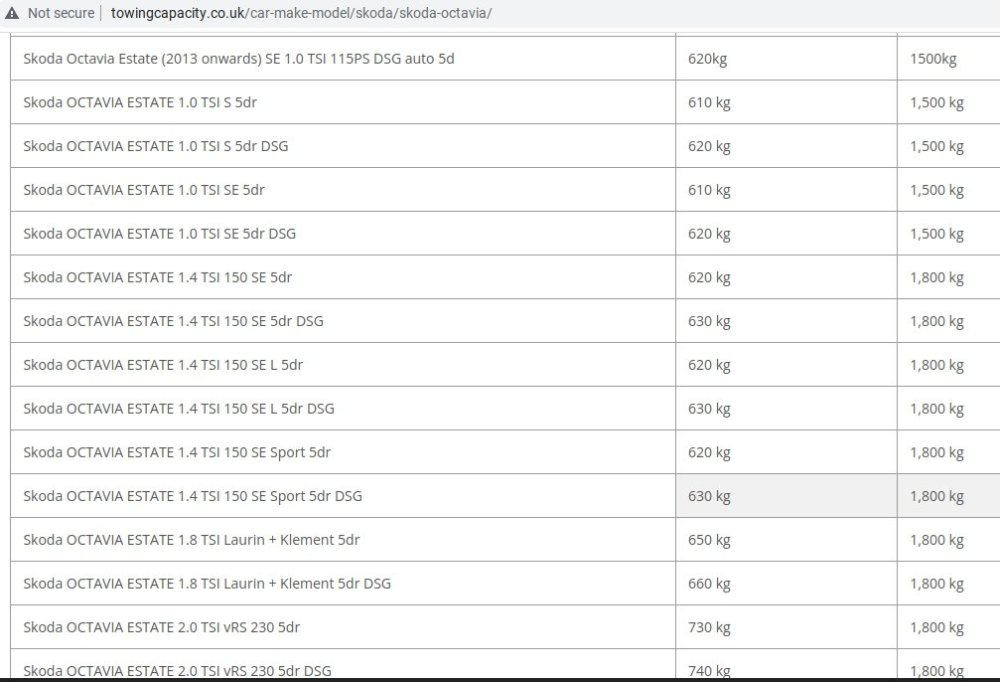
4 pointsI have inflated the caravan tyres to the correct 60 psi and have a nose weight of 75kg with all the heavier items in the van over the rear axle packed low down. Heavier item in car go over rear axle. The van is well serviced with new tyres.4 points
-
3 pointsI'm still getting overtaken by ****wits in Mk1 Fabias and Boras on smoke maps.3 points
-
3 pointsThe part number for the assembly (you can't just buy the broken bit) is 1K0 612 041 HQ if anyone's interested, a mere £42.20 inc VAT.3 points
-
3 points
-
3 points
-
2 pointsIf your car is anything like me, it's just having a moment at having to think too much.2 points
-
2 points
-
2 points****s in Silver Audi Estates coming towards you on your side of the road as well i would expect..2 points
-
2 pointsNever left around me It's still the done thing Seen Mk6 and 7 golfs with smoke maps.2 points
-
2 pointsThis is not a flippant answer but you need another battery as your replacement one wasn't any good. Lots of threads regarding this on here.2 points
-
Interested to see how he gets on when the next vid comes out.2 points
-
2 pointsHello all, I finally took delivery of my Scala SEL a few weeks ago - one year after placing the order! Ordered 16/7/21...delivered 8/7/22 😲 Very happy so far (although I'll be posting a few questions on the forums...). Steve.2 points
-
2 points
-
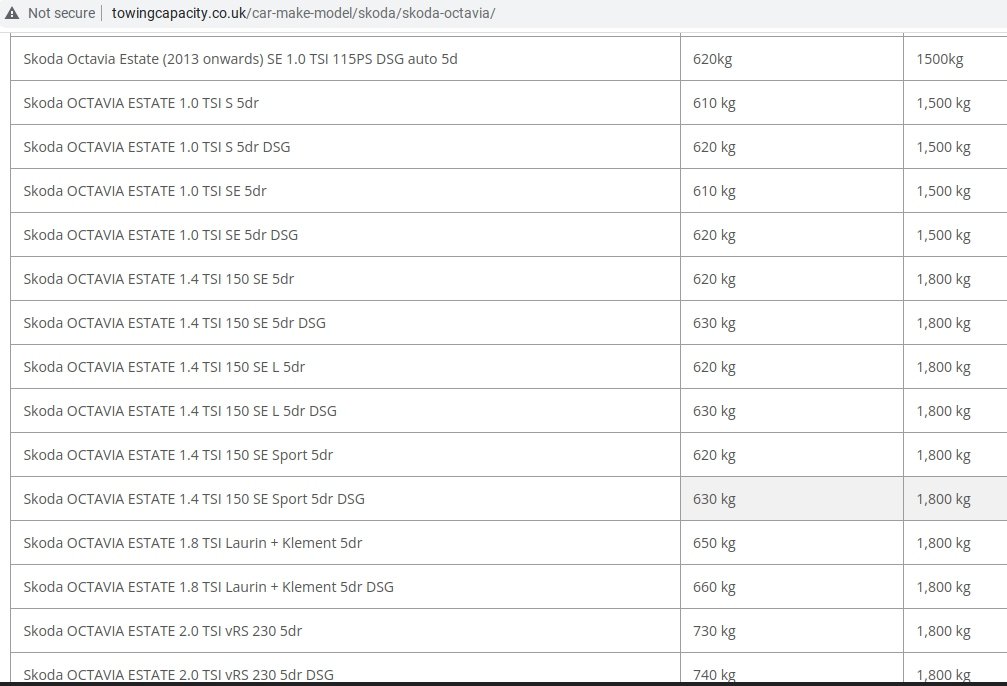
2 pointsIt is a single axle van. It is actually loaded up to about 1250kg and I would say my Octavia Estate is about 1600kg fully loaded. I will inflate the front tyres to 36psi as recommended and the rear to psi. Thanks.2 points
-
Sounds like the alternator/battery combo isn’t generating enough power at idle to me2 points
-
2 pointsDo not take out a poorly serviced caravan or one not checked including brakes and the tyres, tyres condition including the tyre wall you do not easily see but will when the wheels are off when checking the brakes. Be sure to have the tyre pressure on the trailer / caravan correct. Take care of all advice from anyone. Under inflated is an issue, over inflated can be an issue. You want to know the steering feels right, that the outfit feels stable, it is not about 'comfort'. check tyres are not over heating. Get the pressures right. that means having a good tyre pressure gauge and a means of inflating tyres. Know your cars weight loaded and what you are towing weight loaded. Know the nose weight. Know how to load the van. Take the outfit to the local weigh bridge, that is what they are there for. http://protyre.co.uk/car-help-advice/driving-tips/tyre-pressures-for-towing-a-caravan
 2 points
 -
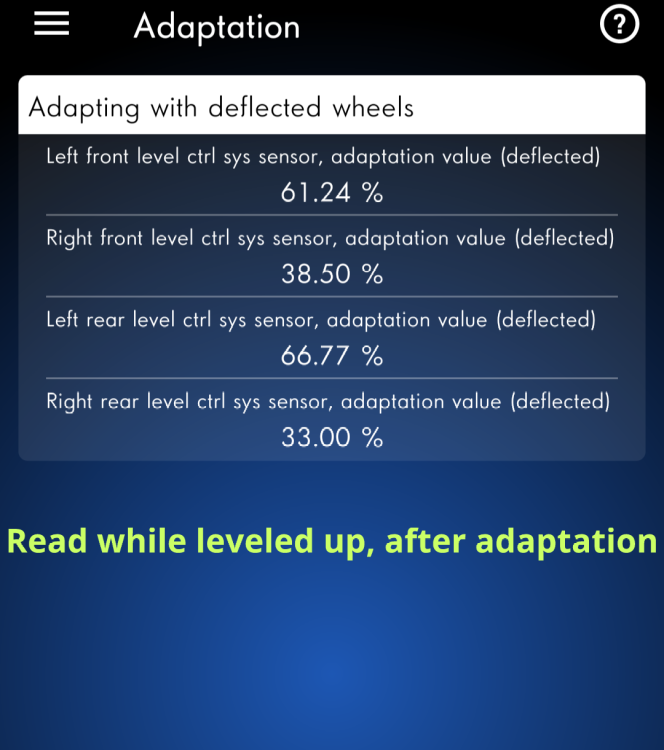
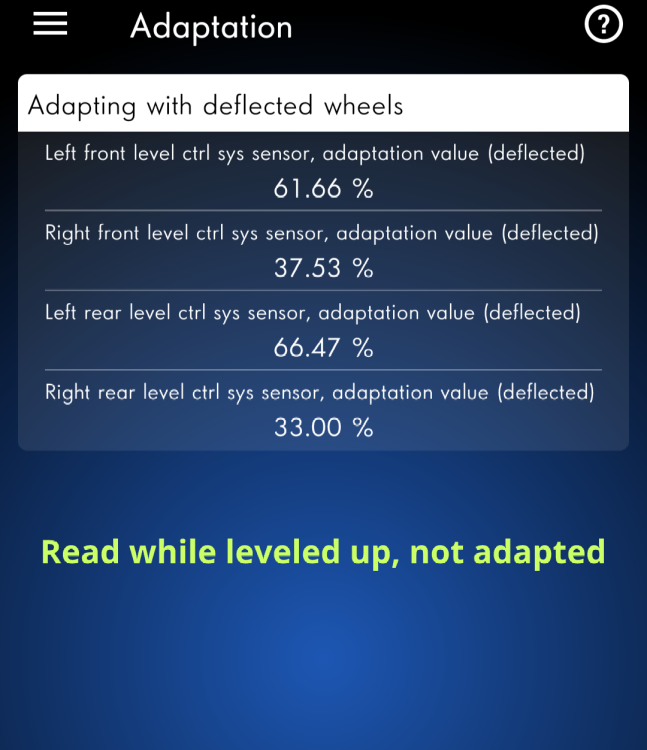
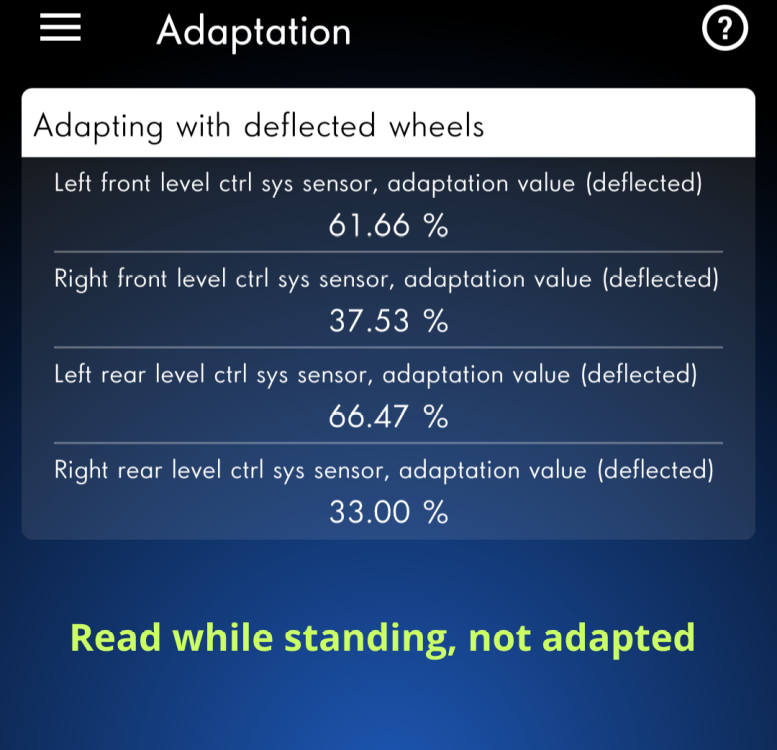
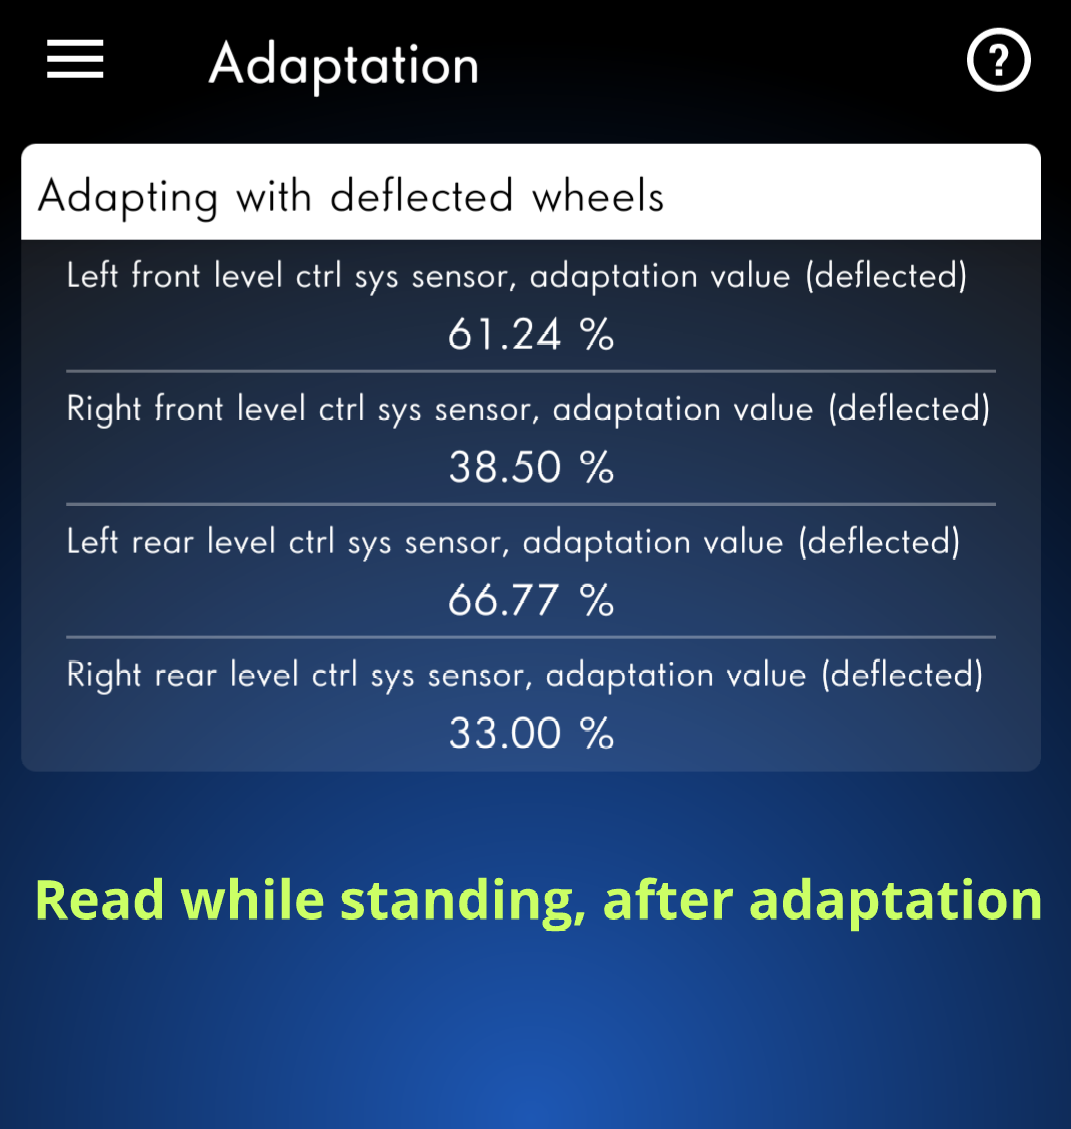
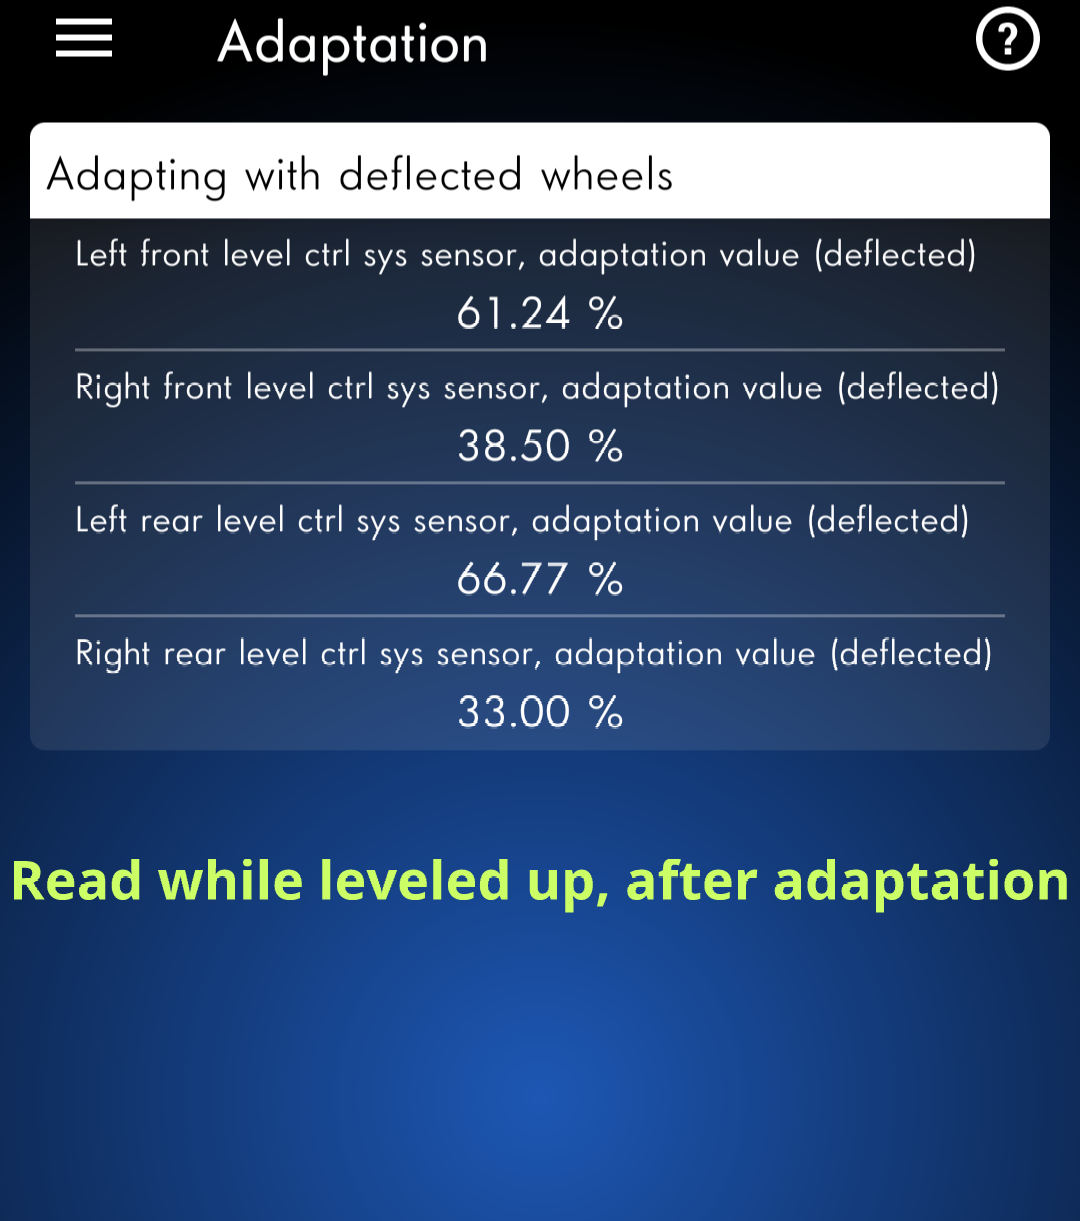
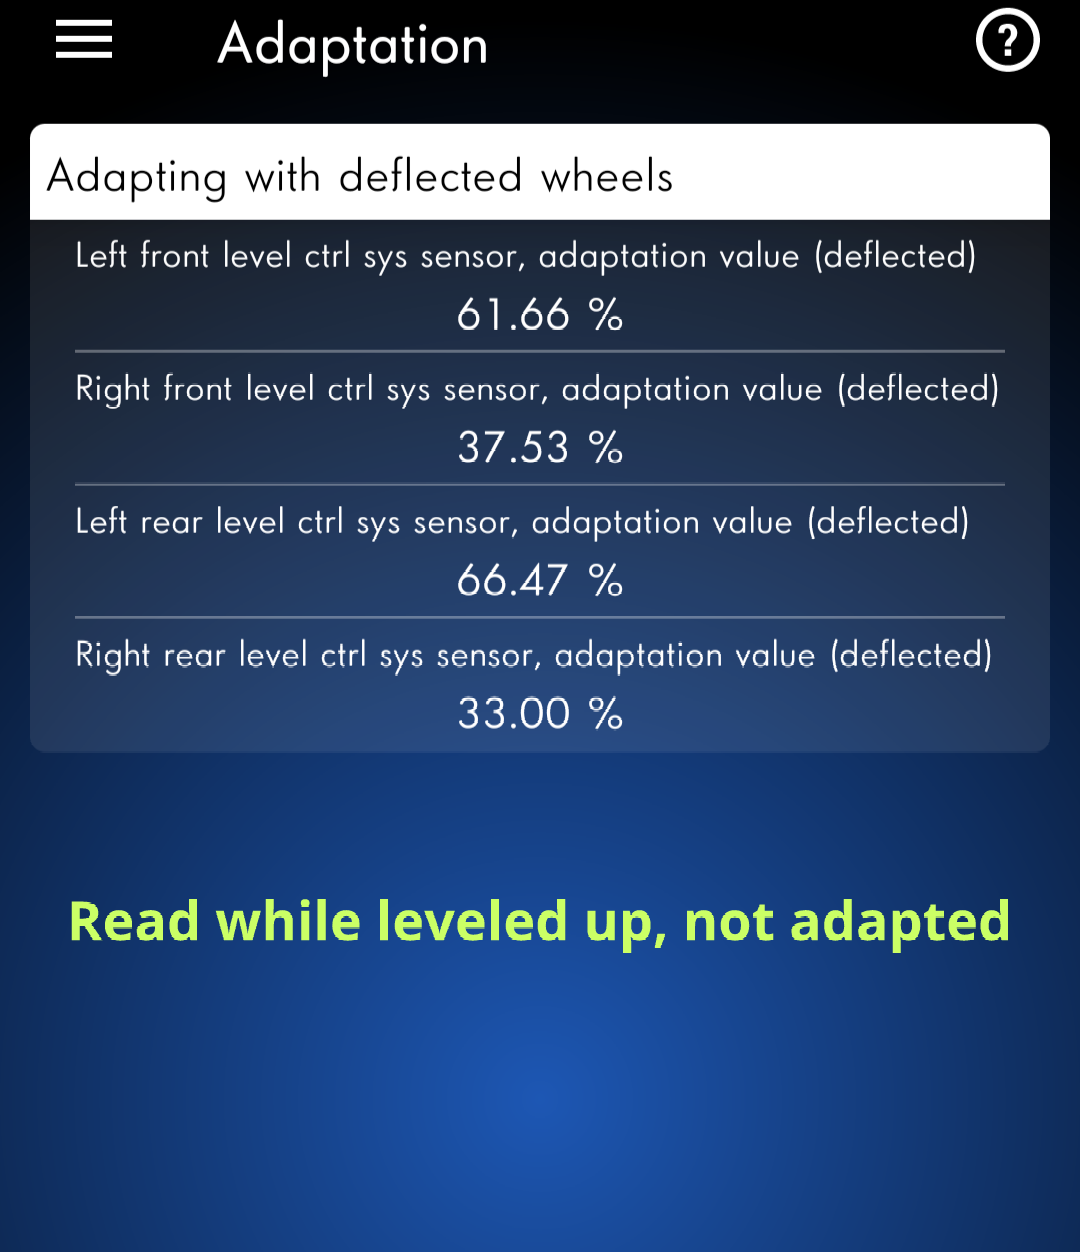
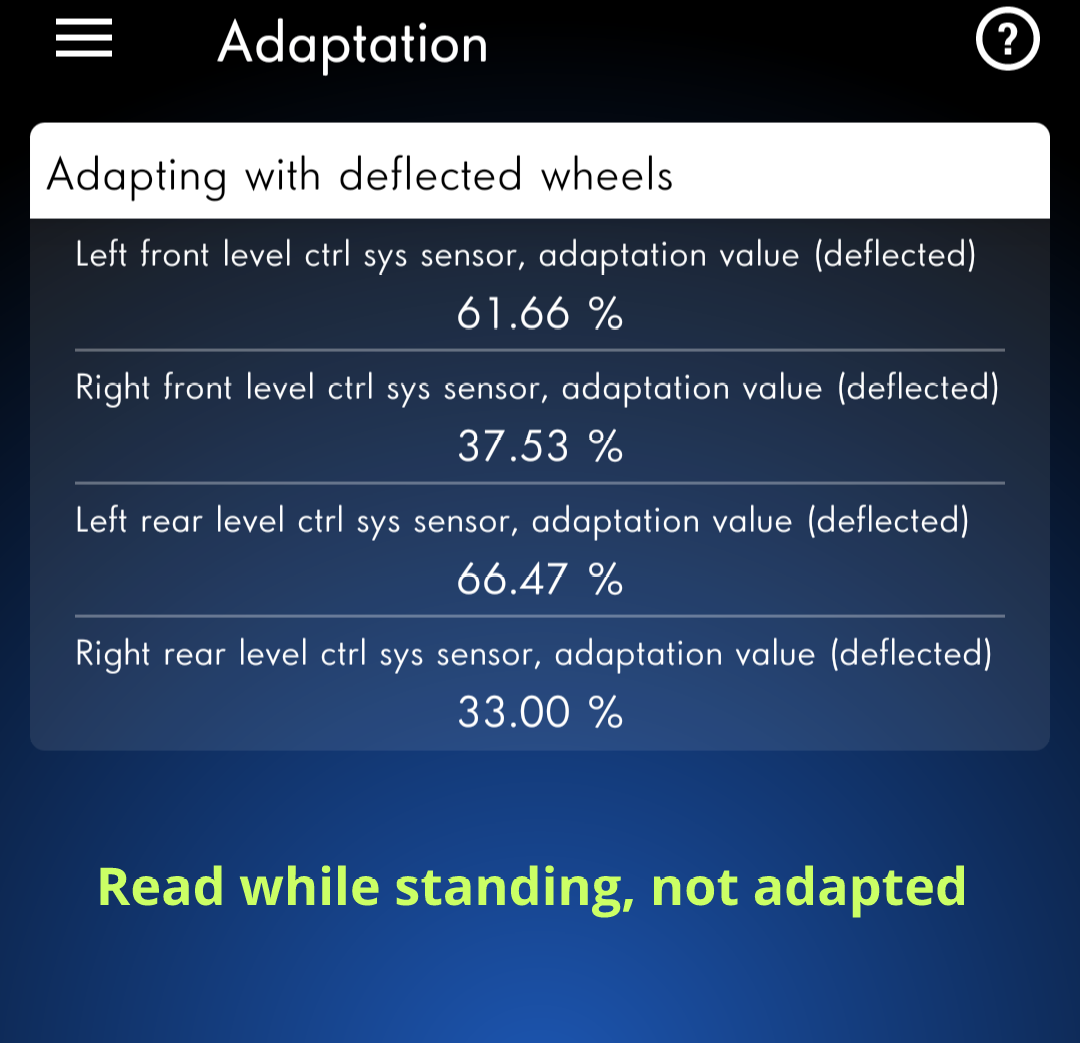
2 points@Stunner good to hear u were able to get the DCC recalibration done on urs, and its made a difference. with regards to the level sensors - there r only 3 sensors - front left/right and rear left. these r located next to the control arms. there is no rear right, which is why its deflected value doesn't change from 33%. the DCC shocks determine the voltage required (for the valve control) based on these 3x level control sensors. each DCC mode (comfort, normal, sport) has its own mapping algorithm, combined with the input values from the level sensors, to determine the dampening level. with regards to the "theory" behind how/why its done, this is the info i found:- The calibration is done with all four wheels off the ground, so the DCC module stores the fully extended value of the sensors. Once the car is back on the ground the DCC module stores a "center" value. This part doesn't require using any of the various coding tools so possibly the module learns this value over a few power cycles or maybe just the first time that it's back on the ground. From that point it's able to do its thing based on the position of the level sensors, the accelerometers and your selected mode. With recalibration done, the DCC module will interpret your lower ride height (from installing springs) as suspension compression, albeit mild, and slightly stiffen all four corners, at all times. Depending on the drop this might not be significant. DCC will only allow you to run calibration (basic settings) with the suspension fully extended. It will only run if the level sensors are in the proper range. They should be when the suspension is extended. You can check each sensor (front left/right and left rear) in measuring blocks for a value that says calibration available (or something like that). It will say possible or not possible. All three need to say possible or else the basic settings won't run. Just because all the wheels are off the ground doesn't mean the values are within limits. it is necessary that the raw values are between the limits 1 and the limits 2 in rebound for each wheel except rear right which does not have a level sensor I don't know the actual full range for the sensors but let's call it 0 - 100. The DCC module expects each sensor to be within a certain range (with the wheels hanging) in order to perform the basic settings (calibration). As an example, let's say it expects a value between 20 - 40. If any sensor is not in that range it will not perform the calibration. In this example all of the sensor should read between 20 - 40 when the wheels are hanging. But if a sensor is broken (could be bent, broken, internally failed, wiring issue, improperly mounted, whatever) it may read a value that is out of that range. Having much shorter suspension (say coil overs set to their lowest) could also cause the value to be out of range (shorter strut means lower control arm doesn't hang down as far). So if the arm of the left front sensor on this example car was bent, it may read a value of 45 with the wheels hanging. That is out of the expected range, so calibration will not work.2 points
-
2 pointsI think it wise to follow the manual's recommendations and resist the temptation to lower pressure even if it feels 'wrong'. The Octavia is a relatively light vehicle (less so if you have diesel and awd version) so a 1300kg towing weight on the back is compromising performance but I am sure you are aware of the potential risks and drive accordingly. I'm presuming the caravan is a single axle unit with simple sliding mechanism activating drum brakes. The brakes are essential but they do have their limitations and their effectiveness can easily be compromised by water ingress, overheating or even irregular servicing. In the event of an emergency braking situation there are all sorts of unusual forces being exerted on the rear of the vehicle (effecting both front and rear tyres) with excessive thrust and downforce on the towbar the extent of which will depend on a number of factors including caravan centre of gravity, its braking system efficiency and road gradient. In the worst situation you will need the recommended high car tyre pressures to resist tyre deformation and consequent compromised tyre/road contact that could eventuate from heavy braking loads. I'll repeat what I posted in another tyre pressure topic: You don't wear seatbelts for the comfort or convenience but for when things go drastically wrong and I consider this is a similar situation and personally I would go for safety over comfort tyre pressures.2 points
-
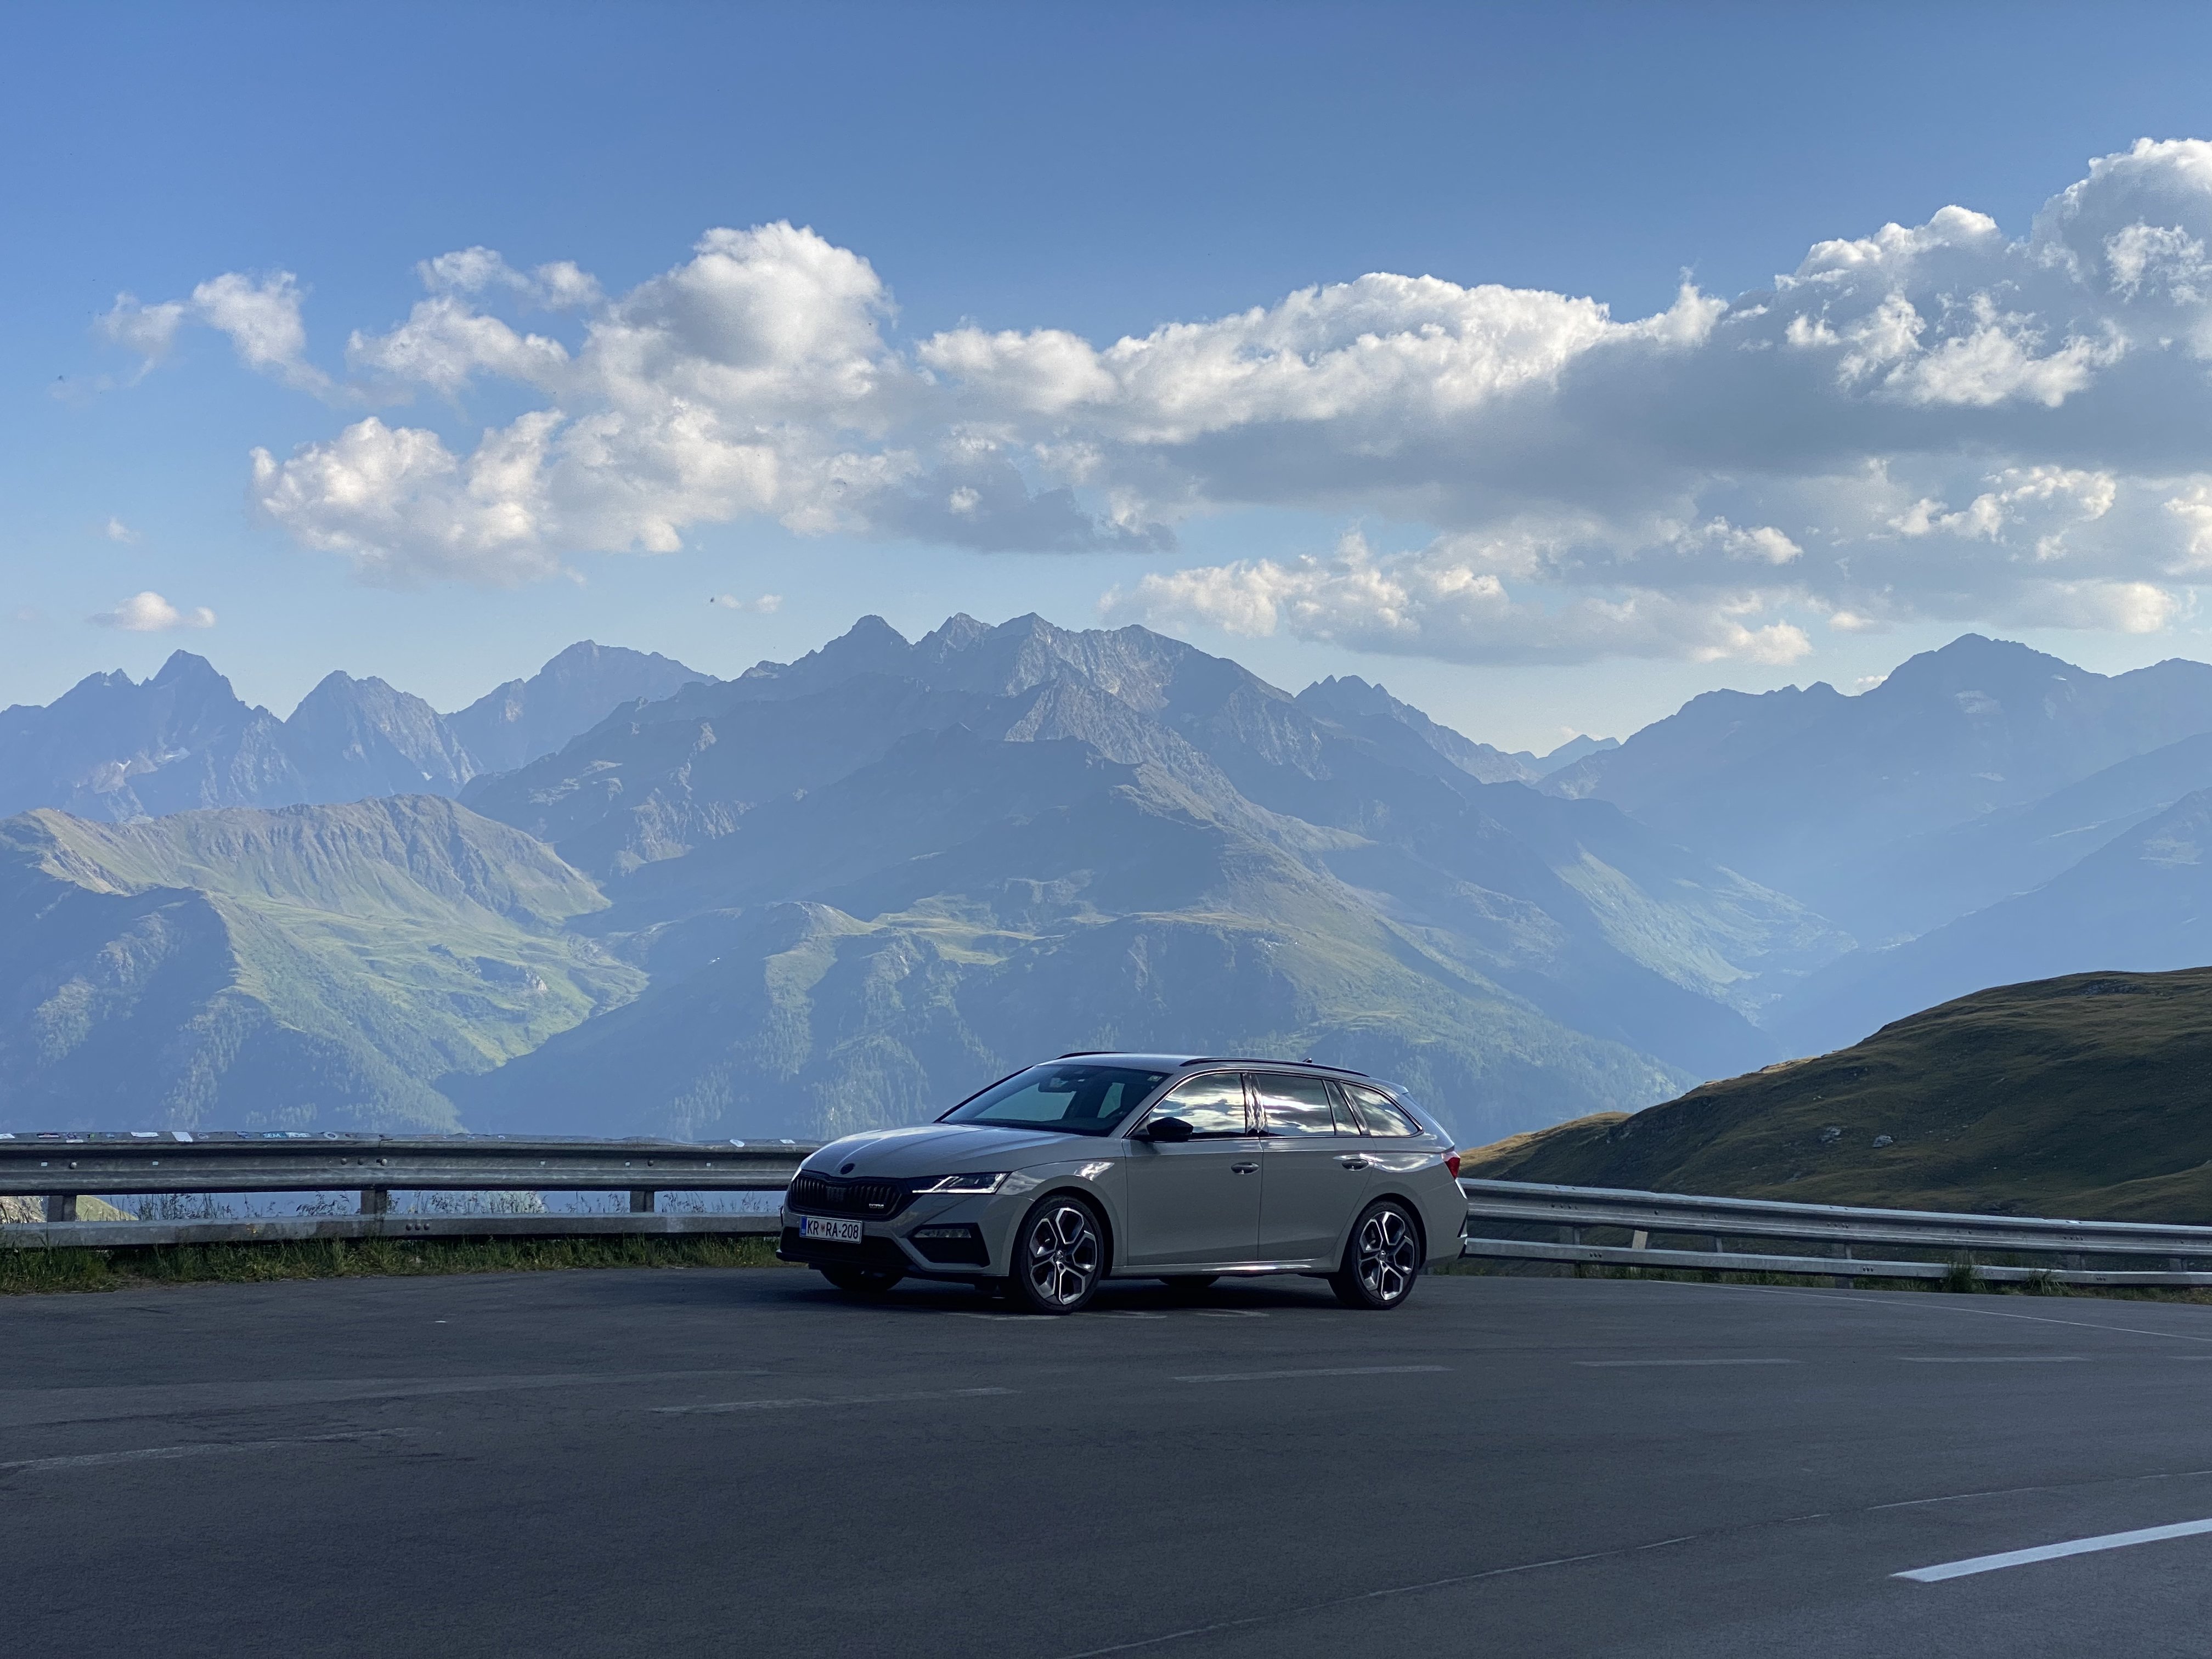
2 pointsDid completed re-calibration today. So here long feedback comes. It was required because packed totally new OEM DCC set (shock absorbers, coil springs, repair mounting kit, anti roll bar links and bushes) that becuase fabric ones dead with oil blow after c.a. 150000km.... recommend using comfort mode moderately or not at high speed to avoid drastic drops... Is what mechanic said🤷♂️ Also found interesting thing, the % values in Adaptation: Adapting with deflected wheels, are stored fixed, logic not(?))), but how Understood that, was to measure them 4 time, with and without adapted - while leveled up and standing. (Attached pics) That values are stored as base, which will reflect on power delivery adjustment when changing different DCC modes, this can be checked while running live test with sensors and drive. Seems like rear right use default values making others reflect on it, maybe because fuel tank position, that sensor also shows available while others not possible in live data info, and it will not change after recalibration, or different way stored or somthing still to learn. So, after adaptation, already made couple hundred km on highway, as well urban routes, same day))).. There is difference YES even with OEM new pack, but many people saying/thinking see no issue no need to, so it's a big big miss if use low spring and not recalibrate !!! As you can see on pics small % diferences but it results in more clearance and soft Comfort mode, while Normal mode has much predictions mean becomes ideal option, for the Sport gained even more hardness controll. After discussion with dealer, they communicated that DCC calibration must be completed after any suspension works, and no way to use it without because reflects on wheel alignment (front / rear), ACC and lights too, all together to be adjusted, not cheap at all, but then you get the right feeling. The DCC recalibration may be required twice, because when aligning steering/wheels the arms will push a bit the whole construction at least on rear side, so it's a complex procedure of couple hours, then having wheel aligned and DCC calibrated, it's time to proceed with beam lights and ACC adjustment. Good if found a shop with all tools, else run across city, usually only dealer will have all this at one place.

 2 points
 -
2 points
-
Hello guys, I've been a long time lurker, but am a first time poster, simply because i didn't have any interesting content to post before. Now we have a few interesting projects on the go, so hopefully I can share some of my learning with everyone here. I'm going to split my first post into 2 parts, 1. Mods already completed 2. Mods currently underway ( 2L swap and build) I'm from India and we only got the EA888 Gen3 Skoda Superb in the 1.8 TSI configuration ( I believe Golf GTI), paired with the DQ200 box which is known to **** itself at the slightest hint of torque. After a few months of abuse with an IS20 turbo (stock is12) the gearbox started to show signs of giving up. We swapped this box out for a DQ250 from a Skoda Octavia. Parts needed were 1. Transmission 2. DQ 250 connector 3. Flywheel 4. Starter motor 5. Aux cooling pump and kya plumbing 6. Transmission Mount. 7. Shift linkage 8. Stub axles After studying the wiring diagrams of both cars, we cut the stock connector and solder in the new one, in hind sight i would have liked to make a patch harness, but at the time I could not find a DQ200 male connector. Once installed, ofcourse the car was not happy with me and threw a whole host of errors and refused to come out of neutral. We connected ODIS and were able to adapt the immobilizer on the transmission to the car, and all seemed again. Took the car out for a drive and everything went without incident. Fast forward a few weeks , the IS20 now started feeling slow, and since we were no longer torque limited, why not swap out for an IS38? IS38 turbo swap done and then onto a custom tuning session on the dyno, with the 2.0 TSI is38 as a benchmark. Although the numbers were good, the torque and power loss due to the slightly lower displacement is quite significant, and something that irritated us. We decided to think of the next step, and in the mean while drove the car as is, and added more parts, a full list is on the link below. http://instagr.am/p/CLOhEfgAhjb/ Ofcourse after a few months, the itch for an upgrade bit again, and the next logical route was the 2.5L DAZA from an RS3. Due to some issues in the import process and a few other issues we lost some money and the parts , and the dream of the DAZA will remain a dream for now... What's the next best thing we can do? It was obvious we had to go bigger, but how? For the time being we decided to swap out the 1.8 tsi for a 2.0 tsi crate motor, the swap was relatively easy and cost approximately 9k GBP to do. Parts needed 1. CHHA base engine 2. 2.0 TSI DI injectors 3. 2.0 TSI HPFP 4. All single time use gaskets etc as we were retaining the old thermostat, oil coolers, and all ancillaries. The installation was relatively straight forward as half of the work had already been taken care of during the dq250 swap, ie the flywheel, transmission etc. We had the old 1.8tsi out and the new 2.0 tsi, with all the old ancillaries in the same day. Fired it up just to make sure, and it started. Great news! We the decided what direction to take with the software side of things. One was was to just tune the 1.8 and make up for the changes , but that would be crude and never perfect. Also we wanted to run APR software, so that made it impossible.... Second way was to truly make the car believe it was no longer a 1.8 TSI Skoda Superb, rather a 2.0 tsi Skoda Superb. We took te software number from a Skoda Octavia RS that we are familiar with and flashed the frf with ODIS. Flash successful, all great! WRONG! While the flash was successful, the car refused to start, and was immobilisd. Strange we thought, but tried to adapt immo line, however it then struck us what has happened. The instrument Cluster and the Engine Ecu contain PowerClass data, it is imperative for both of these to match, on order for the car to work. We ofcourse had the wrong data on the engine ECU, and hence no start. Scratched our heads a bit and then remembered a question i had asked a long time ago to someone who make immo off solutions for the SIMOS18 ecus. They told me they can run the engine on a test bench, without any other modules connected, this got me thinking, surely there is a way to run with mismatched powerclass. I opened the ecu and read the factory file in boot mode. A friend helped me "adapt" the immo in the ecu, so it would ignore the powerclass, but still be active so nobody can steal the car with a dodgy key. Flashed this adapted file onto the ecu and viola we have the first and only Gen3 2.0 Superb running in the country. We took it for a drive and instantly got crazy short term fuel trim. While we had suspected the DI injectors would not be the same between 1.8 and 2.0, they were from the same Bosch family, so assumed it would work, however, rather than try again and depending on fuel trim and risking a brand new engine, we decided to order the correct injectors. The 7 day wait for injectors seemed like months, but finally the new injectors were here and a quick swap later we were out for a test drive. The car was totally transformed, i know it's hard to believe but what a difference those 180 odd cc can make, but believe me ,it's a lot! Next was to put the IS38 turbo back on and flash the corresponding APR tune. 380 HP and 501 NM, not bad for a Skoda Superb Ofcourse the thing with an itch is.... The more you scratch it, the bigger it gets, so we already have the next upgrade thought of, parts are in transit and should be a VERY interesting build, definitely the only one in my country, and probably under a hand full abroad as well, as when i was doing my research, nobody seemed to have all the answers to my questions http://instagr.am/p/CdL7Ho9N_be/1 point
-
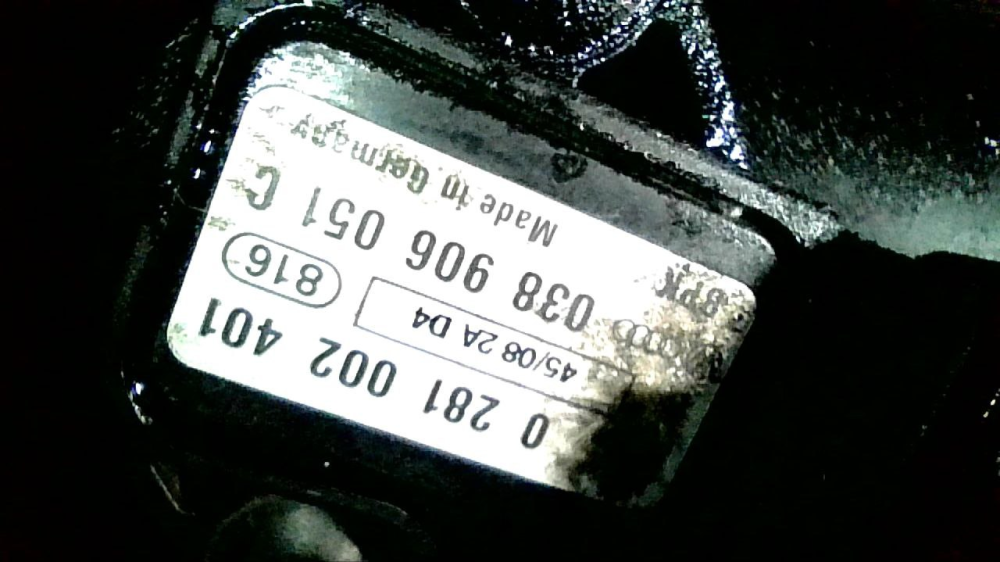
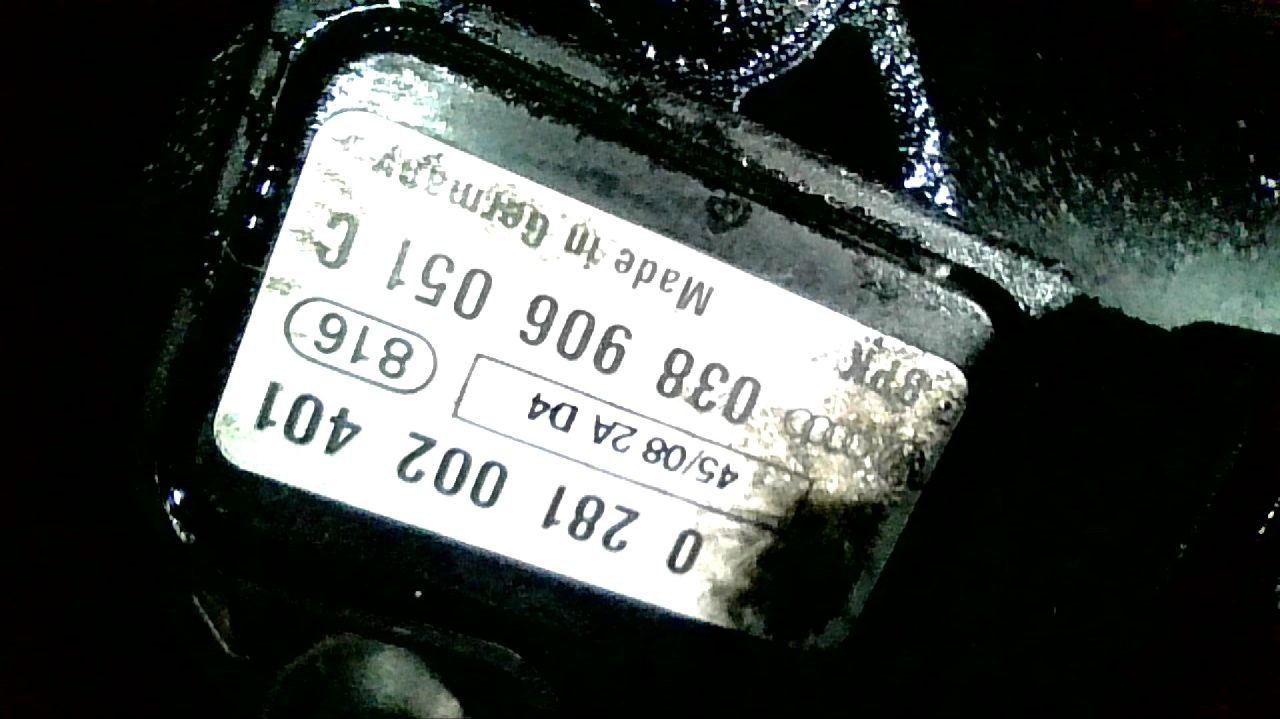
Thanks for the reply. I only could use the compressed air nozzle from a good distance, so I hope I did not cause any damage. Good to know in case I ever need to clean the sensor again once this is sorted. I did read some info regarding that the MAP sensor is a two in one sensor on some engines and just a pressure sensor on other engines, thanks for clarifying that. Even taking the connector off is tricky, I suppose I could try to press on the plastic clip with a screwdriver to release the connector, and then gently tug on the loom to get the connector off. I'll give it a go tomorrow. Thanks for the reply. I can't get the exact voltage from the odb2 reader and the Car Scanner app, but I am able to view the calculated (expected) pressure and the real pressure. This morning the car was giving good readings when I was revving the engine on park, and then all of a sudden it started consistently giving around +0.3 bar even on idle. So something's going on there. The log has got loads of errors (seemingly non engine related) and is a bit confusing to read, but I'll clear all the errors tomorrow, re-scan it and post the log. You gave me an idea, I could try wiggle the loom with the engine running and see if the reading changes at all. By the way, I've ordered an exact replacement part. I had to put an endoscope camera in there to see which model the sensor is, and the label was completely covered with oily dirt. I've crumpled up a paper towel, soaked it with an electronics cleaner and put it in a pick-up tool/claw thing and managed to clean the label just enough to read the part number.
 1 point
 -
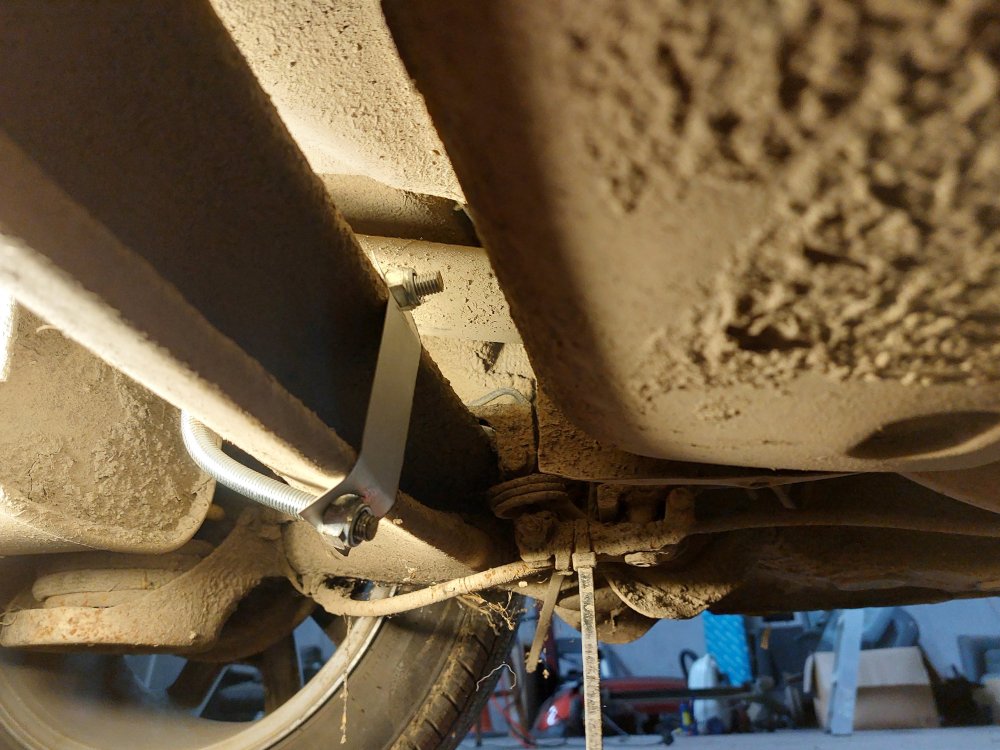
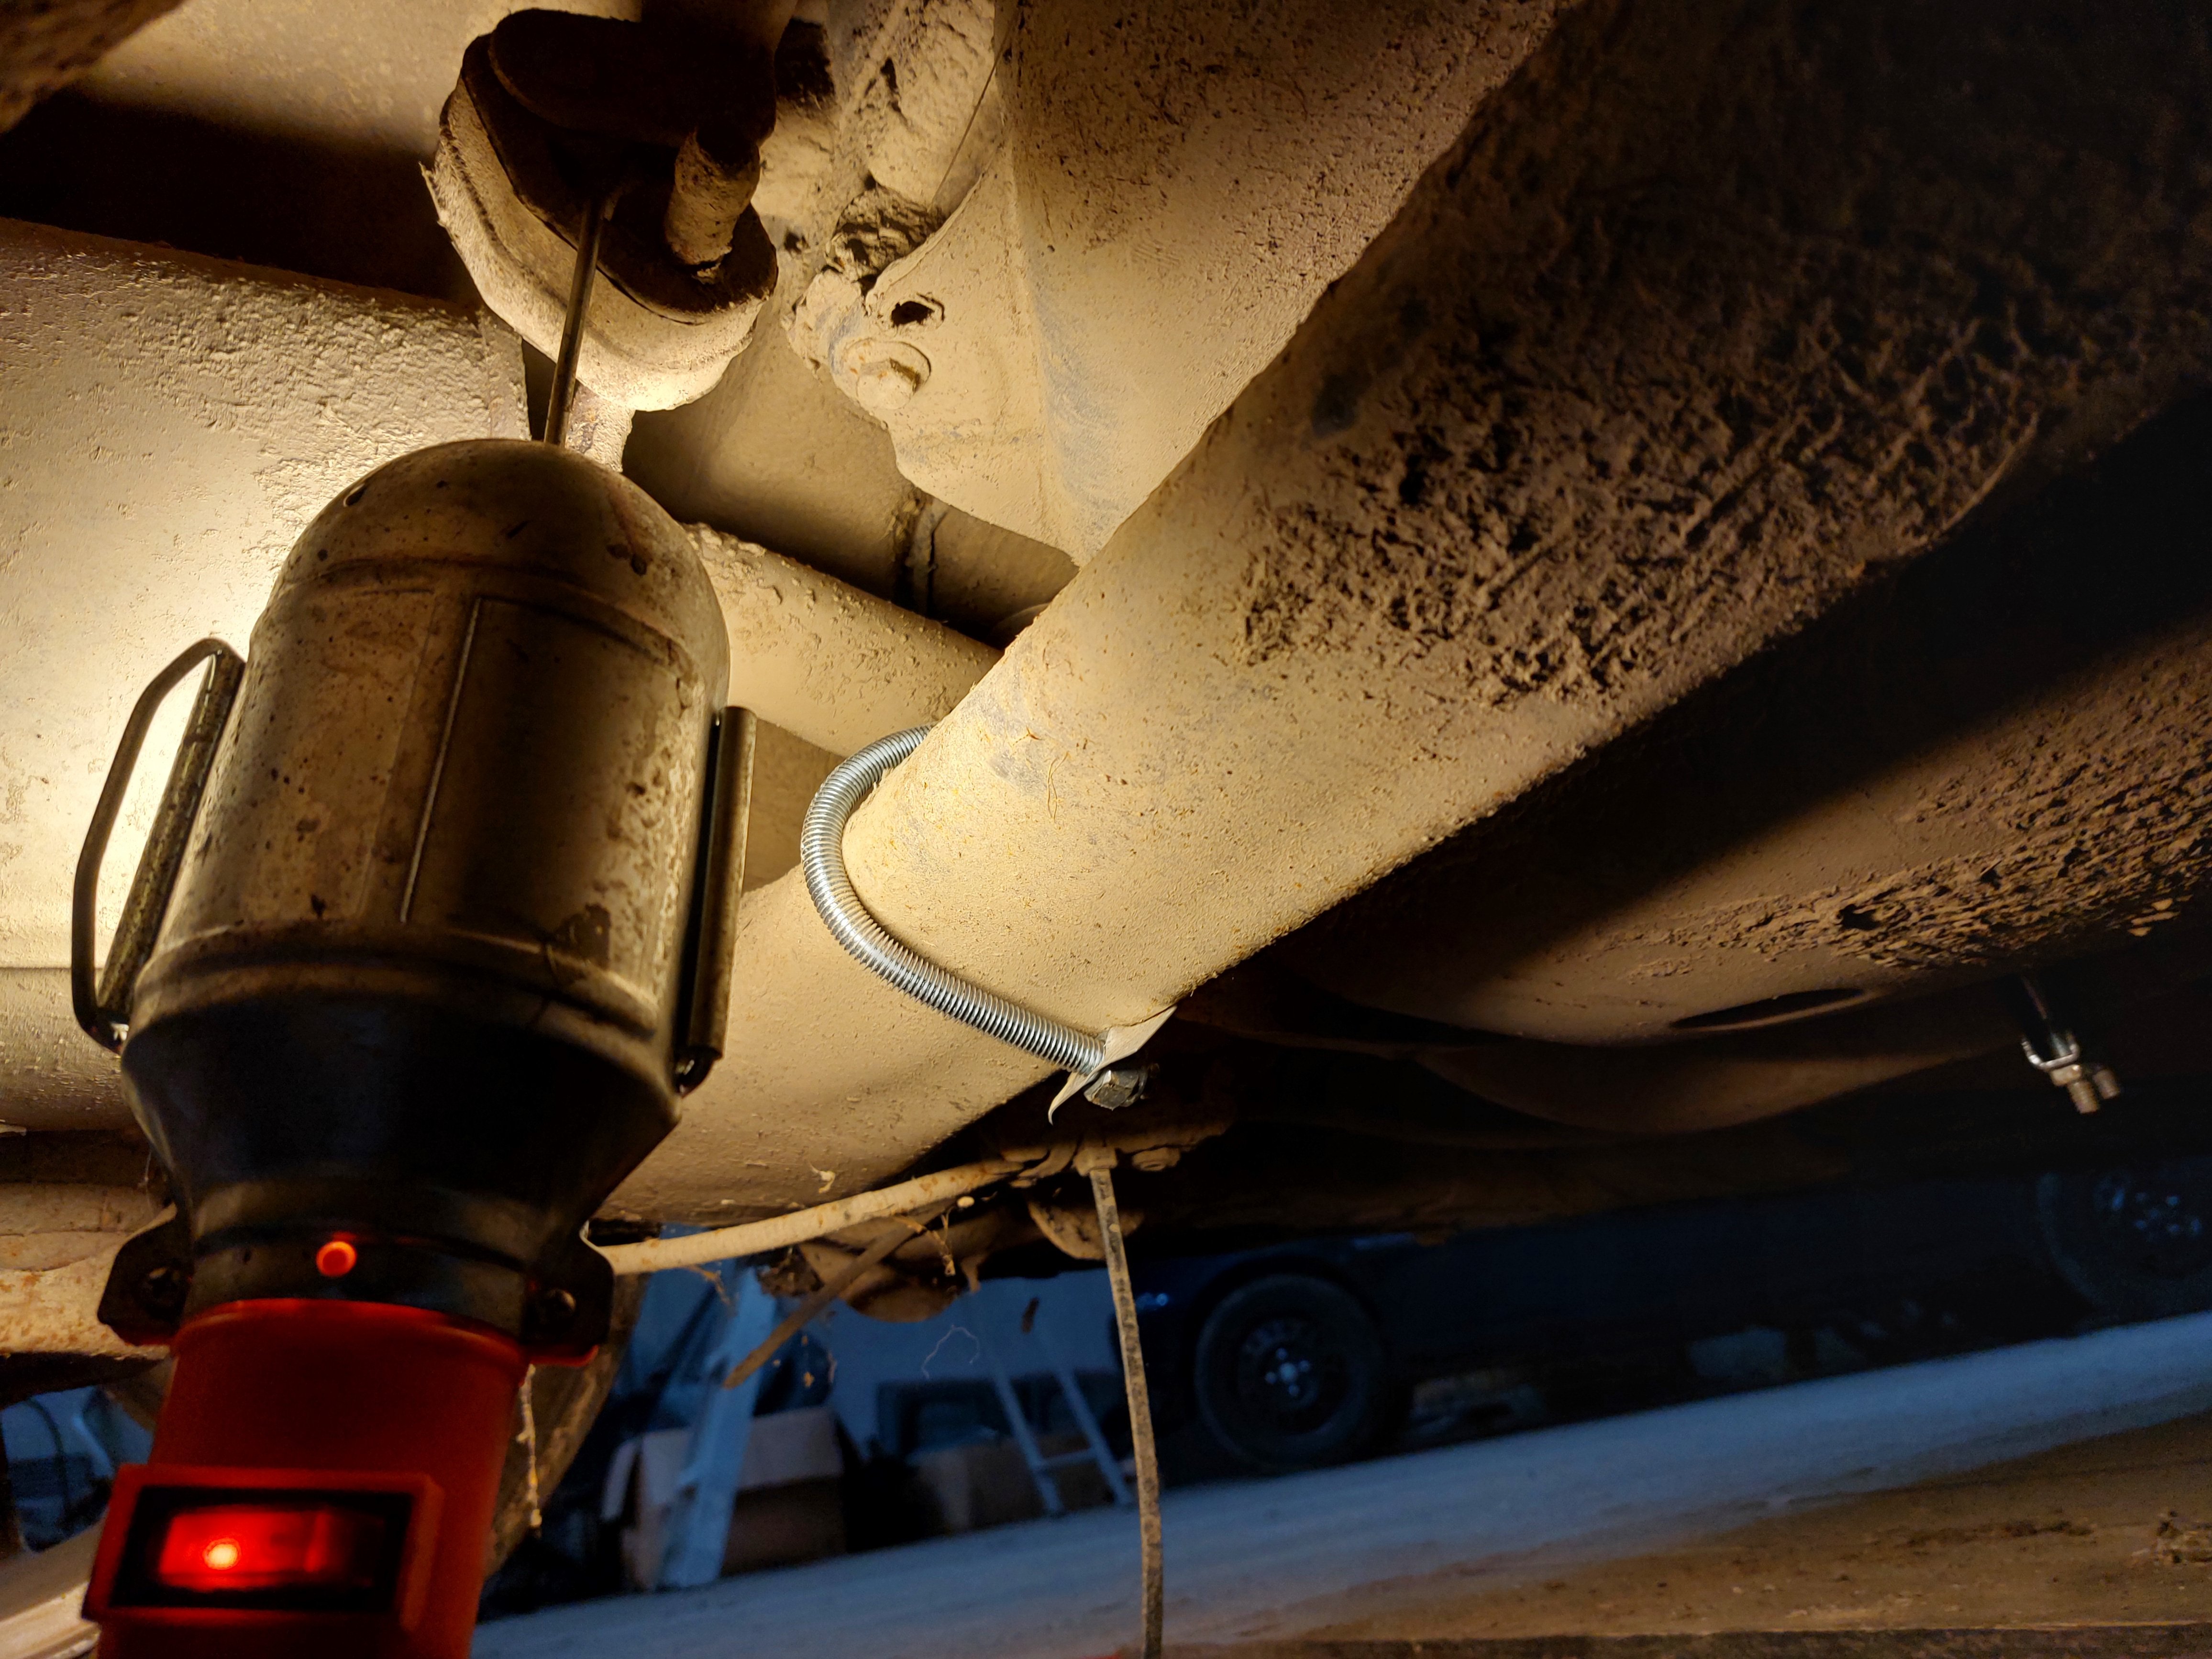
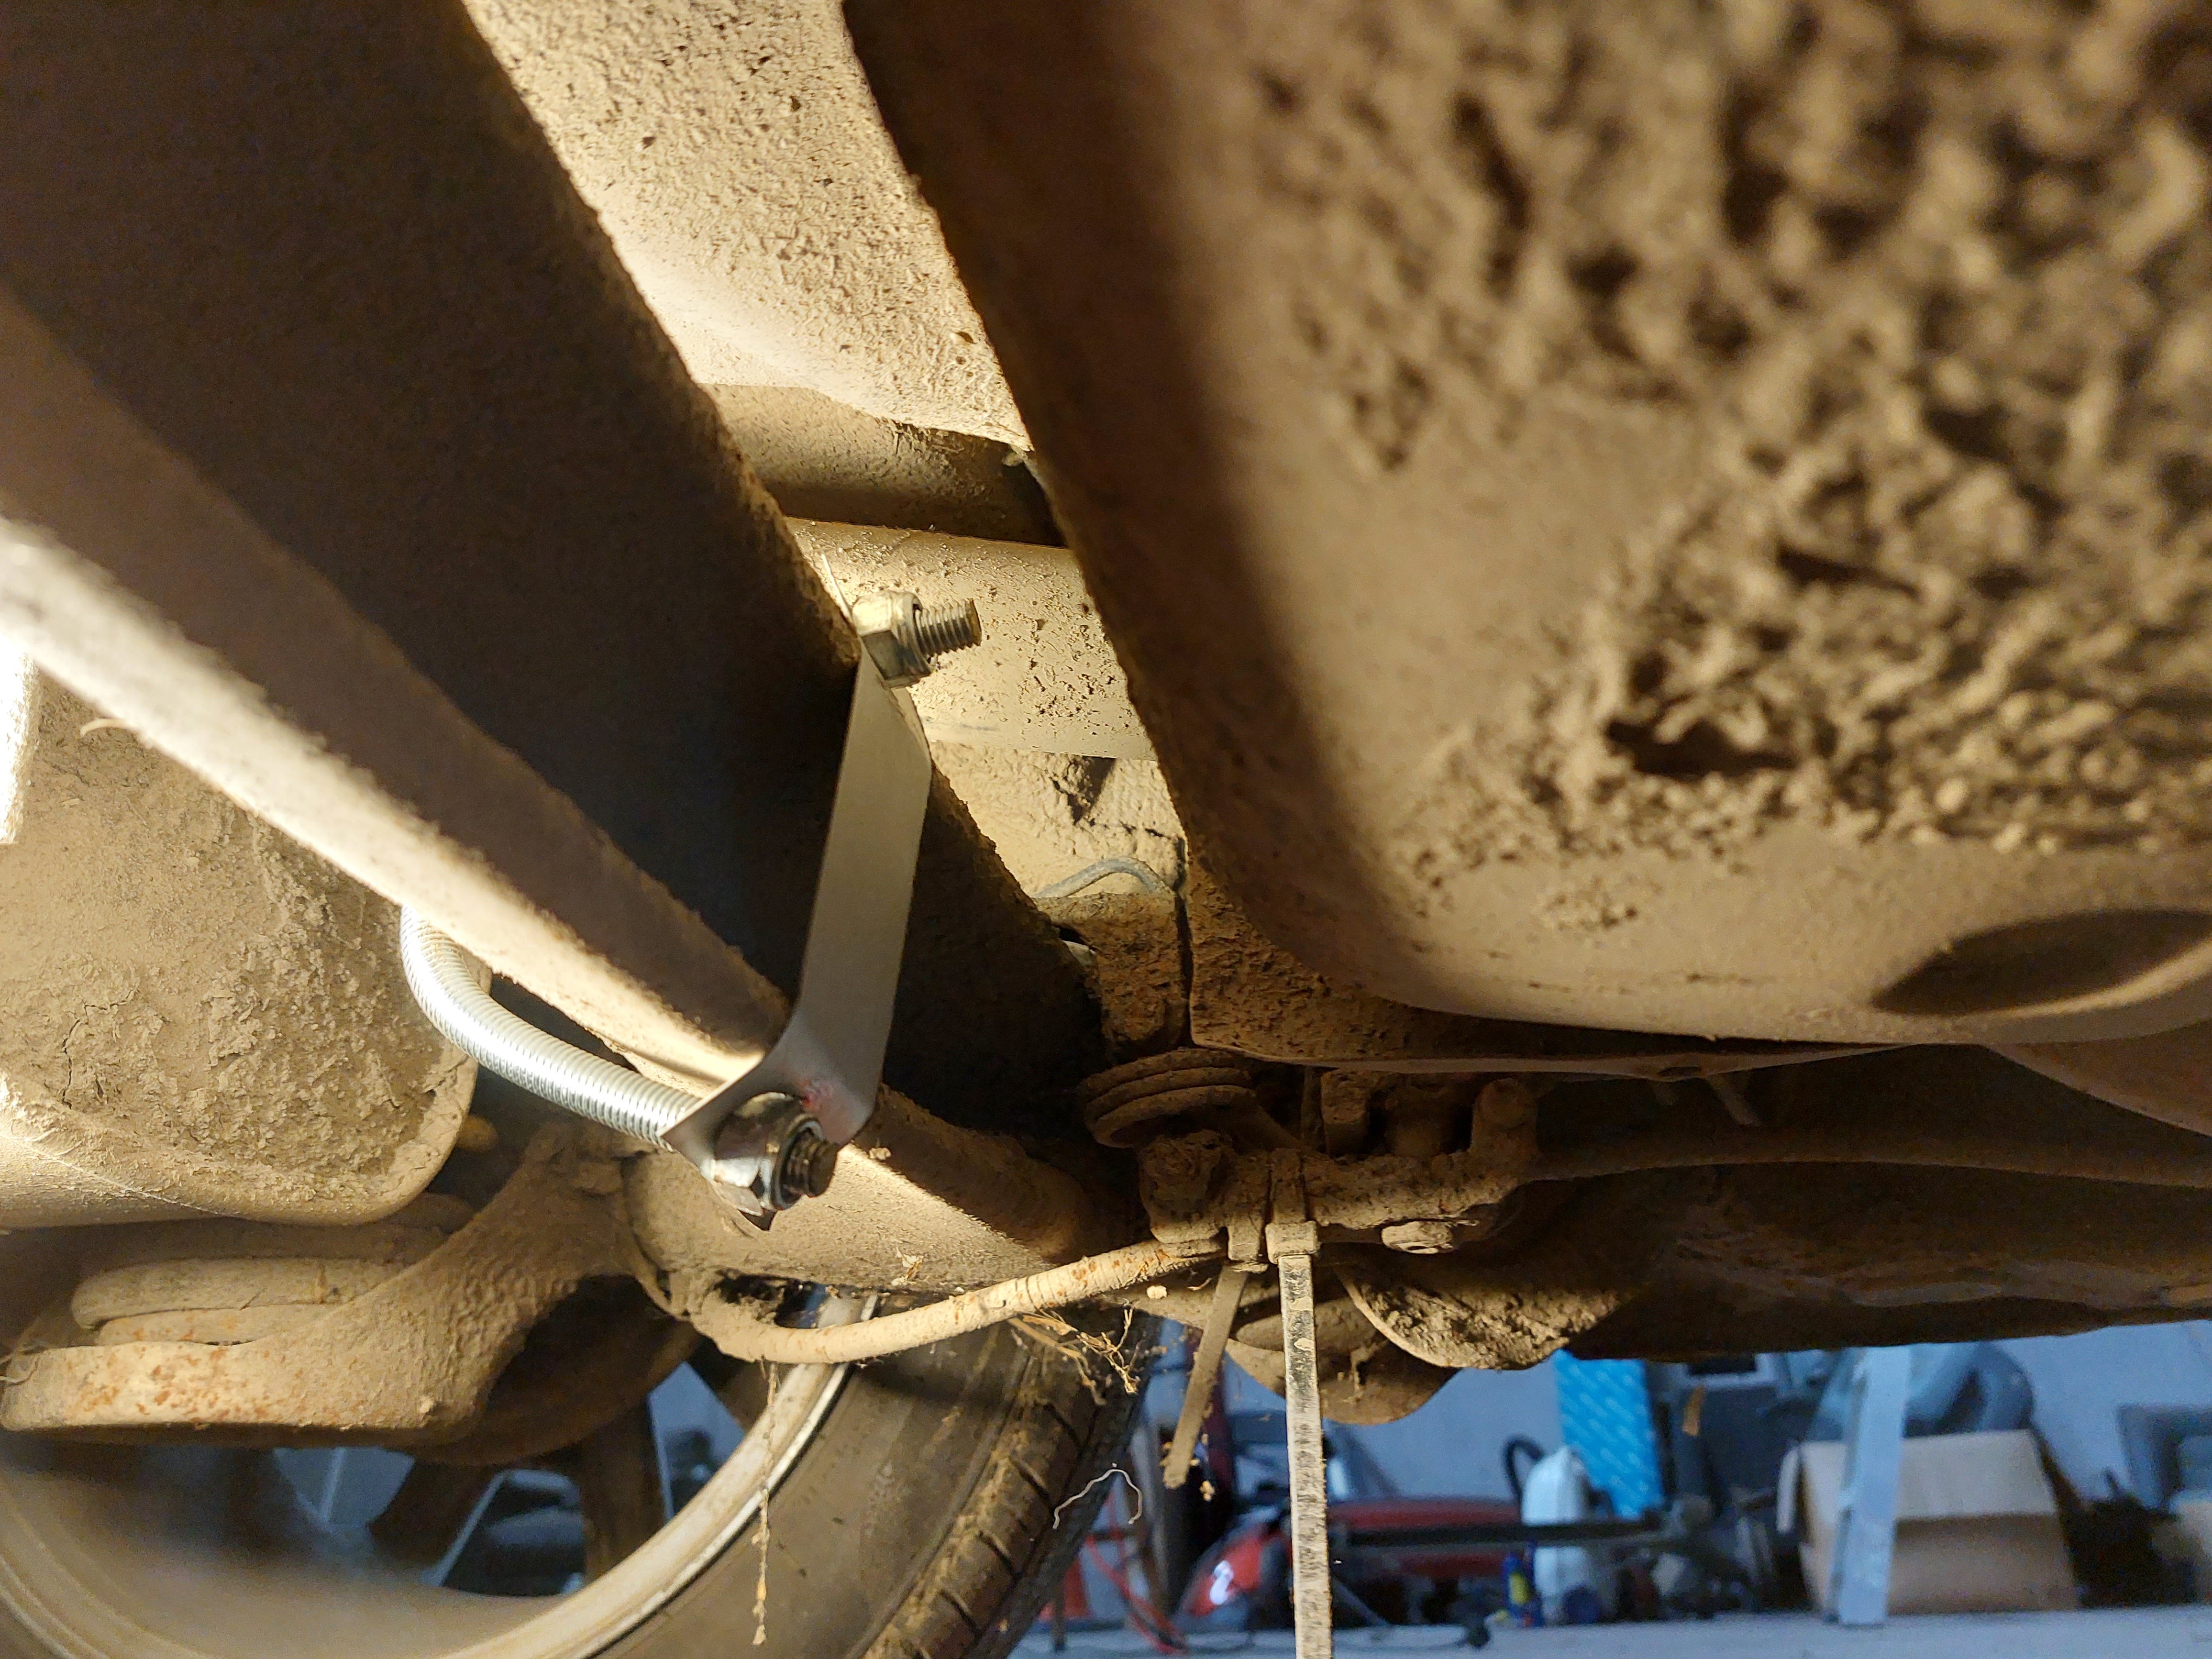
Had tried to change the stalks today and the airbag would not come out. Gave up and made more clamps for this car. Firstly, I've realised that I could have just used some 80mm exhaust clamps. Anyhow. Fitted the ones I made up, easier to fit onto this than the mk2 for some reason, more access. Took it for a few runs and it seems to have made a bit of difference. Seems like it's giving a similar effect to a proper rarb, but to a lesser extent. Driving really well this.


 1 point
 -
1 point1 pointAlways sensible to check that if you have to change wheel you have the tools and get undo the bolts.
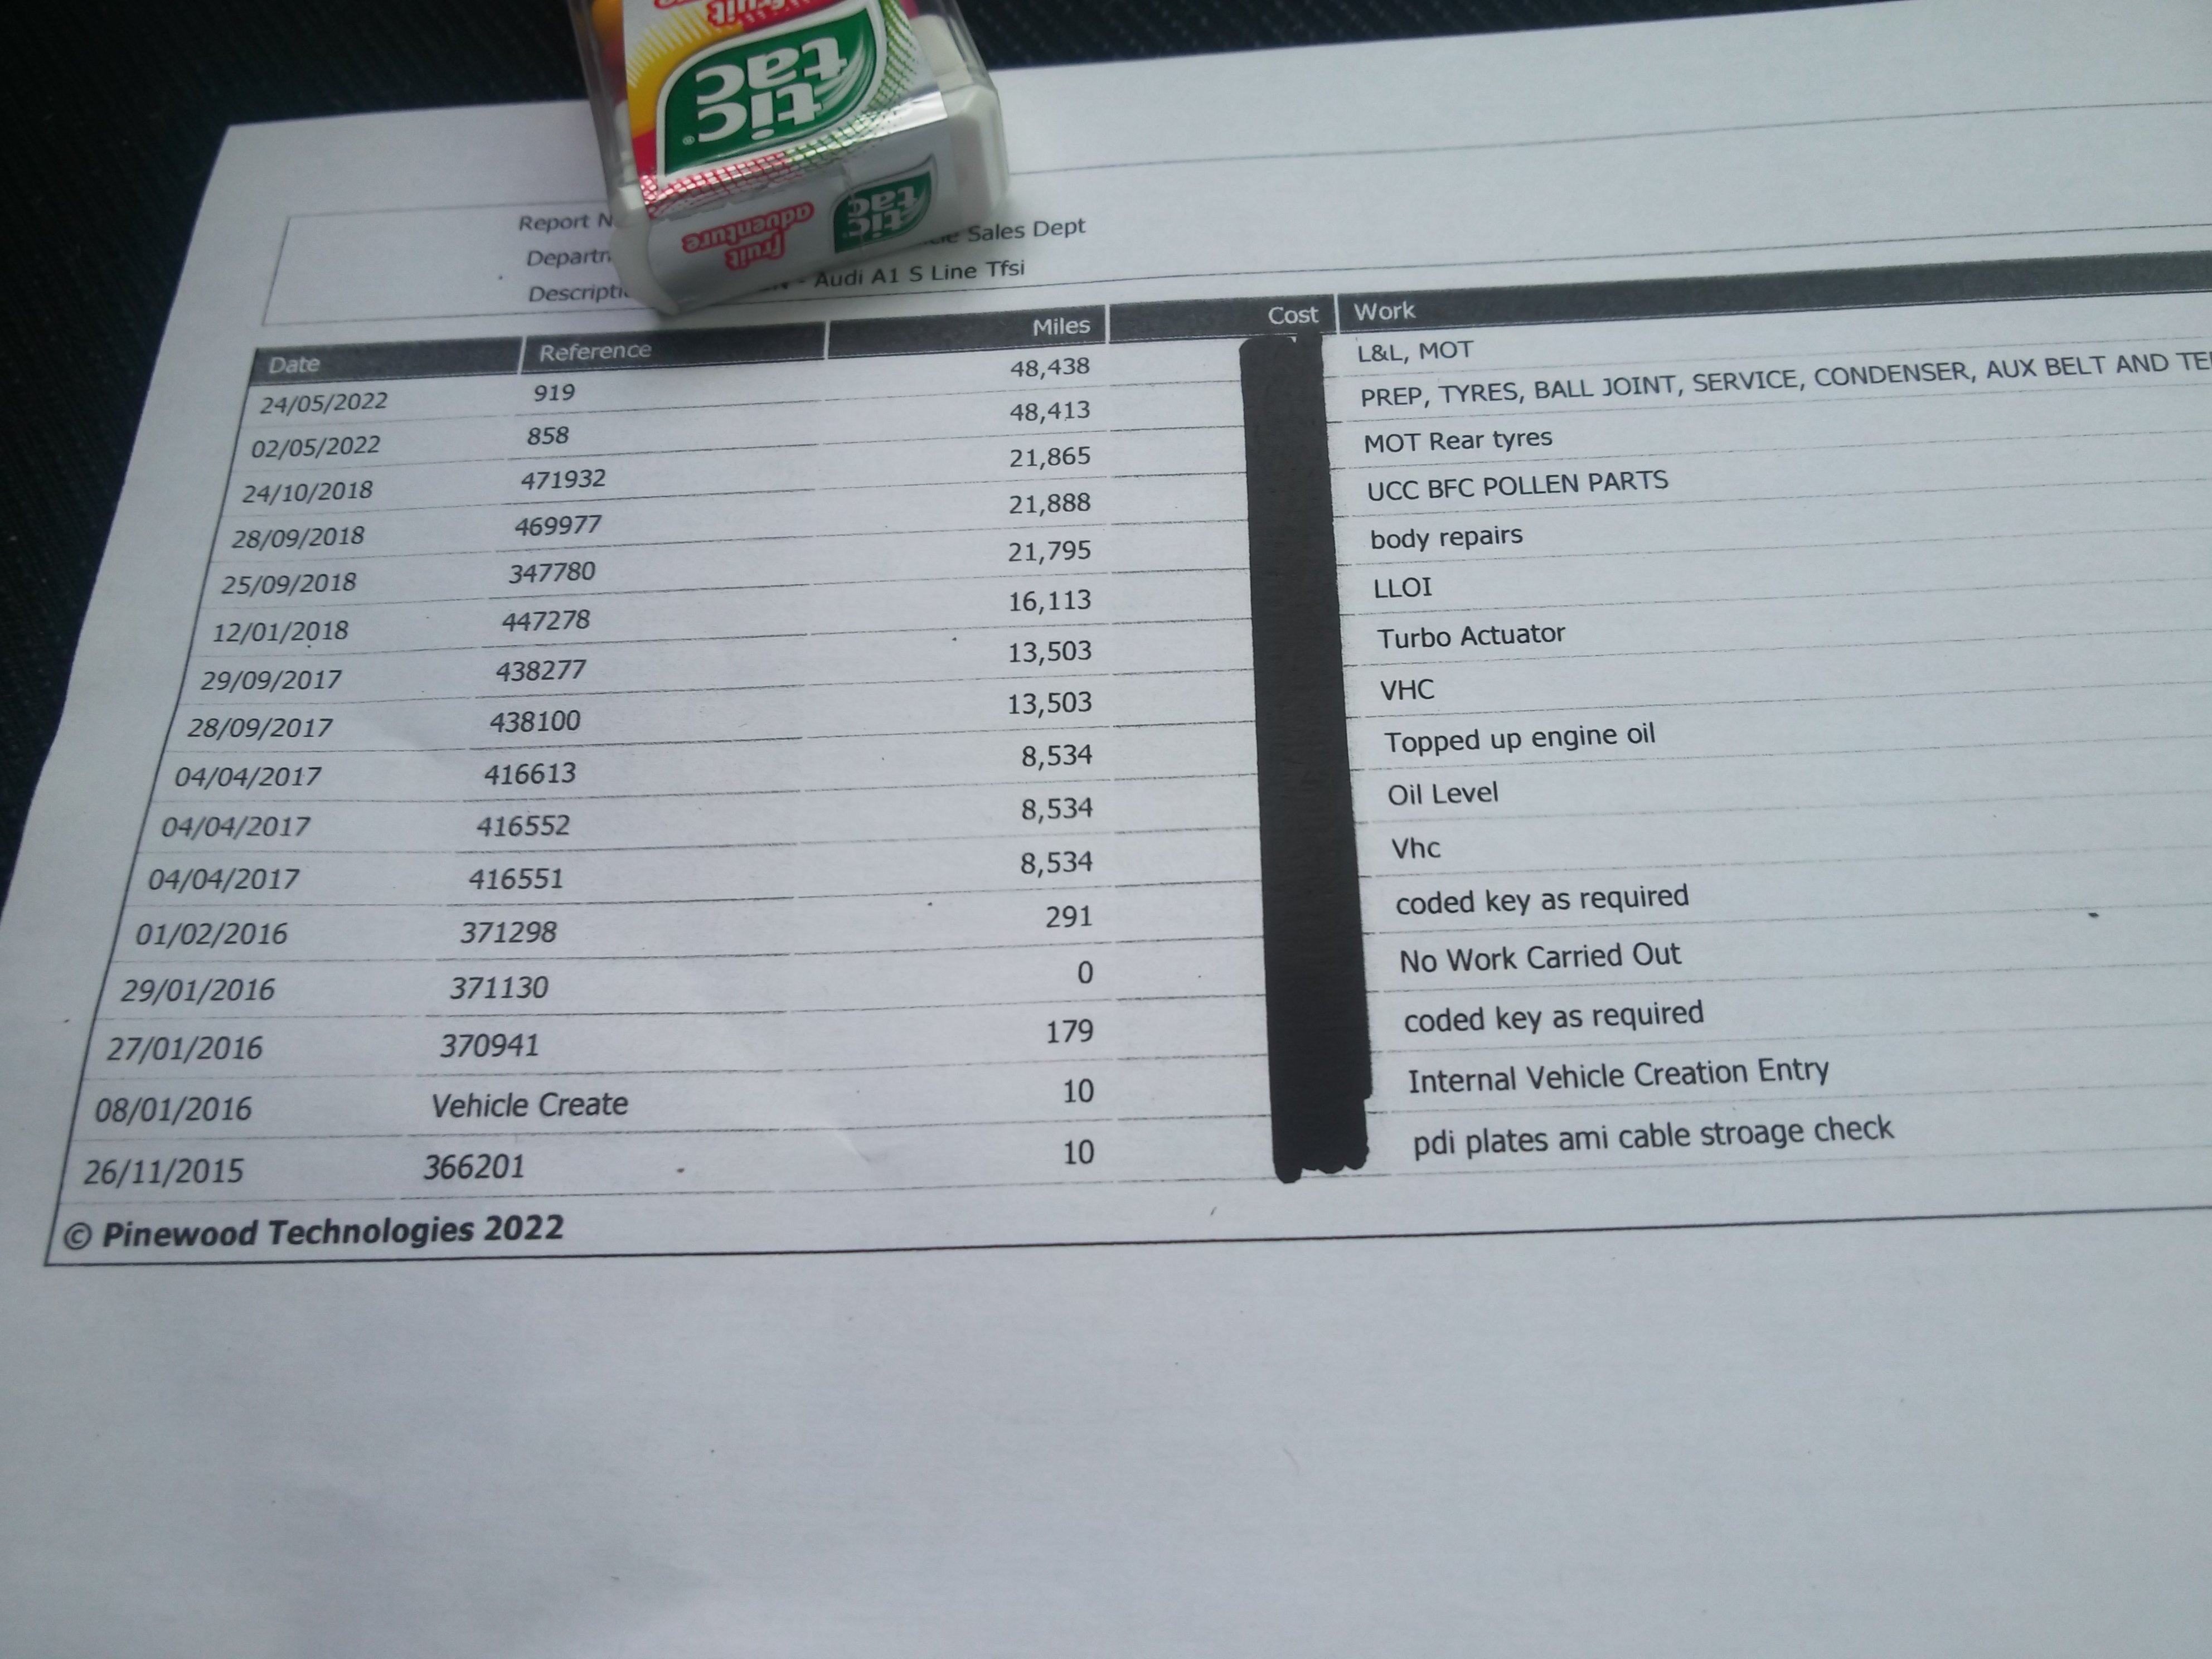
 1 point1 pointWith the caravan correctly loaded and the caravan tyre pressures and nose-weight correct, provided the car is sensibly loaded, it should drive well.1 point1 pointCheers buddy, I was out and about earlier, so didn't get round to digging around for the best place to put my "Please sell me a nice Yeti!!" 🙂1 point1 pointyeah, but youre in borderland arent ya? about 4 yrs behind the rest of the country 🤣🤣🤣1 pointAlso @Adam12 That's the sort of way I was thinking above; the low alternator output causes a "graceful degradation" of as many car systems as possible before actually stopping the car.1 point1 pointThat is the gamble with used cars. Not even a Full Service Record is a guarantee of all work done as it should be. Buying from an enthusiast with all the invoices and receipts is nice but rare now. A wanted ad in a forum like BRISKODA might find you such a car, or sometimes people tell on the forum where their traded in car is now for sale. EDIT, @shillingI made a post in the Yeti section asking if anyone that has moved on their Yeti could say who is selling it if a good one.
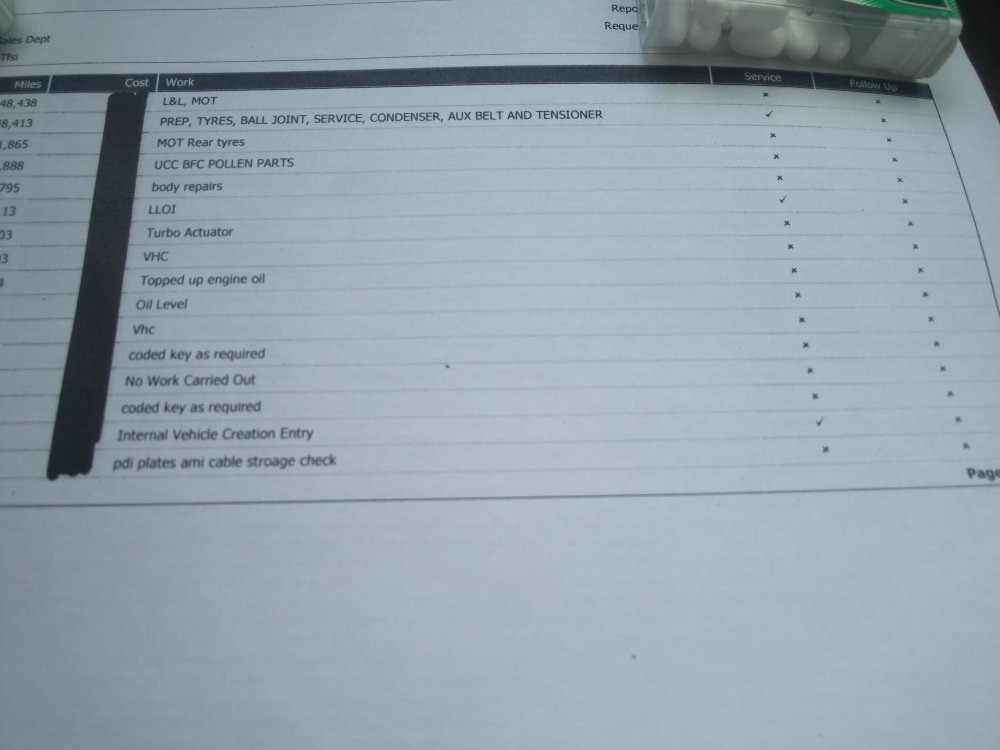 1 point1 pointIt was exactly what you just said, a throttle position too light for the calculated engine load at that road speed.1 pointDid all or any of these three professional electric garages check the battery and charging system? Codes are not the be all, they are useful but you can have problems before they show up and when they do the codes are not always the answer but just a starting point for diagnosis. The heat and especially higher heat effect the battery and charging system more so if you can check your battery and charging system or get it done in none or any of the three professional electric garages did not give you a report that including test results on the battery and charging system. Anyway, to find an electric fault a battery in good state of charge and condition (and all electric wires and connection in good condition) will help with the solution or often can be the solution. Replacing sensors will not help if it is the wiring or connector to the sensor, or computer or its programs, are at fault. Nor will low quality sensors replacing good quality sensors. When trying to resolve a problem it is best not to assume anything but to test enough to prove. A low battery, or low supply to sensor(s) and/or computer(s) can cause the computers to play up in all sorts of ways and throw up all sorts of unexpected warning and error codes. Sometimes just clearing the codes can help, if there is a problem and it has not been sorted then obviously the code(s) will return. Put up any reports you got from any of the three professional electric garages and some posters on here may be able to interpret them to help more.1 point1 pointThese are the ones i have - they've not fallen off yet. Bweele Car Air Vent Cover, Car Ventilation Grille Cover Air Conditioner Outlet Cover for Kodiaq Seat Air Conditioner Outlet Cover : Amazon.co.uk: Automotive1 point1 point1 pointCheers. I will try to have a look near the seat belt plug area. The rolling sounds like it’s on hard plastic. Checked all door pockets but no joy. Can only hear the sound when car is in motion so far but will try knocking on various trims1 pointThose mounts are ridiculously fragile, that's what snapped on my Citigo when I smacked into a deer 😂1 pointHi Adam, welcome to the forum. Because the sensors possibly are sending fault messages due to low battery voltage. Check alternator output and battery condition.1 point1 pointThe best one in my opinion is vcds but you won't be able to add new key with it. With vcds you'll be able to read all modules and change some of the settings l, the price may vary for the tool depending how many vins you will need. When I bought my car I had similar problem with the keys the cheapest way for me was to make a clone of my existing key.1 point1 pointYou might be able to check with a bit of string...😁 If you can get a piece between rack and subframe, long enough that you can hold both ends from above, then 'floss' it along past the point where the dogbone bolt goes through the subframe. If it catches or won't pass that point, chances are the wrong bolt is in there and has dented the underside of the rack tube. No idea if that's really feasible in practice, but I know it's almost impossible to see the area from any angle, though probably not too tricky to get a phonecam pic if working underneath the car.1 point1 pointHello guys, my dealer wrote me today that the car has now an engine number, too, and it's expected to arrive at the dealership between the 5th and 9th of September. Let's see... RS TSI, DSG, ordered July 20211 point1 pointPolo GTi needs a manual box VW didn't honour that on the last model change although it was mentioned. Hyundai and Ford over such on 120N & Fiesta ST.1 point1 pointMy CNG powered Octavia. Black is a pain to keep clean, but oh does it look good after the regular wash 😀
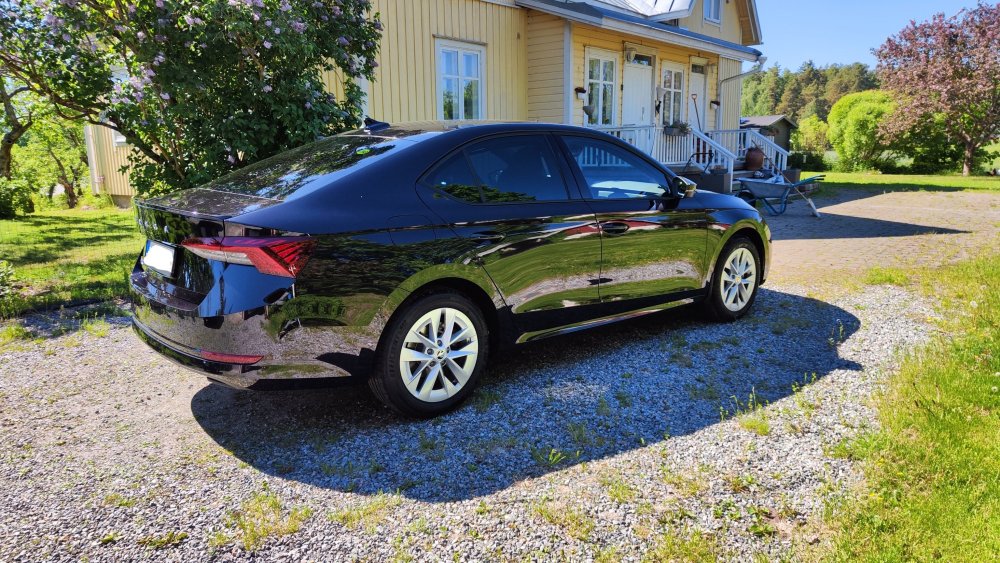
 1 point1 pointNo they are not the same oil used for the DSG & the Haldex oil change. The Haldex Oil change is at 3 years / 30,000 miles.
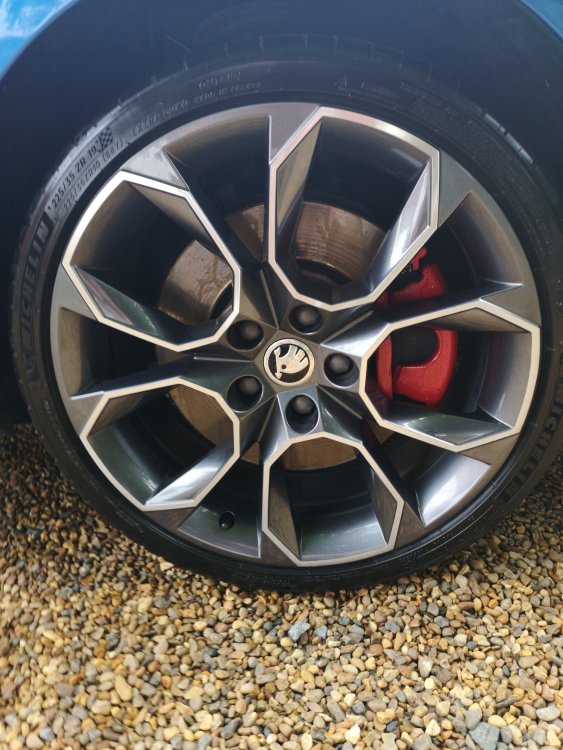
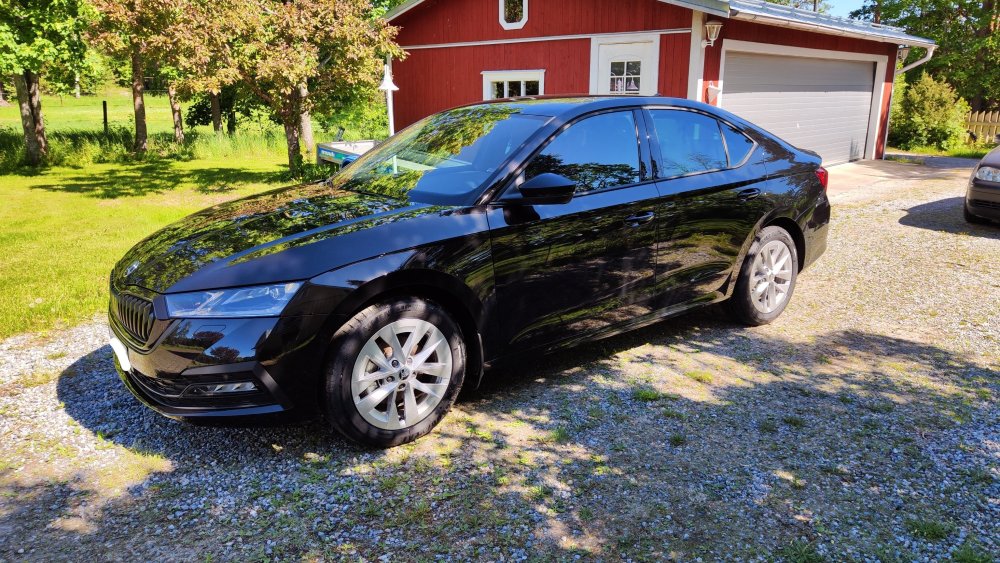
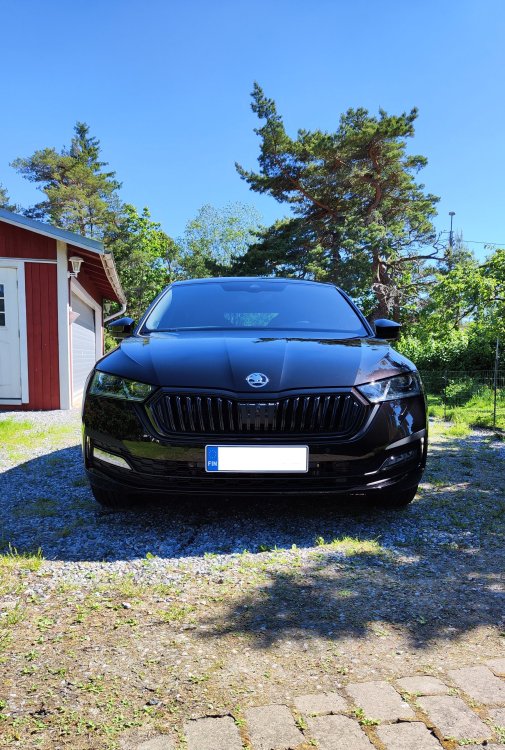
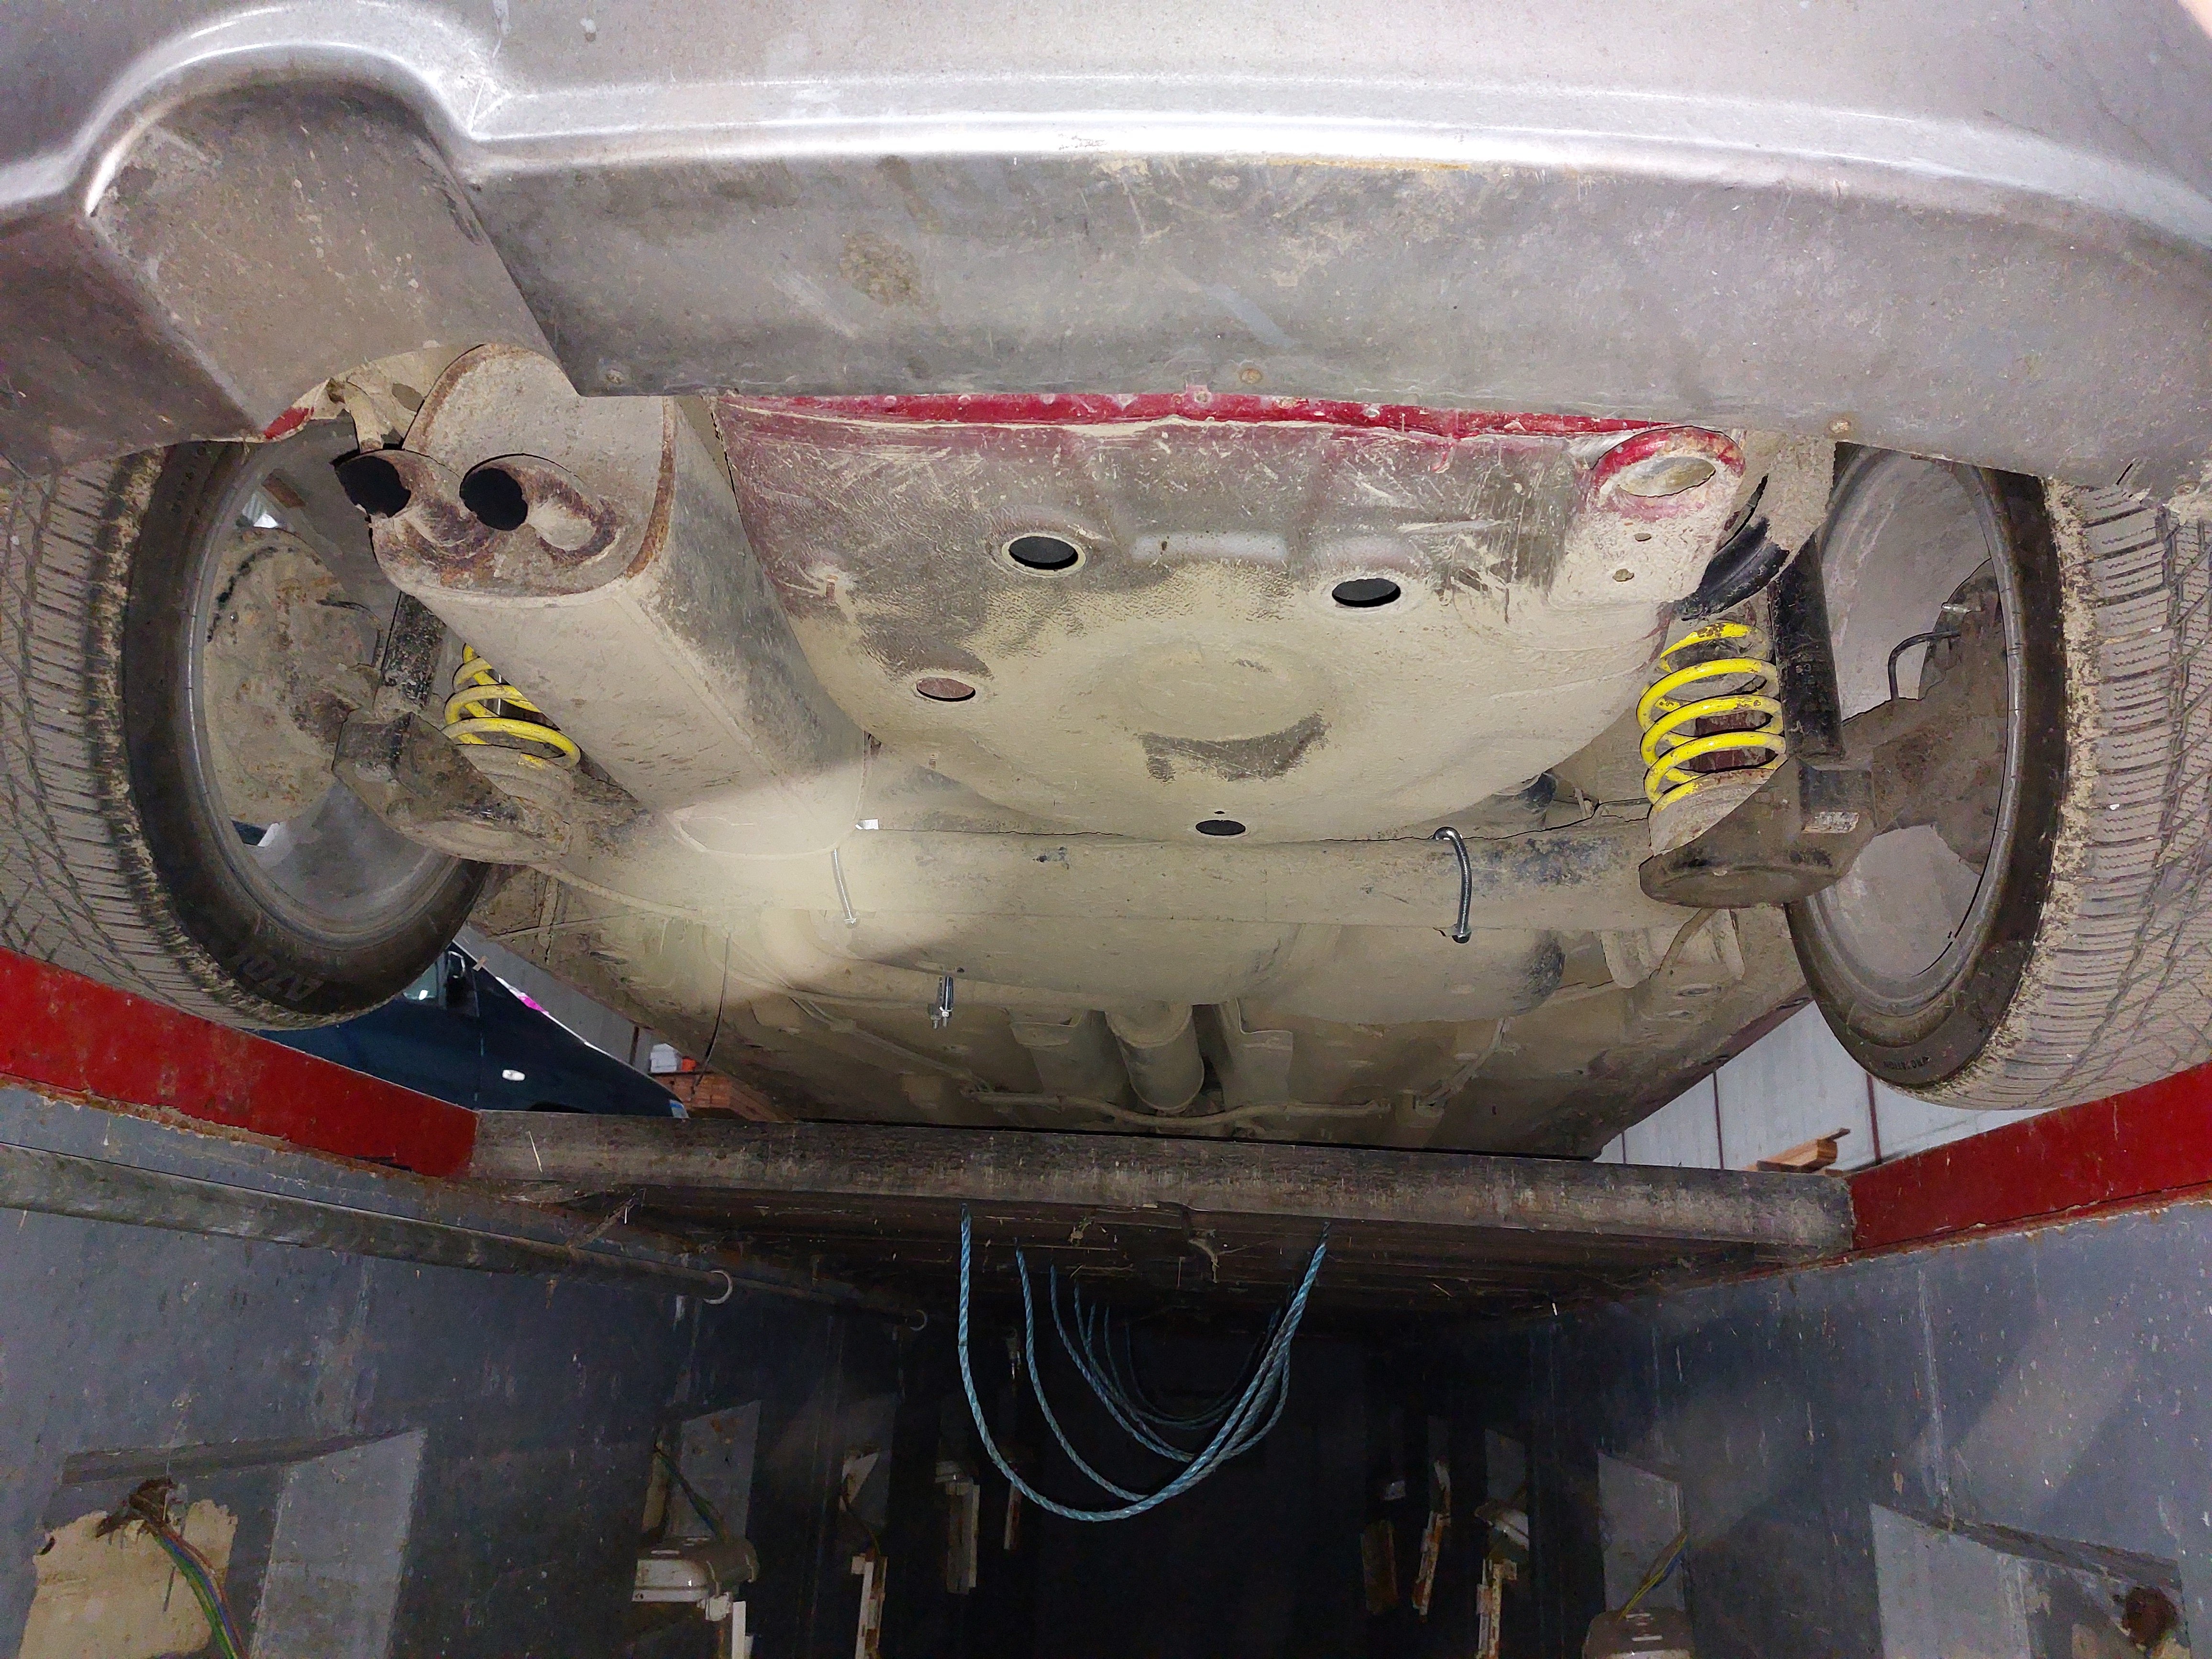
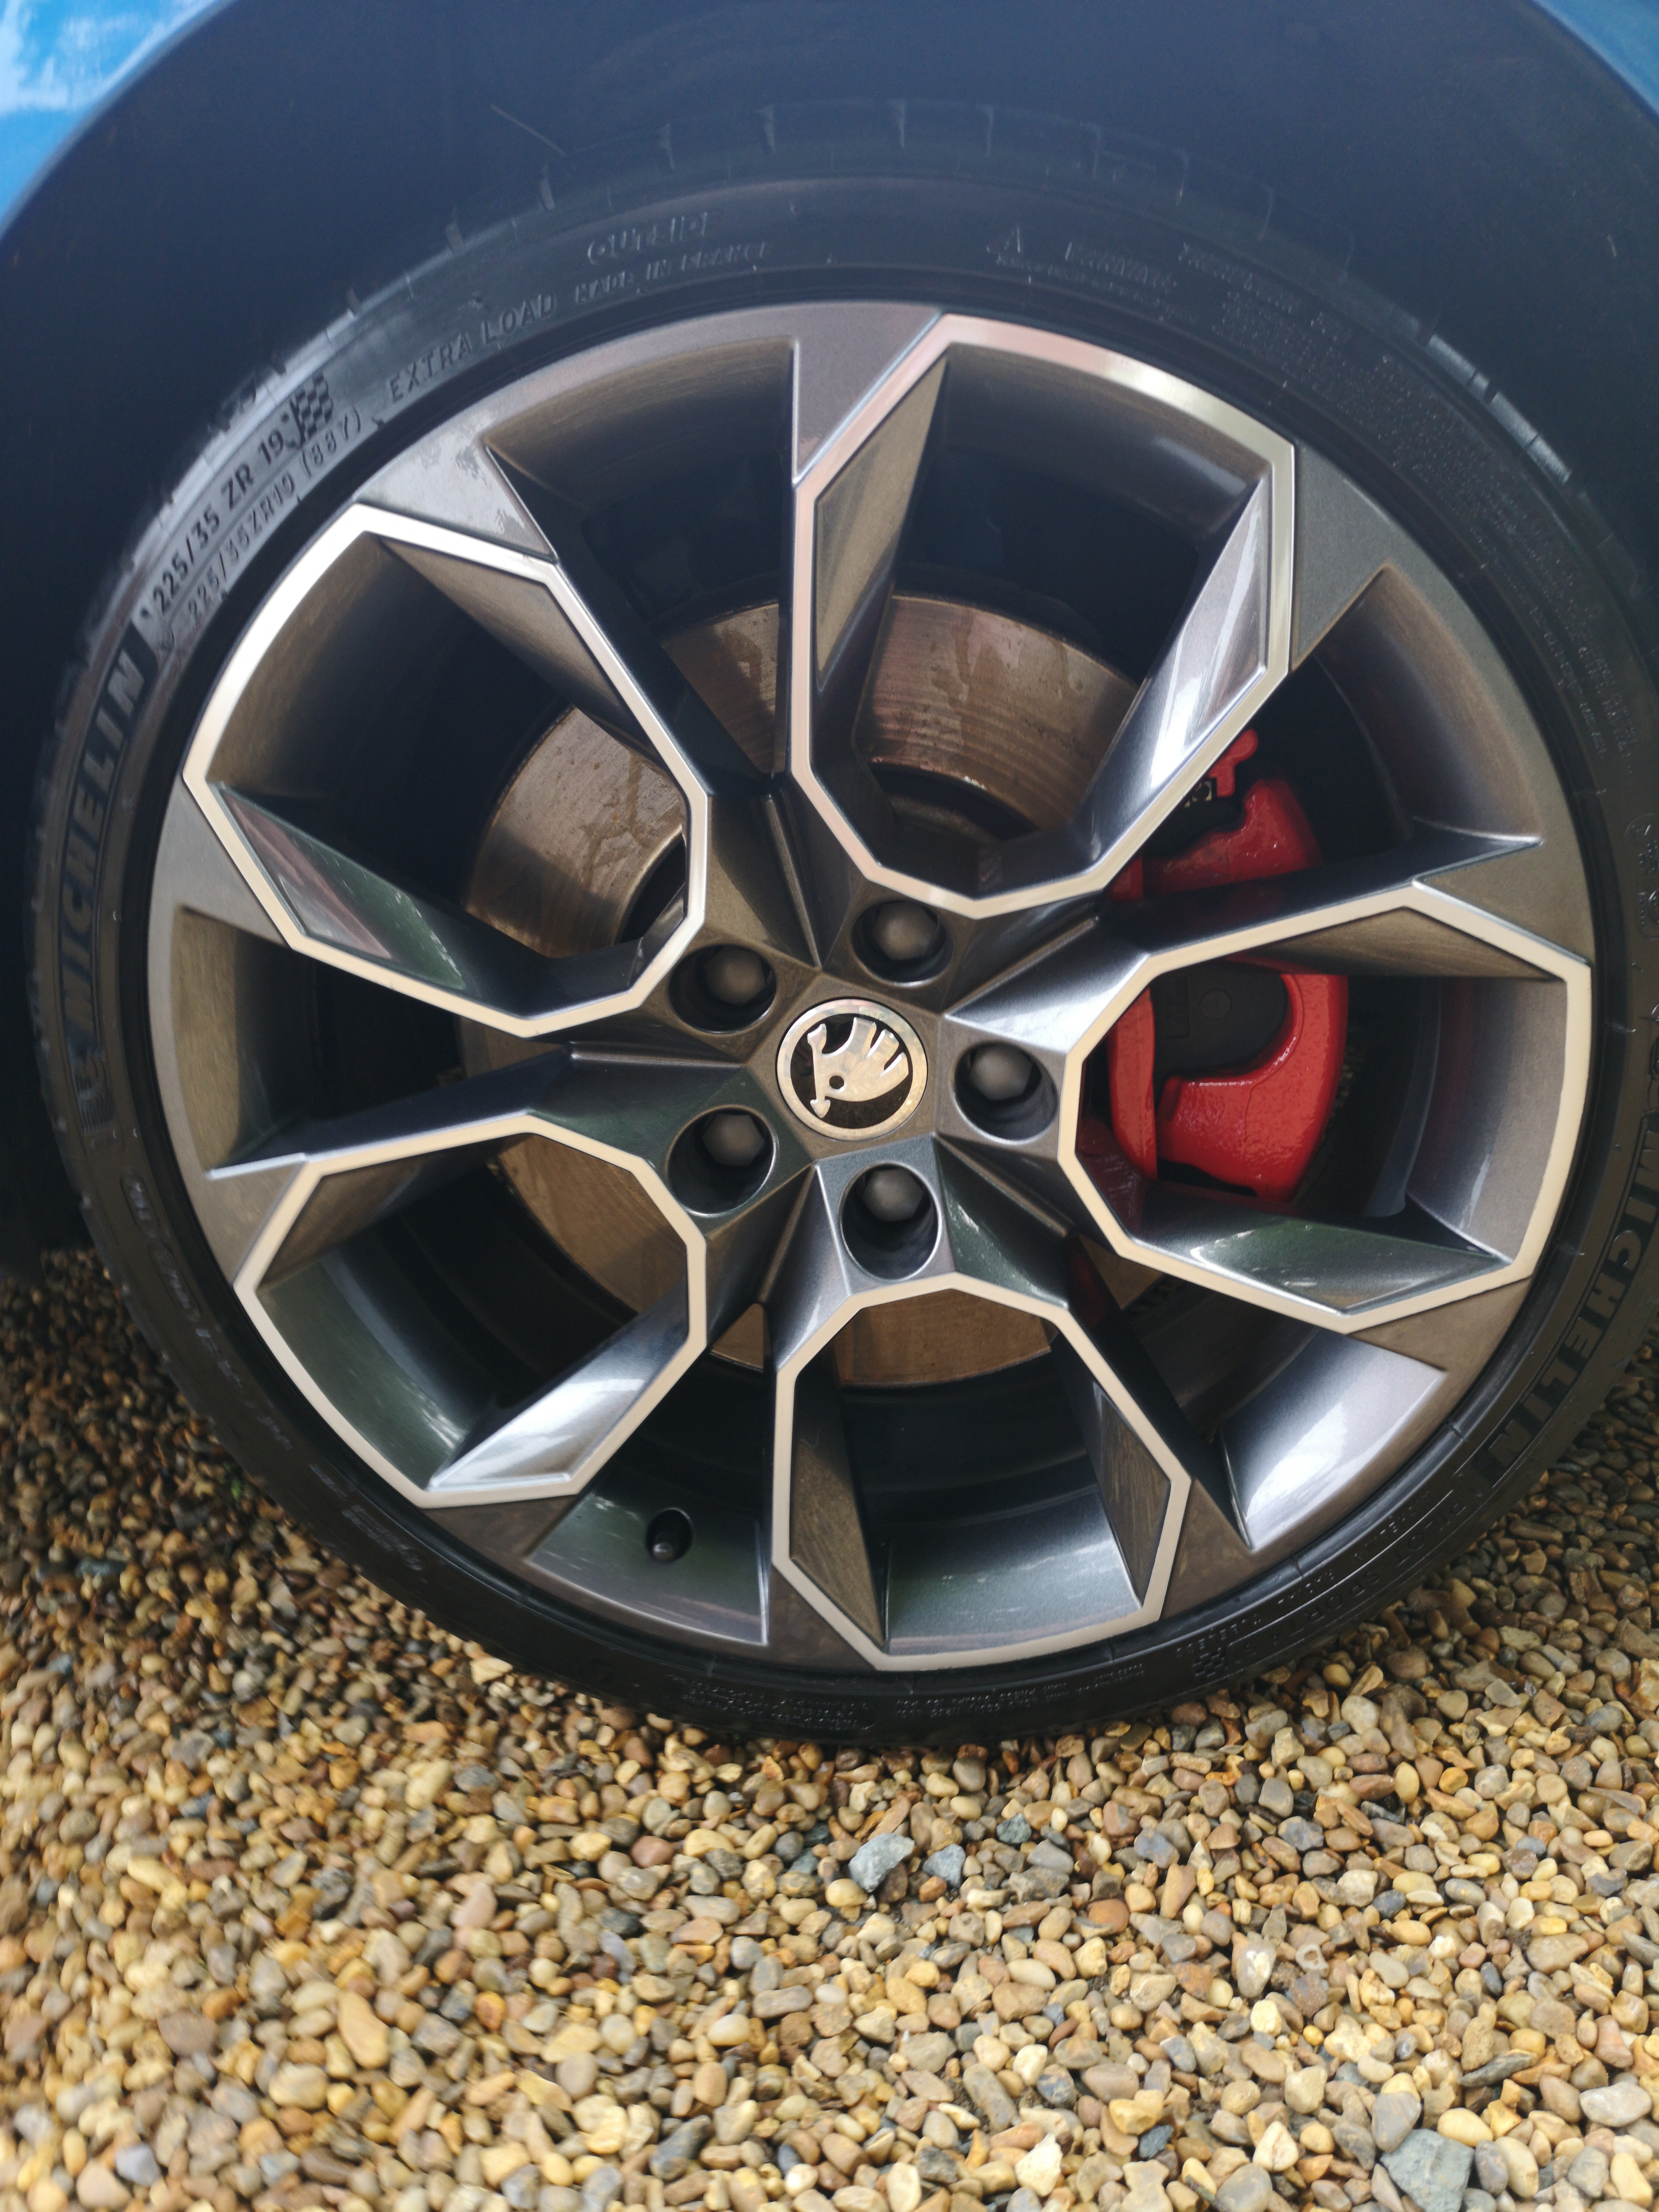
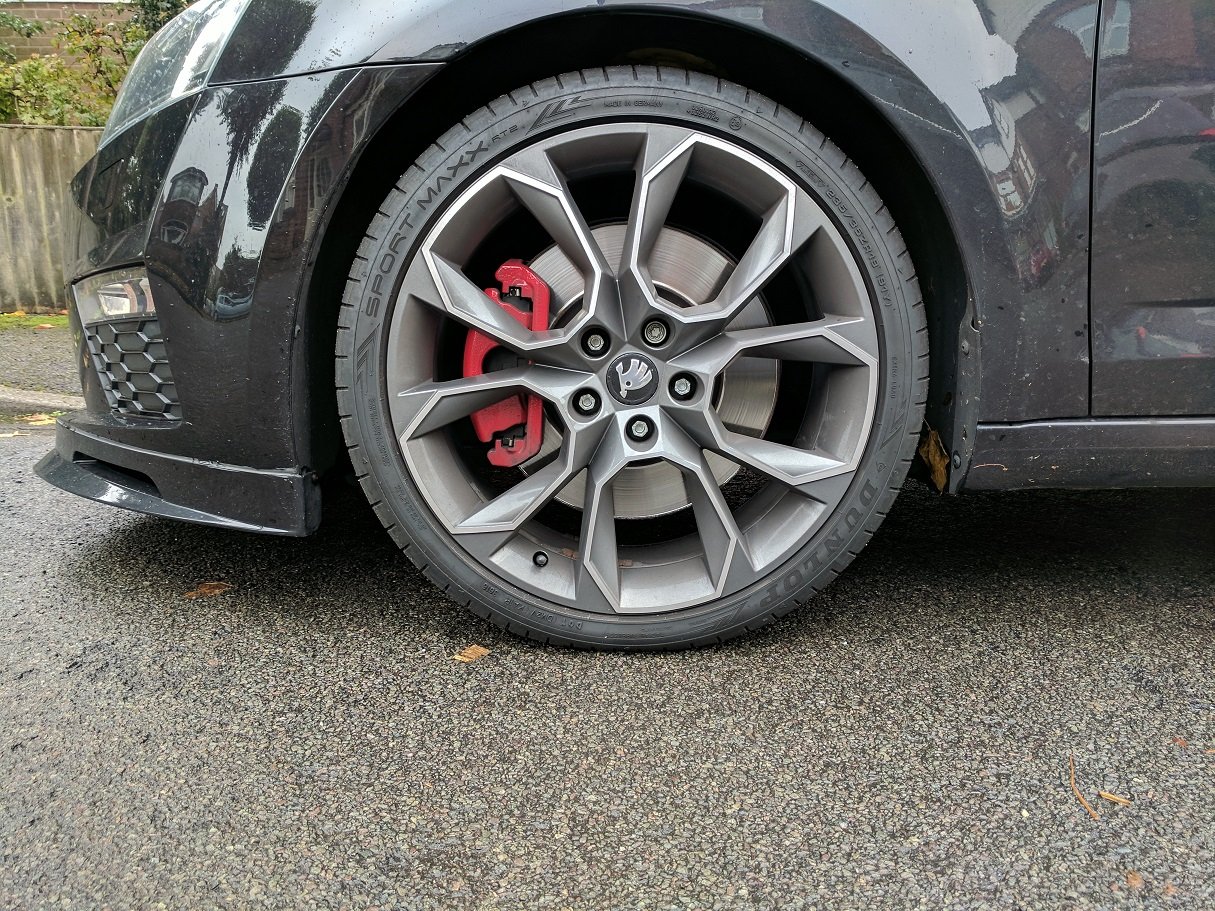
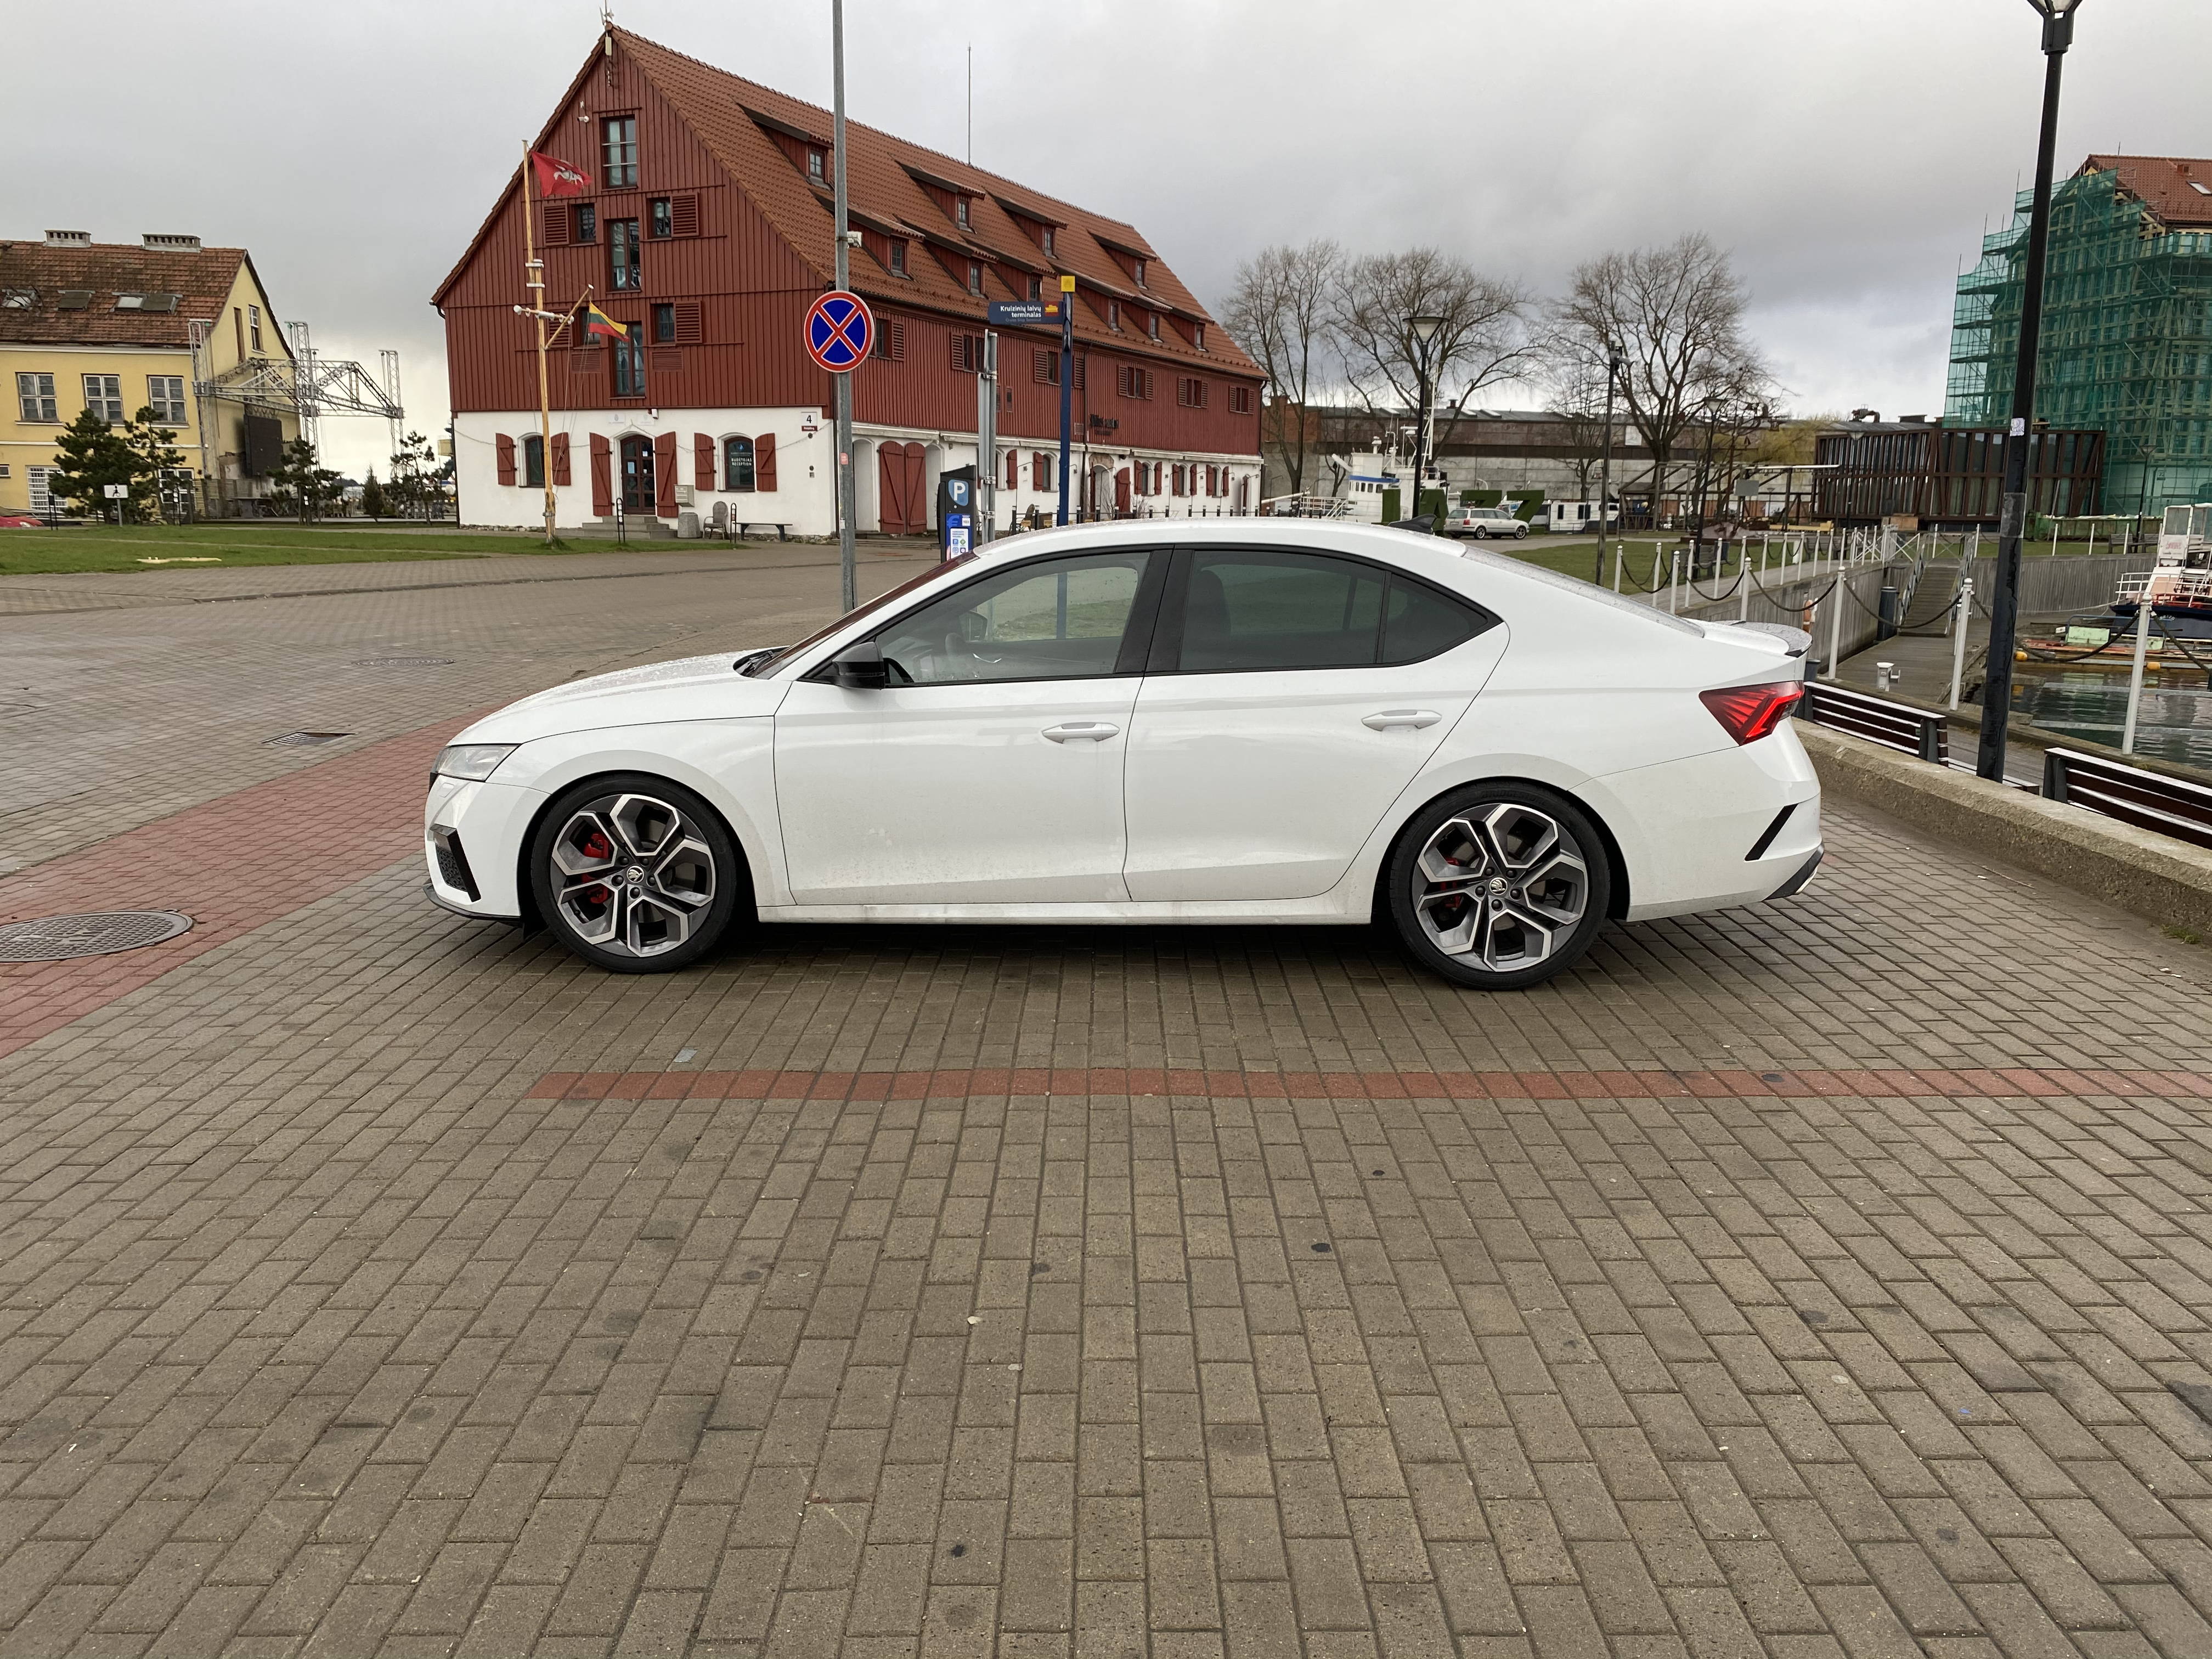
.jpg.329efe0695a8a0f4fa8725c4326b07a0.jpg.261327afafc0a4d91b2a6516585b45f1.jpg) 1 point1 pointHey!! soo I received my H&R springs and Eibach spacers (10mm/15mm) and had them done yesterday 😈😏 My car has DCC and I did all works in Skoda official dealership. I can say I thought the ride will be harsh but to my surprise - it almost did not change!! What i noticed is no more stupid roll-overs on comfort, car handles tight and awsome. As sport car should handle 😈 regarding DCC settings - feeling is that every mode got a lil bit stiffer, like 10-20% tops. For me - its advantage and nice thing 😅 of course springs need to adjust properly over the week but overall - car looks SO MUCH better now 😍 Now waiting for my Maxton kit to arrive 😅 below pics before and after + some extras 😈 Insta @vrsmk4
1 point1 pointHey!! soo I received my H&R springs and Eibach spacers (10mm/15mm) and had them done yesterday 😈😏 My car has DCC and I did all works in Skoda official dealership. I can say I thought the ride will be harsh but to my surprise - it almost did not change!! What i noticed is no more stupid roll-overs on comfort, car handles tight and awsome. As sport car should handle 😈 regarding DCC settings - feeling is that every mode got a lil bit stiffer, like 10-20% tops. For me - its advantage and nice thing 😅 of course springs need to adjust properly over the week but overall - car looks SO MUCH better now 😍 Now waiting for my Maxton kit to arrive 😅 below pics before and after + some extras 😈 Insta @vrsmk4
 1 point1 pointI'd like to offer some advice after doing this install yesterday, and also seeing guides and general chat about how to do this that could be DANGEROUS..... Firstly, the safety part.. The A pillar of most modern cars contains an airbag curtain which drops vertically down at very high speed, protecting you or your passenger from striking their head on the glass or intruding object. Most people seem to run the cable along the headliner at the windshield to the corner (fine). The problem IMHO is that majority of the advice I read is to then jam the cable between the plastic trim and roof liner, and cross underneath the airbag (!), then run down the rubber trim the length of the pillar. By crossing underneath the airbag, you are effectively blocking the deployment of the airbag properly in the middle of its width, OR during deployment the bag will rip out your cabling and possibly dashcam, sending this towards the seat occupant at great speed.... So, don't do this. Please. The plastic trim on the A pillar seems to be near impossible to remove, but if you can, the above method should be okay so long as you can cable above and behind the airbag carefully. What I did however, was run the cable down the windscreen, to the seam in the dashboard, then carefully pushed the cable using the blunt back of a teaspoon into this crack, completely concealing it, and then allowing access via the side panel to the fuse box. GROUND: When you open the dash side panel, there is a convenient bolt (with nut) that I used for ground - simply find another but with the same thread and add it on, trapping the ring securely. REAR CAMERA: For the rear camera, I opened the boot and gentle loosened the headliner clip in the centre. I then used a length of what we call 'yellow tongue' (flat firm 3m piece of plastic for pulling cables) and pushed from this end all the way along the to roofline until it popped out at the windscreen, then taped on the rear camera and pulled the plastic back out. This was actually very easy! I fed the cable through the rubber elbows to prevent water leaks - but I did break both clips doing this, and I'm still not sure how to get these out without doing so, so please use caution. FUSES: I used fuse taps for both the ACC and 12v wires - the 12v I got from the cigarette/12v fuse, and the ACC from the USB fuse (mini fuse). Hope this helps!1 point1 pointInteresting reading about your mods/build, the lights look spot on as does the grill.1 point

.thumb.jpg.06721e8c8b33ed0eea16572ff131b291.jpg)


Important Information
Welcome to BRISKODA. Please note the following important links Terms of Use. We have a comprehensive Privacy Policy. We have placed cookies on your device to help make this website better. You can adjust your cookie settings, otherwise we'll assume you're okay to continue.