


Leaderboard
-
Breezy_Pete
Sponsor10Points24,200Posts -
J.R.
Resident Member9Points15,266Posts -
Gaz
FREEDOM9Points7,749Posts -

mac11irl
FREEDOM7Points16,641Posts


Popular Content
Showing content with the highest reputation on 16/07/24 in all areas
-
5 points
-
4 points
-
4 pointsThere are certainly no issues with onboard storage of hydrogen in vehicles these days... Kevlar tanks and the like are far safer than normal petrol tanks.4 points
-
Company on ebay selling cheaps spares - which is fine - you get what you pay for. However, this company doesnt respond well to any warranty claims do best to avoid like the plague. The ebay reviews are possibly fake. Check out Trustpilot instead. https://uk.trustpilot.com/review/www.carsparesdirect.com or Yell. https://www.yell.com/biz/carspares-direct-london-8081423/ I have raised complaints with ebay and trading standards3 points
-
3 pointsI'm sure that reading isn't the true number. Would be interesting to use VCDS to view what oil temperature reading is at ambient temperature when engine isn't running. That might give a big clue about sensor defect or not.3 points
-
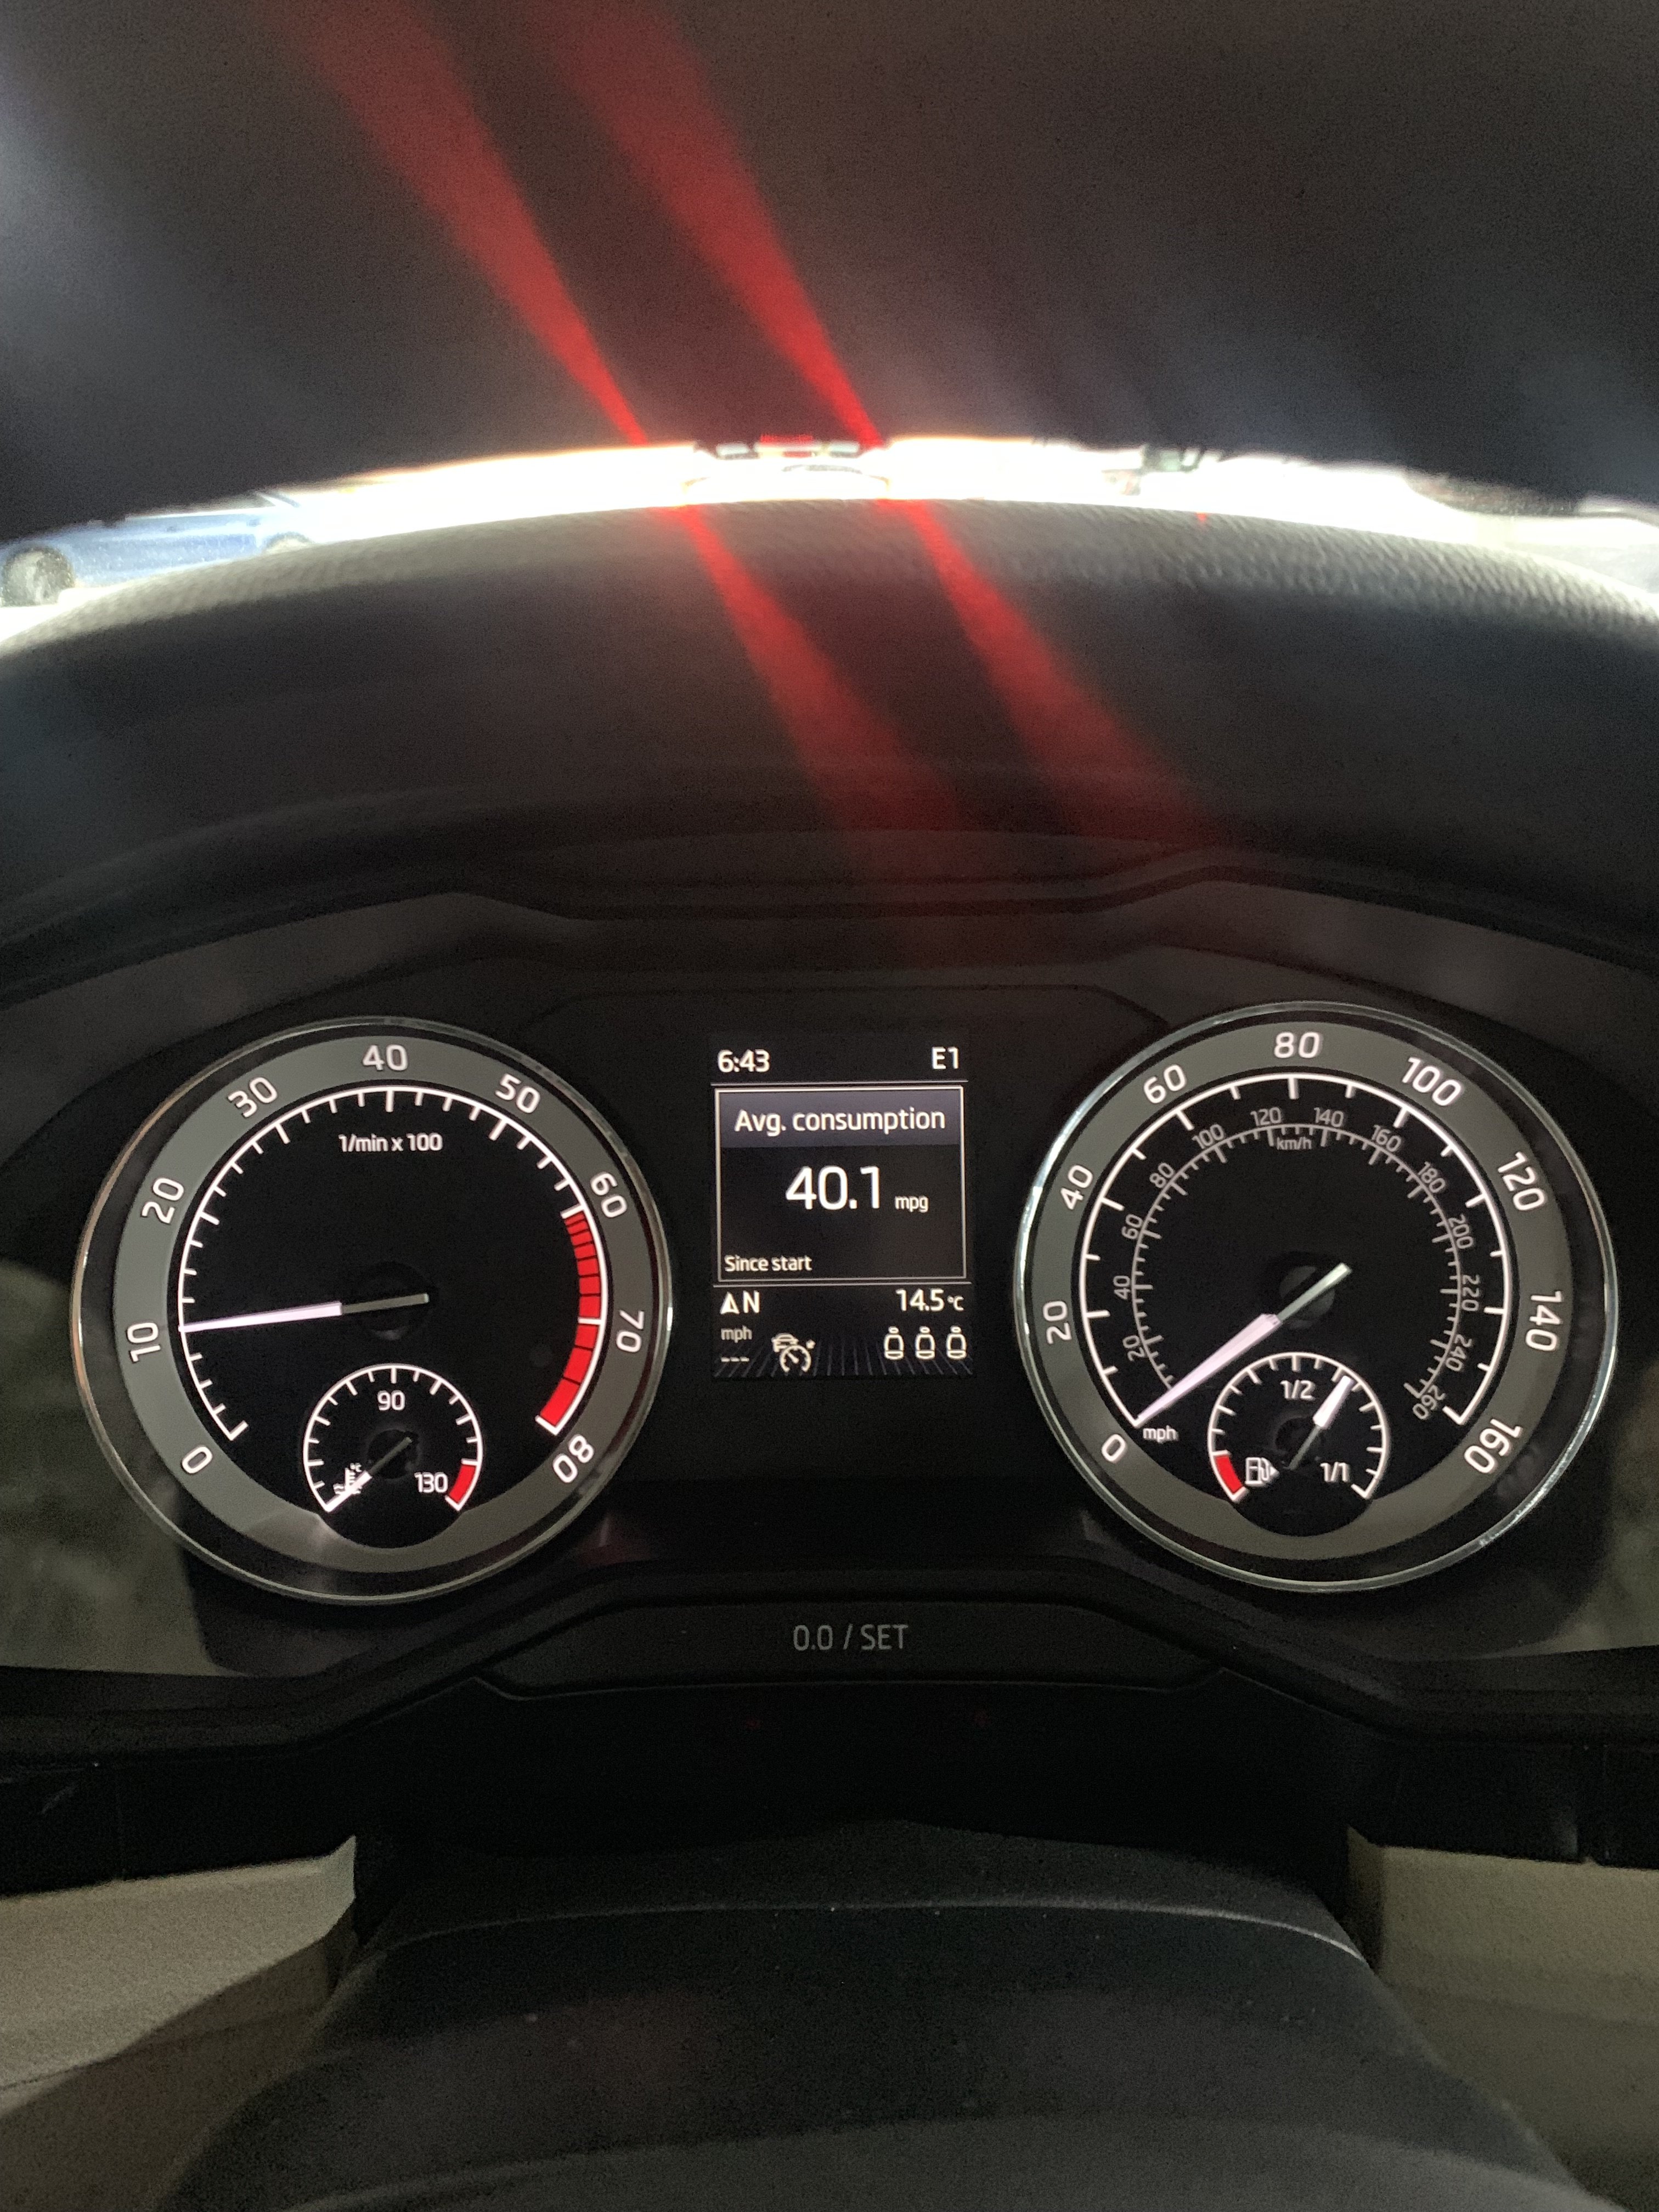
2 pointsBest MPG I’ve had in the 280. Surbiton to the Stena line port at Birkenhead plus one stop on the M6 Toll.
 2 points
 -
Thanks for posting, and well done for acting to help others avoid.2 points
-
Car Parts Catalog - LLLParts This page should have the answers. How many wires go to the sensor? 1 or 2?2 points
-
2 pointsIf you need it once and buying it is cheaper than hiring it, or if the hire shops only have dodgy stuff, then buy it!2 points
-
2 pointsYes, but it may well give a reading at ambient temp, where the display doesn't. So if that says something higher than ambient when the oil is known to be at ambient temp, it would give useful info.2 points
-
I have since spoken to the garage as I had loads of questions, as you can imagine. @nta16 Their diagnostics process involved removing the 3 injectors and testing them on the bench, they could see the trigger coming from the ECU but the injectors would not fire. I believe the CUS engines are new for the mk3 (and a Polo mk5) @Warrior193 I agree, unlikely all 3 failed at the same time, but the garage seems to be convinced that this is the case. @J.R. Thanks for your nice comments. I am somewhat familiar with similar bits of kit (on the electrical and electronics side - not mechanical), but not really with road cars and specially not diesels. I do agree that I should be able to diagnose and fix "simpler" problems. However, I really don't have the time, or the confidence to go much further, allied to the fact that the wife really does need the car back asap. I was very concerned about hydrolocking the engine and I had also read about easi-start damagine the liners as it would affect the lubrication? I do feel a bit had over and that they are using my money to buy kit needed to diagnose the car and taking the ****. When I got the VCDS, I was hoping to find VAG specific DTCs and look at live channels that would point me in the right direction, but after this wasnt really successul, I thought it was better to leave it to the garage as they would have experience with diesels (and the mechanical side of things). in summary, I feel that's quite a lot of money and I am being a bit had over but I really could do with a working car and hopefully this fixes it and it gets us going again. One of our other questions, if this proves to be injector related, is if it could be related to poor quality Fuel. Car usually sees Tesco's finest(cheapest) offering. Whilst with my car (not a Skoda) I tend to use "branded" fuel. cheers2 points
-
Traditionally extras don't really add much to the secondhand price (think more like £50 for an £500 extra), although they often increase desirability and thus make it easier to sell. The normal way to value them is to effectively split each feature into one of the three lists : can't do without, fairly indifferent but maybe a nice to have, and wouldn't pay extra for it, as don't care if not there. Of these can put a price on first category, middle category is worth £0 to you, and third category is between £0 and negative (just something else expensive to repair if it fails) The car is 2 years old and specs change over time, some are added, some dropped. Go onto the Skoda website, new cars, scroll to bottom and find brochure downloads and print out the pages with the list of features and options and their prices (not pages with pretty photos), use this for basis of your 3 lists as above. Put a price against those in first list, add it up, then decide how much prepared to pay for what is being offered.2 points
-
2 pointsPlunge saw AKA track saw. Its a circular saw not dissimilar to a normal circular saw but has a plunge function and a depth stop. Its so you can place is on something plate down and the blade returns back into the body. My description sounds a lot more basic than it is. They are very capable tools and usually run along a guide track. This ryobi one I'm looking at is a kind of mini one that doesn't use a track. I have a small portable guide rail that is perfect for in the car alongside it. Just don't want to get the saw if it's a novelty use once type of tool.2 points
-
Dont be tempted, I started out that way before investing in the correct kit at considerable expense (manifold gauge set, vacuum pump, R134a cylinder, weight scale) and am still learning 4 years later and still have a lot more to spend. Most of the supposed R134a disposable canisters are in fact "R134a Substitute" if you look carefully and are no more than butane gas, definitely not something to be added to your existing refrigerant and even if it were the right stuff (but how would you know?) you have no way of knowing if you have the correct weight of refrigerant in the system. With my kit I used to judge the correct amount by the high and low side gauge readings corrected for temperature and humidity but it is in no way good enough, I risked having significantly too much or too little refrigerant in the system both of which have bad consequences. Contrary to what I have written in the past the only correct way to refill is a complete system evacuation and refill by weight, the stages and the reasons why are explained below. Test system pressure, if none then proceed to vacuum test and then hold full vacuum for an hour to remove any water vapour which may have got in. If system does not hold vacuum with pump off and valve closed then abandon procedure or go to Nitrogen pressure test and use a spray foam leak detector to find leak. If the system has pressure then remove the refrigerant gas using a transfer pump and transfer cylinder. Then pressure test with Nitrogen to full high side system pressure, a vacuum test will not necessarily reveal pressure leaks and is at minus 1 bar, the nitrogen test will be at 18 bar positive, 26 bar on my home AC system. If pressure test OK (valve closed and no pressure drop over 20 minutes) then pull vacuum again and proceed to gas recharge. Connect R134a cylinder to manifold set and then purge connection pipe of air. Cylinder must be on weigh scale that has no cut out timer (so cheap ones are no good) and set to zero Tare. Open valve and commence charging with cylinder upright, inverted filling risks fluid locking the AC pump (dont ask me how I know 😒) Release valve and allow one third of the charge weight (probably 525g whole charge) to enter the system, initially it will flow quickly due to the vacuum. Start engine and observe high and low side gauges when compressor cuts in. Cease charging when the cylinder has discharged the correct weight. Check high and low side pressures against chart corrected for temperature and humidity. Check temperature of cold air from face vents on maximum cooling.2 points
-
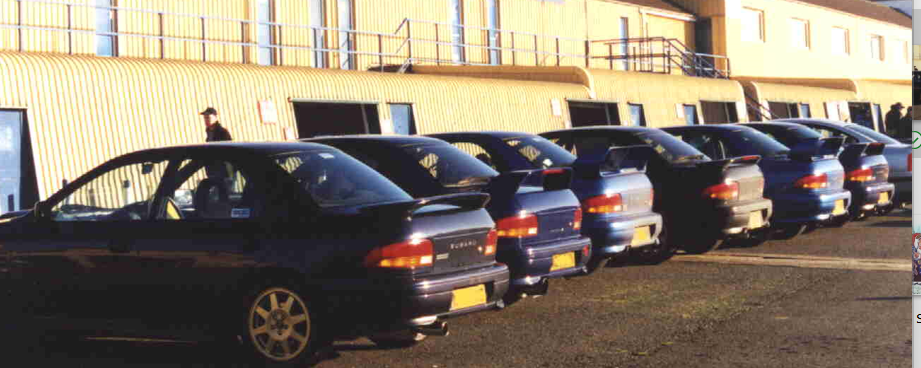
Front drain holes can be found when opening the door and looking down the A pillar. Rears are behind the bumper and not visible. Mine leaked at 3 years old and was repaired by main dealer under warranty (£1400) but a few months later it leaked again and required a replacement cassette at (£2400). Fortunately I have a very good relationship with my dealer and they picked up the bill. It was fine for a further 4 years until I sold it. I too am an ex Scooby guy. I had a Series McRea in the late 90's spent a few years on Scoobynet and at SIDC events and trackdays.
 1 point
 -
1 point
-
Thanks, no further forward really. Pulmans sales manager admitted it was very poor then after I raised a complaint with Skoda UK said there was nothing wrong with it. The actual Sub has very little output, it's only really audible with the front speakers off, as soon as you fade them back in it disappears and the bass from the front and centre speaker takes over. After blasting it for 6 months it's improved very slightly, what I now do is put the tracks I want to use in the car through a program called Audacity and boost the bass by 6db then save them to my mobile before using them. I'm afraid I won't be going anywhere near Pulman Durham ever again!, they used to be a lot better than their VW branch, I bought a couple of Yeti's from them previously. I'm not due to change cars until Jan 2027 (Motability) but unless Skoda have improved the software and phone system I think I'll be looking elsewhere. On the good side, the HUD is very good, the Matrix headlights work well and I'm getting about 3.5 miles per kWh while not making any attempt at economy!. Winter range was about 220, now I'm getting about 300 on the guess-o-meter Regards, Jeff1 point
-
1 pointBut, now that you have hopefully simulated the micro switch working, as far as the car knows, and if the oil was high enough, and of course if the bonnet switch is faulty, you should now have cleared that oil level warning. If it is still there, the root cause lies elsewhere like the wiring, maybe a fuse, or the oil level sensor.1 point
-
1 pointThe seat belt sockets are spring loaded so can swivel up & down, is that what you mean?1 point
-
1 pointAnd I definitely did not replace the “single use” clips either as they continued to hold the base in place; I’m sure they’re the usual VAG £7.80 plus VAT… EACH…. and on back order.1 point
-
Hi, Thanks for asking J.R. The parts supplier the garage use are usually very fast delivering but I have lots of bad luck so this morning the parts arrived late; I saw them being delivered so the garage wasn't messing me around. Out of interest; https://www.examinerlive.co.uk/news/local-news/fire-crews-battle-overnight-blaze-29550254 This is getting too near home? Kind regards, Col.1 point
-
The function of each fuse location varies between models and years. However your handbook will tell you what each fuse is protecting. If you don't have a handbook then you can download it from the sticky thread above the current threads. The fact that you have no power in a cluster of fuses at the top suggests that all of these are supplied through a larger fuse or relay elsewhere. Please post here the functions assigned to the circled fuses as a guide to find the source. [If you want to try my guess first after looking at a generic wiring diagram, it is that relay 1 has failed on the fuse panel under the bonnet. It supplies power to what is called Terminal 15 (a supply point for many of the fuses in the cabin fusebox).]1 point
-
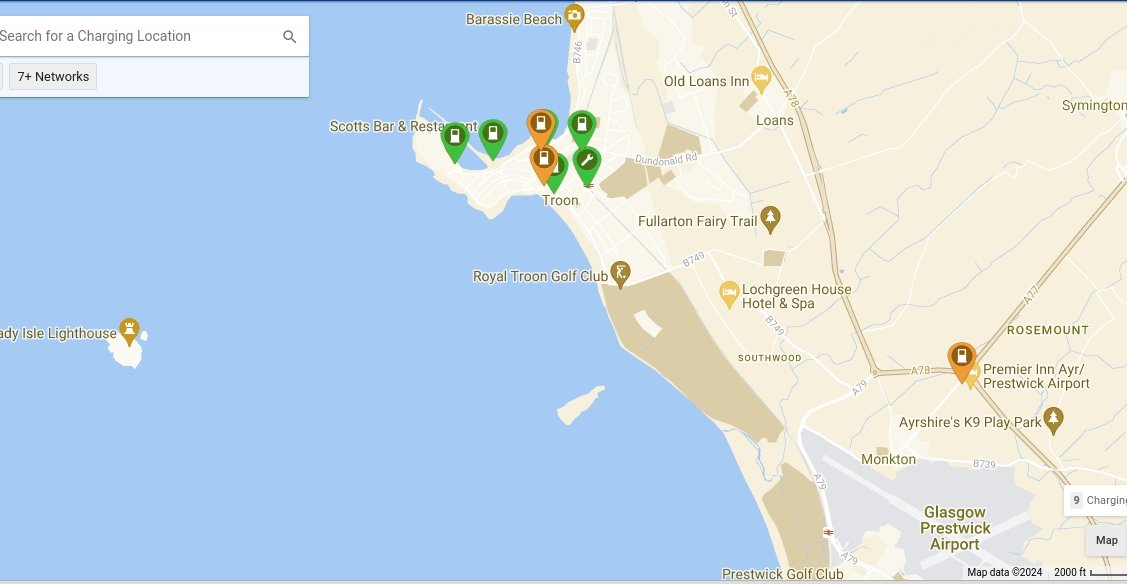
1 point1 point1 pointA farse at the Open Golf at Troon. Diesel generators providing charging at a farm out of town for the Official vehicles, players and VIP transport by BEV,s. EDIT, my bad. HVO powered generators. Bio-diesel. Waste products and feed stock. So very very Green.

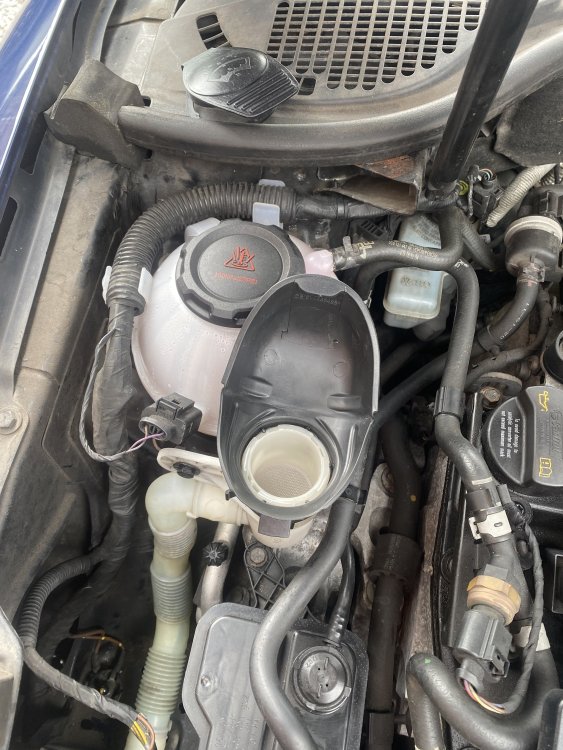
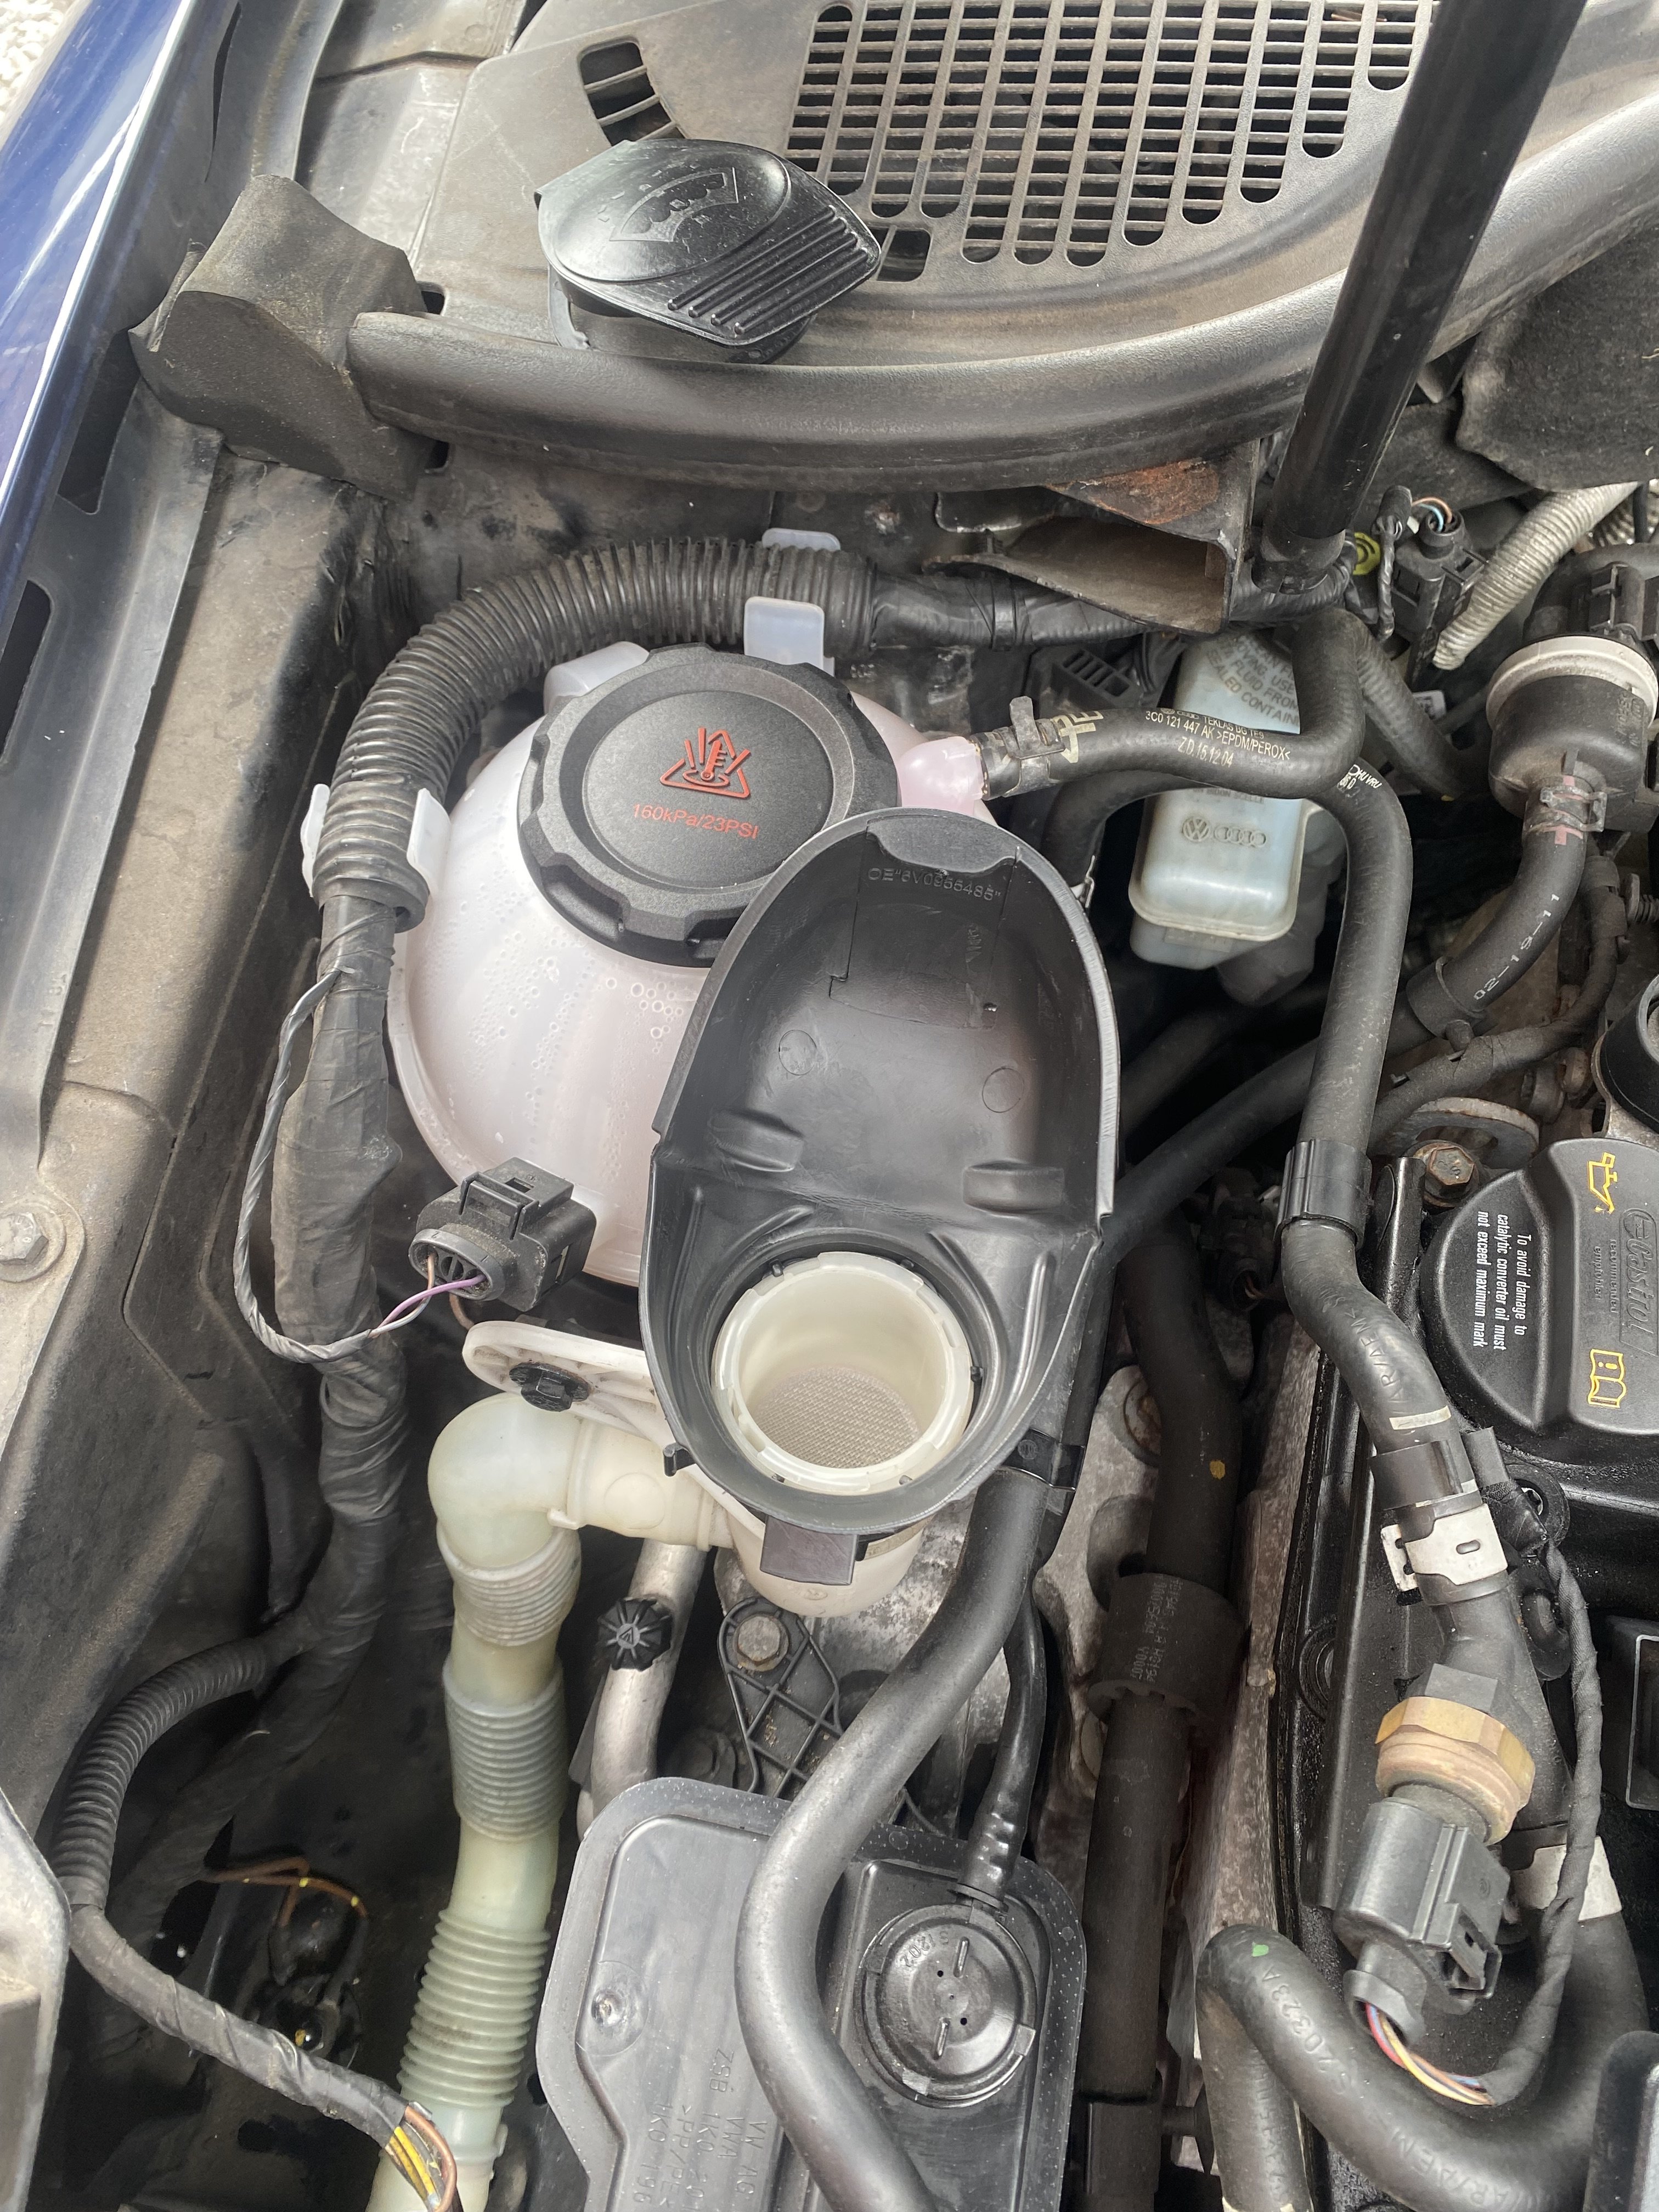
 1 point1 pointNew washer bottle cap in the style of the later Skodas with the built in funnel but found a black one 😁 also took dash apart a little to fit dashcam as I don’t like the wires visible where possible just required a little hole drilled under climatronic panel that will never been seen to feed wire through

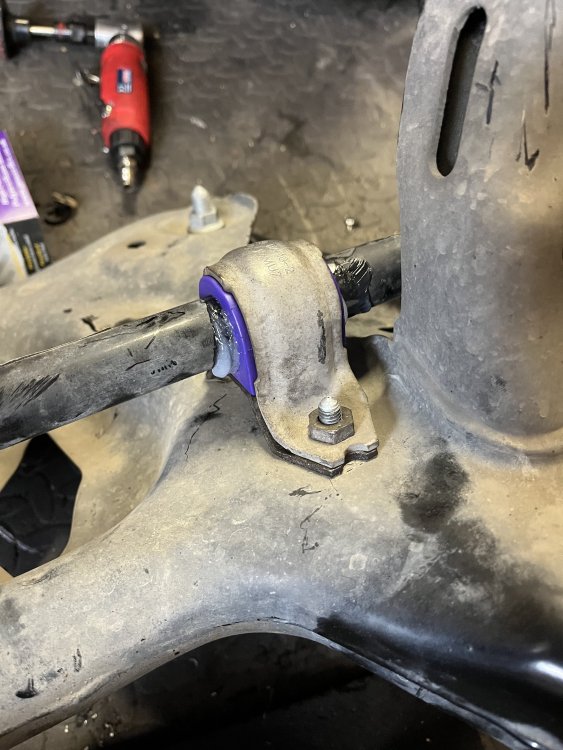
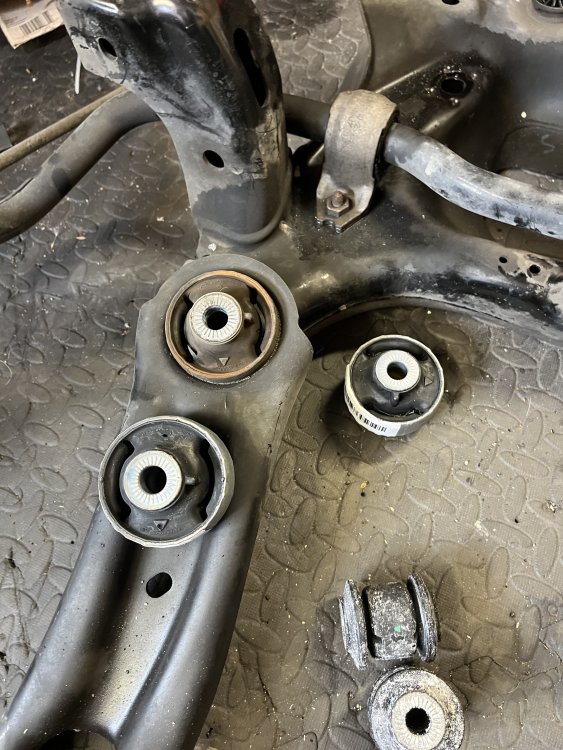
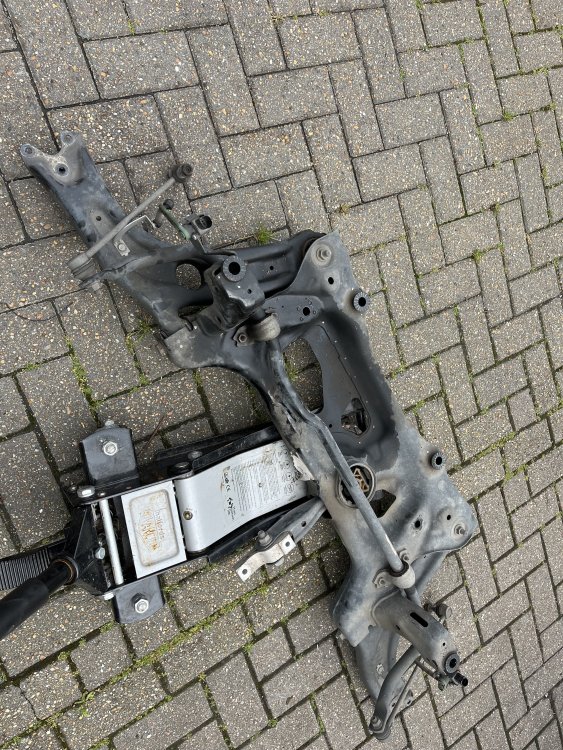
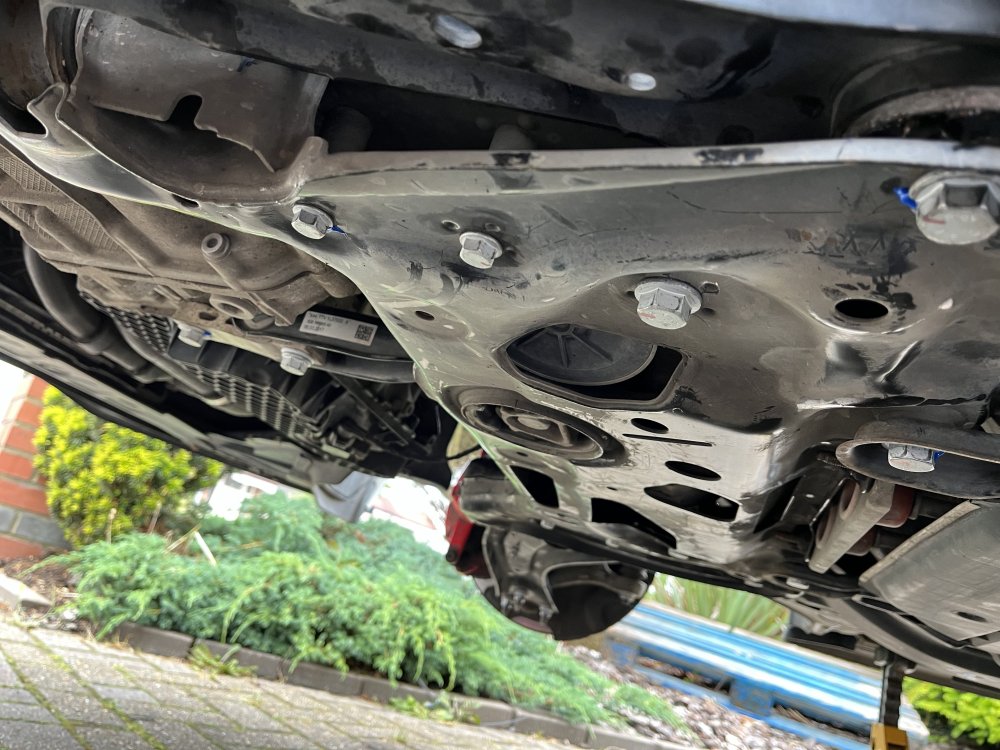
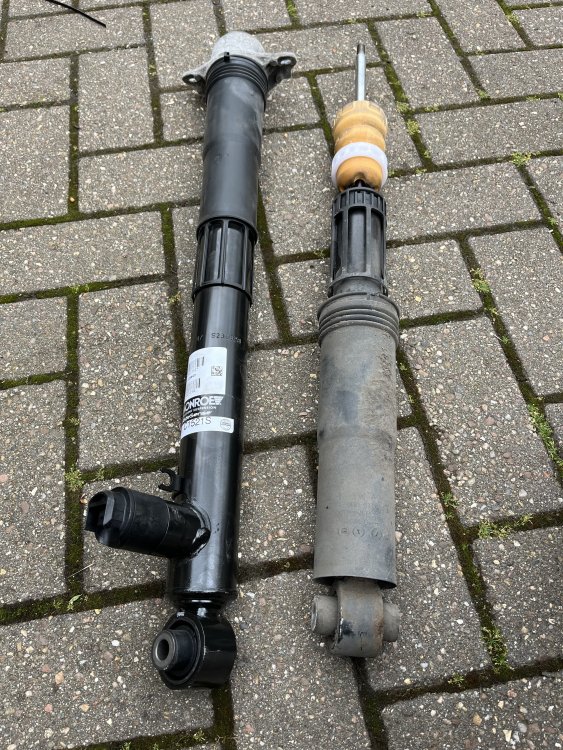
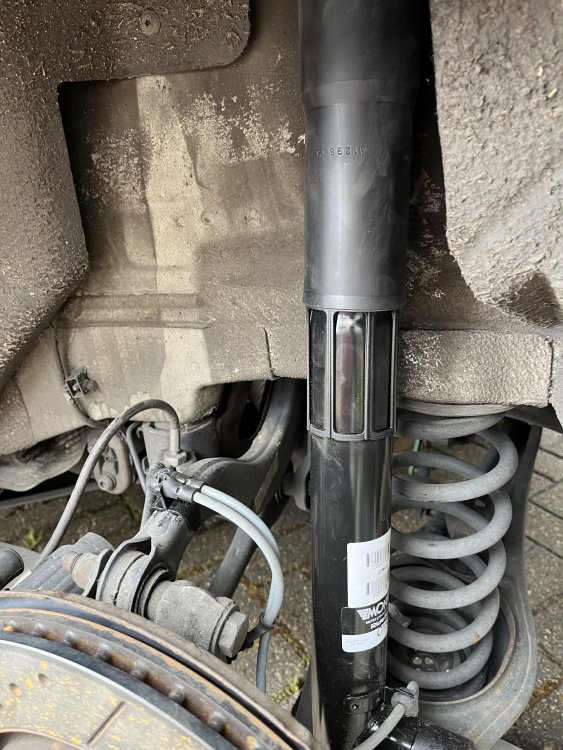
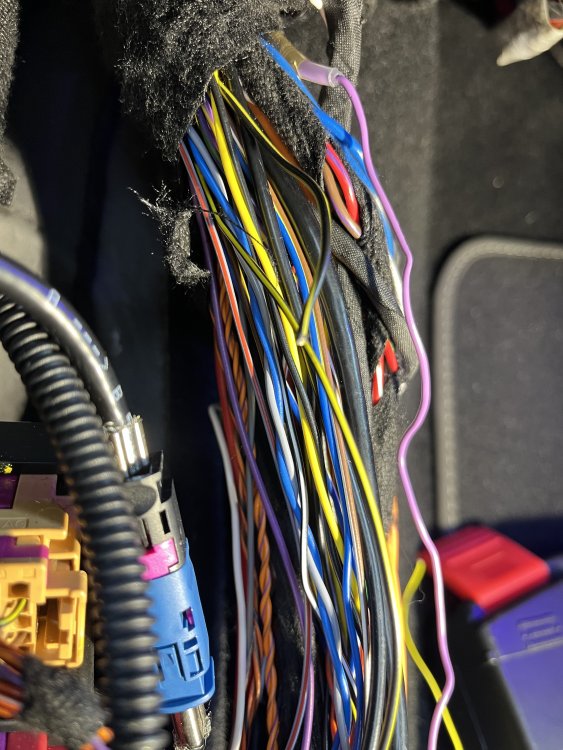
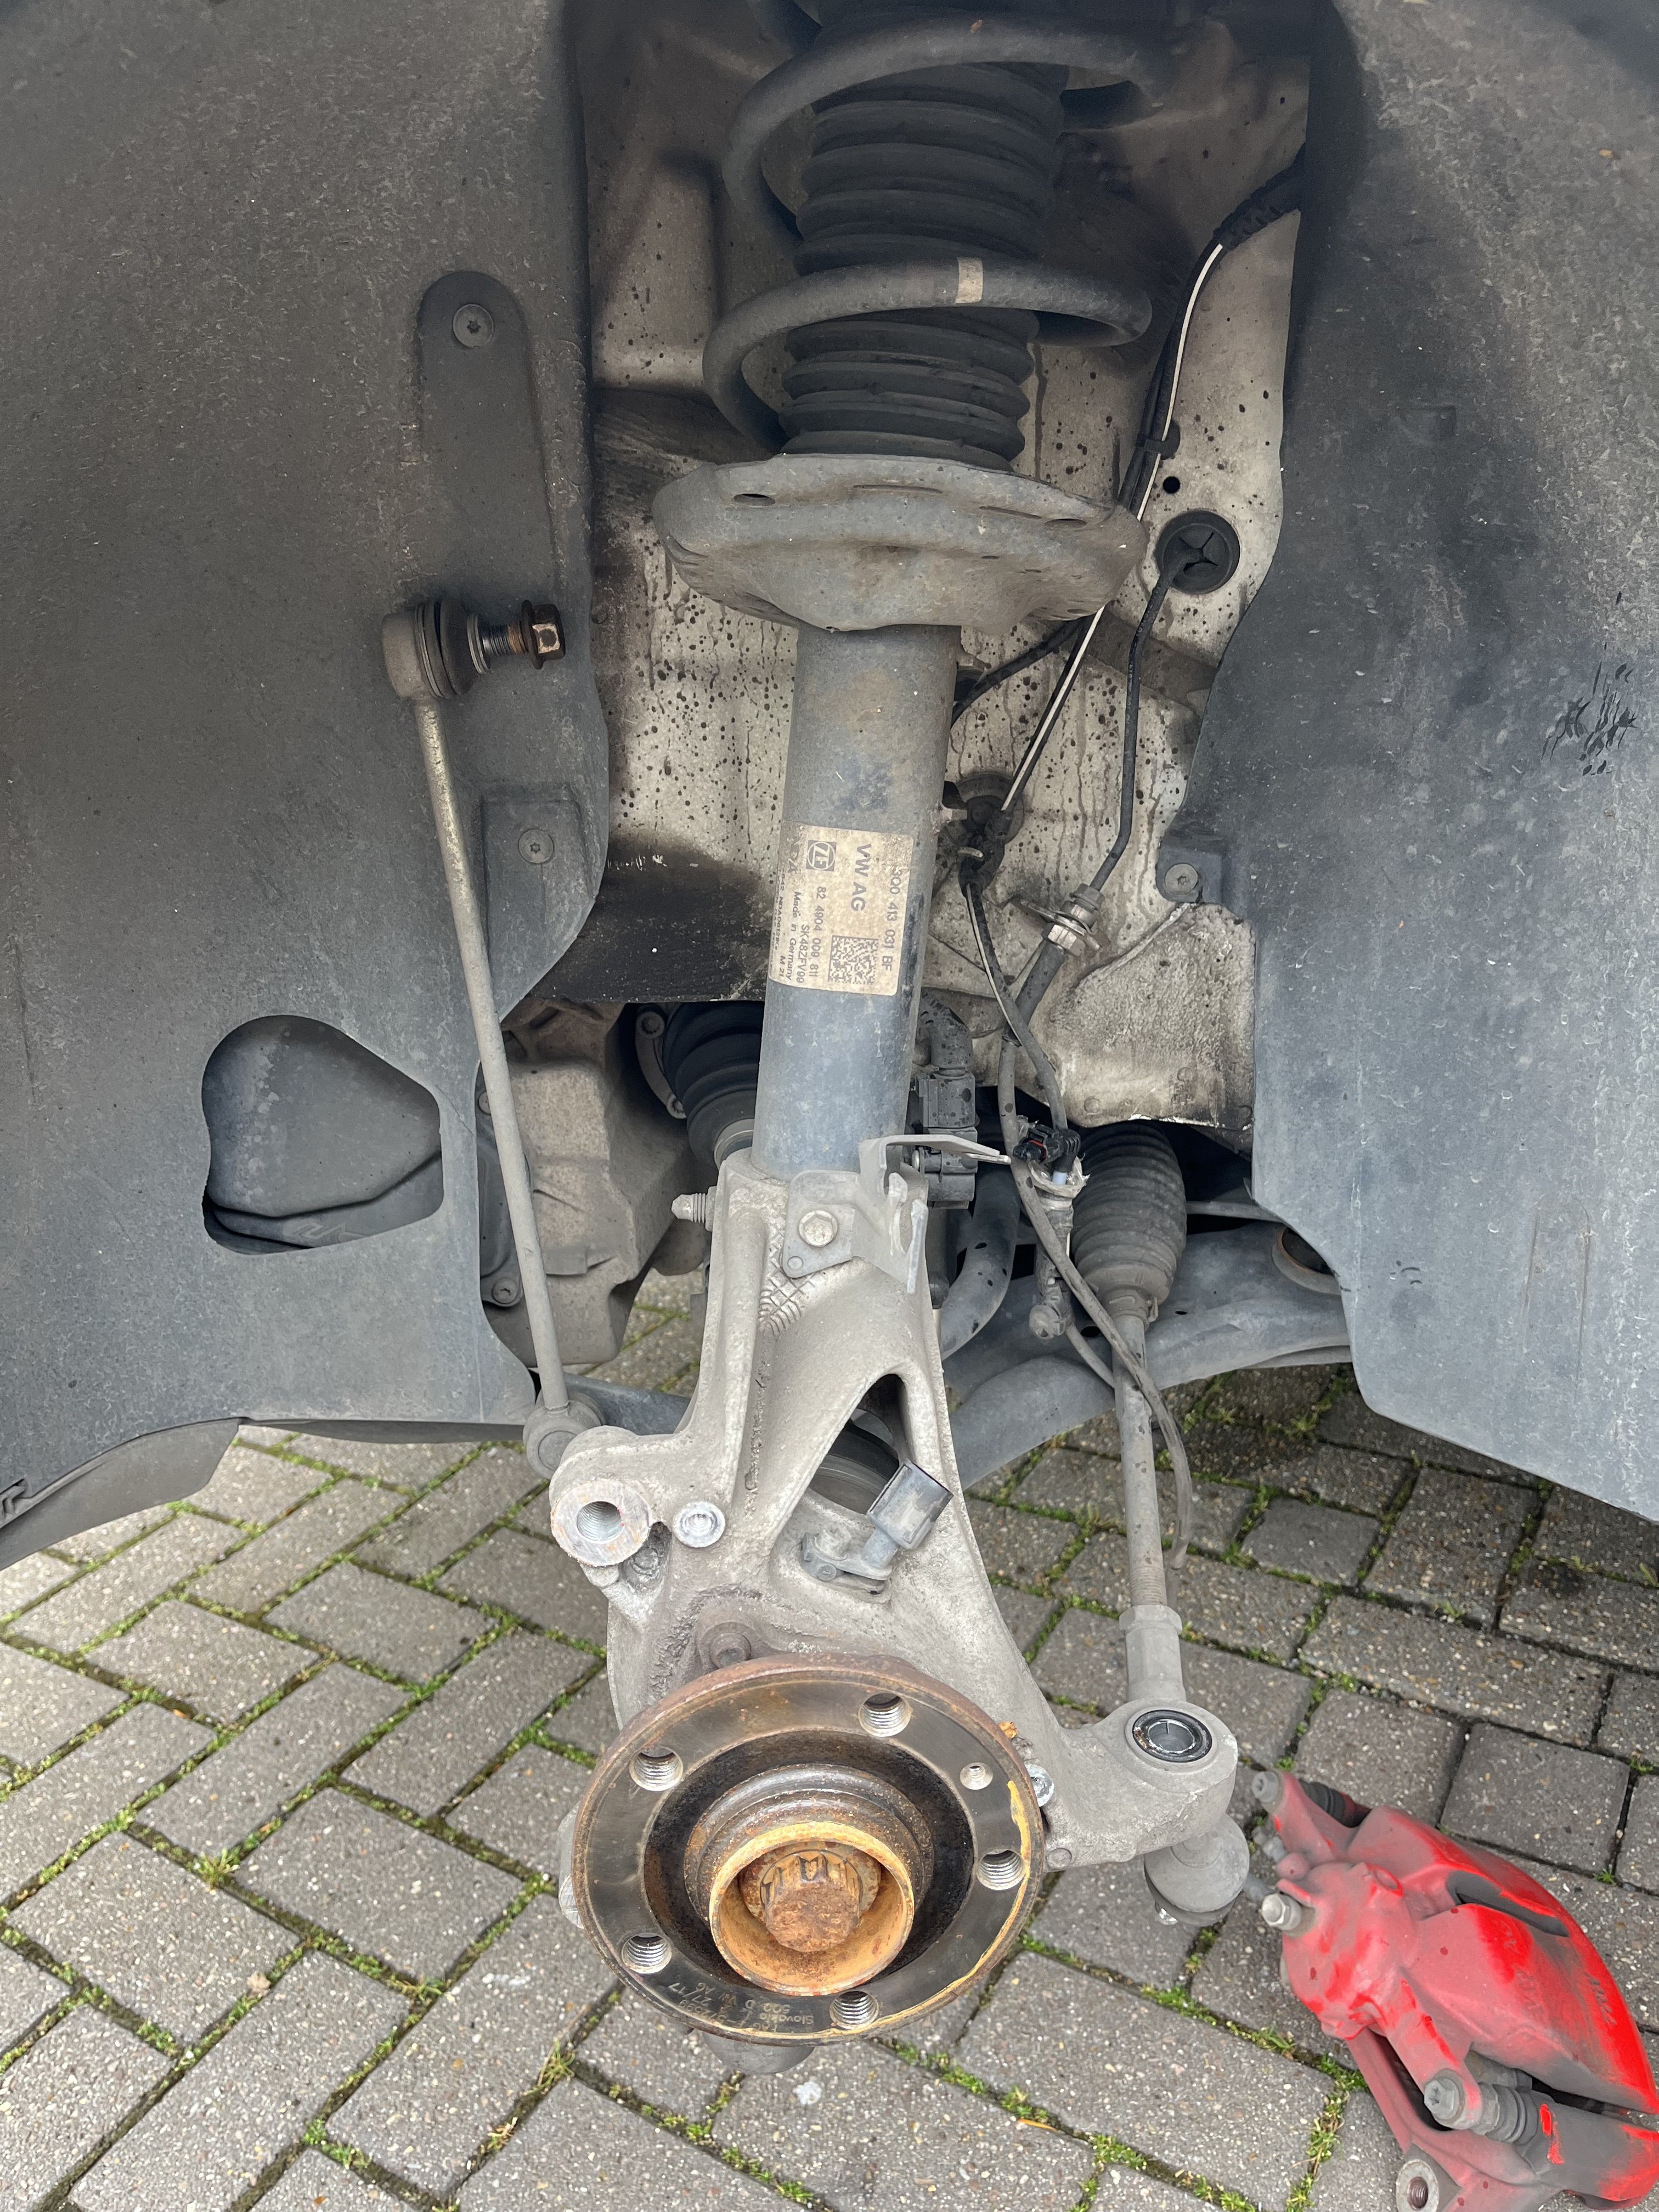
 1 point1 pointThat is very good for a 6 speed 280. I think the best I got was around 34. My new 7 speed 280 is better on the motorway, I get around 40 on a long run at 75.1 pointIf you take it to your mot garage they have a probe to put down the dipstick to check temp1 point1 pointWhen Skoda built a new plant and increases the number of DQ200,s that they built for the VW group in 2015 they said they were used in 48 applications. That is models with power output from 75ps to 192 ps, petrol, diesel, and now mild hybrids. I would think the cost of producing pretty much the same gearbox from 2008- 2024 and not yet come up with a new version has been good value. What a pity VW can not put a 10 year warranty on a product with no service schedule or maintenance regime. Well other than that had to in 2012 in the like if China because they c0cked up.1 point1 pointWe have seen pictures of the Hindenburg airship disaster but is it that much more difficult than LNG like many Dacia are fitted with as a dual fuel ? Yes hydrogen is the most leaky of gases due to the smallest of atom size but insurmountable problem with today's tech ? Already a few cars out there Hondas and Toyota I think I have seen. Even as a EV fanboy I can see merit in propulsion fuel diversity.1 point1 point1 pointWhat J.R is getting at is if there is a sensor reading 10 degrees lower than it should be, the control module won’t know this is a bad reading and may output air significantly hotter than it needs to, to compensate for this. To self diagnose these issues you need a complete set of data for the car, all the temperature sensors, flap positions etc. maybe some cheap thermometers for comparison.1 pointYou don't say what model year your car is but the page of engine diagrams for a 2004 1U Octy are HERE, although the AVU engine block is not marked as such. I think it could be THIS one. The oil pump diagram is HERE, although it doesn't show any gaskets - maybe they're listed elsewhere.1 pointSteering motor is also not uncommon on them. Note for greasing the shaft and bump stop on shocks with silicone grease too.1 pointThey are gambling that with £1600 for nothing they might by chance stumble across the real reason for non starting, not gambling with their own money. Mind you if they can diagnose not one but three faulty fuel injectors without being able to start the engine then maybe their psychic powers are worth £1600, what do I know!!! It sounds like you have done all the right things using VCDS, I commend you as a new user for having worked out how to do all that, someone with that competence should not be giving in and gifting £1600 to a garage, I would have persisted a little longer with the easi-start, it will tell you a lot about the basic compression ignition capability devoid of any engine control, will show if the timing has slipped or there has been valve damage. It can sound horrific but you are not likely to damage the engine with it running on Easi-start for a few seconds, just make sure you dont drown it because it can hydro-lock and when it happened to me broke the planet gearing on the starter motor. In my defence I was helping a mechanic start his own vehicle and doing exactly what he was telling me forcefully to do, I knew it was becoming flooded but his ego knew better.1 pointWhen looking in the app it says it's the "Lifetime" plan, and the dongle is the original small white unit. The app says I can upgrade to the "ULTIMATE VAG" whatever that is..... but I've got VCDS anyway so no need to upgrade for me. When I did the adaptation I didn't notice anything about using credits but I know they've changed how things work with newer licenses/dongles....1 point1 point“Ahhhh right……you mean that NOX sensor, oh well then yeah, that one’s around €125!”1 point1 pointI'm reading/interpreting what you wrote as " on the dash each door and hatch opened show on up - but when the bonnet is opened it does not show up", if that is the case, then sort out the micro switch and/or lead before looking elsewhere would be my plan. Edit:- in other words, the car's systems need to know that the bonnet has been opened before it will revisit and clear the low oil level warning, logically, if the bonnet has not been opened then the oil level can not have changed, if that makes sense.1 pointSo i took the week off work to put a big dent in things! Webasto parking heater - Finally got the basic settings to run through on this and got it to run without cutting off. The remote was then very very easy to pair with ODIS and took 30 seconds. I now have a fully working parking heater and ventilation setup! So on cold days/mornings I can either press the remote to start it up, or set a time on the dashboard that i want to depart and the heater will boot up and get the interior nice and warm! And being summer now, i have the ventilate option - which instead of heating the interior will turn the blowers on to remove all the hot air in the cabin before you are even in the vehicle. Webasto signed off fully and a rough guide on the coding will be along shortly. Areaview/360 camera - no further updates on calibration yet sadly, still trying to find time. The DCC and suspension work - probably what a lot of you have been waiting for. Before picture of the front strut. Now as all the wiring had been done and can be seen wrapped up in the photo above, it was just a job of physically doing the suspension work. The new monroe strut fitted up with all new top mounts and bump stops. As everything is being done by the book, all new hardware was required, and for all this work it was roughly 60 nuts and bolts. (The blue goo in the picture above is a wax visual indicator I put on all critical bolts to see if they ever come loose). Whilst we are still on the front of the car, it was time to get all the front bushes changed to finally get rid of the known creaking issue over bumps. 3 sets of bushes were changed here: Front lower arm inserts - fitted with genuine rubber bushes - no signs of wear on old ones Front lower arm puck inserts - fitted with genuine newest revision rubber bushes - old ones were creaking and a known issue for this Anti roll bar bushes - can only be purchased as a complete anti roll bar so polybush fitted instead - also a known creaking issue. So far, no noises at all from the front anymore! After this we moved onto the back - much more straightforward, 3 bolts for each strut and they were out. New bump stops and guards fitted but top mounts reused as ive never seen one of these fail. Straight forward fitting and done both rears in around 20 minutes. After this, all the hardware is fitted and the car was all fitted back up and all coding was carried out. (Im still working out some nacks with the coding so wont post it just yet) But.... we ran in to a fault code for the front left level sensor reading short to positive, so it was time to start diagnosing. Rather than pull the front wheel i decided to go from the NSF footwell where the multiplug is for both front sensors. 3 wires to each sensor, a ground, a 5v feed, a signal. On the 5v feed i was getting 12 VOLTS, not ideal. So the boot was stripped out to access the DCC module incase I had wired it incorrectly and after disconnecting the DCC plug in the boot, there was still 12V on this wire.... some head scratching commenced and a conclusion was made, and i remembered my earlier post The wire for the DCC level sensor is a 0.5mm black with yellow trace, one of the wires going to the phonebox amplifier is.... you guessed it, a 0.5mm black with yellow trace. Both wires ran alongside eachother in the passenger footwell and were very easily cut and swapped around. This is the huge upside to me doing all these jobs using original wire colours, routing, plugs, pin outs and wiring diagrams. It means that tracing faults is no different to any other factory fitted car, and more-so, if someone else had to diagnose the fault, they could follow all OE documentation. So not only did this cure the DCC fault, it cured the phonebox fault also. The final part of the DCC is the calibration which i will cover in more detail - but basically leave all 4 wheels hanging off the ground at maximum travel, and press calibrate. I will post all of my used suspension torque settings - THESE ARE SPECIFIC TO MY CAR AND MAY NOT BE THE SAME AS YOUR REQUIRED SPECS - PLEASE FIND THE CORRECT ONES FOR YOUR CAR AND DONT BLINDLY USE THESE These are all posted in Nm+Angle format. Front Subframe Main 70+180 Subframe small 50+90 Steering Rack 70+90 Steering rack end 20+90 Steering rack to column 20+90 Anti roll bar 20+180 Anti roll bar links 80 Lower arm to ball joint 40+45 Lower arm forward 70+180 Lower arm rear 70+180 Hub to shock pinch bolt 70+180 Driveshaft 200+90 Shock to upper mount 60 Shock mount to body 20+90 Brake carrier 200 Dogleg to subframe 130+90 Dogleg forward 50+90 Dogleg rear 50+90 Rear Shock to lower arm 70+180 Shock to upper mount Shock mount to body 50+45 Upper eccentric bolt 95 Lower eccentric bolt 95 Wheel torque 140 There will still be more updates to come as things are fully completed as well as all coding required and such.
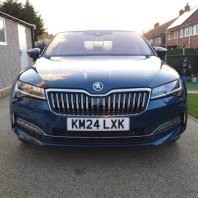
.thumb.JPEG.296521ec97952af7fde54a6ce49e19e0.JPEG)
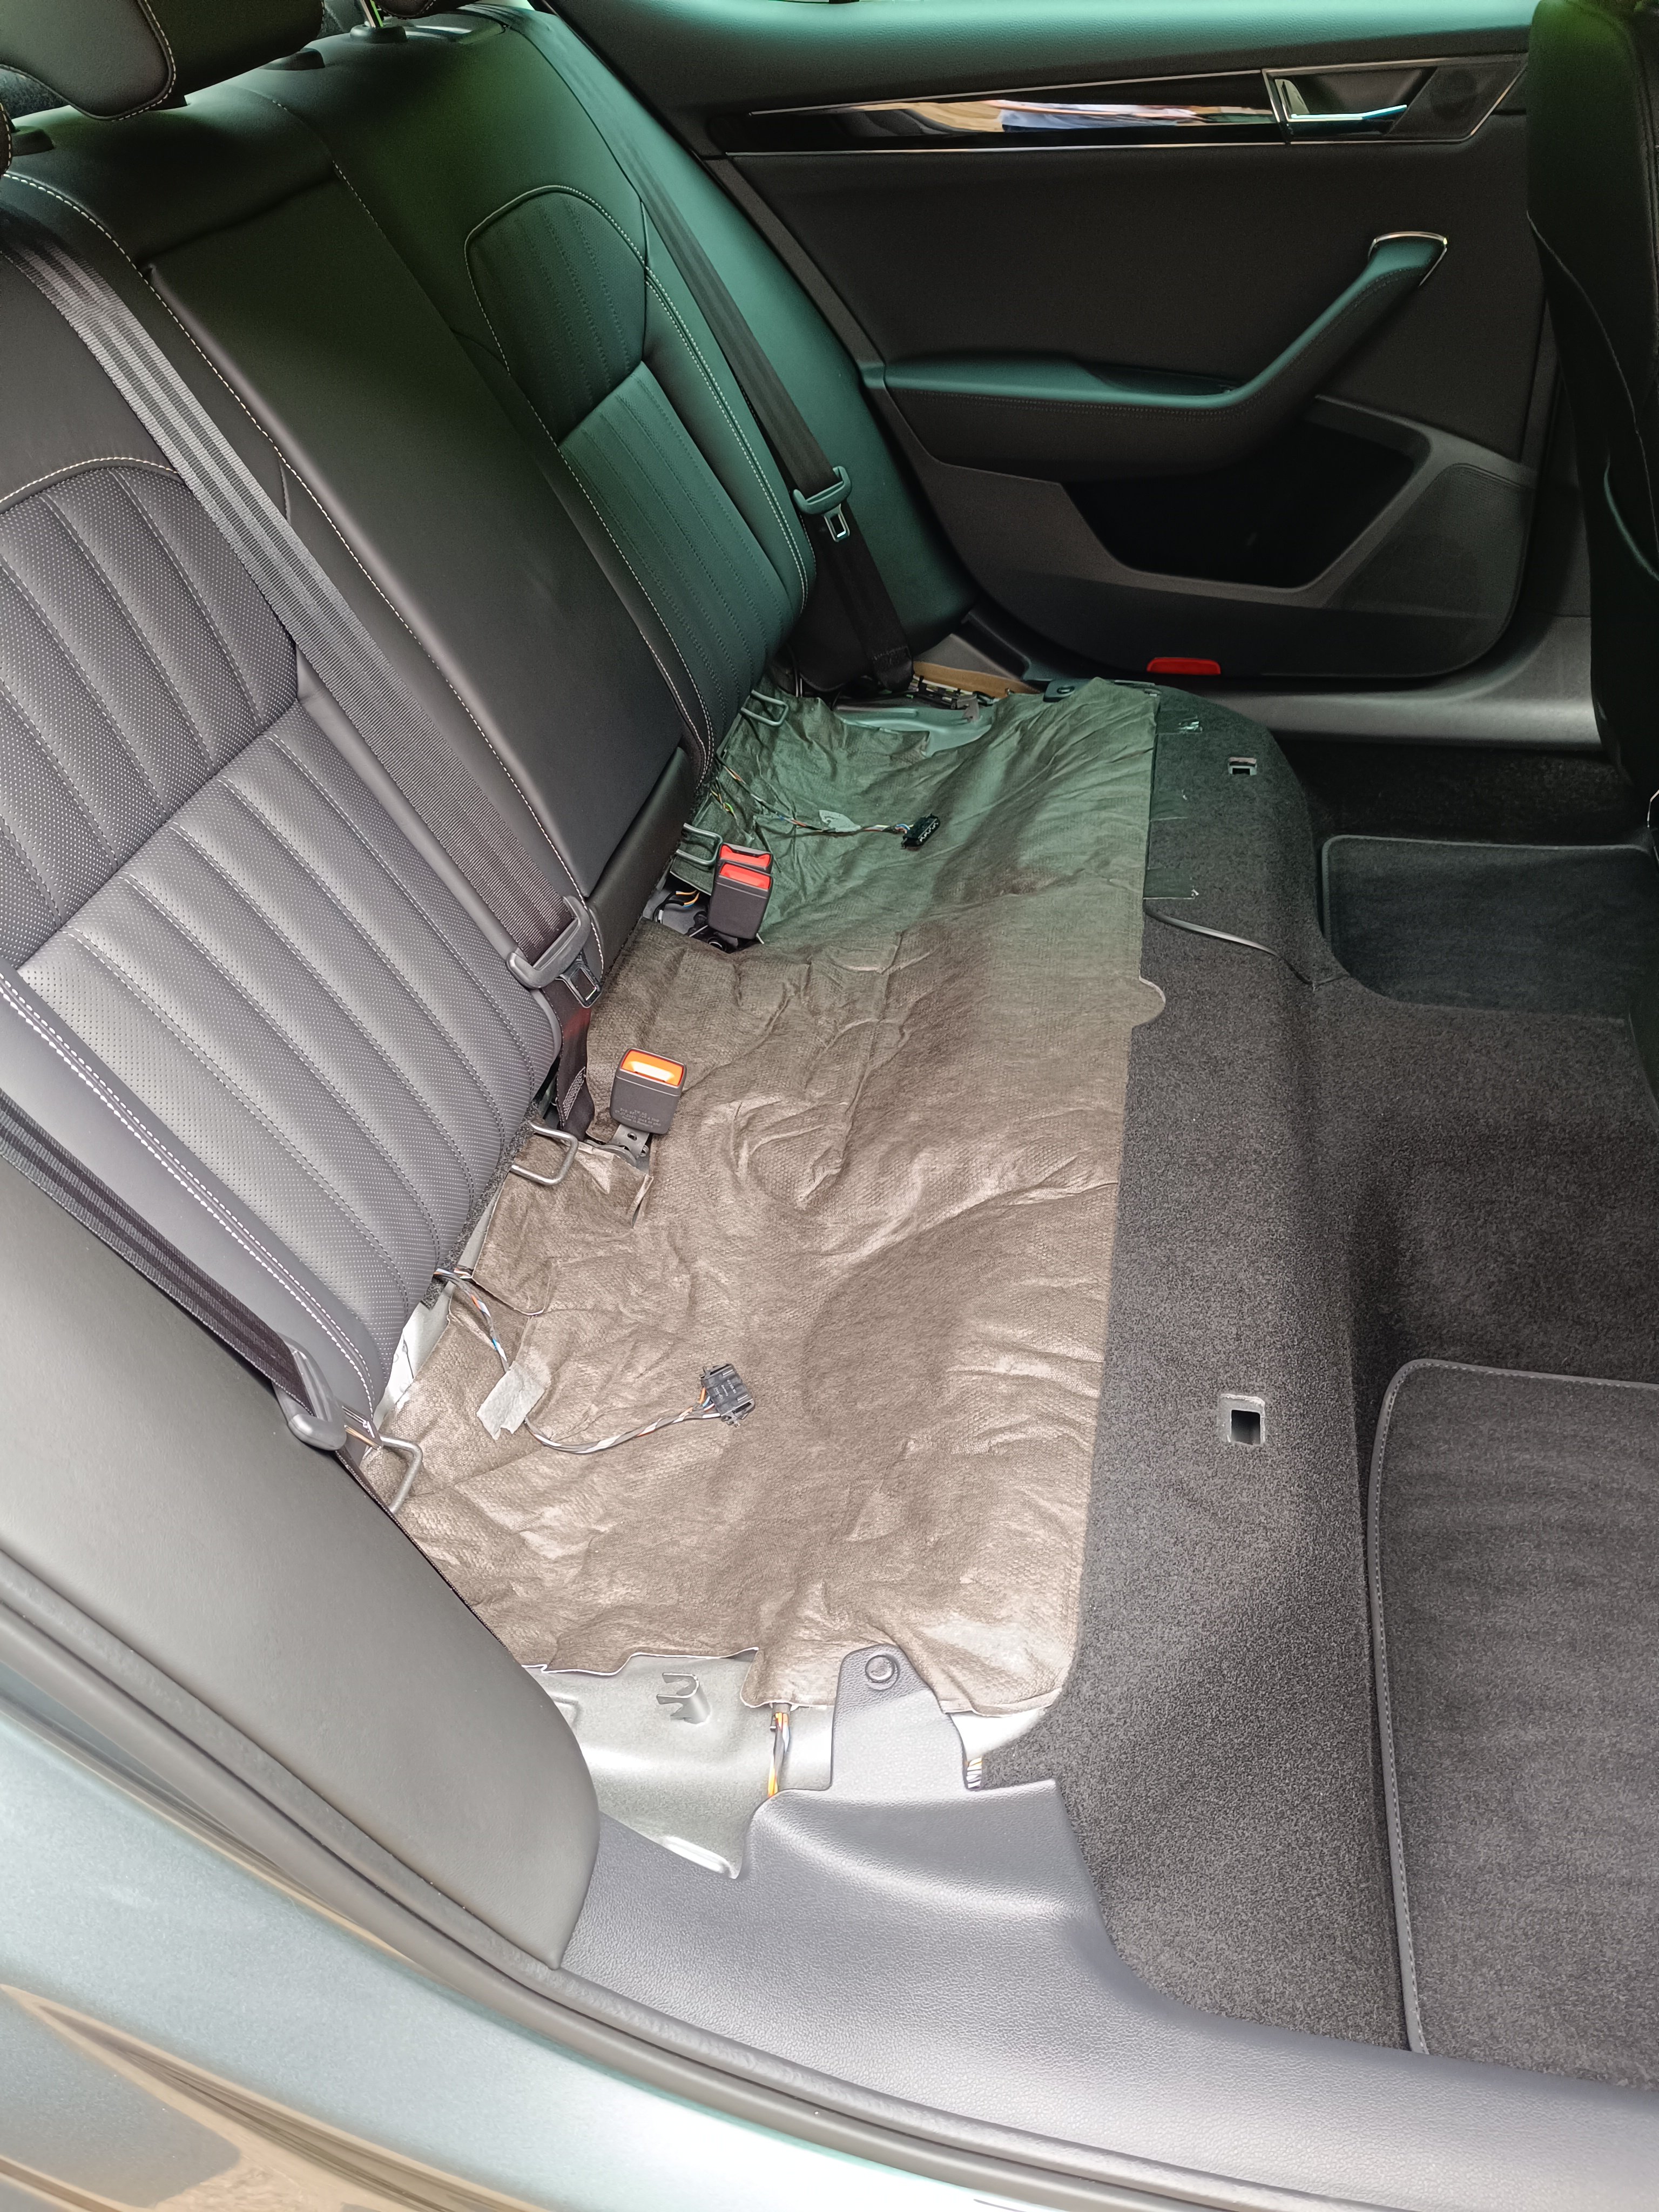
.thumb.JPEG.232ea84d5163d13038955427cd7183fc.JPEG)
 1 point1 pointIt is not a recall. It's a service bulletin/tpi etc. So unless the tech looks at any known fixes/problems they may have missed it.1 point1 point1 point1 pointHow about hardwiring the dash cam into the fusebox instead? Then it's only the glovebox and pillar trim to come off.1 pointOther people have reported a problem with the slide over the handbrake lever sticking, causing the handle not pulling up correctly. Lubrication seems to cure that problem.1 point1 pointNew Mk4 Superb owner here, shes quite an upgrade compared to my previous Mk3 superb, but that's mostly due to the spec and less due to the new model. Not to say that's a bad thing, I'm still really happy with the upgrade and would not like to go back to the previous car. The interior is quietness with sound proof glass and canton sound is really good. Also the automatic rear hatch with automatic cover is a hidden blessing, i did not imagine i would actually enjoy using it as much as i do. Part of the older mk3 tech that i did not have before is travel assist, yesterday i drove trough a city whilst using the accelerator pedal once and brake pedal twice. Coming from manual gearbox Mk3 the last one is something i did expect but also did not expect, there is so much less to do. The HUD has integration with android auto, so it does display the waze navigation turn arrow with the distance. Design is still understandably Skoda Superb, front looks great but rear just does not compute for me, old one looked better. Maybe it will grow on me, but for now it's a step back. Because 95% of the cars on the road are gray/silver/etc colour i selected the only other colour available that was not blue - red. It's not as bright as on the eniaq but still looks really good, i love it. Few annoyances that are starting to annoy me: the lack of memory for the simplest of things. I was told that those things are mostly due to the "green" nature of the car or for "safety", but i would still like to turn this BS off. First thing is the speed alert that just keeps coming back after each restart and there is no way to permanently disable the damn thing. Even if i turn off the beeping, it just reverts back to factory setting after i restart the car. Second thing is the seat heater memory, on the Mk3 i was able to enable this setting on the first day of ownership, so i would like to repeat this feature for this car. Since i do a lot of short trips during the winter, i got accustomed to just turning the heated seats and wheel on in november and turning it back off in march. Thirdly is there a way how to remove the "take over the steering" nanny in the travel assist? At around 500m on a flat straight road when that car is positioned correctly by travel assistant, and does not need any steering alterations the car starts annoying me to do some steering input just to make sure I'm still here. But the car did a good job already so what am i supposed to do, develop parkinsons just to keep the wheel twitching enough? Also, where are the front fogs? Not that they were used often, but still...
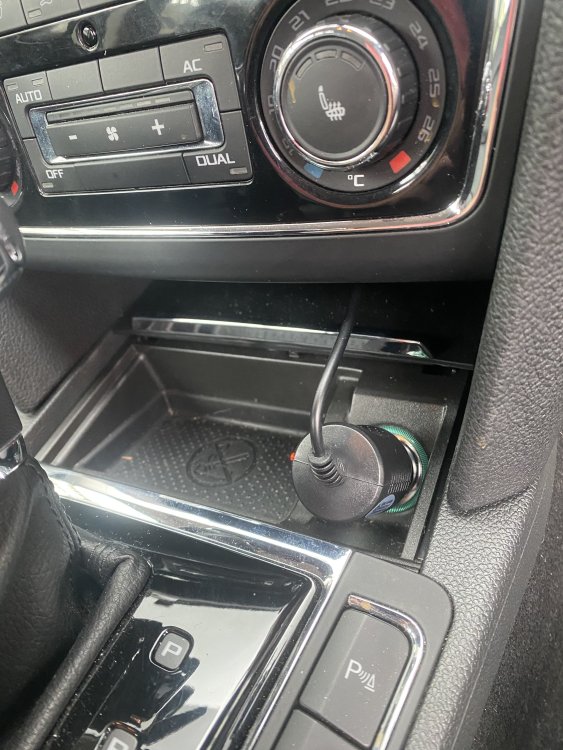
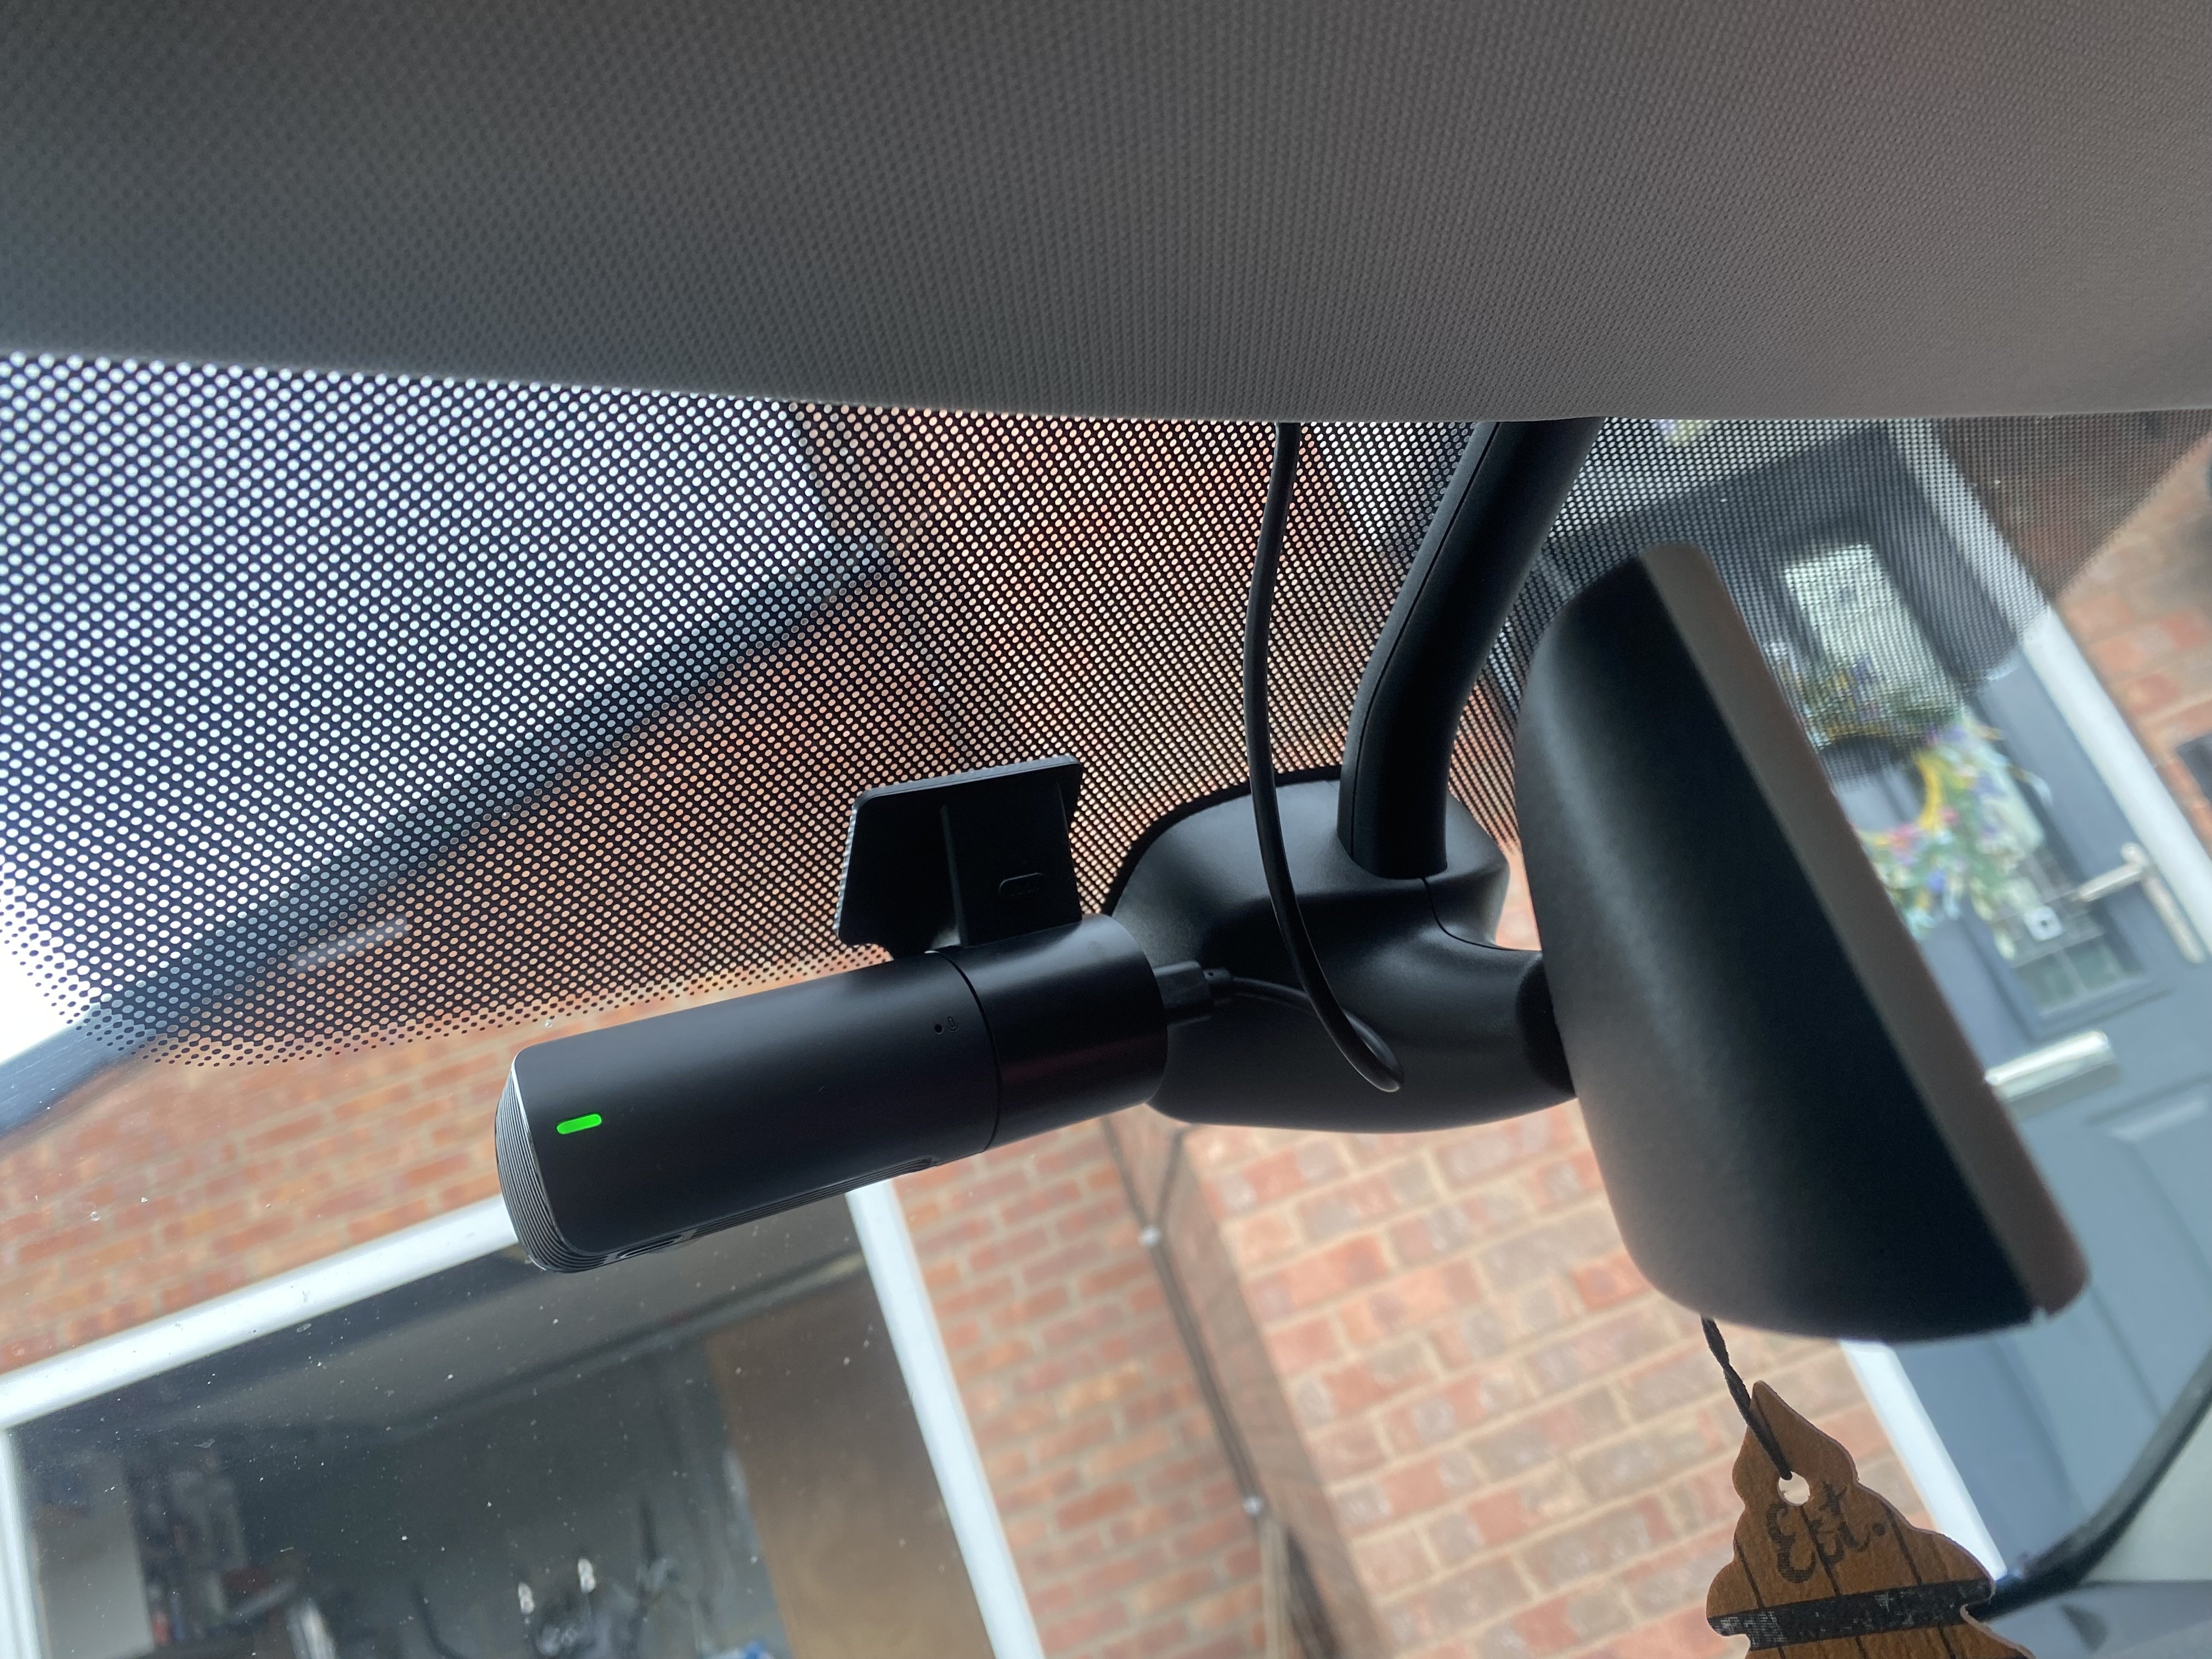
 1 pointI don't know for sure about the 1.9 PD engine but on my Mk1 Octavia (1.9 ASV engine) it was a common problem. The cause was because VAG had chosen to allow a cold engine to start at any revs but for a warm/hot engine it was necessary to exceed a certain higher revs before allowing a start. Result was it would start easy first thing on a cold day but not start when warm because a failing battery could not crank the engine at the required higher revs. The PD engine was around at the same time as the ASV so I suggest the similar software was use. The fix was to replace the battery.1 point1 pointNo and no. Age doesn't matter like use, abuse and neglect. If you wait until something misbehaves that is already passed the better point of fuller recovery and better and long service life of the battery. By the time you get a low battery warning message the start-stop will have made itself unavailable for use one or many more times, worst still the computers don't like low batteries and can show this by causing unexpected issues (and unseen error counts) before putting up any messages and lights to the driver. This is when the engine still starts normally and the lights seem bright enough. Best that the battery is recharged before this but certainly at this point for better and longer service life of the battery. The recharge might be a good run with less electric items used on the car or to use an appropriate charger maintainer having read and followed the instructions in the car's Owner's Manual and charger' instructions. When you get to the point where the engine is difficult to start on a modern car you have possibly/probably taken the battery beyond where it can fully recover from this and may have shortened its service life. For many a few, as required, preventative recharges by using using an appropriate charger maintainer, having read and followed the instructions in the car's Owner's Manual and charger' instructions will prevent the premature and unnecessary change of expensive battery and prolonger and better its service and life. But for those that prefer to change the battery that's fine, helps the economy and companies profits at least, I've changed batteries before just out of convenience (and being lazy in my case and loathing working on my own cars). It's a bit like filling the fuel tank before you run so low you have run around looking for fuel or running out - I've done that a few times but never with more recent modern cars, they might not like that. 😄1 point1 pointThey tend to only test with dry nitrogen if there's obvious leakage during a vacuum hold period, or documented rapid leakage from a recent refill at same establishment or on the car's records.1 pointAre you seriously going to bother asking for a 1£ battery?1 point1 pointAnyone have any idea if you can increase the max brightness of the ambient lights on the dash and doors? I know you can through the MMI. But they are still quite dim in day light.1 point


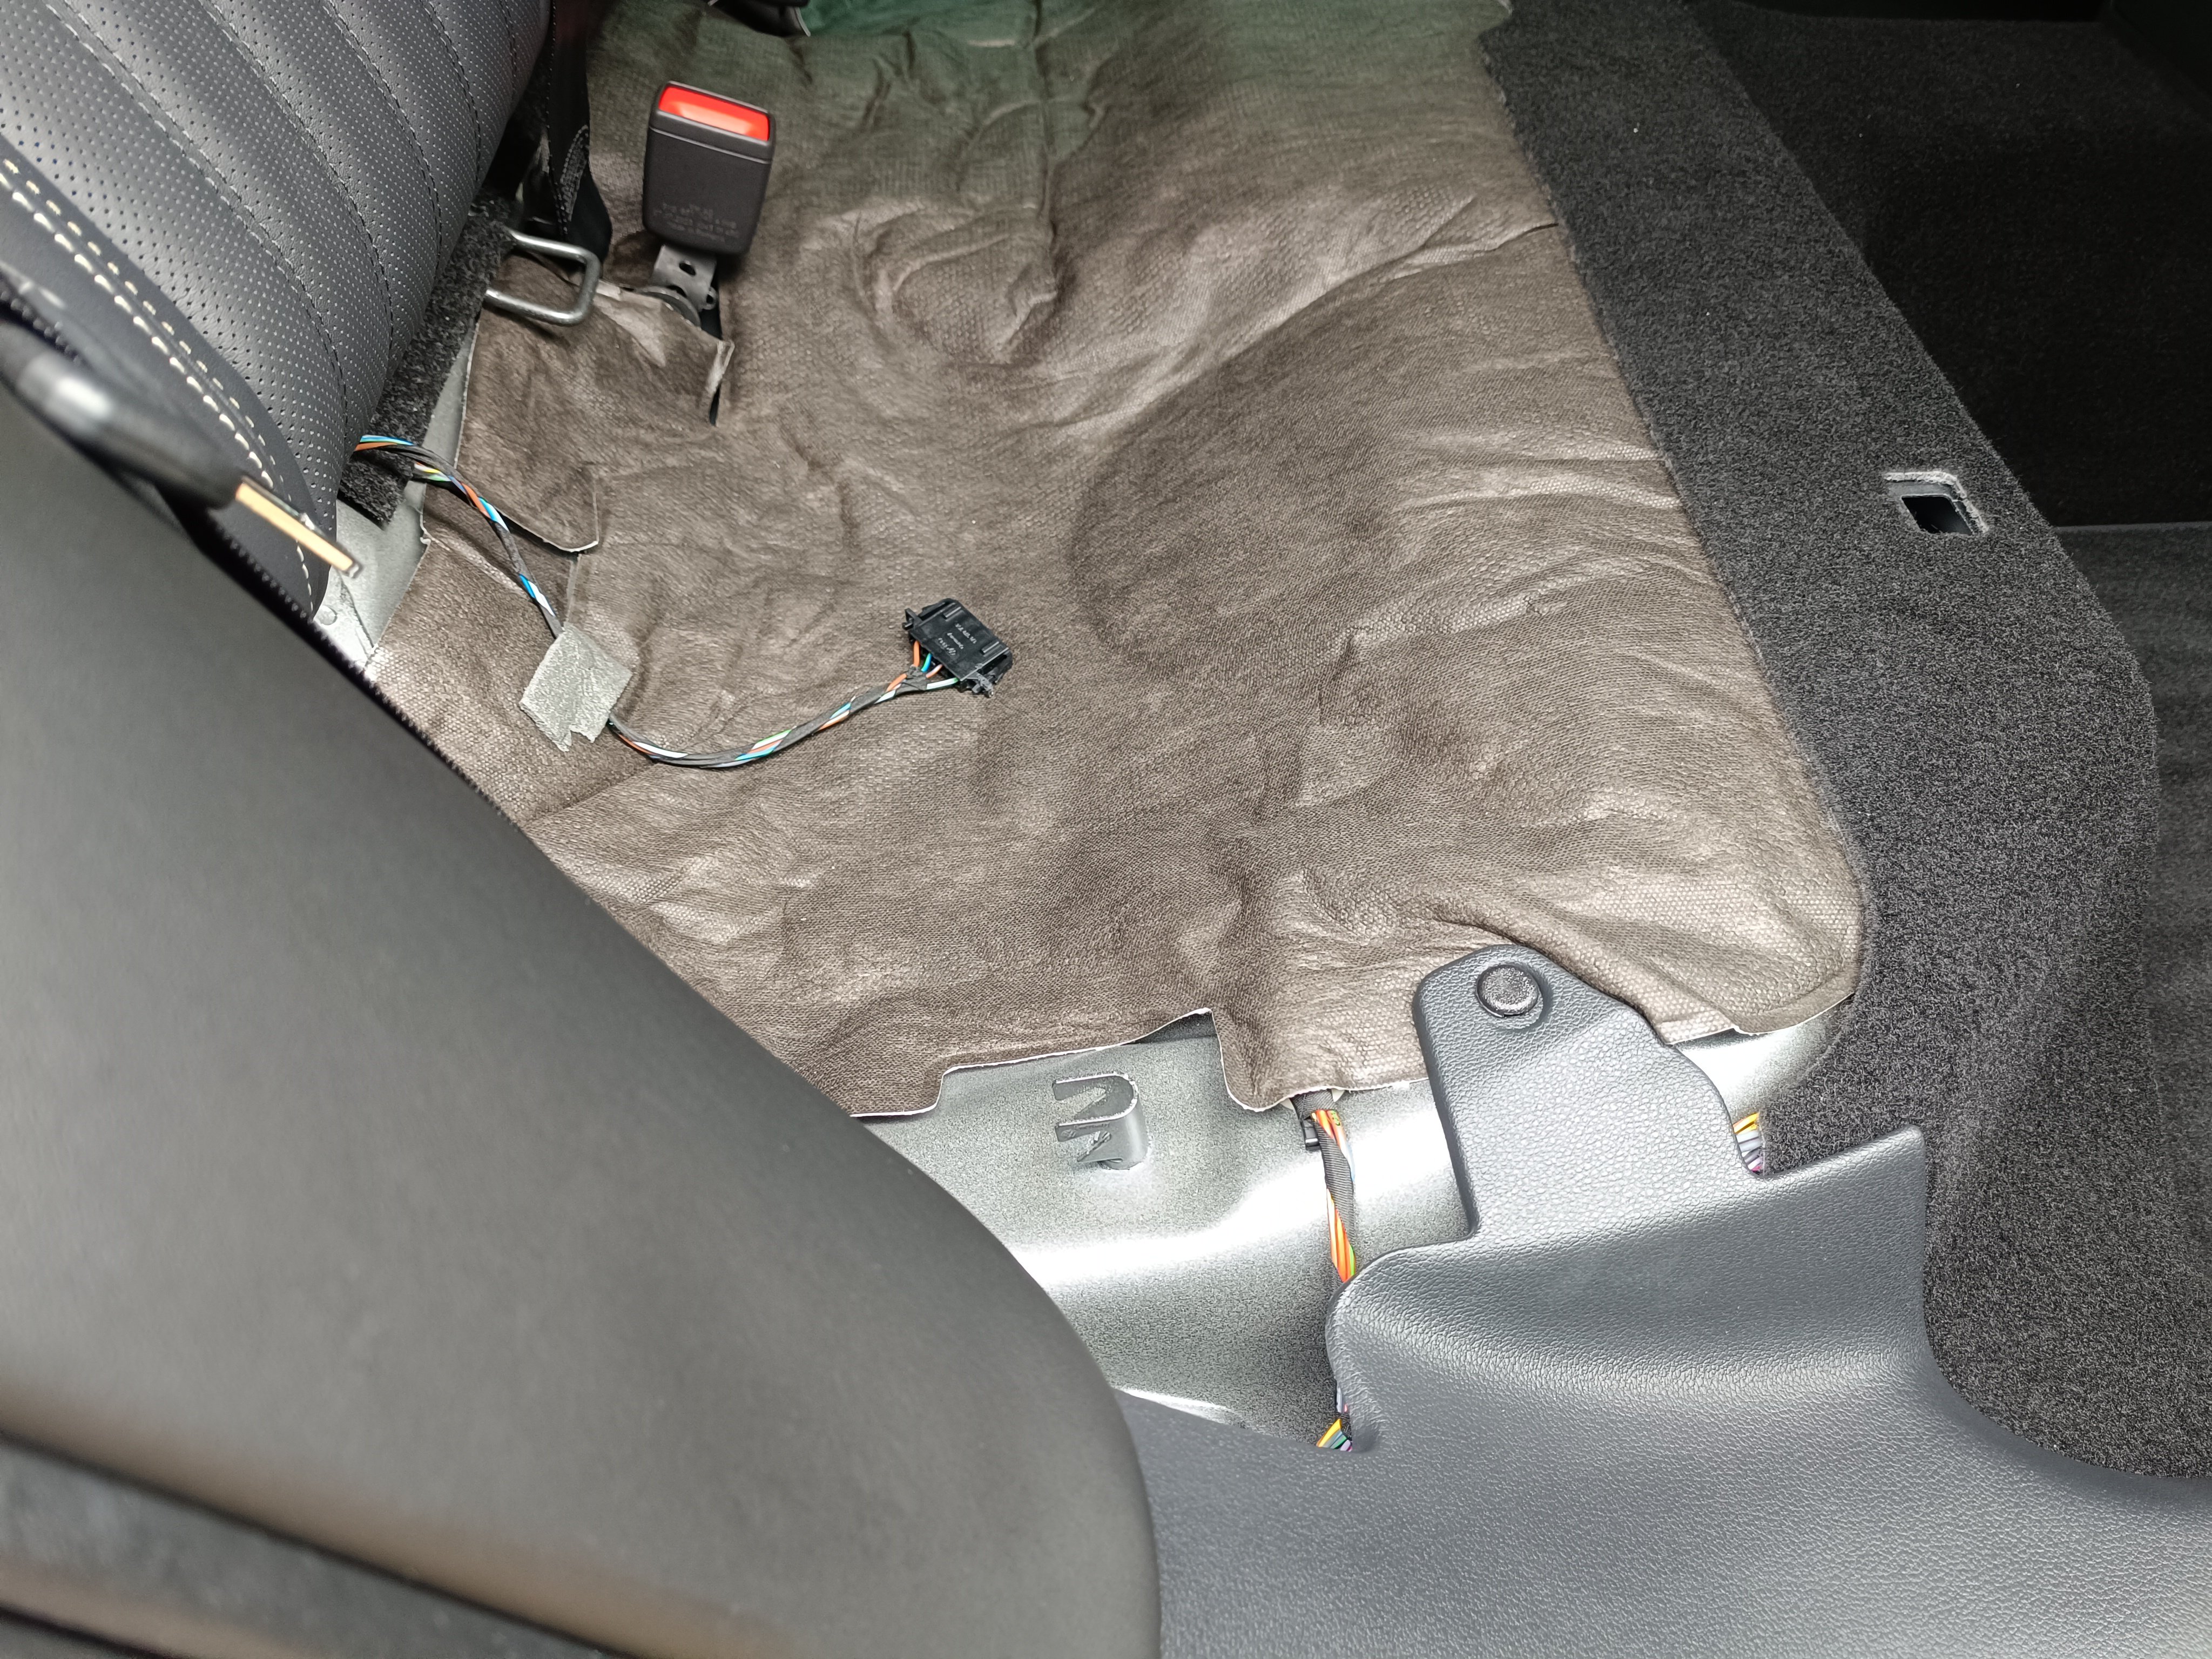
.thumb.jpg.f83a46b9b3c0d976b9dbffbb523c9874.jpg)


.JPEG.4b9e6b44f51e23abb666719964a20da7.JPEG)
.JPEG.19779bc42963901b79a0c0119f0cbbb7.JPEG)


Important Information
Welcome to BRISKODA. Please note the following important links Terms of Use. We have a comprehensive Privacy Policy. We have placed cookies on your device to help make this website better. You can adjust your cookie settings, otherwise we'll assume you're okay to continue.