


Leaderboard
-

lancpudn
Members12Points873Posts -
MikeTheThinker
FREEDOM11Points8,537Posts -
EnterName
Resident Member7Points3,811Posts -

moley
Resident Member5Points10,262Posts



Popular Content
Showing content with the highest reputation on 25/11/24 in Posts
-
Hi @VioMee what @Gaz is saying is that the section of the forum you posted in is not for specific questions about cars - it's for how to use the forum itself. You need to post in the relevant Superb section to get your answer and Gaz has therefore flagged your query to the moderators to get the post relocated to the correct Superb section. Regarding your question I'd assume it is similar to other Skoda vehicles and you simply need to use the right hand scroll wheel on the steering wheel to change what is displayed?3 points
-
3 points"The forward facing camera is part your forward collision system" I am perfectly capable of driving a car without these systems and anyone who is not should not have a licence!3 points
-
I got a VW CC to replace my long serving Audi Allroad back in June and decided to update it a bit with an LED boot light and puddle lights. I ordered the bits on Aliexpress as most do and then went about fitting. It was really straight forward on the CC (mirror a bit tricky, but doable) and it makes the puddle lights functional as they're pretty useless with the standard W501 bulbs. I then decided to do the same with my wife's 2013 Superb Elegance. Parts arrived from Aliexpress and I had a go today. Firstly, the boot LEDs didn't fit. They looked very similar to OEM, but were slightly longer. I machined them with a Dremel, but it was a chore and they're still not a 100% fit. Then on to the mirrors. Dismantling the Superb wing mirrors is the work of the devil compared to the CC. I eventually got it apart and put in the LED puddle light. However, after 30 mins, I still couldn't get it back together. Eventually I took out the new part and closely compared it to the OEM part. Again, it was slightly different, i.e. taller and was the reason the mirror wouldn't go back together. I eventually put the OEM one back in and reassembled. Not sure why the Aliexpress parts for the VW are dead on and slightly different for the Superb. Anyway, take my advice the don't bother or else suffer a world of pain. I'm going to take a look and see if it's easlier to fit an LED W501 bulb to the puddle light as that will be a whole lot easier. If anyone found a part that does fit, please let me know.2 points
-
If it's a DSG there is an additional small inline thermostat which usually causes this. It's a very easy DIY fix and can be bought for around £20. Have a search on here for guides on how to do it.2 points
-
Or perhaps you could learn to read, since this forum is marked "Not to be used for car related questions"?2 points
-
2 pointsOK for anyone who might be interested: 1. To free the bonnet get one person to pull on the opening handle while another jumps on the front of the bonnet. (Bang with palm of hand; short hard push down). If there is only 1 of you, holding the handle pulled tight with a piece of rope through the door pillar worked for me. 2. Before working on the catch at the bottom, check that the clip on the top of the bonnet moves freely from side to side. If you dont get a click when you pull the opening lever it is likely that the top clip is jammed. Clean it up with a stiff brush and liberal application of WD40 3. And of course while you are there, clean and WD40 the bottom catch.2 points
-
2 pointsJust find your user manual and at least in mine it says my car can use upwards of 0.5L of oil per 1000km and that is considered within spec for warranty. My car is outside of warranty as it's 8 years old, but my car use 0.25L per 1000km and is considered perfectly normal. My car has recently tipped 200.000km so if a brand new car can use twice this amount and still be within spec, then it's fine for me. 2016 Skoda Octavia Scout2 points
-
2 pointsI have just received this email from Skoda in the Czech Republic: thank you very much for your email. We deeply understand your frustration. Till these days Skoda have been intensively working on the correction of the software. We are very sorry for the time you have been waiting. Let us explain why it has taken the time. The issue resulted very complex, affected more control units therefore the whole issue required more time than other tests. Now the software is ready. Kindly check the availability of the your preferred workshop for the update.2 points
-
2 pointsA regen every 100 miles is not very frequent considering its daily use. If you must keep the car, as a minimum, make sure to drive it until regen completion every time it tries to do one, probably on your way home, this lessens the damaged caused by constant active regeneration and will allow the car to reach operating temperature. I would use premium fuel regardless with your usage, the difference is a drop in the ocean.2 points
-
2 pointsThe Premium Diesel with more additives / cleaners is not causing the 100 miles a time regens. Likely just the same with standard DERV. The state of the EGR and DPF is what they are. Maybe getting away on some longer runs will help. Instead of the cost of buying additives use a gallon of diesel and take a 50 mile jaunt.2 points
-
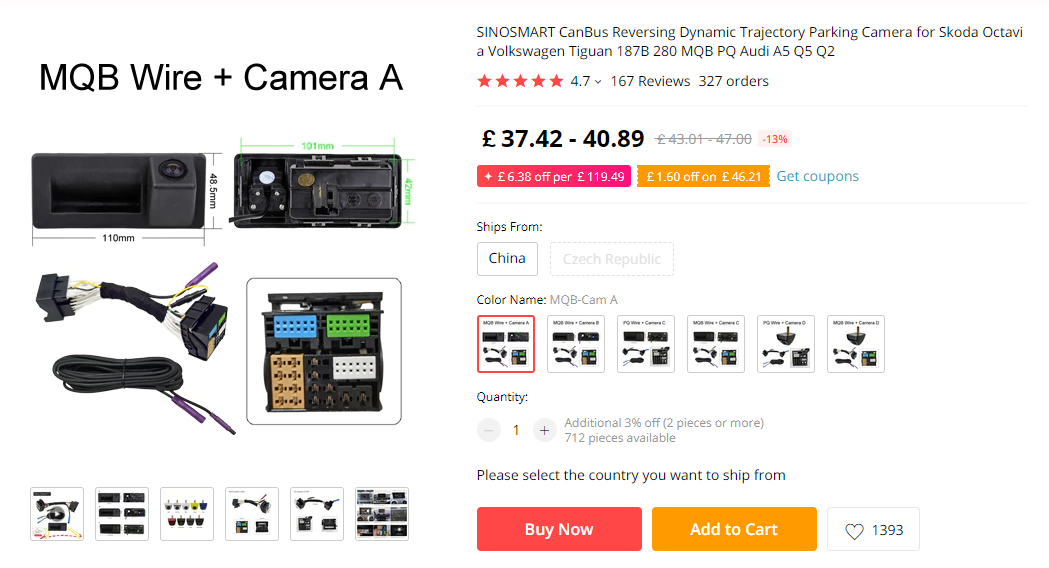
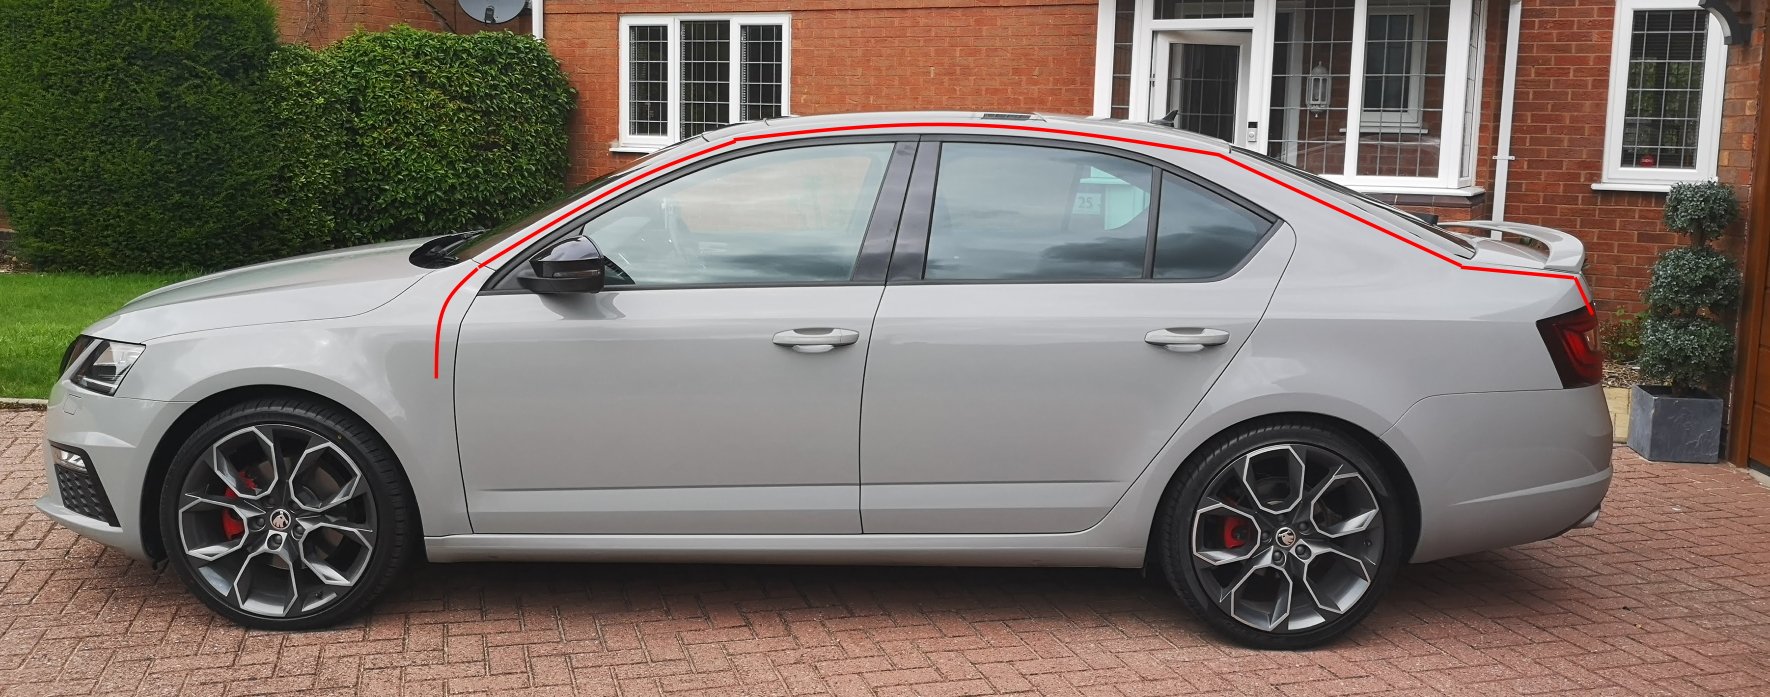
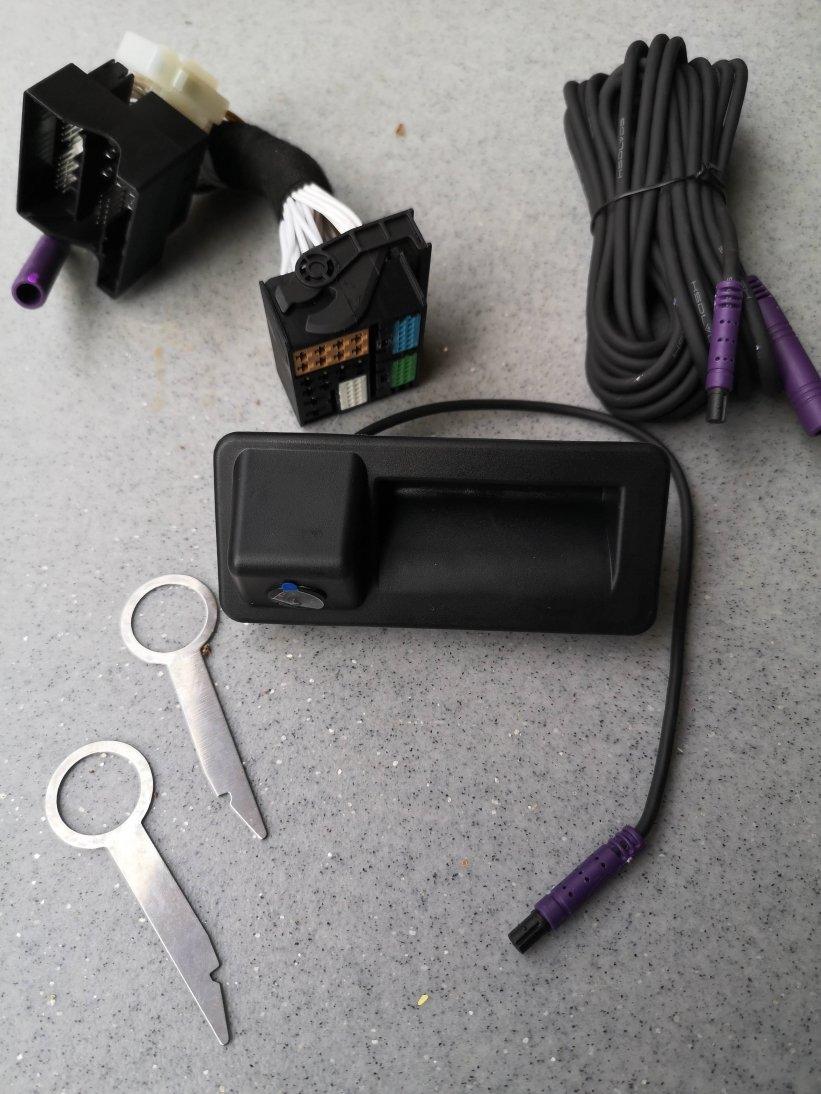
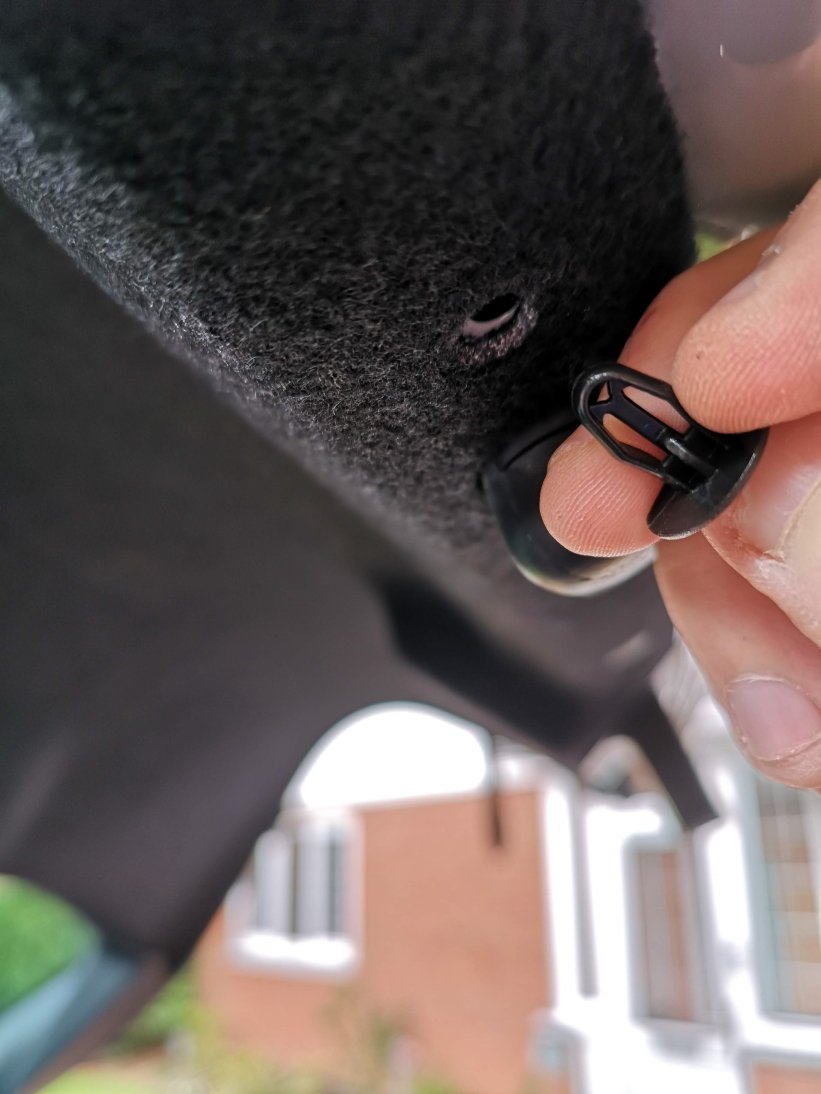
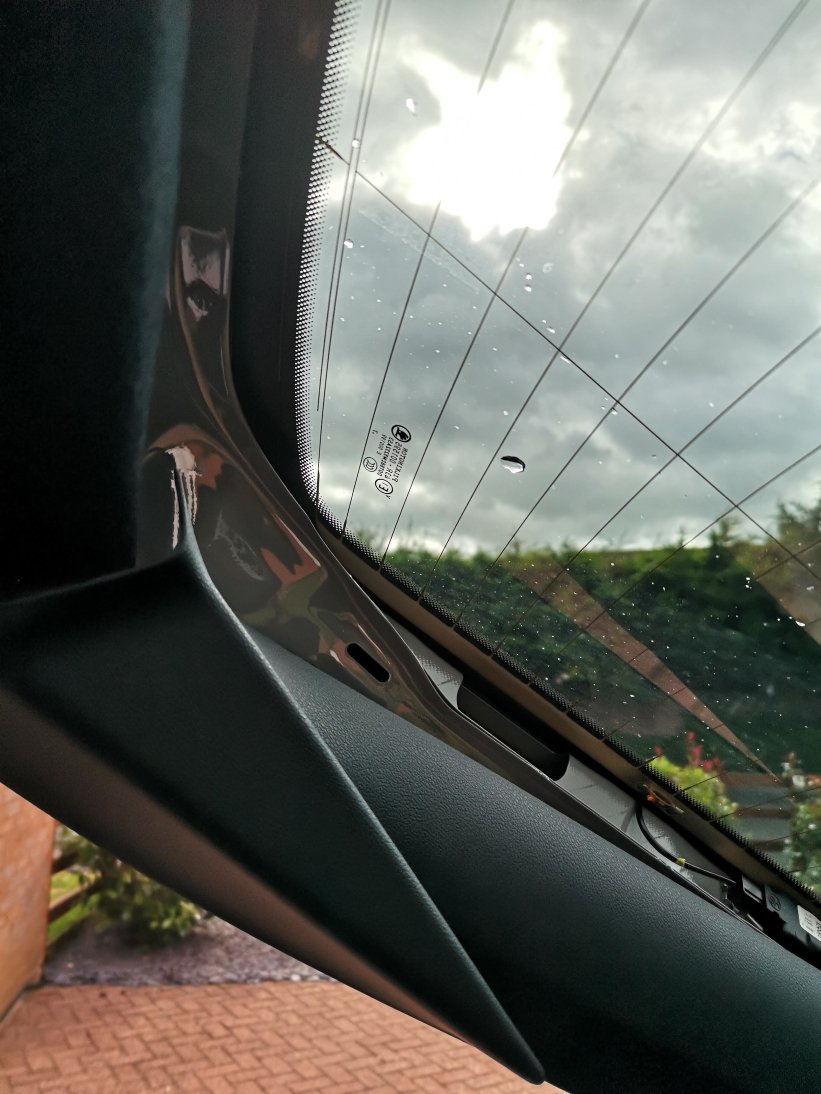
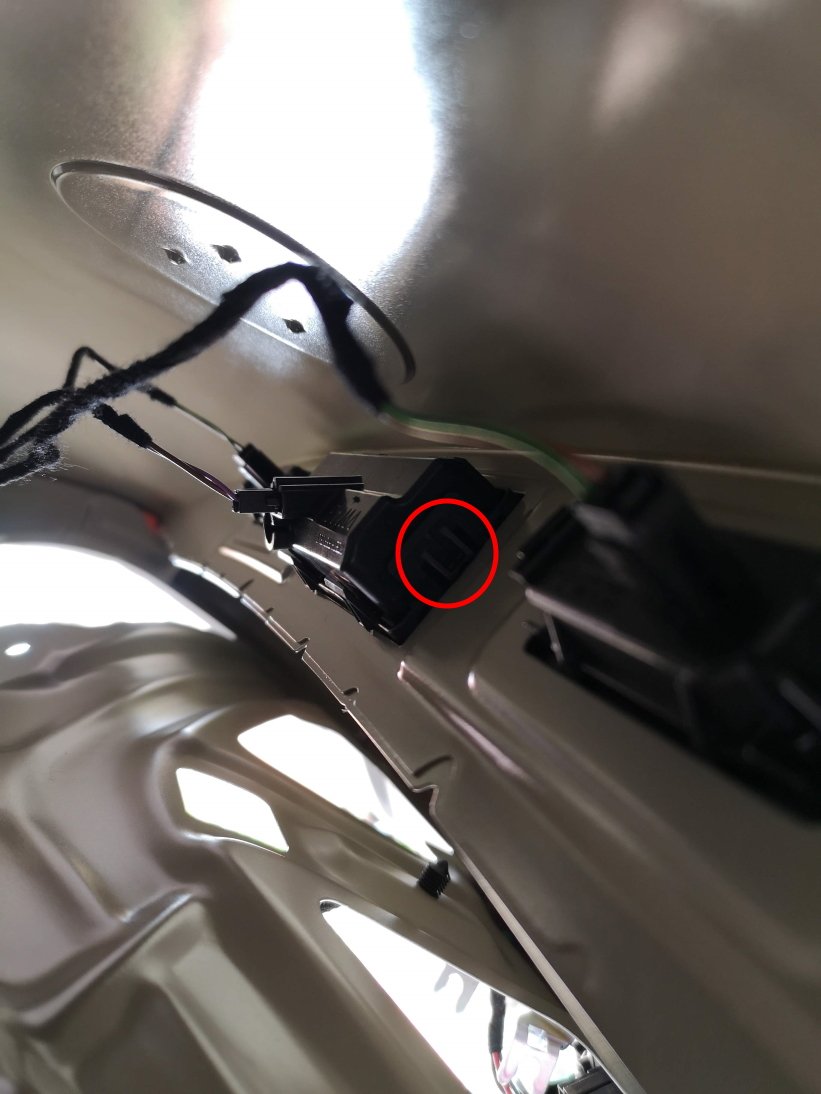
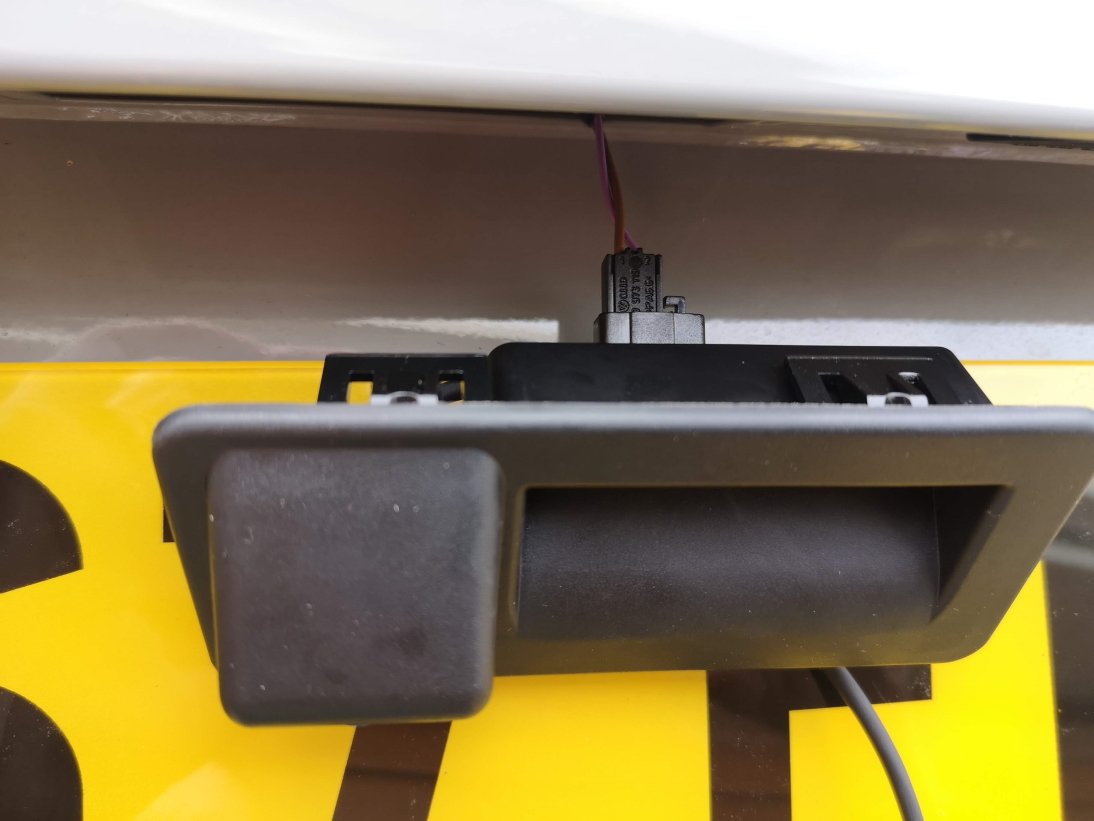
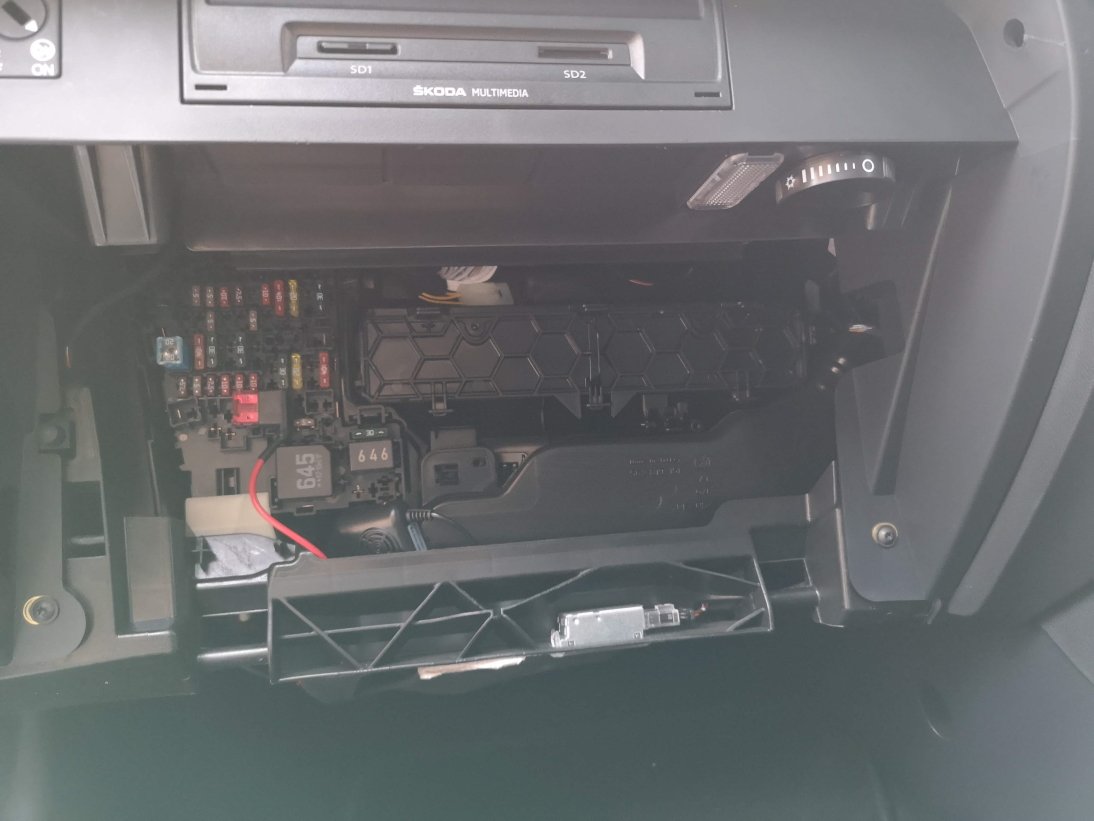
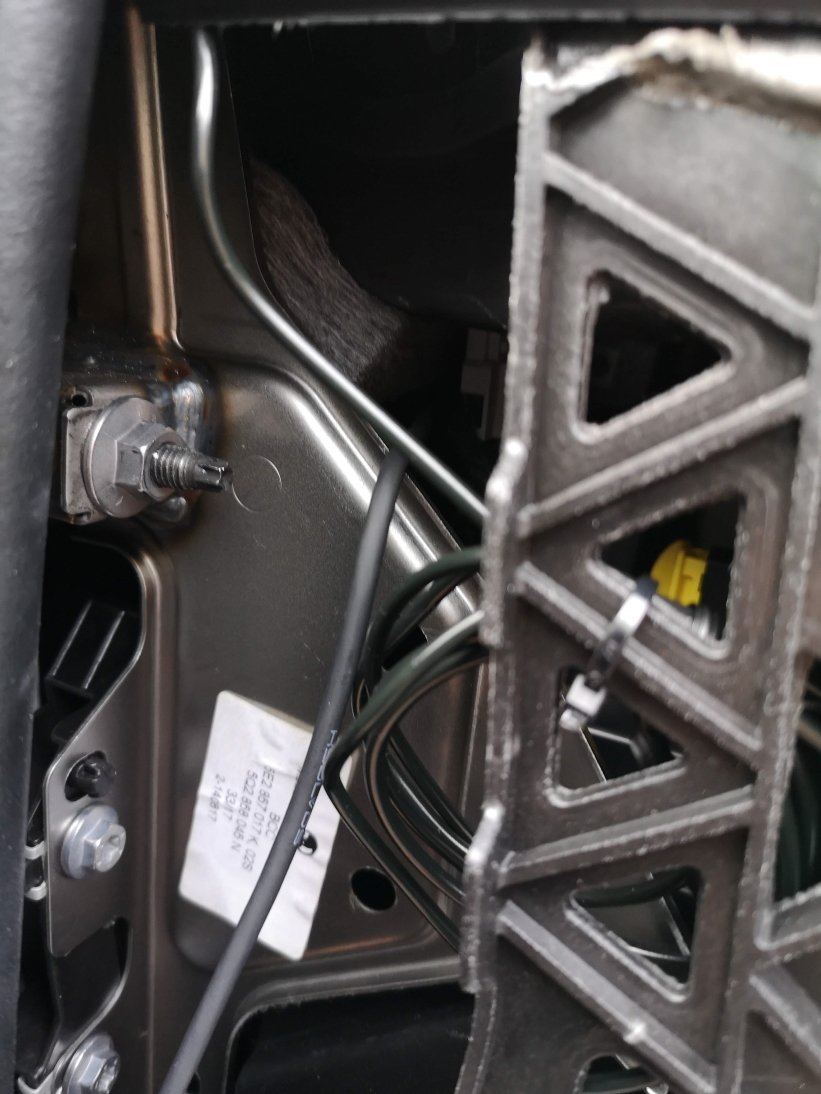
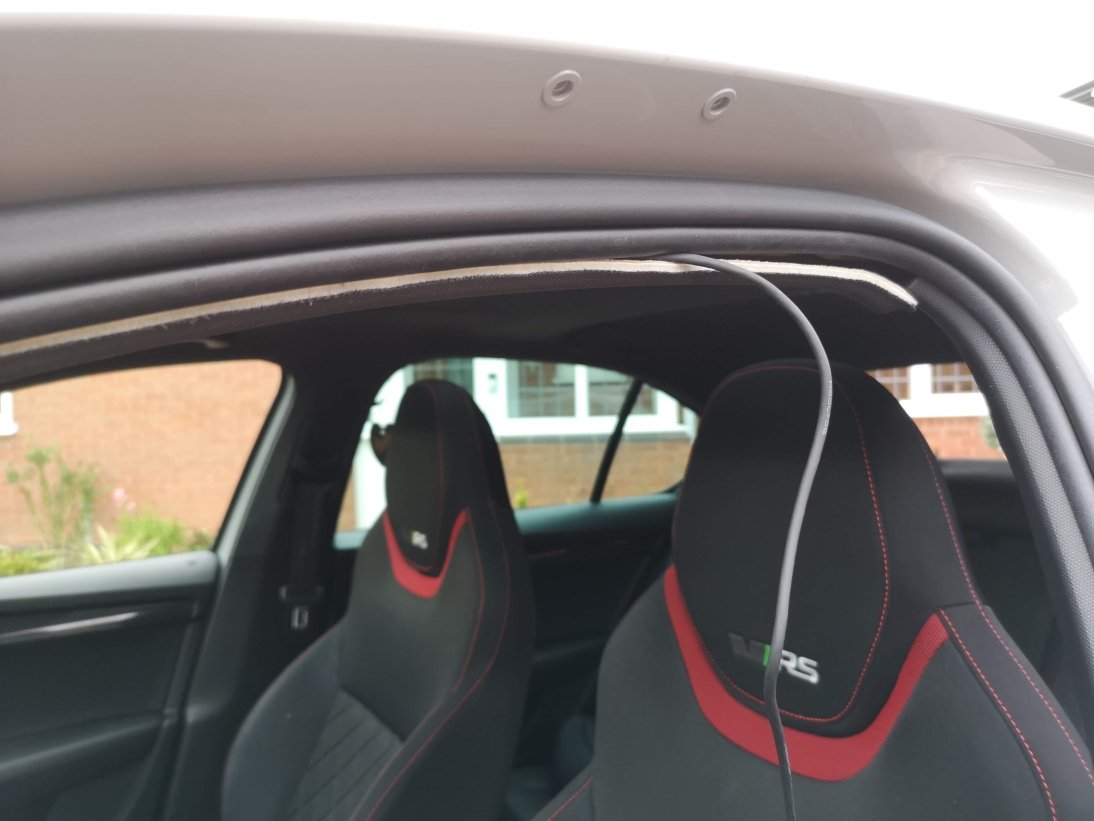
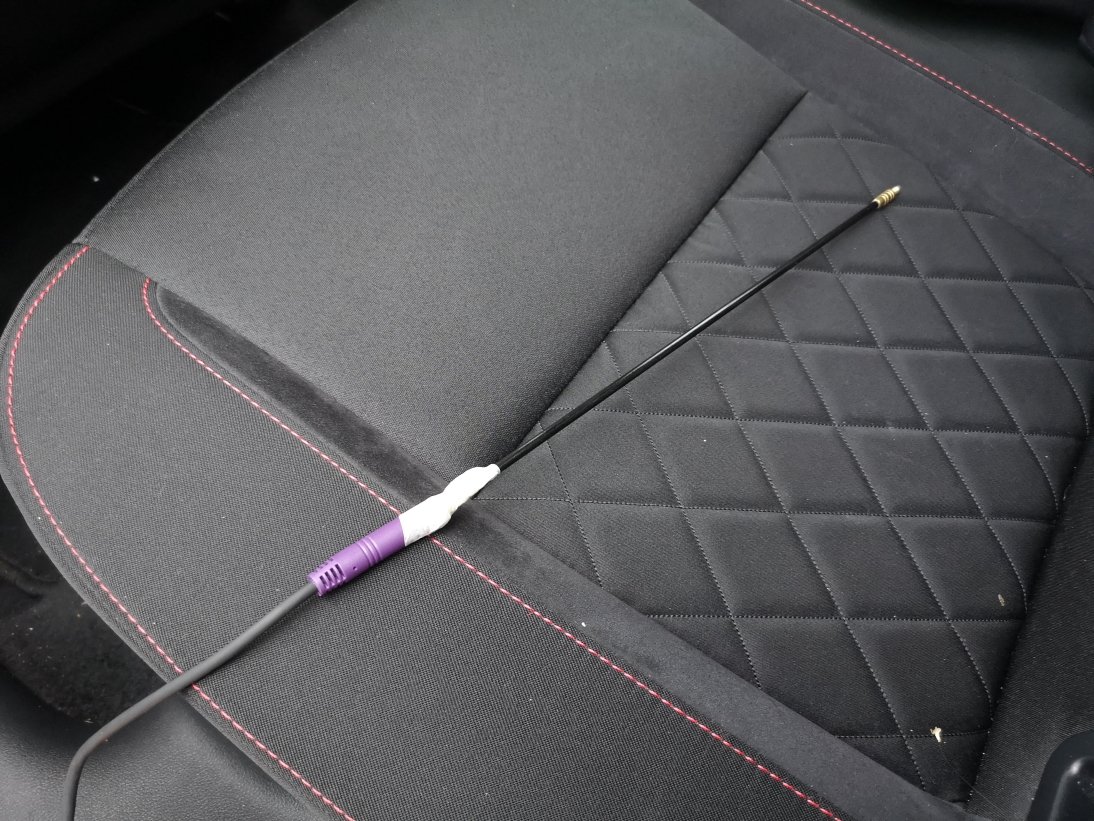
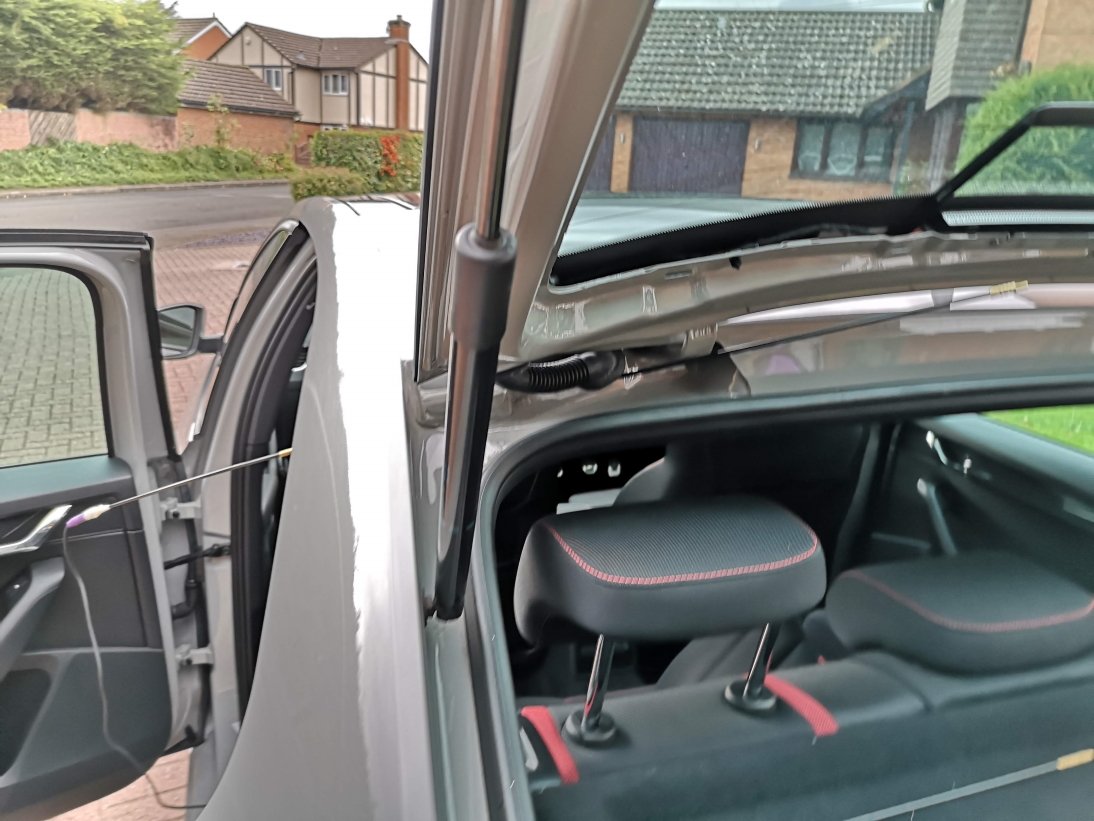
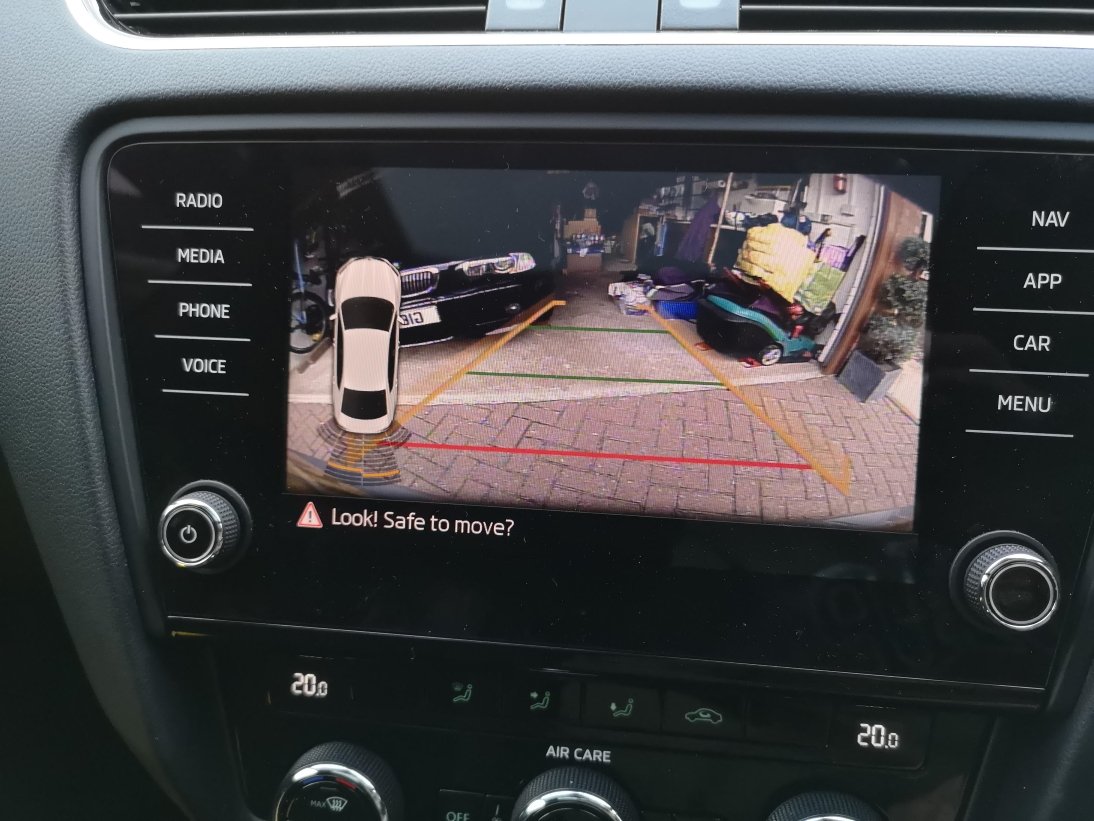
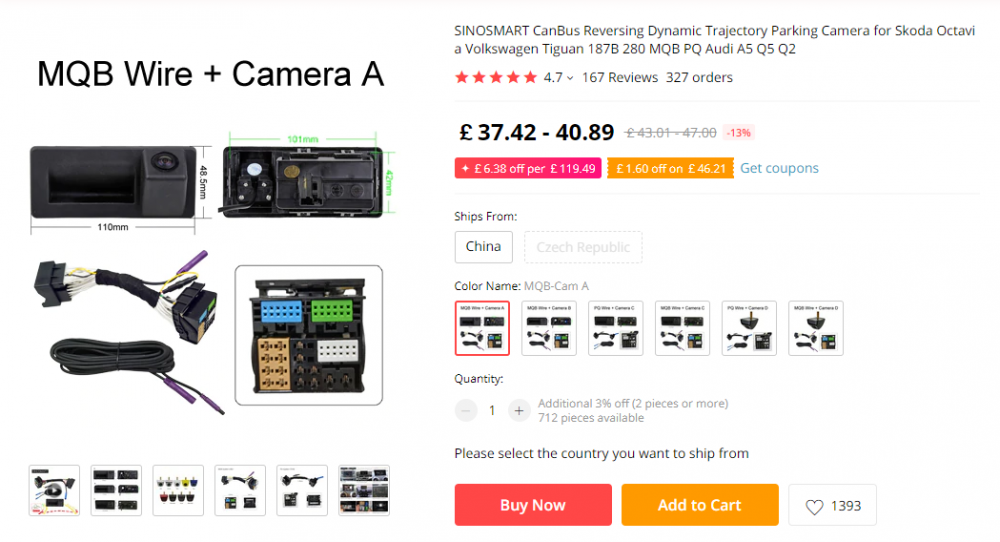
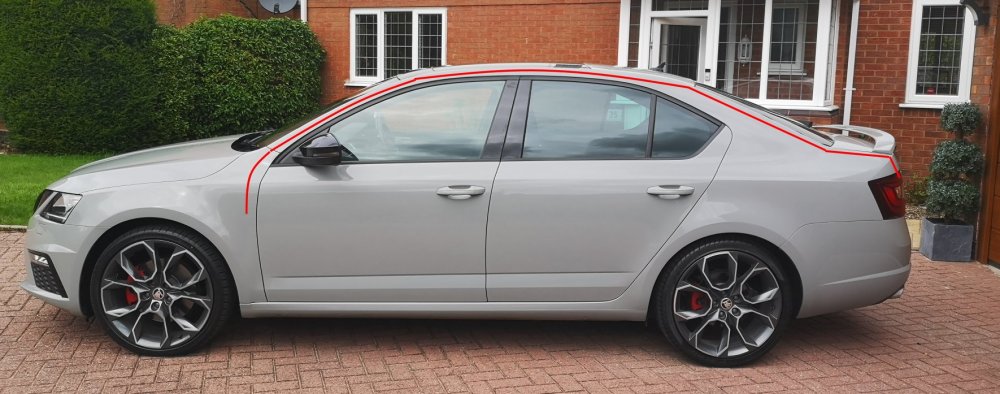
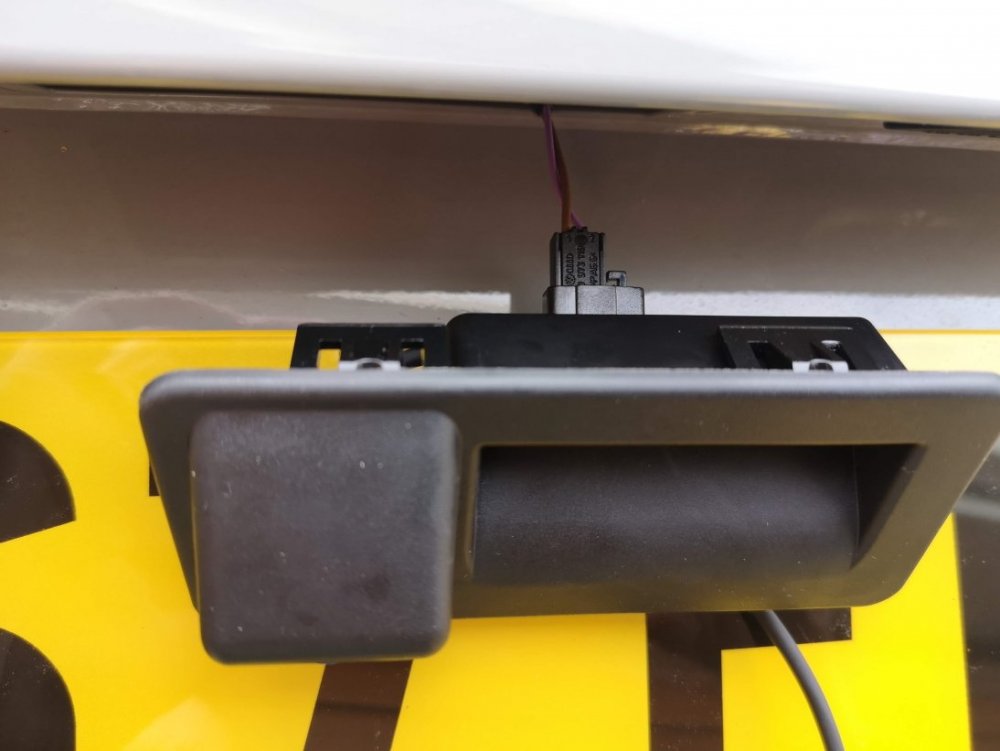
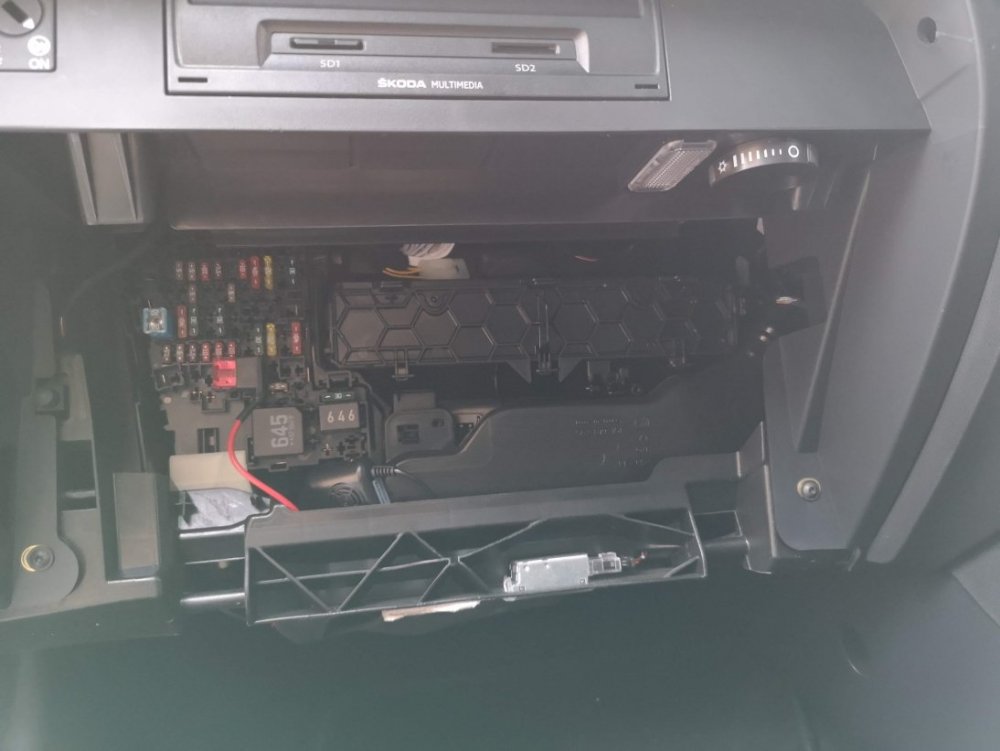
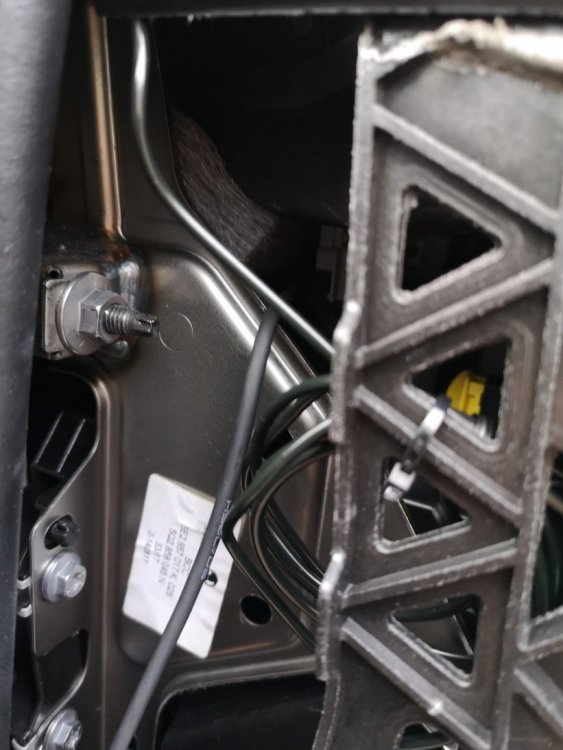
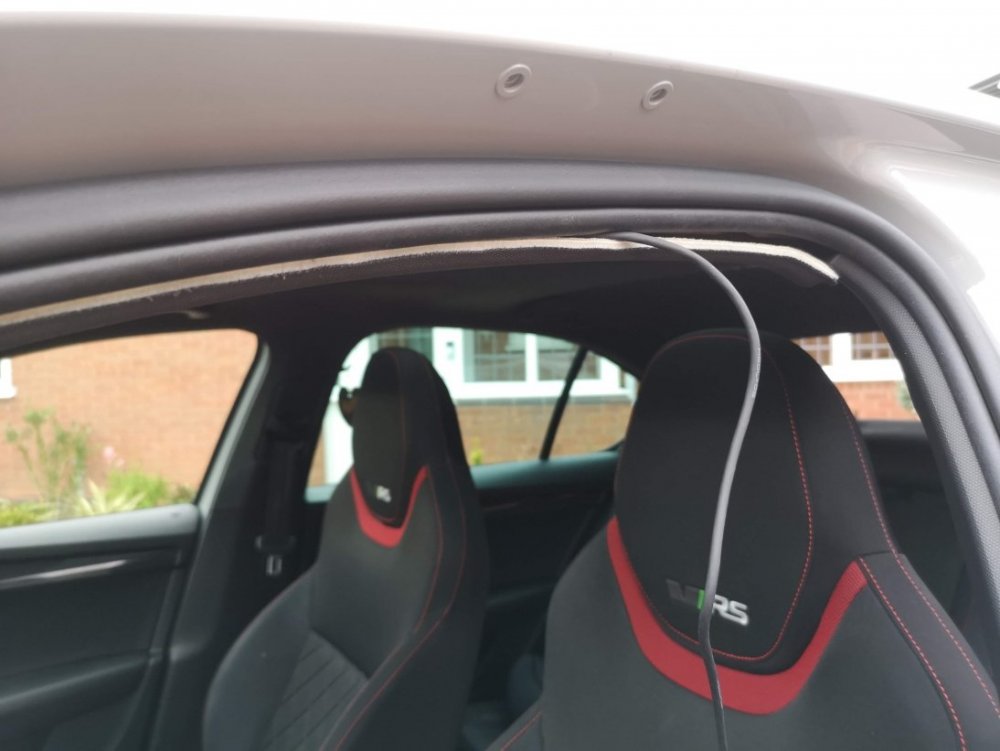
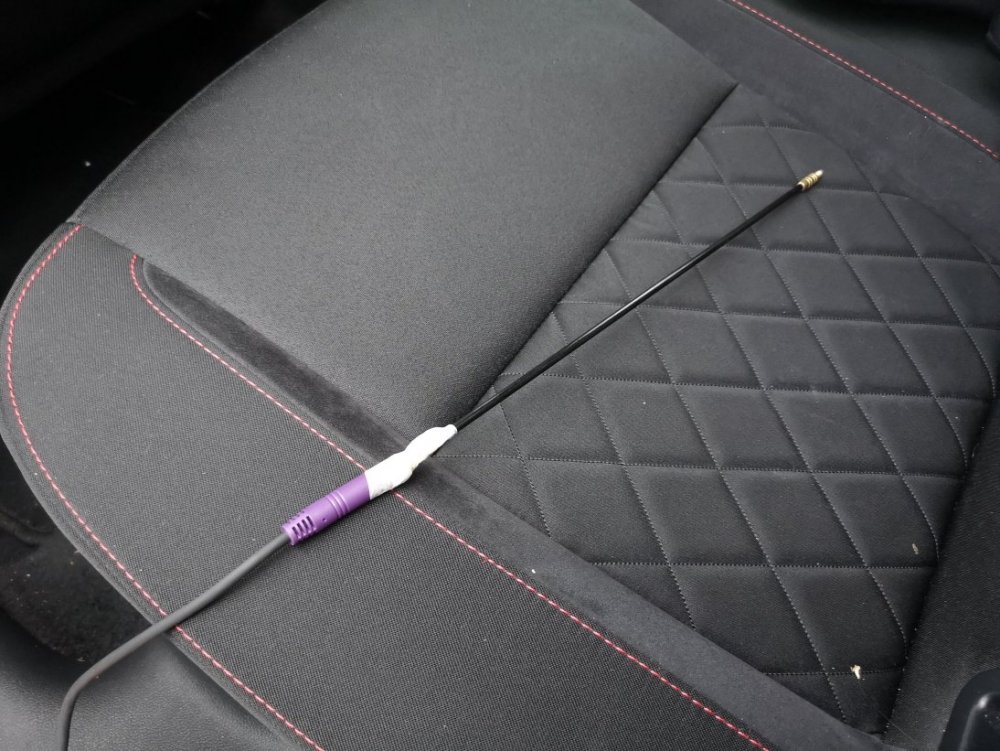
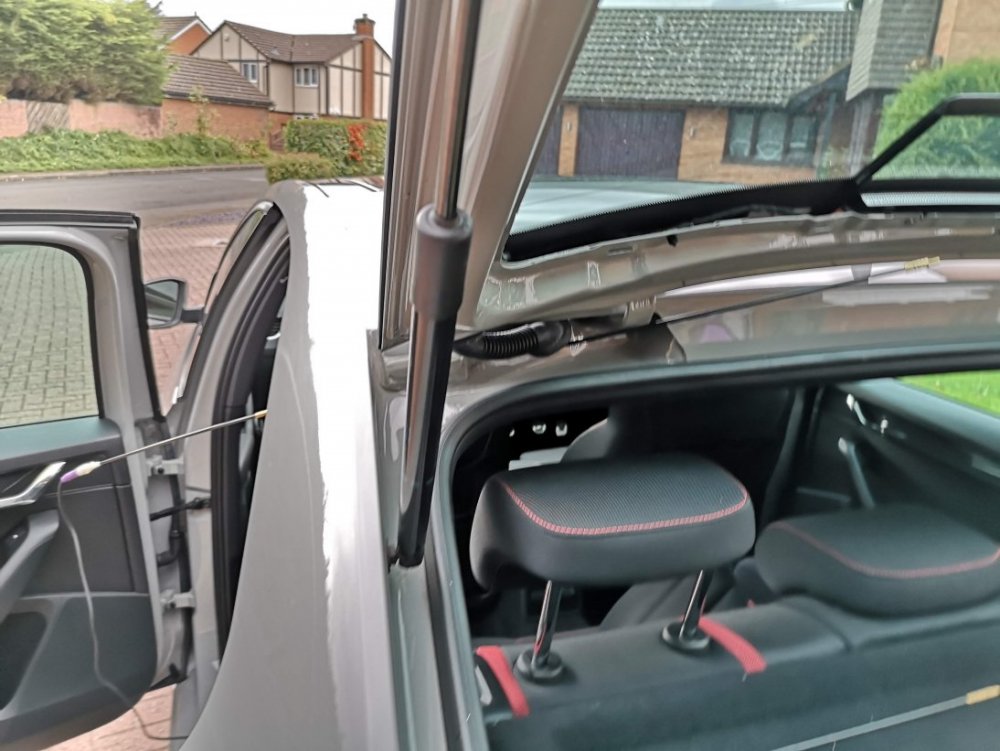
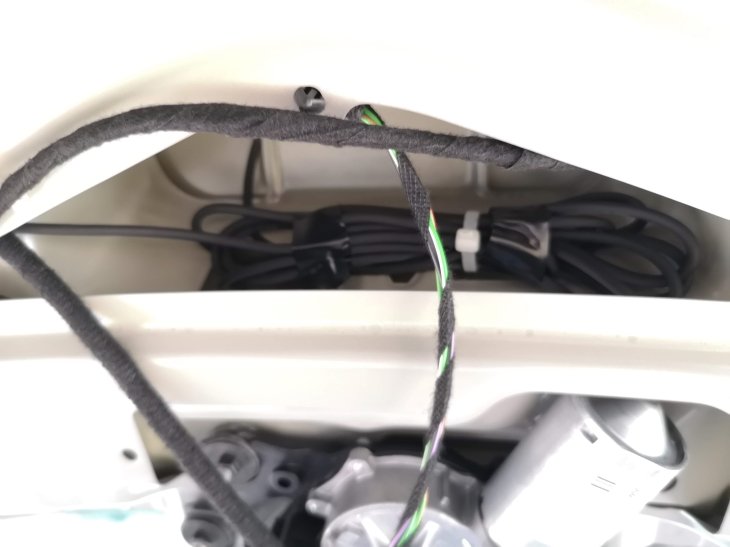
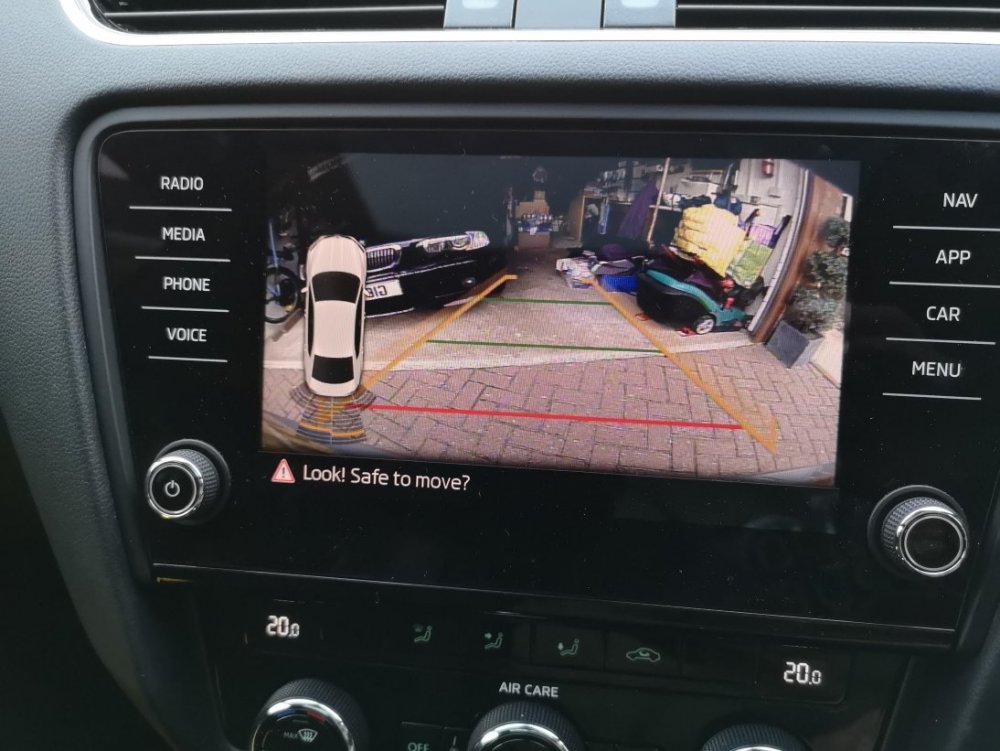
As there seems to be a lot of people asking questions about this lately, I thought I'd put together a quick guide showing how I fitted my reverse camera to a facelift VRS hatchback. They way that i've fitted this will apply to most models, with the key differences being the size of handle (based upon car model year) and whether hatch or estate (but this is just inside trim differences), there may also be wiring loom differences for earlier cars or none VRS models. I've benefited from info from these forums so hopefully this will be useful to others. I am by no means an expert & I won't be able to answer all of your questions, hopefully others will chip in and can add other info as well. First of all, this is the camera that I ordered for my MY 2017 VRS (Camera A/Handle A): https://www.aliexpress.com/item/4000230897829.html?spm=a2g0s.9042311.0.0.40694c4dTEPT93 (link may no longer be valid when you read this so screenshot below) No programming is required for this camera and it supports dynamic reverse guidelines Tools: Trim removal tools would be useful, but otherwise plastic tool that won't mark your car, or screwdrivers or similar with masking tape over the end. A T20 torx head tool is required if you have a hatchback to remove the pulldown boot strap Cable rods are very useful, I couldn't have fitted through the roof lining without. Stereo removal tools unless they come with your camera kit Cable route - I went with an OEM route for my cabling, following existing cables through the roofliner and out to the back as show by the red line below. The camera: The first thing that I did was to check that the boot release switch was working on the new unit - there's no way you want to wire this in and find it is faulty. You'll need to start removing the boot trim to access it. Remove the plastic clips from the lower boot trim- this consists of a few plastic clips which easily pop out with trim remover/screwdriver. There are 8 of these on the hatchback. After that start removing the upper plastic trim, this simply requires forces to release the metal clips. You don't need to remove all of this for now, but it will all need to come off later Remove the lower upholstered trim covering the tailgate. More metal clips - work your way around. You'll also need to remove the pull down strap with the T20 torx head. When this is down you should be able to drop the boot liner which will give access to the boot release handle. This can be awkward to remove, but can be done by pushing in the clip on one on the ends whilst also pushing down on the handle from the inside (ignore the clips along its length) - it should then pop out. Repeat for the other side. Unplug the harness and plug the new handle in - check the release switch works. You can either now push the new handle in until it clips, or leave it out to test the video connection later before fitting. To wire it in Remove the glovebox (open, rock left to right whilst pulling up & you'll hear the bottom clips release. Raise the glovebox lid up and inside the housing and reach in and remove the dampening on the left hand side) Use the stereo release keys to release the multimedia unit. The kit used here comes with a replacement harness that sits between the original one and the media unit & includes the video feed cable. Some people have removed the upper glovebox section to provide more access, be careful not to unplug the airbag connector if you do this. This can be fiddly, but I found the best way was to lie on my back with my head in footwell looking up at the unit from underneath. With the media unit slid fowards this gives access to the harness. It's the large one at the bottom and there is a locking connecting that needs to be pushed backwards to release. Check how it works on your replacement harness. Unplug old harness and plug it in to one end of the new one, push the harness in to the void and plug the new connector block in to the media unit. This took me a while to get it all to fit in. When done you can now test the video feed to the rear camera before your start wiring it in permanently. I took the camera cable over the top of the fusebox cage & out through the side panel I then ran the cable up the A Pillar to the roof lining and all the way to the end. Cable rods were really useful at this point, especially to get around the B pillar , and to go from the end of the roof liner through the cable exit point behind the rubber trunking where the original boot cables are. You can also run the cable in the trim above the sill and work your way back up to the roof lining on the C pillar. When you get to the end of the roof lining you'll need to unclip the rubber gator at the top of the boot so you can get the cable out of the roof liner and in to the boot via this gator. If you install the same way as me you only need to peel the roof liner down a few cm, being careful not to deform or damage it and you'll see the OEM cables behind. Once you've got the cable this far it's a case of feeding it through the rubber gator, up the side of the boot and over to the handle; connect the video cable and tidying up any spare cable. Everything should now be up and running. Retrace your steps to refit your trim. You now have a fully working reverse camera, activated when reverse is selected and with dynamic guidelines. The parking sensor guide now shifts to the left of the screen the same as an OEM reverse camera. I will come back and re-edit this tomorrow and resize pics as it's getting late. I'll tidy up any errors as I see them so please don't jump on me straight away!
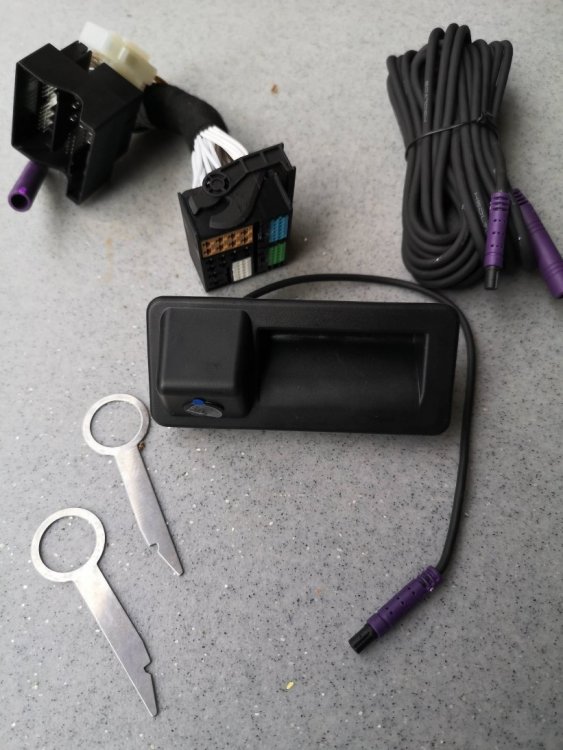
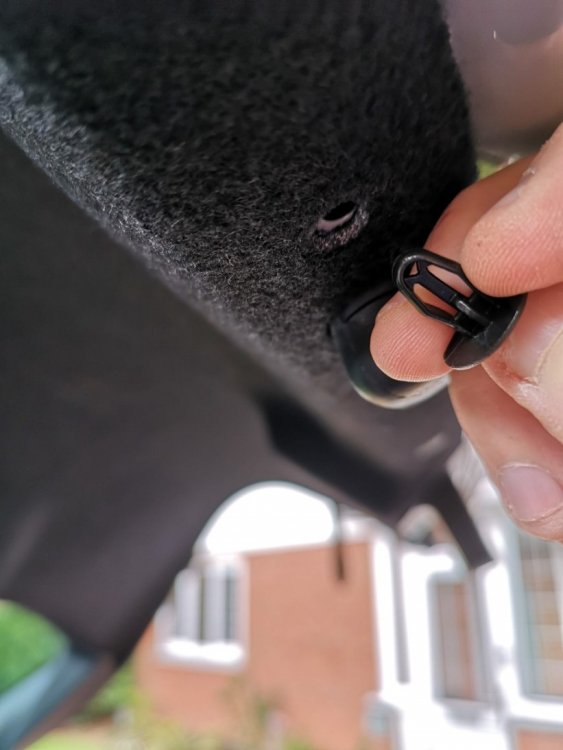
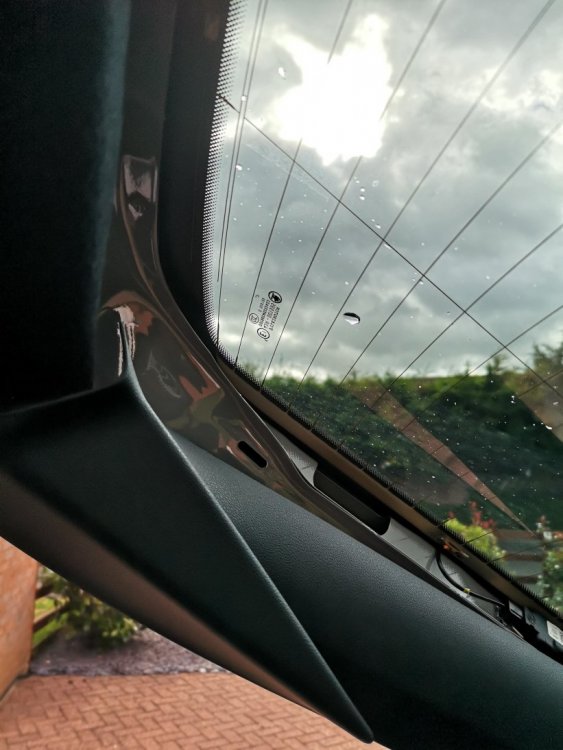
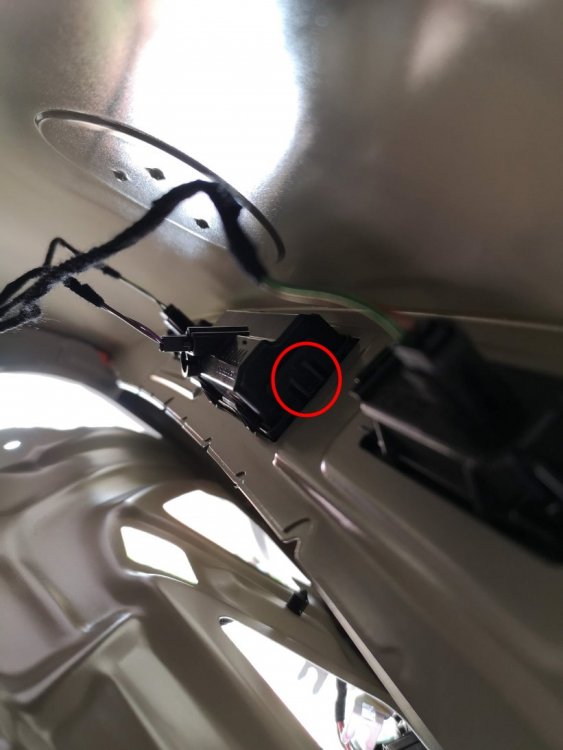
 1 point
-
Had car since 31st oct its been at mechanics place untill thurs evening just gone .Its had new rear spring found when dismantling brakes ,new discs and pads and 2 calipers and pipes ,Oil and filter change , drove it to work and back today with a detour and it drives nice ,brakes could be better but i expect them to improve over next few days as rear pads bed in . Car has been stood for getting on 5 yrs only being started and moved now and then , it has 2 tyres with cracks in the sidewalls one was punctured yesterday i had to put the new spare on.I went to purchase 2 new tyres today but tyre bay was shut,Car may have an issue with damp as windscreen took a while to clear inside of tailgate glass was wet and even had some mist on dash clocks .Car has only done 68k and its an 09,I wonder where to start with moisture ingress i do wonder about tailgate rubber as it doesnt seem cushioned enough when closing it makes a sound as if no rubber present .I did worry about this car being stood inactive for a long period there is visible rust on the underside components but car is pretty much mint internal and external ,there is a scratch on rear wing that i may be able to tcut out and on rear bumper another scratch that mat just touch in.I wonder whats next ?1 point
-
1 pointHi to all, I wish to say hi to everyone, new to this community but, not new to other communities, so I’m up to speed with most forum rules. I’m an ex SAAB tech, I know my way around an engine etc, however, every car manufacturer has their own way of building cars and each have their own little foibles, I find that forum members are more knowledgeable than some dealerships, forums generally don’t sugar coat the truth of known issues, so an invaluable resource, you’ll find I have a good sense of humour and I’m as daft as a bag of frogs 🤪 so looking at some of the previous posts on here, I should fit in well 👋1 point
-
1 point
-
UPDATE 25/11/24 EGR & Throttle adapted CEL + EPC reset and not come back on even with hot engine fuel economy issue resolved - no longer idling and siting at 1500 rpm for no reason even at lower gears I should get the old EGR tested in case it was always working. Otherwise will sell for scrap or something. Maybe make some money back.1 point
-
1 point
-
@VioMee I’ve moved your post. The title and content was fine. Just a better place for it. bit like trying to push a door with pull on it, we all do it at least once. So to is with a forum when there are a lot of places it could be. I have toyed with hiding this area till folk have had a few more posts. Very, very occasionally, although struggling to recall one, someone has a forum question as their first post. anyhow, now you’ve got an idea the door is pull, ie there is a superb IV forum, you’re away to the races. I know iv and iv are swappable terms, the romans got there first, so iv is mk4 not specific to the iv badged cars. phew, maybe i try the door push one more time, nope definitely pull, good all safety checks done here. have a great day.1 point
-
1 pointHoping that you didn't really mean 'jump' on the bonnet - that would certainly be an abomination unto Nuggan. 😁1 point
-
It catches a few people out, but the area you posted in is for Forum Support, as @skomaz has kindly pointed out, and is not for specific questions about cars - it says so at the top of the section: My comment about it being flagged for moderation was to save there being duplicate posts, to let other people know I'd flagged it (so they don't have to - thus fewer reports for the Mod team to deal with), to save you re-posting it elsewhere, and to try to avoid there being more than one thread about the same question, as helpful people on here might reply, only to realise there's another thread elsewhere. There's significantly less footfall in the Forum How To area than there is in the Superb IV area, so your question would be better moved. The Superb IV area is here: https://www.briskoda.net/forums/forum/424-skoda-superb-mk-iv-2023/ Gaz
 1 point
-
1 point
-
1 point
-
1 pointBig thanks for the bolt size tip mate, first time doing anything like this and probably would have ended up doing something of the sort haha1 point
-
1 pointThink I have found why trim will not come away , possibly due to a recessed screw inside dash side cover. Found a video detailing removal of dash on Fabia 2 and the clue was there. Also see my photo with hidden screw only just visible behind plastic lug.. So correct relay should arrive soon and hopfully be able to install .
 1 point
-
1 point@chelon Is your coolant level relatively steady now that you are not filling above max. line? NB. there will be some changes in level, depending on whether checked hot or cold, but should remain in vicinity of markers if no losses from system. NB. don't remove EV cap when checking coolant level.1 point
-
1 pointDid you have this problem before the water pump and radiator were done? Or when this problem started? Why was radiator done? How about the notorious silica bag? Do you have it? ('mit silikat' written on the coolant expansion tank, google / search forum if necessary).1 point
-
1 point
-
Thanks for the tyres, Kenny, it was a pleasure doing business with you and I'm delighted with the tyres. I hope you get your winter wheels sold soon. Cheers, Ian.1 point
-
SD Card slot -> Mib2 or Mib2.5 High, for Amundsen original card required or some with cloned serial number Type-C port -> Mib3 click on link in my signature, a lot of questions have been already answered1 point
-
I would, it's unwise to overfill oil, a mil or so is ok but what you indicated I would definitely draw some out.1 point
-
I don't have mine fold in each time I lock the car. Don't really see the necessity, it'll probably be less wear and tear on the motors too and just fold them on the turn knob on the door card when you need to. Good point about freezing weather may affect the motors.1 point
-
1 pointHi, I'm Naxo, from Santiago, Chile. I've acquired a 2017 Superb like four months ago, and I'm very happy with this impressive car, which sadly is not sold in this country anymore. I hope to have a good time here and share knowledge with you all!1 point
-
1 pointRegardless of fuel type, consistent short runs of only a mile or so as you propose are pretty much the worst thing you can do - the engine will always be running cold.1 point
-
1 pointWell, just in case anyone cares, some digging. It was originally turned on or off via the phone. Then everyone's Android phones got updated, and Google hid the wireless Android Auto toggle away, in Developer options. Then they updated Android again, and the toggle has gone completely. So no, if it's on, you can't just turn it off, and it's not and never was in the car menus. That might save someone prodding about endlessly, as I did.1 point
-
1 pointRe the What Car guys video and 1,000 miles drive. At least they are driving the cars like many people do drive and got what they got as far as efficiency / economy. Far more like Real World than the round and round a proving ground track in convoy and that malarky, or the Carwow / Mat Watson drives on a Motorway and no pushing on because places to go and things or people to see.1 point
-
1 pointIf you are only a mile from work why not walk or buy a bike. From experience I can tell you that your journeys are going to kill your car.1 point
-
1 pointThey either don't know how (if they're looking for eccentric adjusters) or don't want the hassle (if they know what's involved). You have to loosen off the bolts and bump the subframe across the chassis. It'll make a slight difference to tyre wear and handling side to side but not that you'd really notice, there are so many other variables involved especially on the road.1 point
-
1 pointI tend not to get involved in debates on forums about additives because it gets a bit ridiculous, based on previous Subaru and Audi, Vw discussions over the years. It gets all a bit polarised. 'However' at 14 years old and short trips ahead, I would consider a pro clean of the system. Then, if you use additives I have found Miller ECO power max diesel good on lots of diesels and I still use it. Never had a DPF or EGR issue. Bye, out of here now...1 point
-
I agree. Don't quite need them yet, but too good an opportunity to miss. Picked them up yesterday.1 point
-
1 point
-
1 pointNot much to look at... But they did the job. Would say you have to be really careful when detaching the wiring. A broken wire or connector would be a real issue... Goes without saying not to force anything. When the clips are properly released the connectors slide out very easily. You can see I clipped the round ends off a bobby pin for the larger connectors, and a reshaped paper clip worked for the smaller ones. There are a couple (from memory) of purple clips which need removed also. I've tried to show how I used the paperclip... The file size is too big so I'll need to send the bobby pin photo in other reply.

 1 point
-
1 pointBest way is to create a directory structure in the SD card root directory of: \Artist\Album\Tracks(1...n) I rip my CDs to 320kbps MP3 files using this structure then copy them to the SD card. Then on the infotainment screen you see a list of Artists, click on an Artist and you see a list of their Albums, click on an Album and you see a list of Tracks - click on one and it plays.1 point
-
1 pointThanks, that's useful to know. And then it's straightforward to use via the infotainment screen, is it? ( Self-confessed dinosaur who's never tried loading music from SD cards before, writing here!)1 point
-
Skoda manual pages 186 to 190 for headlight bulbs. H8 are for the front fog lights if you have them. Thanks. AG Falco
 1 point
-
1 pointThank you for all your replies, turns out both brake light bulbs had blown, once replaced, glow plug light stops and message disappears!1 point
-
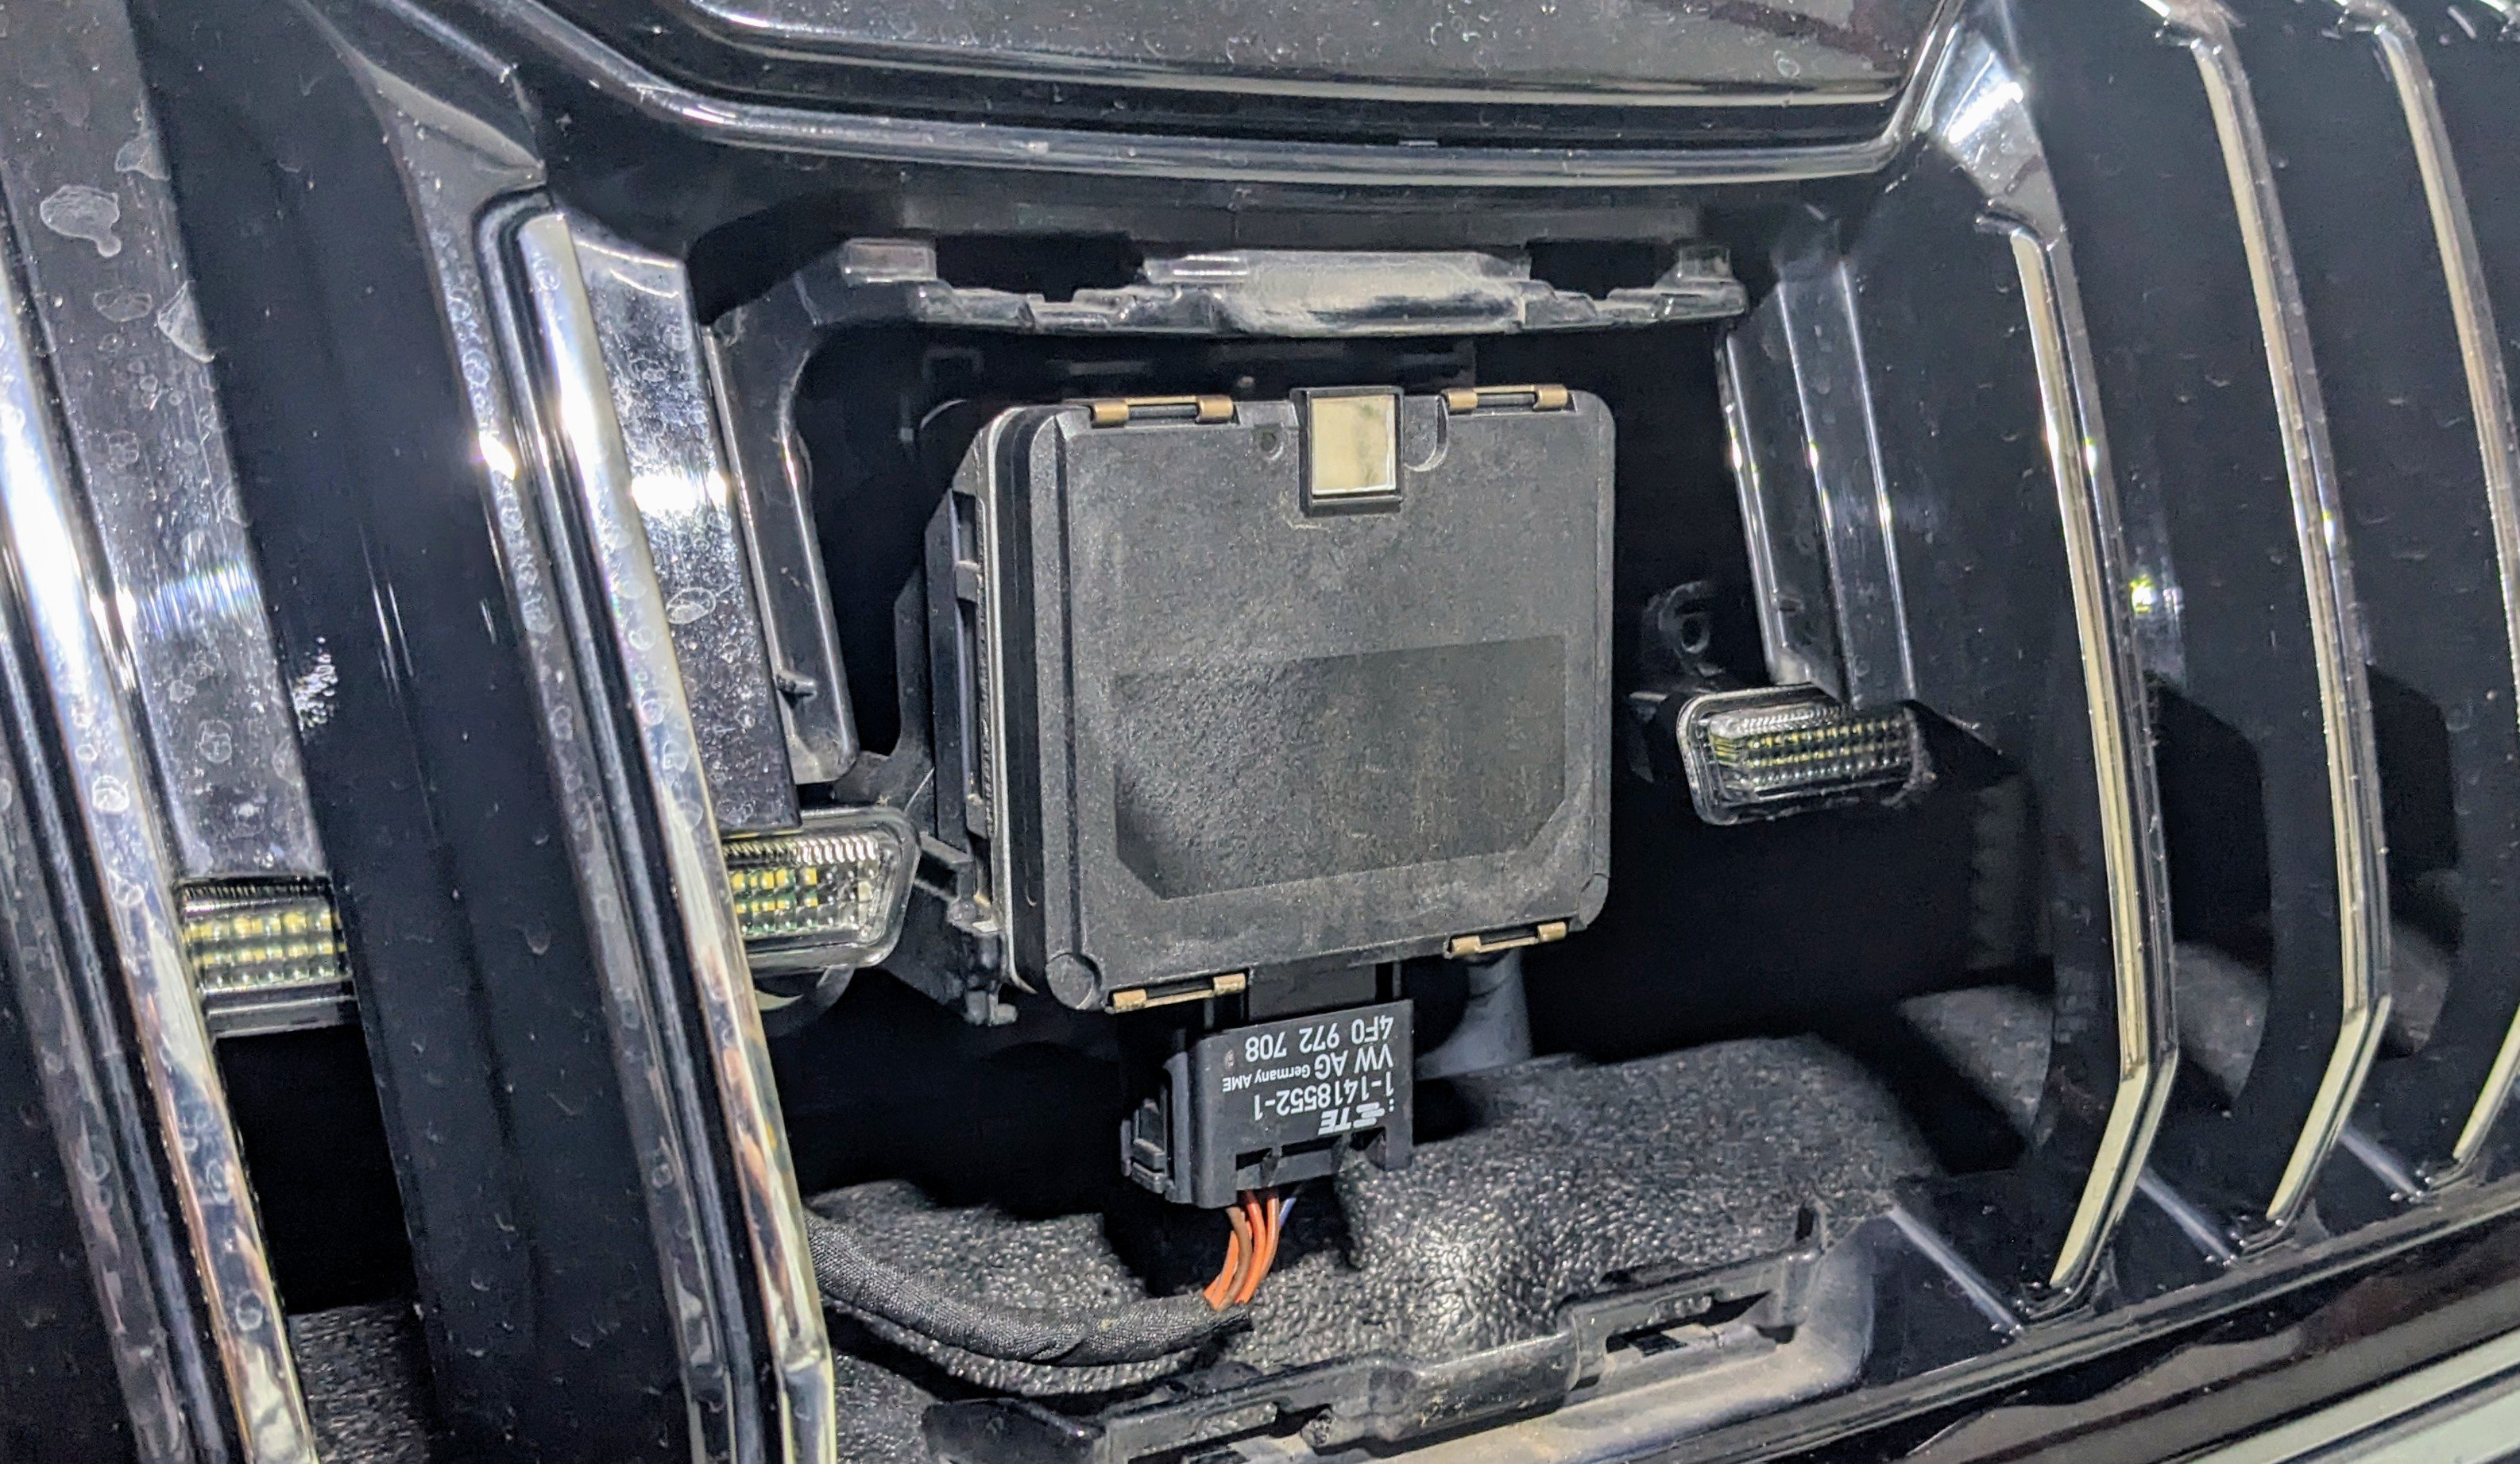
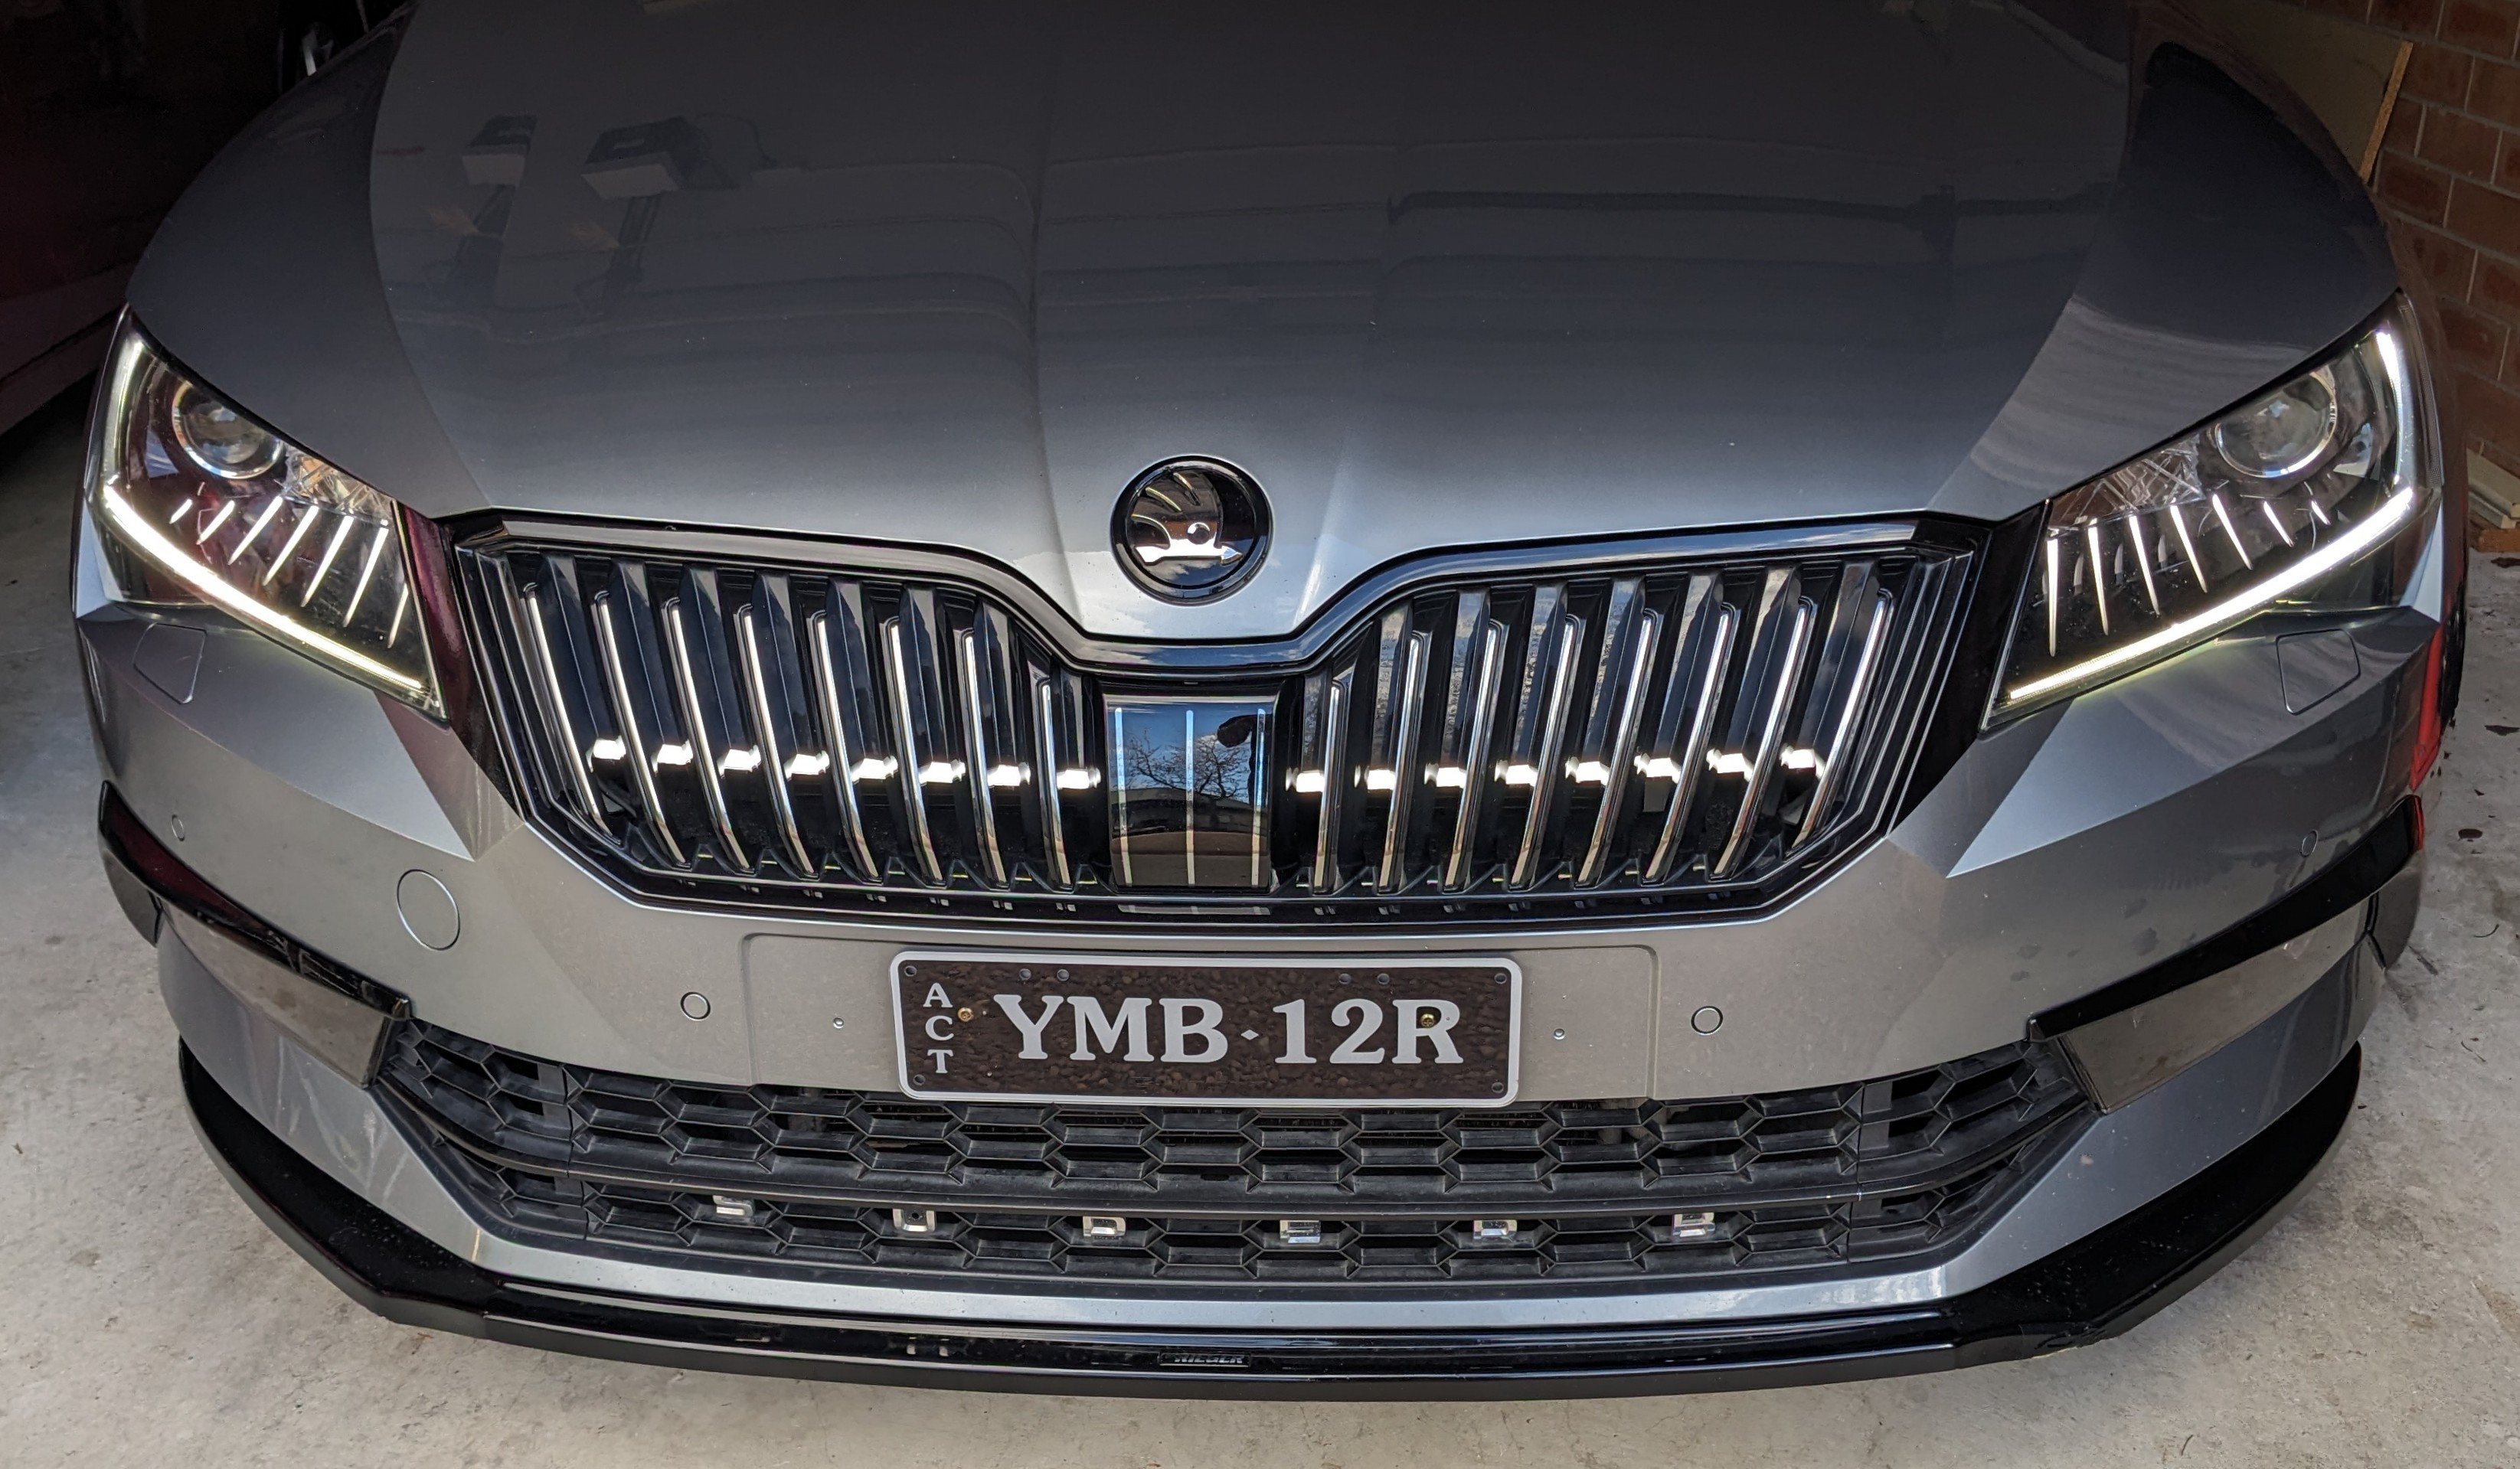
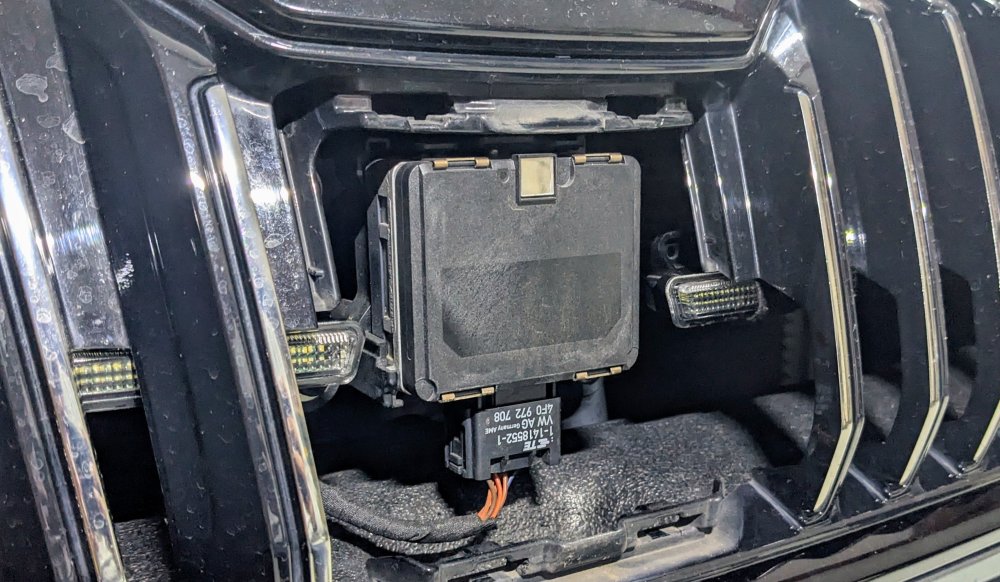
1 pointSo I decided to change the front grille light bar to a proper one, i.e. not a homemade version. This one is an aftermarket one, from AliExpress - link here. They make different versions - mk6, mk7/7.5 and mk8 Golfs. Comes with the light animation at the start. It's cool. I specifically got the mk6 version as it was the right length for the Superb grille. I simply removed the surrounding trim that came in. It comes with a wiring harness (14-pin) that u can connect to ur existing headlight plug. Its designed to turn on with the low beam. I however used my existing wiring that i did before to power it up, so it comes on with the DRLs. The kit.... The light bar for the mk6 Golf.... The light bar without the surround.... The light bar test fitted... Clearance around the ACC radar.... The finished result.....


 1 point
-
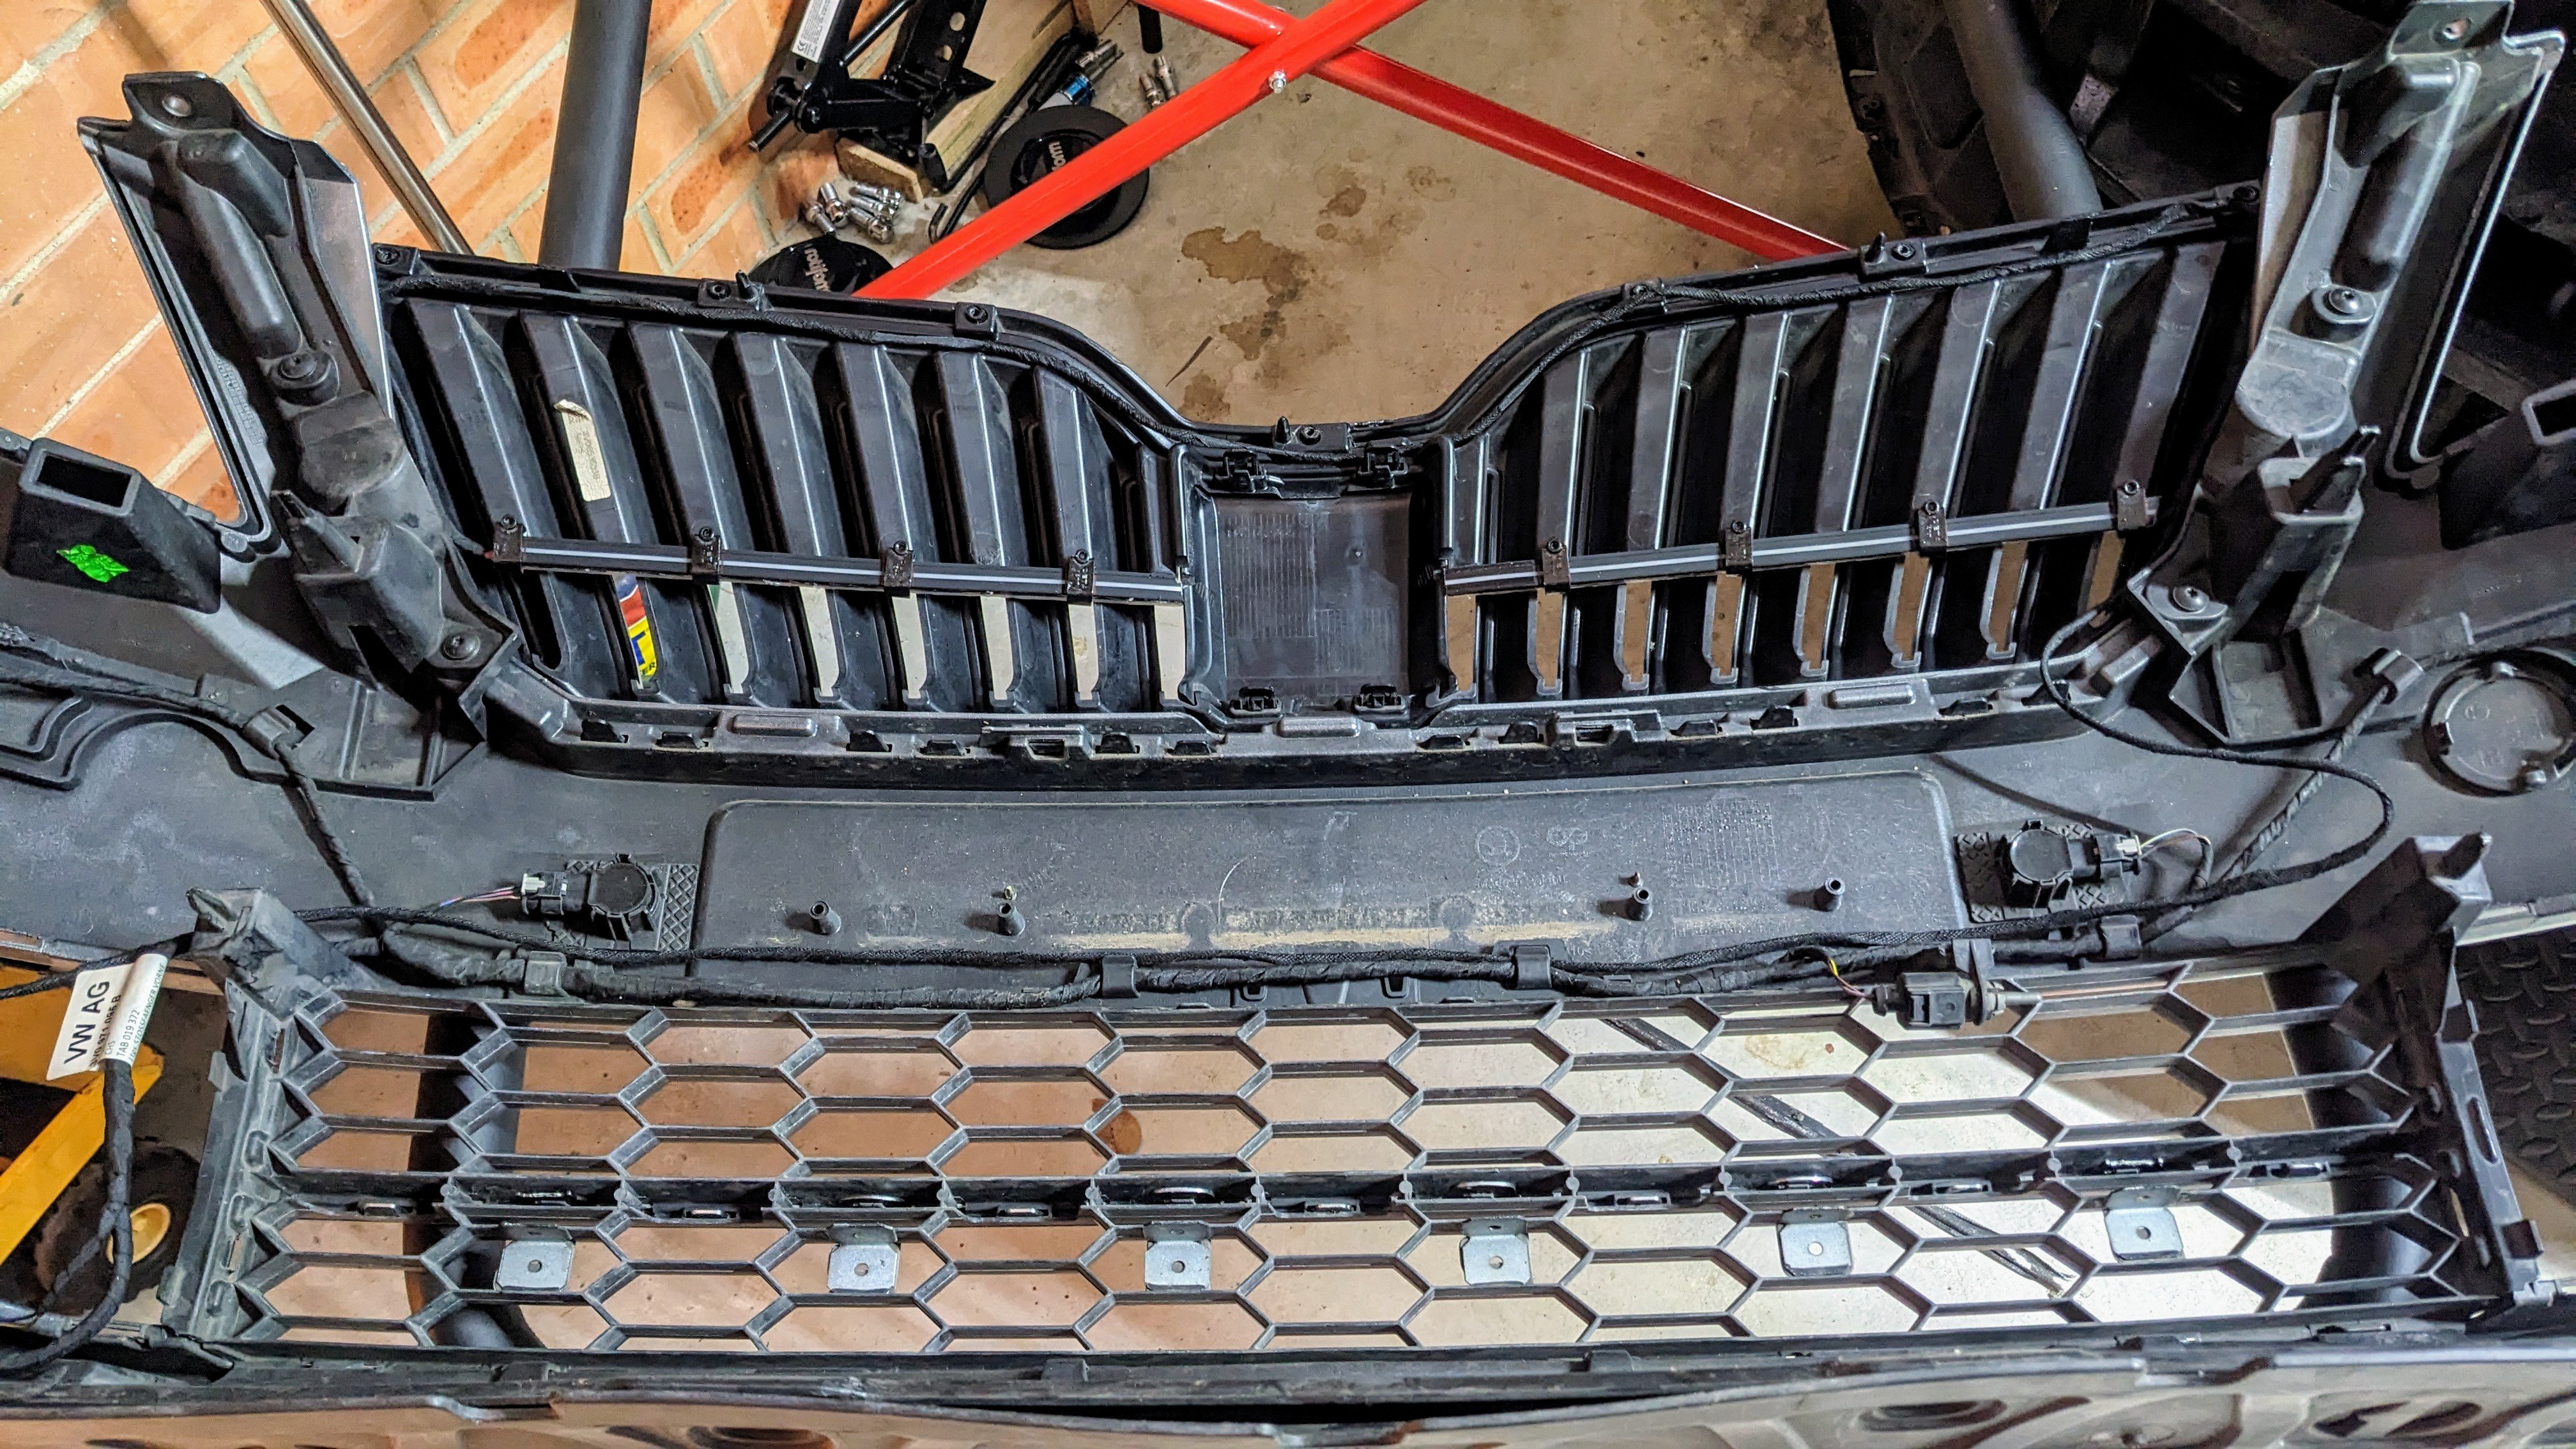
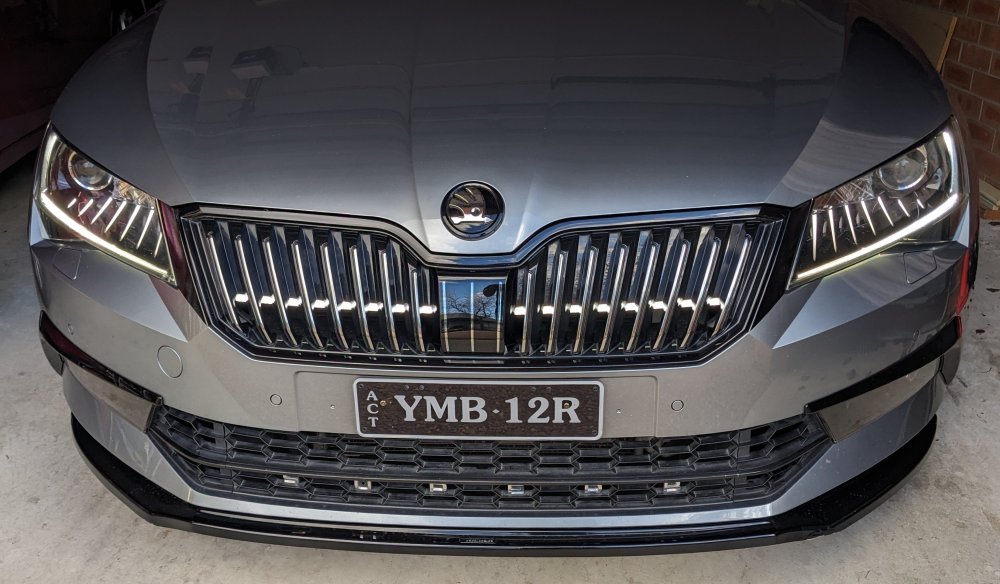
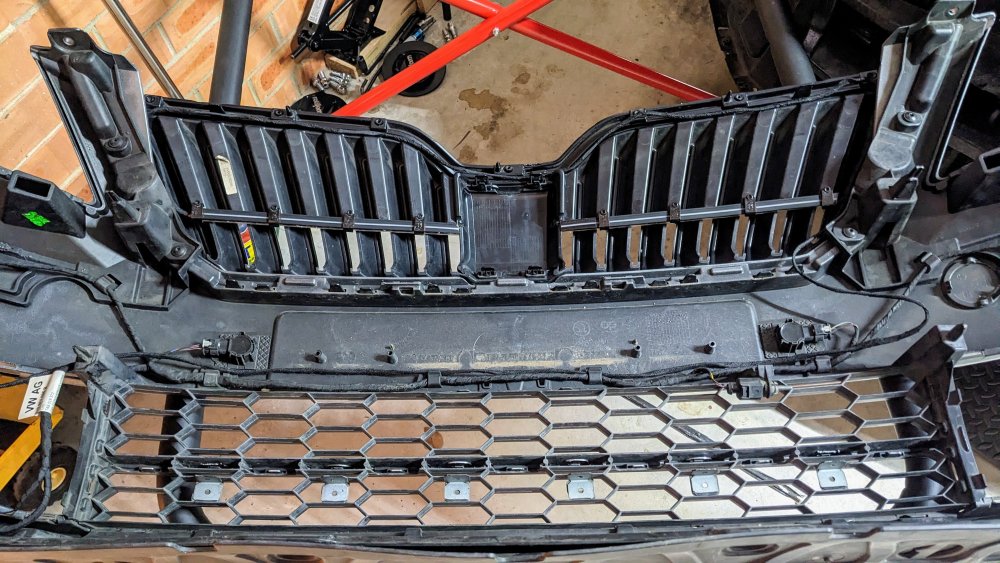
1 pointGandalf's latest "project" is complete....Front Grille DRL light bar. Towards the end of last year Skoda released the new Kodiaq which has the front grille light stripe - I saw that and I decided that's my new project. The new mk4 Kodiaq... Been planning this since last year. I'm happy with how it's turned out. The light bar is connected to and controlled by the BCM, so it dims and brightens like the factory DRL, with the same coding. I used an empty lighting channel, Leuchte8F LB39. The front grille has an opening that is perfectly in line with the headlight's DRL - so perfect alignment for the light bar. The light bar I made myself, using an LED strip, a plastic holder, and a light diffuser. Fingers crossed that the light bar hold up against the elements. The light bar I made... Test fitting the clips to hold the light bar behind the grille. Mounted and wiring routed on the bumper to use the same path as the factory PDC and headlight washer wiring. Wiring from BCM was routed through the firewall, into the engine bay, they down to the factory wiring harness for the PDC and headlight washer.





 1 point
-
1 pointLuckily, it's pretty easy to upgrade. The light disassembles really easily. Just remember to get an LED with CANBUS resistance. I have these for reference (I know it's in Danish, but the specs are there: https://dinled.dk/products/kopi-af-t10-w5w-12v-canbus-led-paere-saet-med-2-stk) These light up really good.1 point
-
We picked up the Scala a week ago, a 1.5TSi Manual Monte Carlo. We are pleased with the car so far, Being an early '23 model it has no Kessy, and although quite sparse in terms of bells and whistles (given I have had the benefit of a lot of the vag bells and whistle on my last few cars), it has most of what we wanted. Although the ride is decent for most of the time, I do intend to downsize the wheels to some 16" when I can, to be more compliant on the crumbling and pothole strewn roads locally ! This was something I had considered before purchase, and felt it worth it as we intend to keep the car for some time, But that's another topic to post 😊1 point
-
Model: SUPERB SE L EXECUTIVE TDI - 2015 Hello all The recent cold snap in the UK seems to have broken the clip on the back of the headlight washer cover on driver's side, and during a trip it has dropped off so I need to get a replacement. Any recommendations for stockists and more importantly, they apparently come unpainted so any advice on getting them painted to match car would be gratefully appreciated. Thanks1 point
-
I have an Octavia Mk 3 saloon (2018). In a recent cold snap one of my headlamp washer covers also broke off. I imagine this was due to insufficient screen wash antifreeze causing an ice build up behind the cover when the jets were activated. Ice casuses expansion - that is well known. In my case though the two "lugs" on the end of the washer jet also broke off with the cover 😒 I didn't want a long repair involving the removal of the front bumper and replacement of the entire jet as it is bad enough having to spray a new cover with the correct paint so I experimented with removing the end of the jet by first first griping the assembly on the car with a mole wrench to stop it retracting into the bumper and then placing two thin blades (I used artists pallet knives) in between the clips and the serated part of jet assembly as shown on one side in the photo. That allowed the end section of the jet to be removed by carefully pulling it off. I further discovered that the jet assembly parts for the Octavia 3 (Part Numbers 5E0955966 Right and E0955965 Left) used the same end pieces as the more easily available and cheaper VW Golf Mk Vll 2013-17 (Part numbers 5G0955966 Right and 5G0955965 Left). It would also seem that those end pieces are not "handed" so are interchangeable. Replacing the end piece of the jet is a breeze as it just pushes on to provide an interference fit with the teeth on the main assembly. Hope this might help someone with the same issue PS the part numbers for the washer covers are 5E0955109E GRU - left side and 5E0955110E GRU - right side (driver side of RHD car). Best to get the primed ones if you can,
 1 point