


Leaderboard
-
.png.391eb0542b140436ebc57f3e50f692a4.png)
Rustynuts
Resident Member8Points6,232Posts -
Aspman
Resident Member6Points21,151Posts -
TheUltraRunner
Members5Points1,258Posts -
Lady Elanore
FREEDOM4Points24,875Posts


Popular Content
Showing content with the highest reputation on 14/06/21 in all areas
-
4 points
-
3 pointsMy garden see's a few nocturnal visitors. I think they may well be four in total.
 3 points
 -
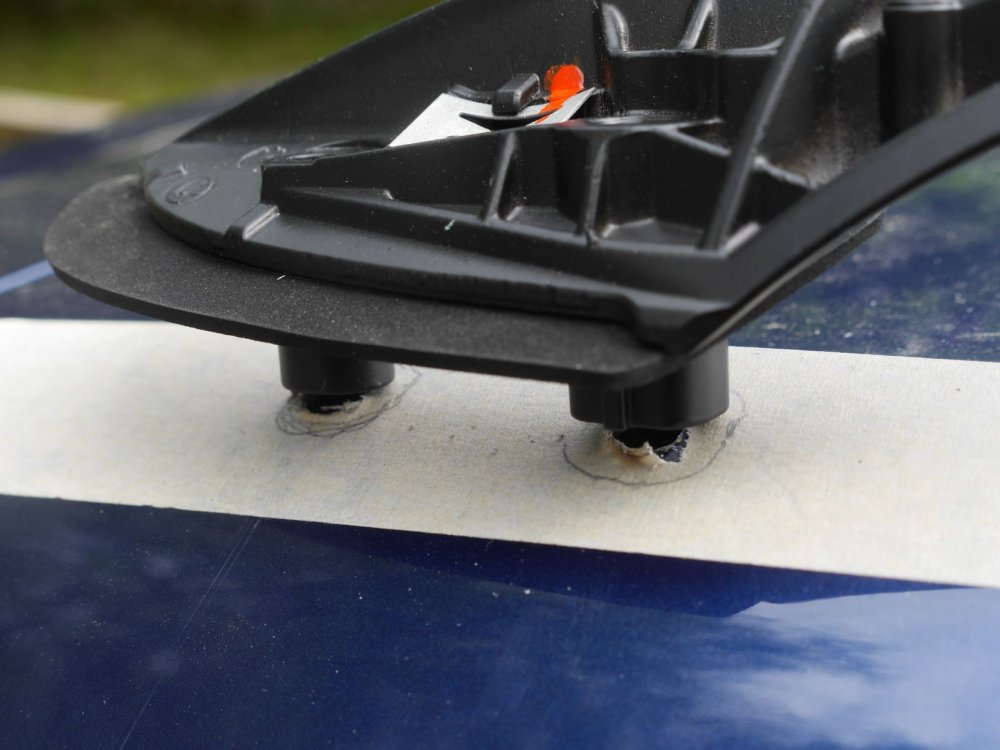
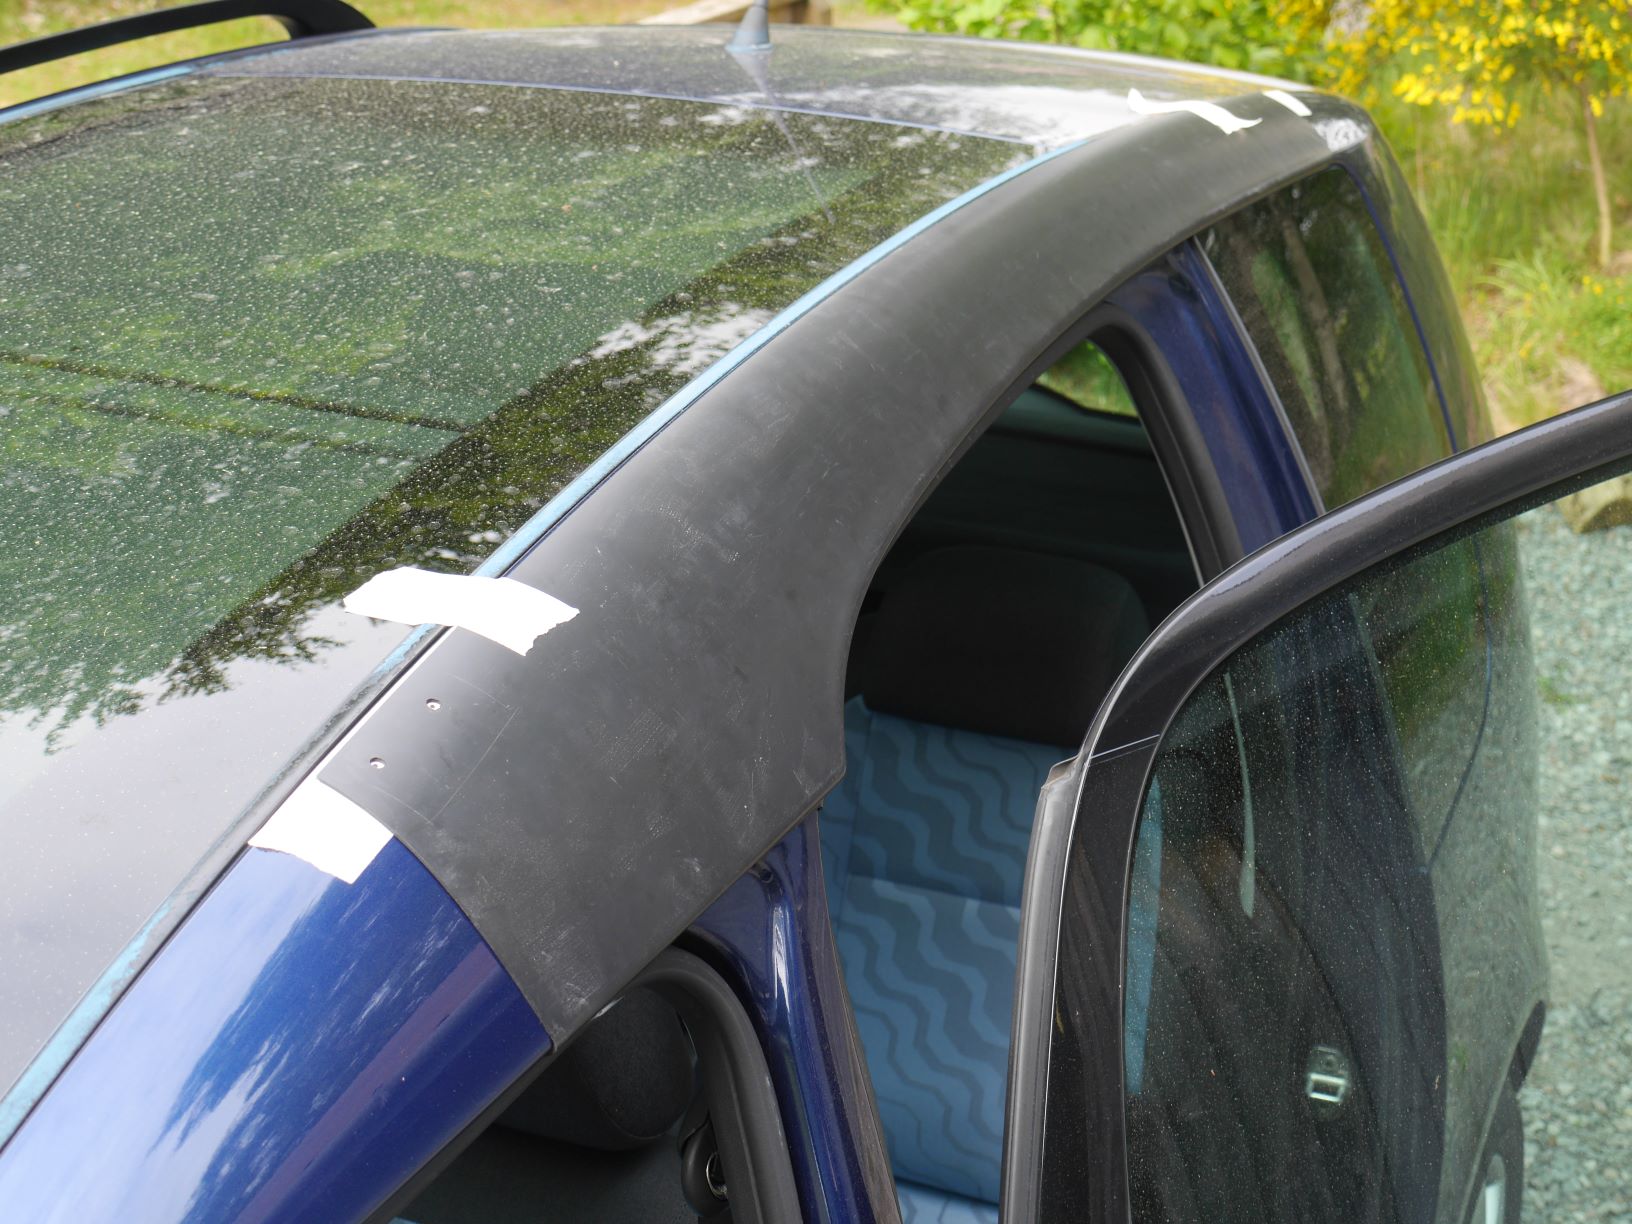
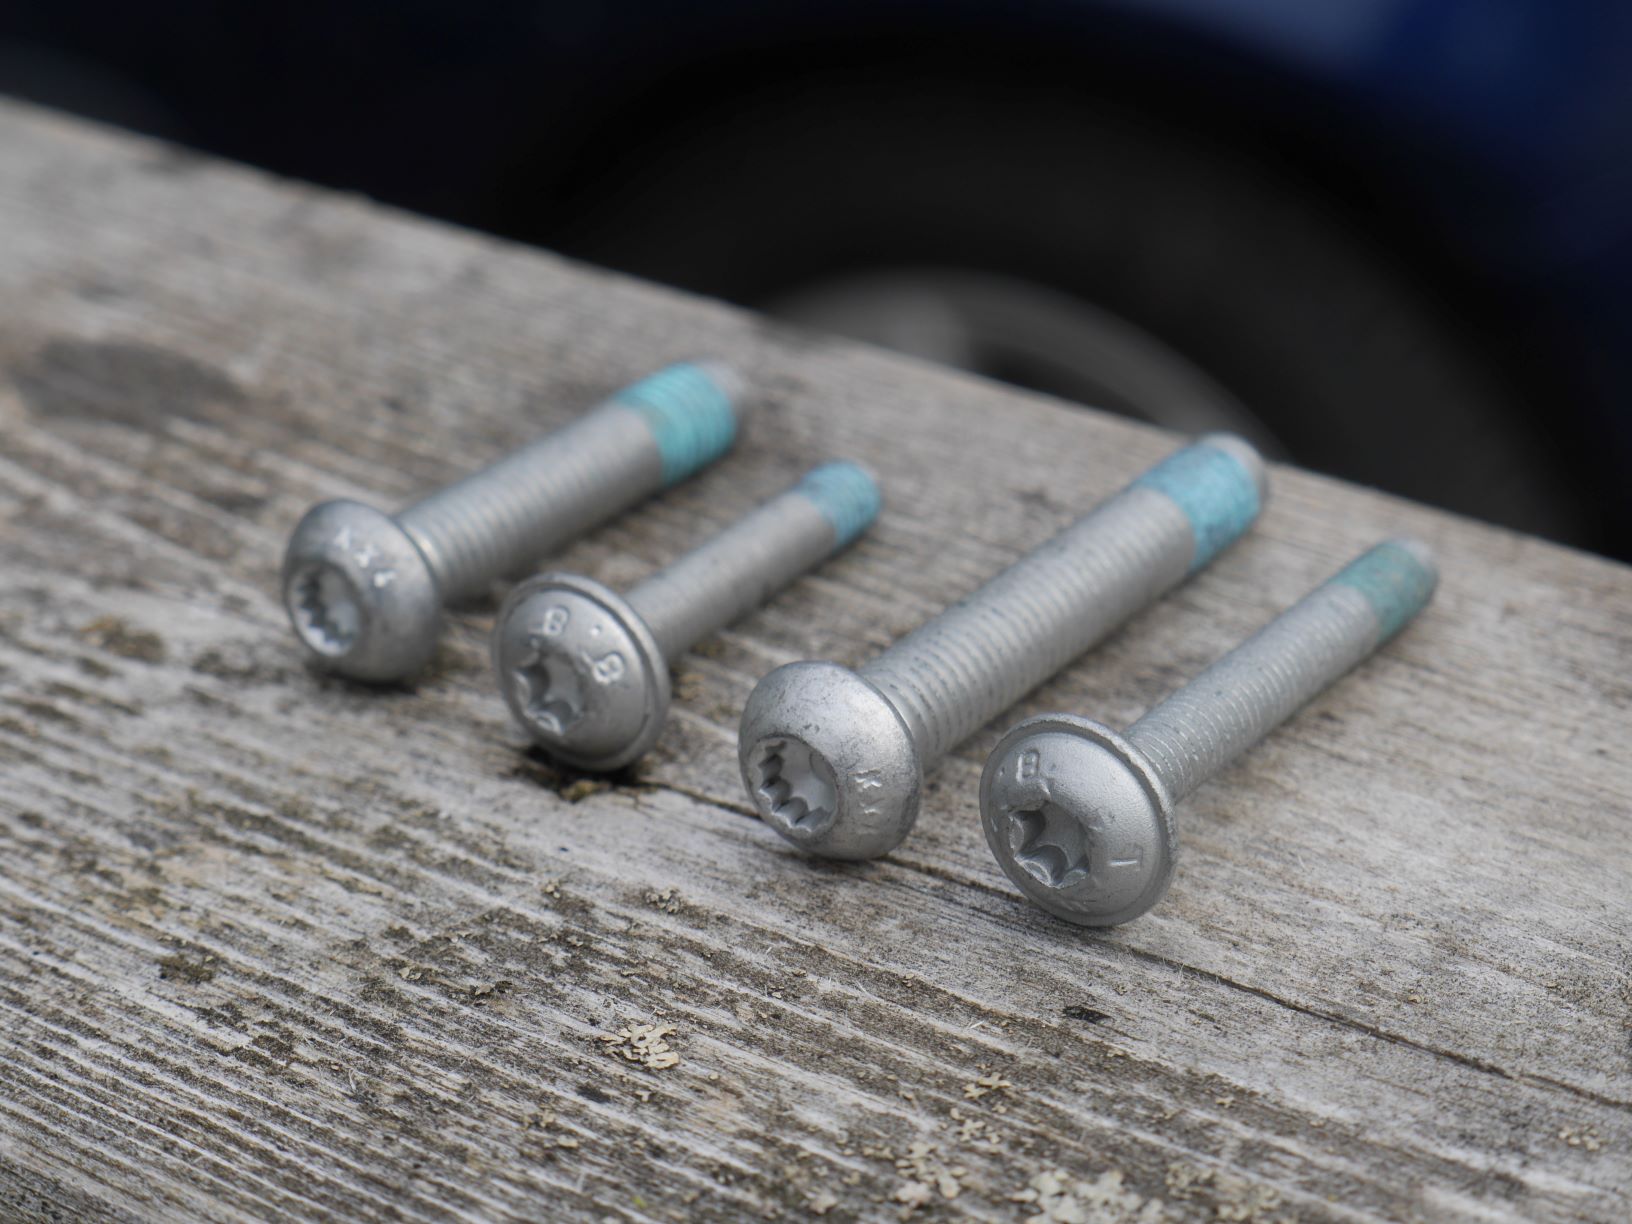
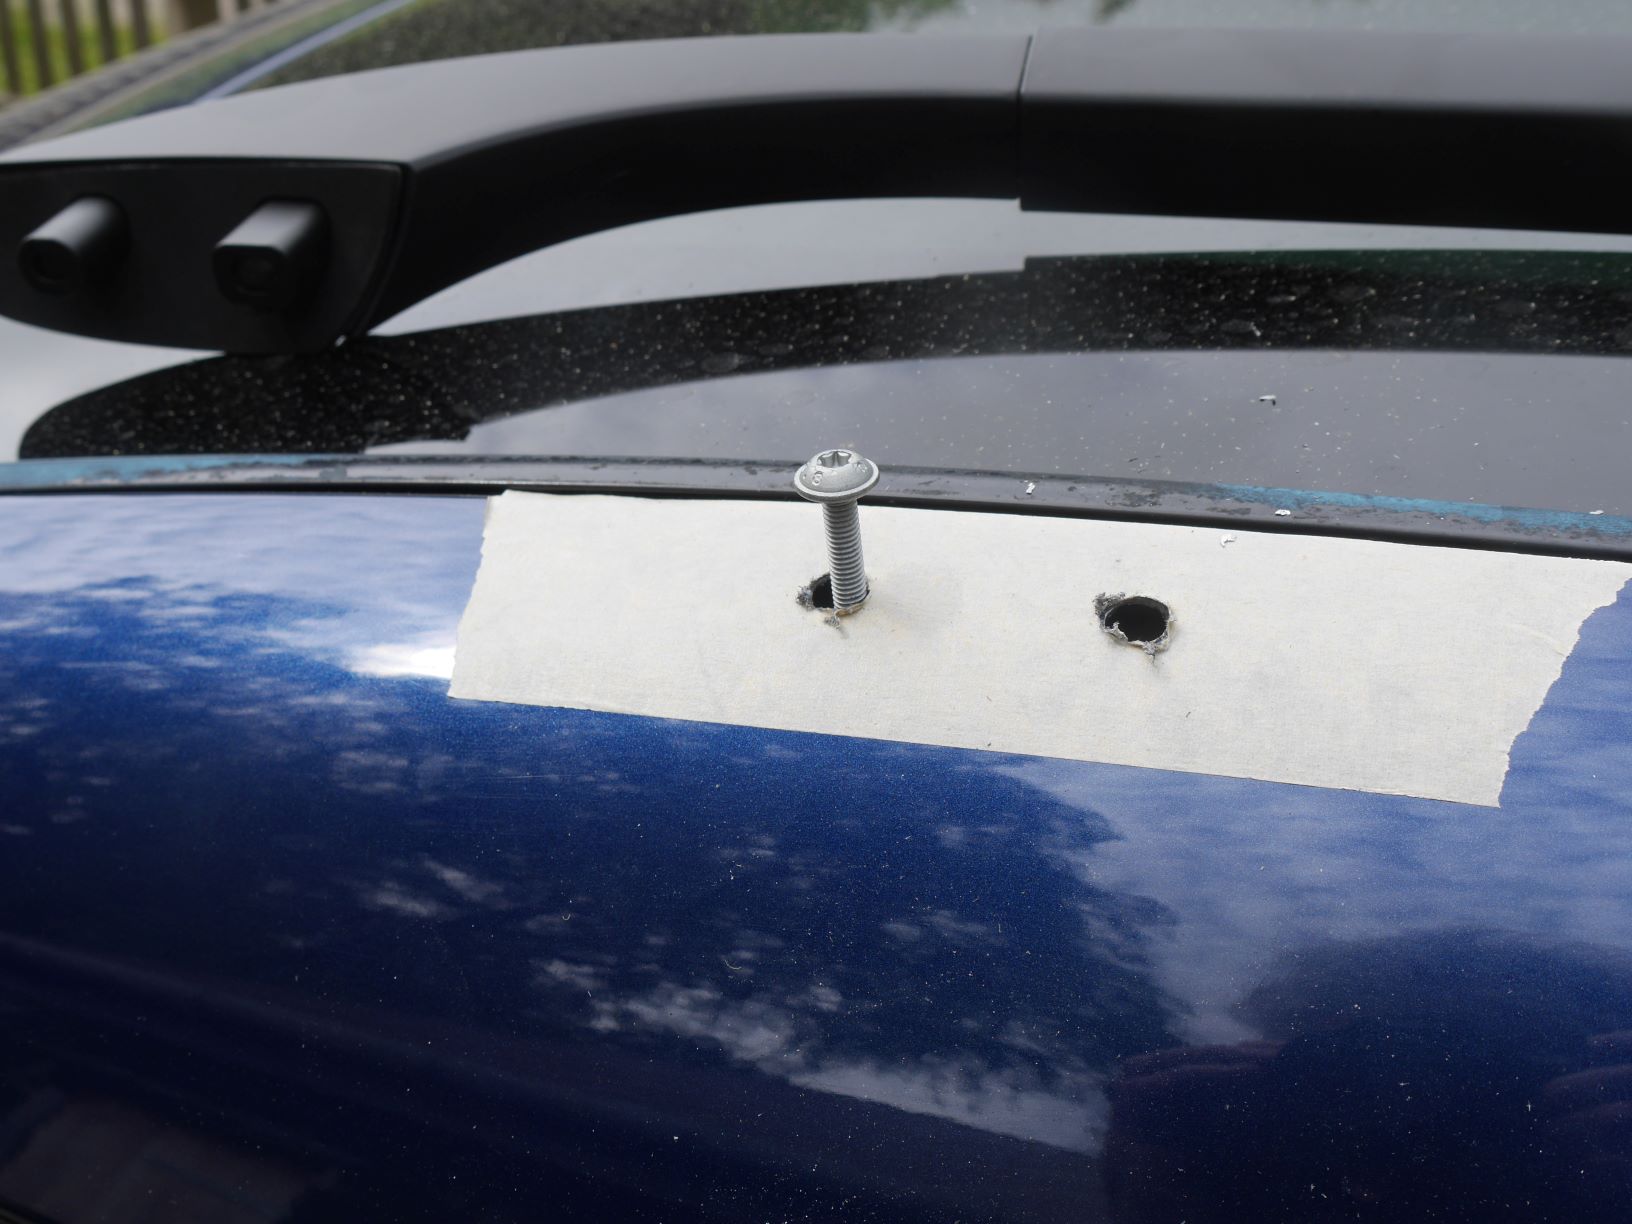
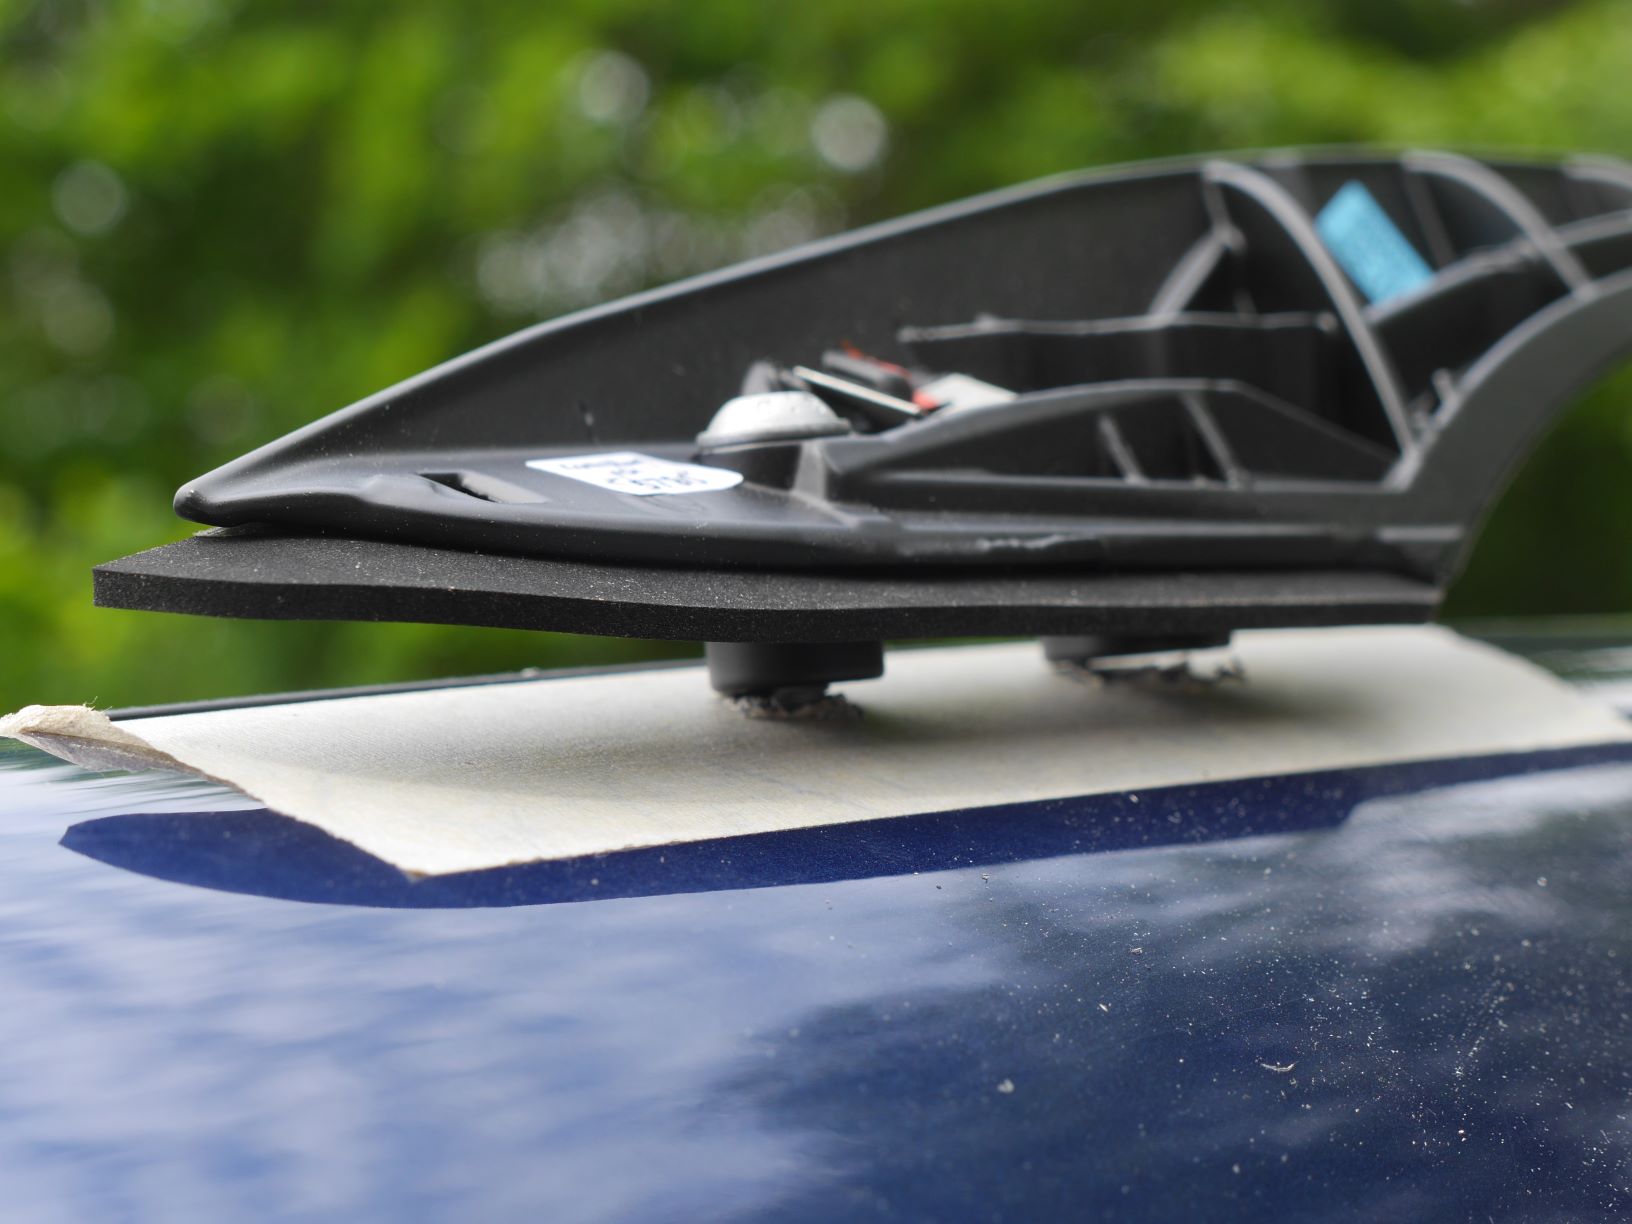
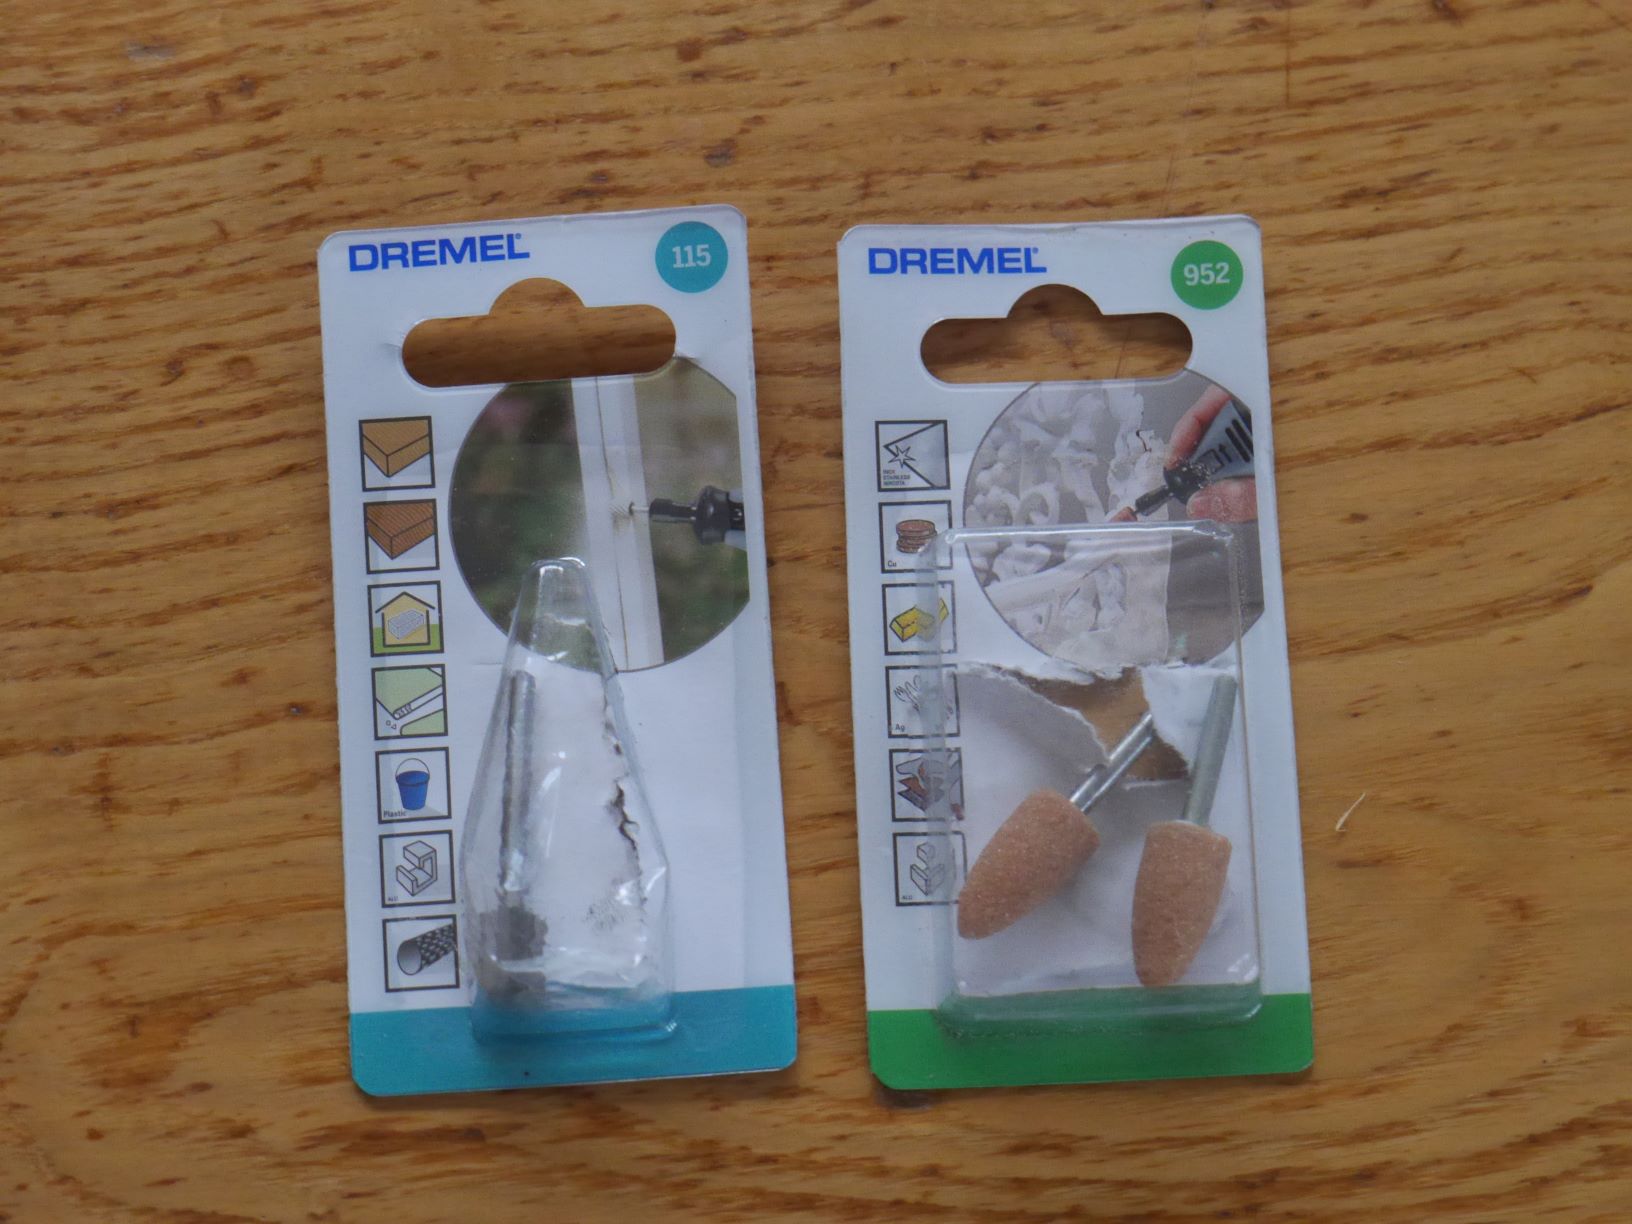
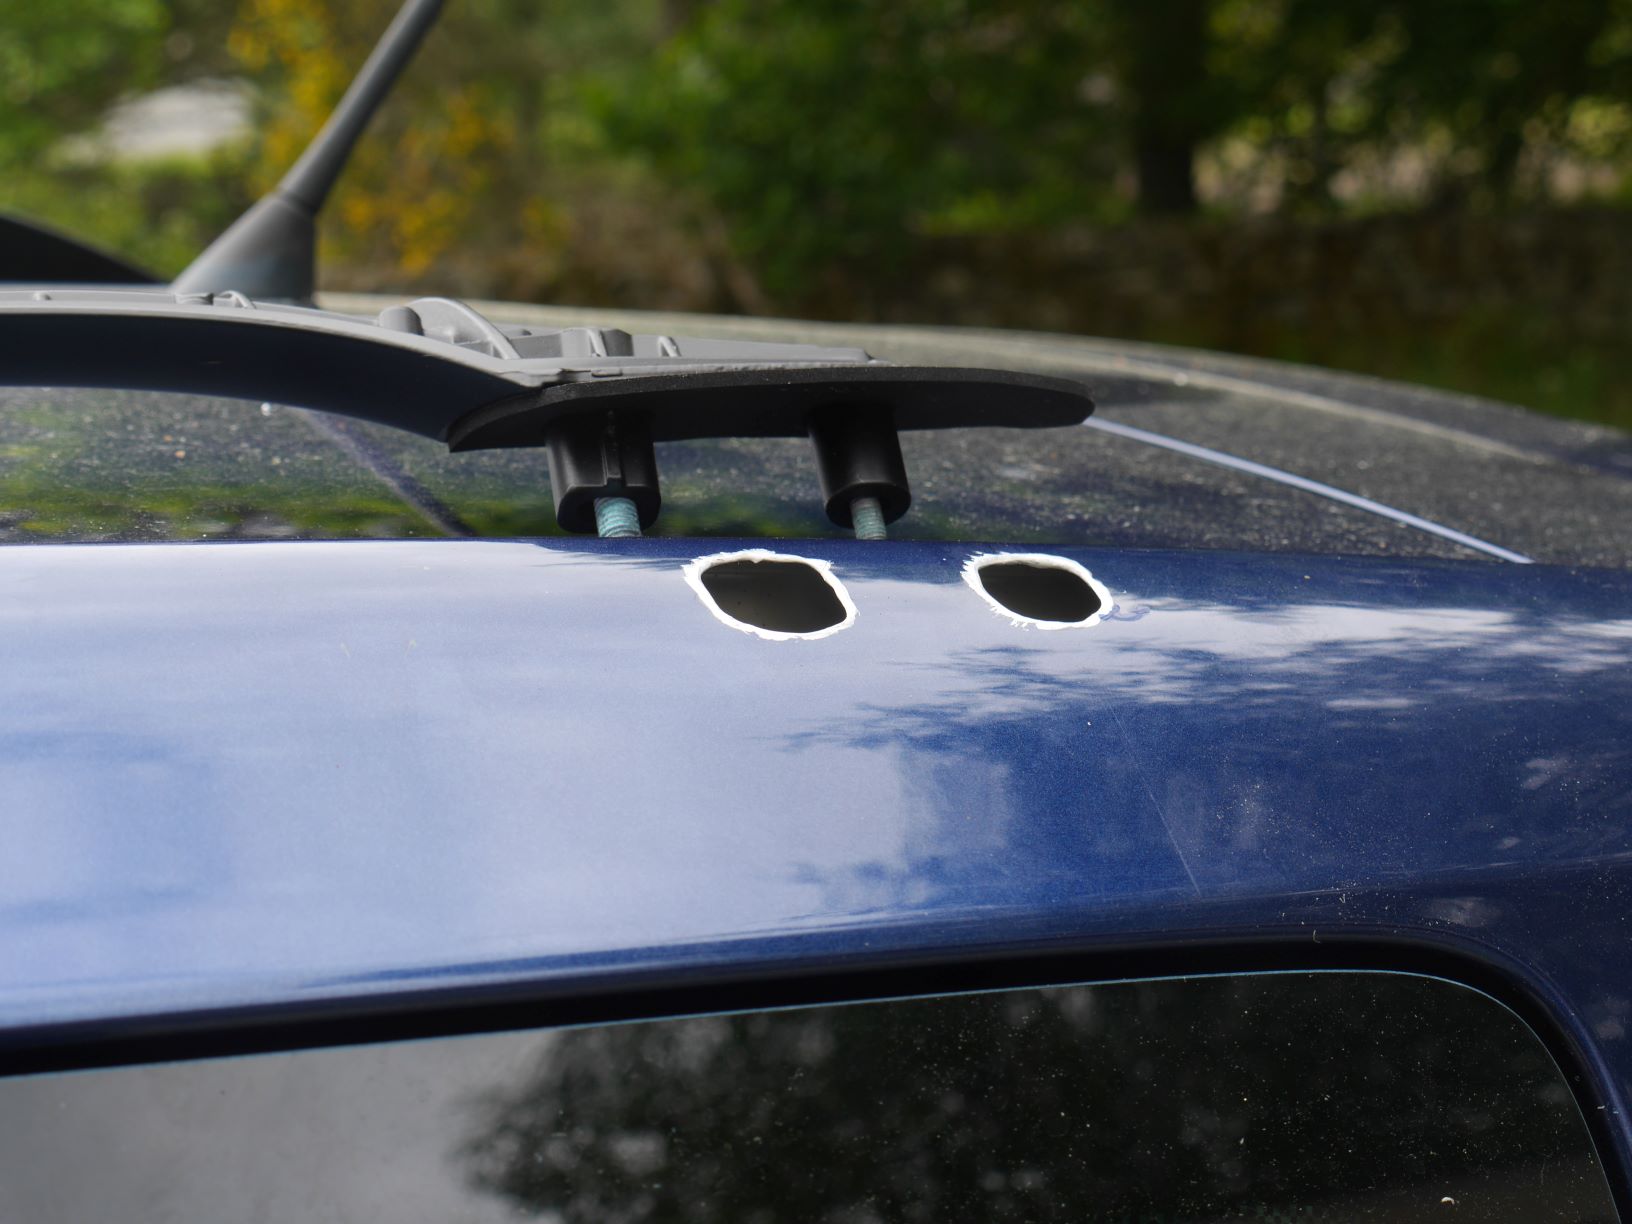
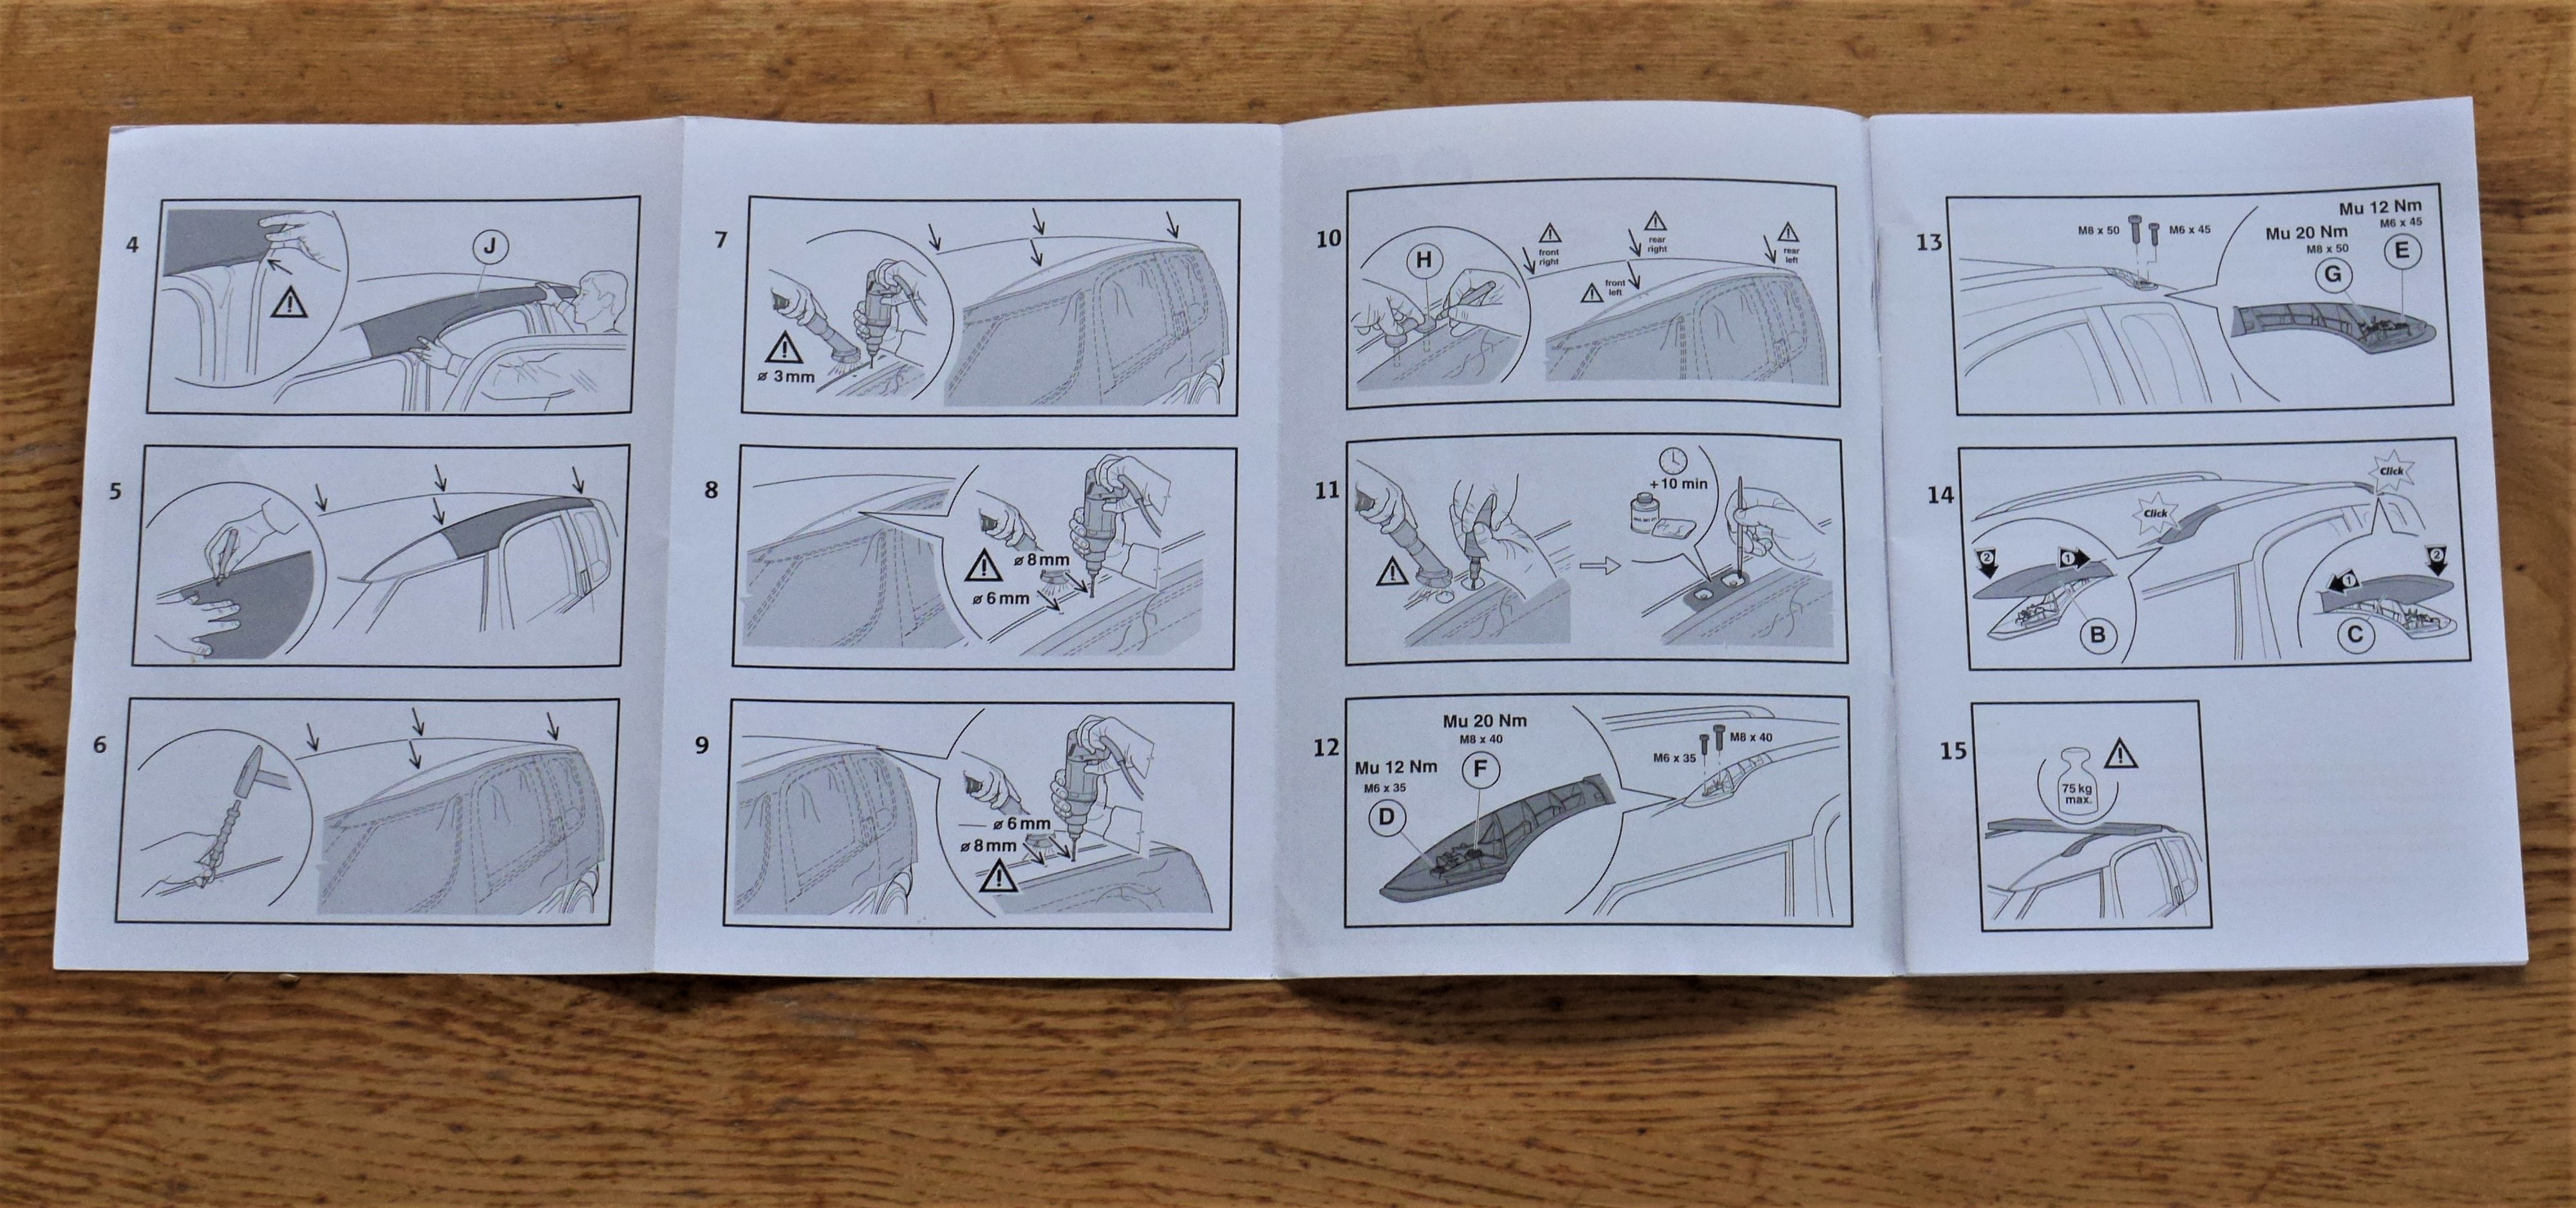
There have been various threads and postings on this DIY installation job but not a step-by-step guide. Have just fitted these on my 2009 Roomster with a Pano roof and thought others might benefit from my fumblings! The Big Picture The roof rails can be retro-fitted to cars with or without a Pano roof. There's no difference when it comes to installing the roof rails. If you're not too handy with tools (or have limited access to tools) and you have deep pockets, then definitely get a Skoda dealer to do this job for you. There's been mention on the forum of Skoda dealer Parts Department staff producing low 'book price' labour quotes. Accept the quote! Drilling into the car to locate some hidden captive nuts certainly feels a little 'balls out' (even using the Skoda template) so the job is not for those of a nervous disposition either! However, if you're a bit of an impecunious bugger like me and have done a few more technical things on your car then this job is definitely do-able....as long as you have the right tools. Stuff you'll need:- The roof rails themselves. Skoda part number: LAH770001 The roof rails template. (Attempting to do this job without the large templates would be a nightmare and if you get it wrong it might require an expensive visit to a bodyshop to put right your mistakes). Skoda part number: LAH770011 . There are two of them, one for each side and they can't be mixed up. If you buy this installation kit from a Skoda dealer then it will also come with a selection of small plastic templates that allow the accurate enlargement of the pilot holes you'll be making. I didn't have these small widgits so had to ad lib a bit but nevertheless achieved a satisfactory outcome Tools Power drill, Dremel drill thing (or die grinder, or similar), 1/2" or 3/8" torque wrench (that goes as low as 12NM), a Torx and a splined bits for torqueing down the securing bolts. A sharp-pointed centre punch, hammer & needle nose pliers. Consumables Drill bits: 3mm, 5mm, 6mm, 8mm. HSS or similar. I broke two of the 3mm bits so have a few spares of these smaller one. Dremel or die grinder bits to expand and clean up the quite large holes you've made. Paint: Primer (I used rattle can of acid etch primer, sprayed a bit into a jar and used and a very small artist's paint brush to apply the paint. Plus some sort of quick drying top coat to seal the primer and keep the weather out. (Above) #1. One of the large Skoda OE templates in position on the Roomster. It's made of cheap plastic but carefully and accurately moulded to the contours of the roofline and B pillar. Don't leave the template out in the sun just before you use it - which is what I did - because it expands lengthways at least 8mm or so which was a bit alarming and gave quite a locational error at the rear rail fixing points. I let it cool down to below room temperature and then got busy marking the centre of each aperture onto the masking tape I'd put down in the general location of the bolt holes in the roofline. (Above) #2. A bolt set for one roof rail shown. 4 bolts per side, all different sizes. M6 and M8. The two longer ones go at the rear fixing points. *Note they have Torx and splined socket heads. (Above). #3 The captive bolts are located beneath the black dots....I hope! Make a dot in the centre with a pencil or Sharpie then lightly punch it with a centre punch. This will reduce the chances of your drill wandering around too much when you first start the 3mm hole. (Above) #4 Using a selection of drill bits progressively make the holes 6mm and 8mm. The 6mm holes are at the front end and rear end of each rail. (You should be able to see the captive nuts down in the holes....and yes, they were there thank God, pretty much spot on!) If you have the selection of small plastic hole templates in your installation kit this is when you insert and trace around them to give you the finished hole sizes sizes. I didn't have the small plastic widgits so had to use other freehand methods to sketch the larger holes onto the masking tape. (If you have the small plastic widgit templates then you can skip the next three photos.) (Above) #5 My free-stylee approach to sketching the larger holes. As a temporary measure, place the longest 6mm bolt into the hole at the front of the car and lightly screw it into place. Finger tight only. (The bolt you're using will eventually be used to secure the roof rail at the very rear of the car.) (Above) #6 With the roof rail lightly attached at the front of the car, next swing the roof rail over where the rear holes are and temporarily tape it in position. They won't line up, which will freak you out slightly (or a lot). You'll assume the roof rail is too short, or the template was wrong , or the captive nuts in the wrong place. Or all of those things! But don't worry everything will come good. (Above) #7 Trace around the projecting pegs onto the masking tape at the front of the car. (Above) #8 Drill 3mm holes then enlarge with 5mm until all the drilled holes merge and the excess metal in the centre can be pulled out with needle nosed pliers. (Above) #9 Dremel time! Smooth out the edges of the holes. Test fit the roof rails. Make sure there's clearance all round each protruding peg since you'll need to rust protect the edges of each hole so you don't want any pegs rubbing on the sides of the holes. Make sure you hoover out all the metal chipping that have fallen into the holes. (Above) #10 The Dremel with one of the metal grinding bits I used - Dremel grinding bit 115. A steady and firm hand is required when using this tool. You definitely need face protection when this thing is cutting metal at 22000 revs. The grinding bit was just about up to the job of cleaning up the holes but only just. No way could it have been used to remove most of the 'meat'. (Above) #11 Also used Dremel grinding stones (right) to smooth off any final rough edges around each hole. (Above) #12 Remember photo #6 above, the one where the holes didn't line up? Well, with the two holes at the front of the car now complete and front pegs dropped into place, miraculously the pegs at the rear of the vehicle become aligned. Witchcraft! Next step is to drill and enlarge the rear holes similar to previous steps. (Above) Paint protection for the holes. I used acid etch primer and then some anti corrosion stuff I had lying around in the garage. It's at this point you'll want to touch up any nicks you created when using the Dremel or die grinder. I had a couple that needed minor attention with a body coloured touch up paint kit. (Above) Almost there. A test fit of the roof rail. Torque down the bolts at each end of the rails. M6 bolts torqued at 12NM and M8 bolts at 20NM. Nearest the camera you can just make out where I nicked the paintwork with the wayward Dremel. I fixed the paint prior to final fixing. (Above) The finished job. The plastic cover trims at either end of the rails snap into place easily & securely after you've torqued down the rails. (Above) The 'Destructions'! Each set of roof rails comes with a easy to understand set of written and diagrammatic instructions. Well worth referring to. Hope this helps! End note: If money was no object I would definitely let the dealer do this job!


 2 points
 -
2 points
-
Can you find out what the "IP" ratings of all of the components, plugs and sockets that you are using? That will tell you how waterproof and dust proof they have been tested to. If you do not need a long lead can you get a shorter one made up?2 points
-
2 pointsIm sorry but ragging a customers car around IS NOT a test drive and would be very unlikely to be covered by their insurance. I would suggest that you request thier insurance company details so that you can report them and show your evidence. That should get you an outcome2 points
-
2 pointsThe login details are written in the sign-in page - it is guest, guest. There is plenty of information, useful tools, SW and so on. There is really a lot of things to see there. You can also get ODIS from there.2 points
-
2 pointsSasha is the option you need I could not reccomend her enough .I they are not oem and coded right they cause all sorts of issues with the cars electrical system MIB unit etc. I2 points
-
2 pointsFinally repaired. 8 weeks but worth it. Windscreen and headlining stayed in. Thank you David Smalley at Horton Lincoln for sorting it out.
 2 points
 -
1 pointUnfortunately nickname didn't change. Could be SW issue as @sdolenec mentioned.1 point
-
I filled the tank today and have covered 650 miles of mixed motoring in five weeks and have achieved 96mpg , three times better than our Karoq on the same driving pattern. What a car! Love it.1 point
-
1 pointI would be f+^%"** furious about this, totally unacceptable to drive a customers' car in this manner, but let the dealership see the video and then they can make a judgement. If that doesn't get some action tell them you will give the video to the media to name and shame them. BUT, what do want to achieve at the end of all this apart from a deserved apology, financial compensation, free services, get someone sacked? As I said I would NOT be happy, but to be honest I don't know what would placate me in such an instance, take to another dealership in future, sometimes easier to say than do if they are 100's kms apart. Good luck and I hope that you get to some kind of resolution.1 point
-
OK, so now I'm finally able to play MP3. My car was at the dealer for some other issues, and I asked them to fix the MP3-thing too. When I picked up the car, they told me that it had worked the first time they tried it. I was a bit baffled. But it does work now. And after returning home, I see in the papers that they have actually done som sort of software update. So probably it wasn't just me and my bad karma.....1 point
-
1 point
-
That's great info @Wino - thanks a lot for that!!1 point
-
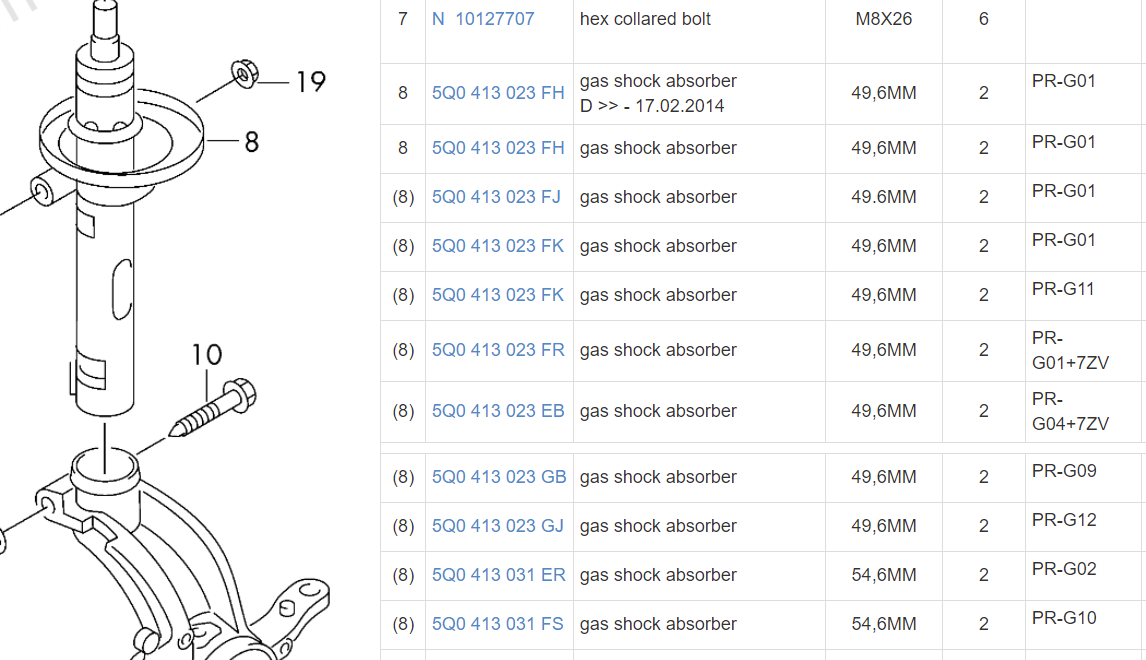
Yep, or you might be able to figure it out from the PR codes on the build sticker in the boot. Various 3-character PR numbers starting with G correlate with different part numbers and diameters of front strut. This is a screenshot from 7zap, but there are two other pages here and here if info on your particular "G" number and part number combination isn't on this one: G02, G03 and G10 seem to be the 55mm ones from quick scans of the three pages. Measuring as a double check isn't a bad idea though.
 1 point
 -
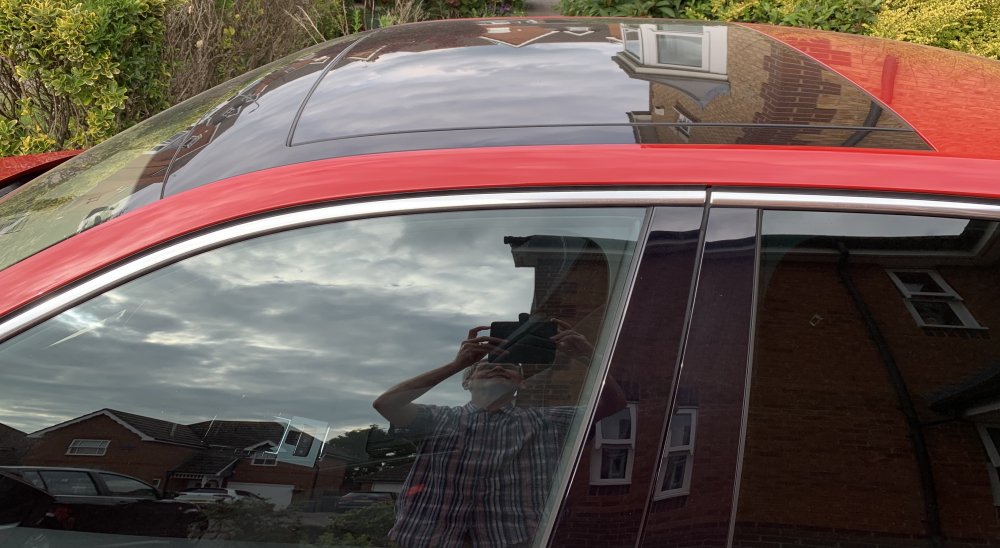
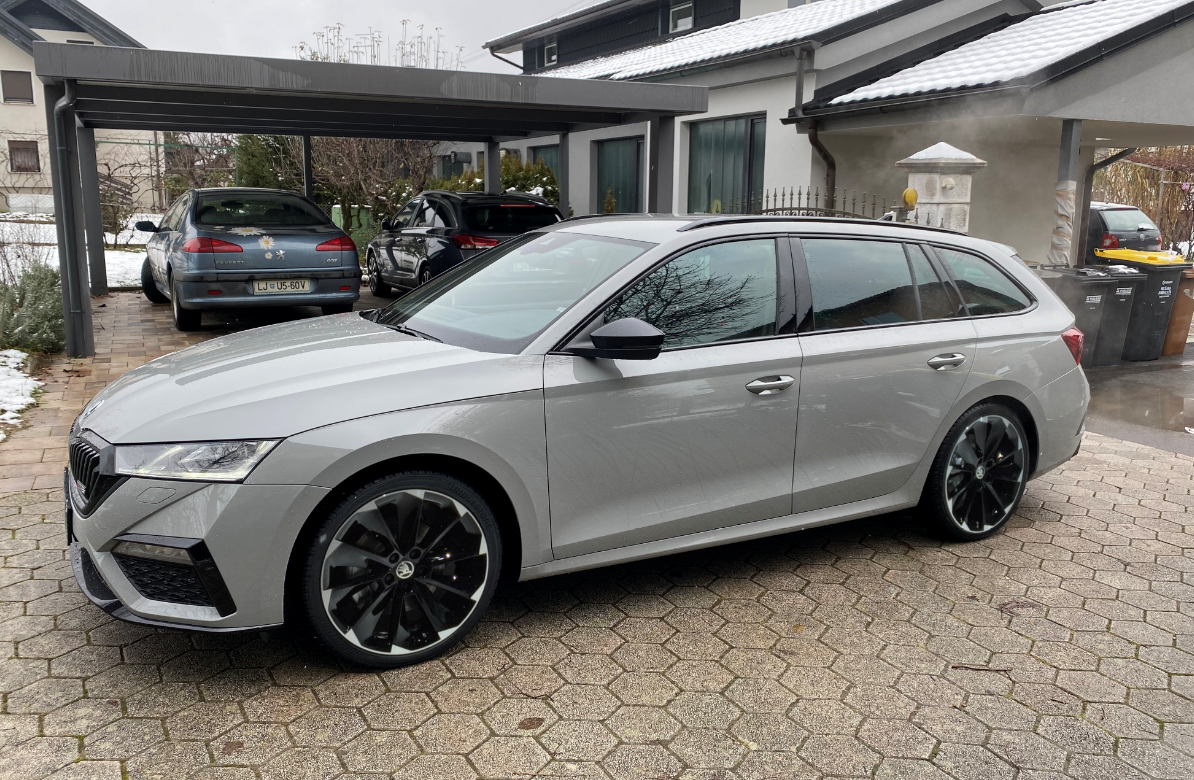
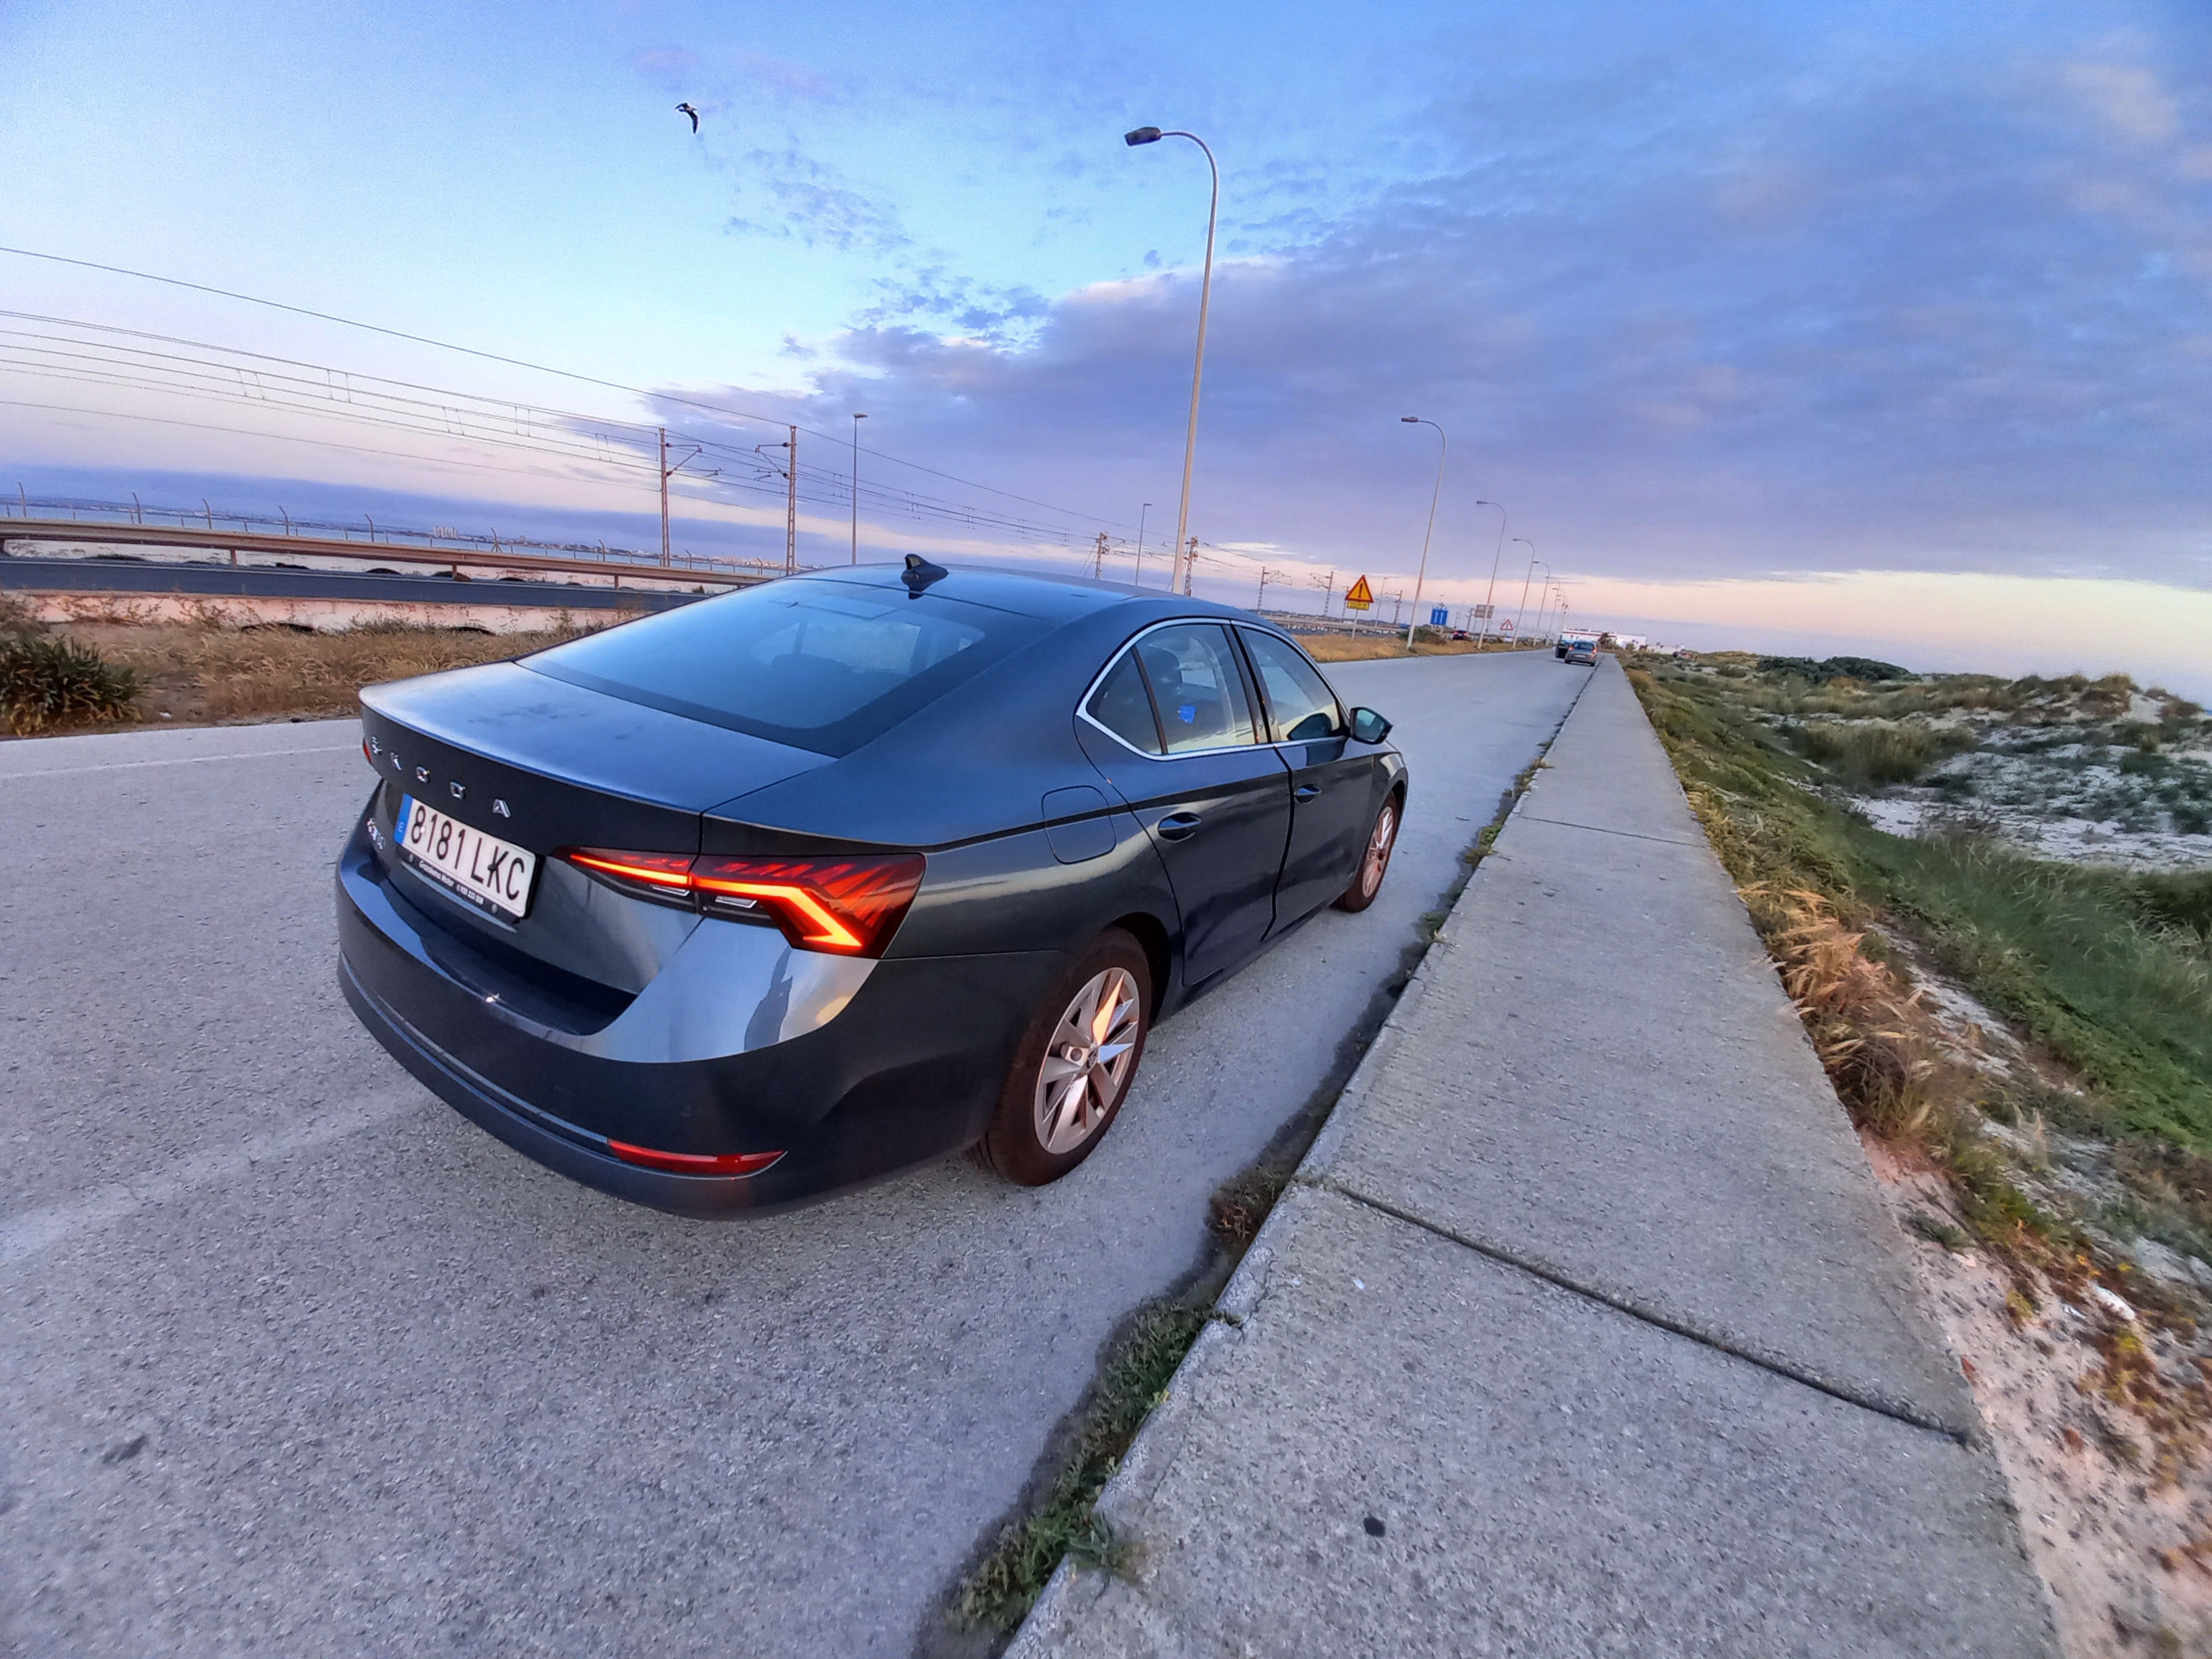
Black cars are a bugger to keep clean, but when they are....the reflection and shine is difficult to beat! Lovely job.1 point
-
1 pointIt's a lousy response from any dealership . 16 months or whatever, it's a failure. Couldnt they get a new one and replace it.1 point
-
1 pointCollate your evidence and present it to the dealer principle/senior management, also threaten to take to the police. I would be LIVID!1 point
-
If you've got "leather" seats (option on vRS) then parts of the seat panels are fake and part real. There was a thread a couple of years back describing which where which. I used Autoglym's leather cream on the lot with no adverse effects. Mercedes got into trouble a few years back by not stating their "Artico leather" was artificial. Skoda get round it by stating in their bumf that there is artificial leather in parts of the trim.1 point
-
1 pointAh, maybe I should have been more clear. Yep it was a main dealership here in Poland. I saw the mark on the bumper when I collected the car but I thought I would leave it as it is being replaced anyway because someone damaged it when I was in Switzerland on holiday earlier in the year but after reviewing the dashcam I'm really not happy.1 point
-
1 pointWhat.....! After reading your post I wrongly assumed it was the local tyre fitting shed, not the main dealer. Scandalous, I'd be making a big fuss and if they don't make amends I'd be on to Skoda UK customer services.......1 point
-
1 pointNo... They are a main dealership too. Yep, I am going to speak with them today. I wanted to check to see what other people's reaction would be.1 point
-
1 pointAgreed. OK, I don't read @r$ebook or tw@tter feeds, but I'm inclined to say that, if what we said was the least of what he took, the trolling the Tidy One got was mostly self-inflicted. Jade made her point (eventually; I knew she could), Glynn and Jessica Hawking both managed to finish all 3 races in at least the sort of positions the Tidy One would get on a good day.1 point
-
1 point
-
https://mibsolution.eu/#/1/9/pACC Has software resources to help you with pACC Let me know if you want access Cool.. I'm sure I notice you on the VAG/MIB telegram group too 🙂 they're a good bunch1 point
-
1 pointActually depending on the tune and on whether the DSG is mapped as well it can get quite lower than that, while still only running a stage 1, meaning just software, no exhaust mods etc. That's what my 272 stage 1 (albeit with a 7 speed DSG but the 280 won't be too different) was hitting with the DSG mapped as well but no other hardware mods apart from an intake which has minimal impact on times:
.thumb.jpg.9aa1f2361b9b2bad2a372c71c14759a0.jpg) 1 point
1 point -
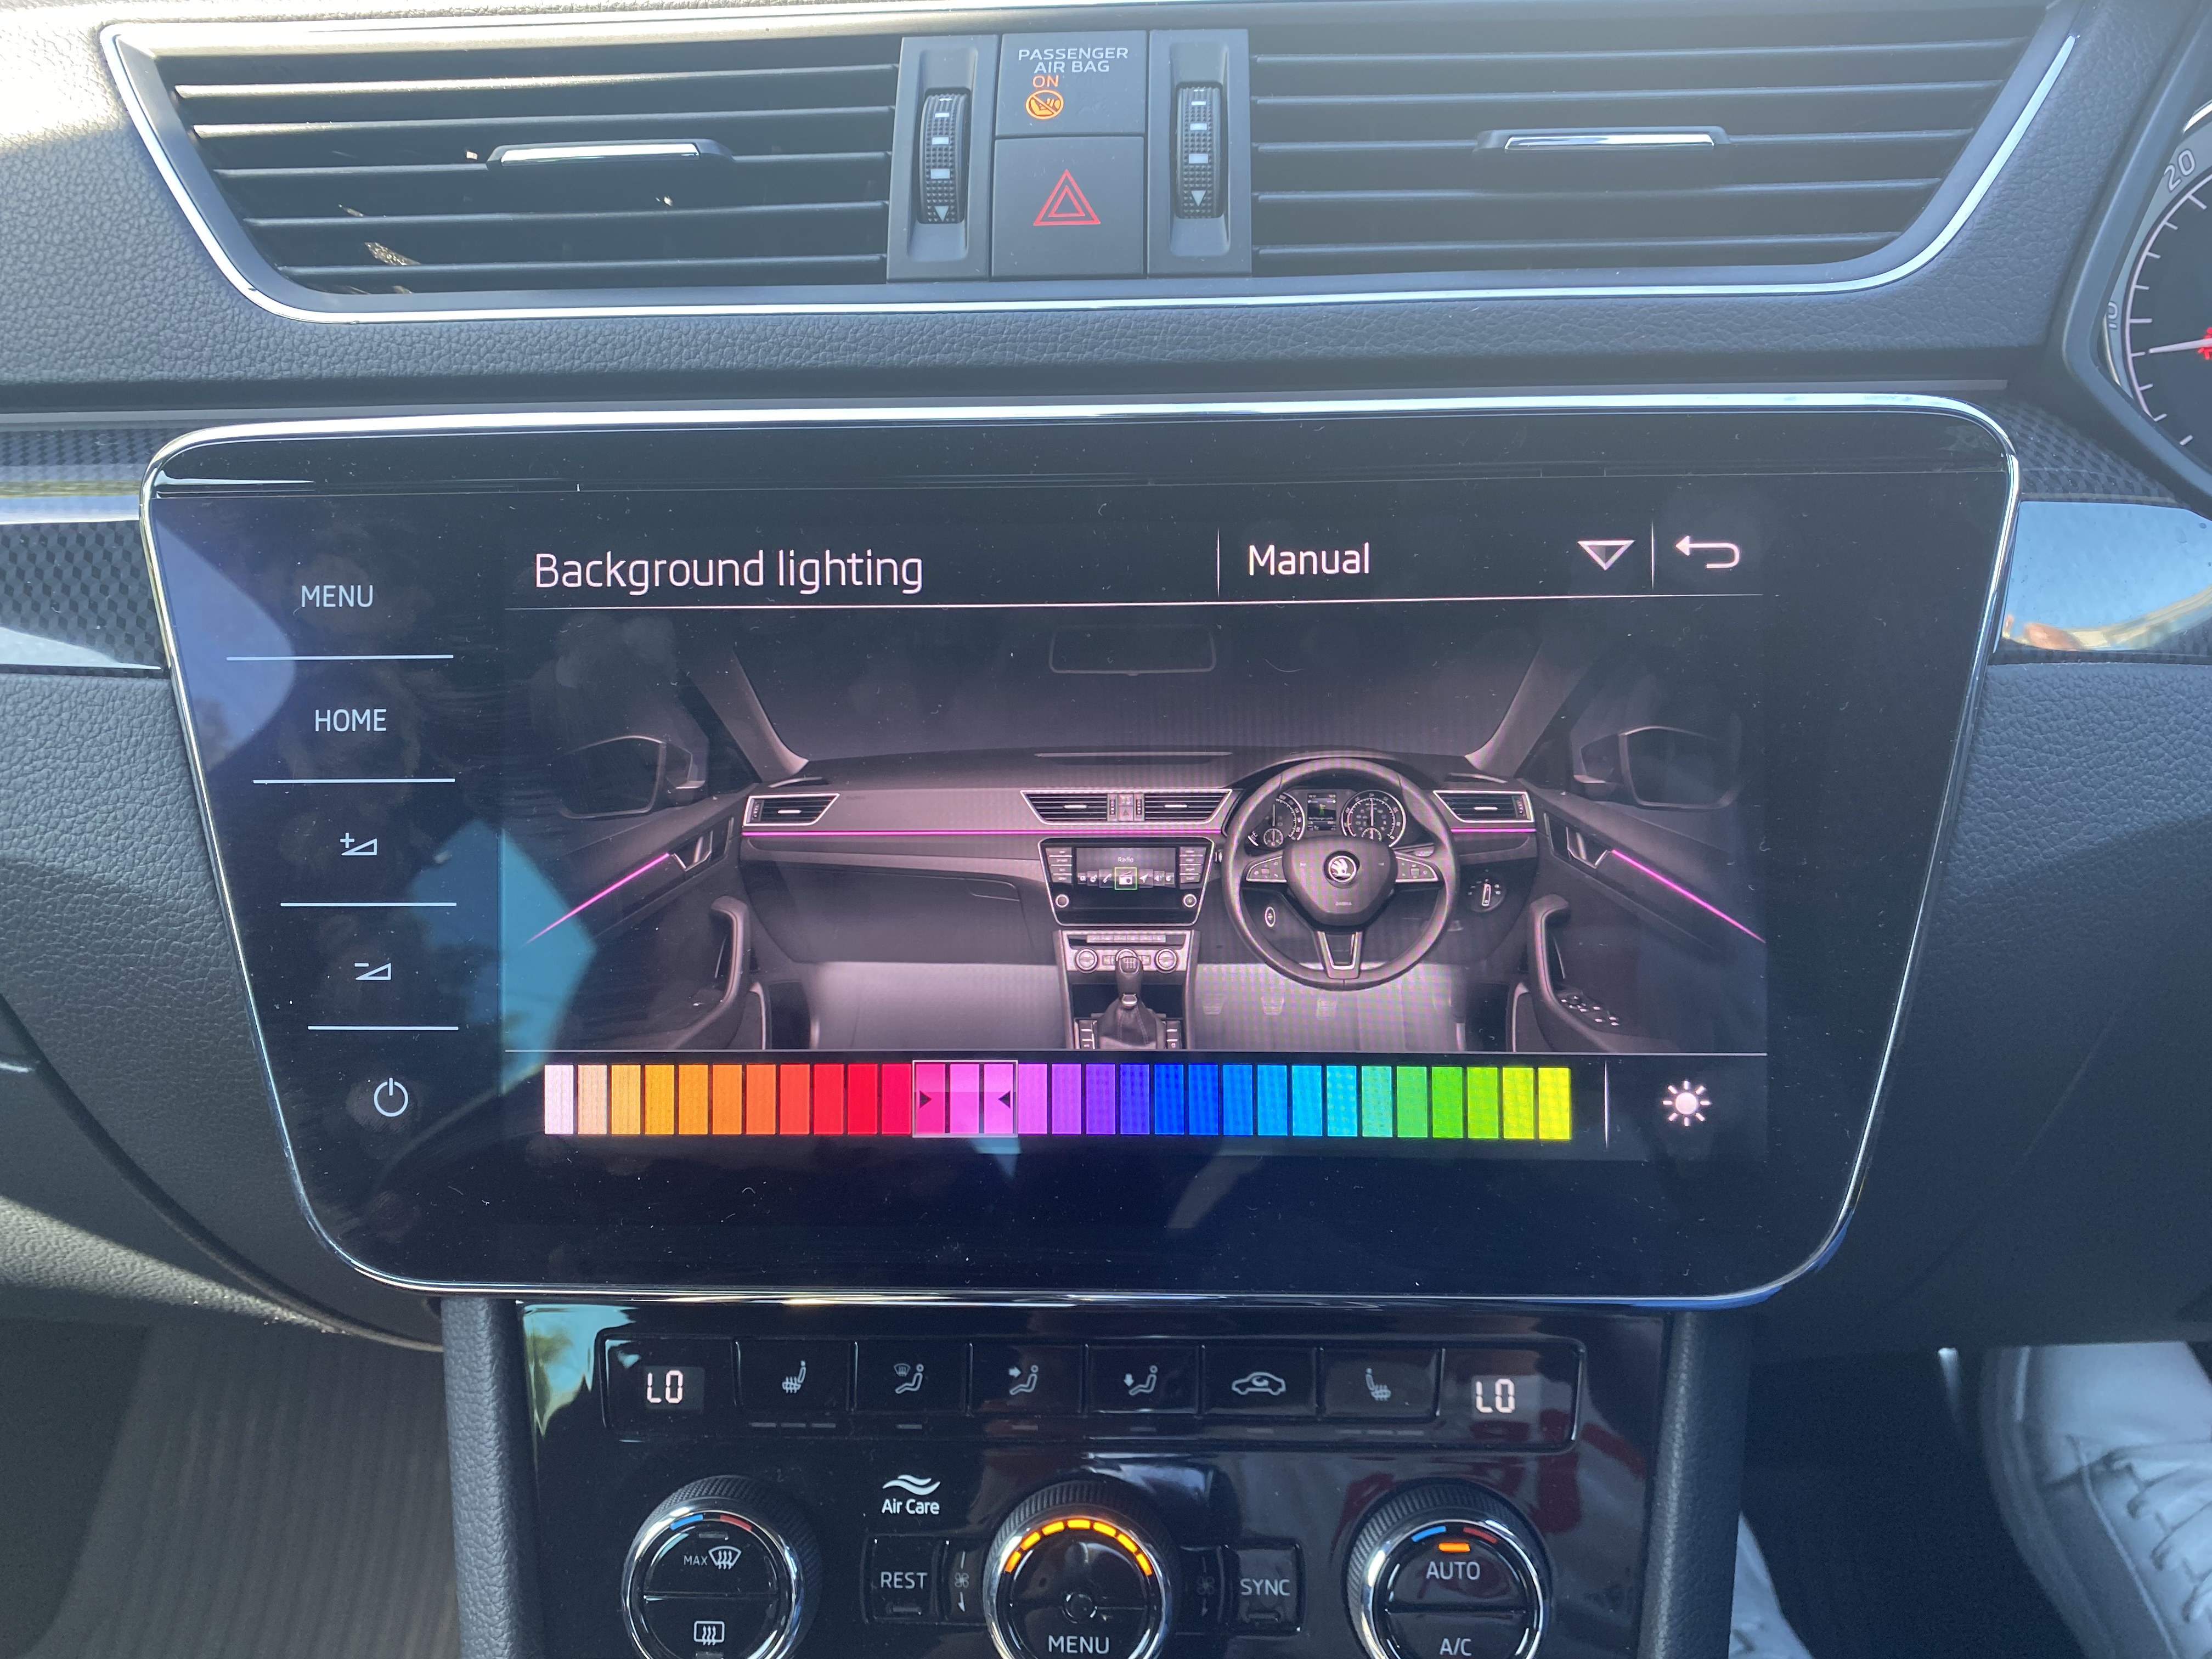
I got this working myself today. it's not coding, it's not adaptation, it's paramaters, for which you need vcp with the correct zdc file , or odis-e with the correct xml paramater set. I have odis-e, and got my hands on the correct paramaters. You need a vas5054a and a copy of odis-e installed to use these paramaters they are marked for software version 261 hardware H13, my module (late 2016) was 'J' revision and had this software and hardware you can see your hardware and software versions near the top of a vcds scan of module 6d VCP try and catch these paramater sets during communication between VAG group and copies of ODIS-E, they try and grab them and save them, then encrypt them in their zdc format to stop them being freely shared around, but if you have the xml paramaters (i.e. native ODIS-E) , you can share them, if you have VCP and want the right .zdc for this, you can probably use a converter to convert these to .zdc Again, I used ODIS-E ( via my aliexpress sources vas5054a adapter) and this worked a charm superb close boot from inside.7z1 point
-
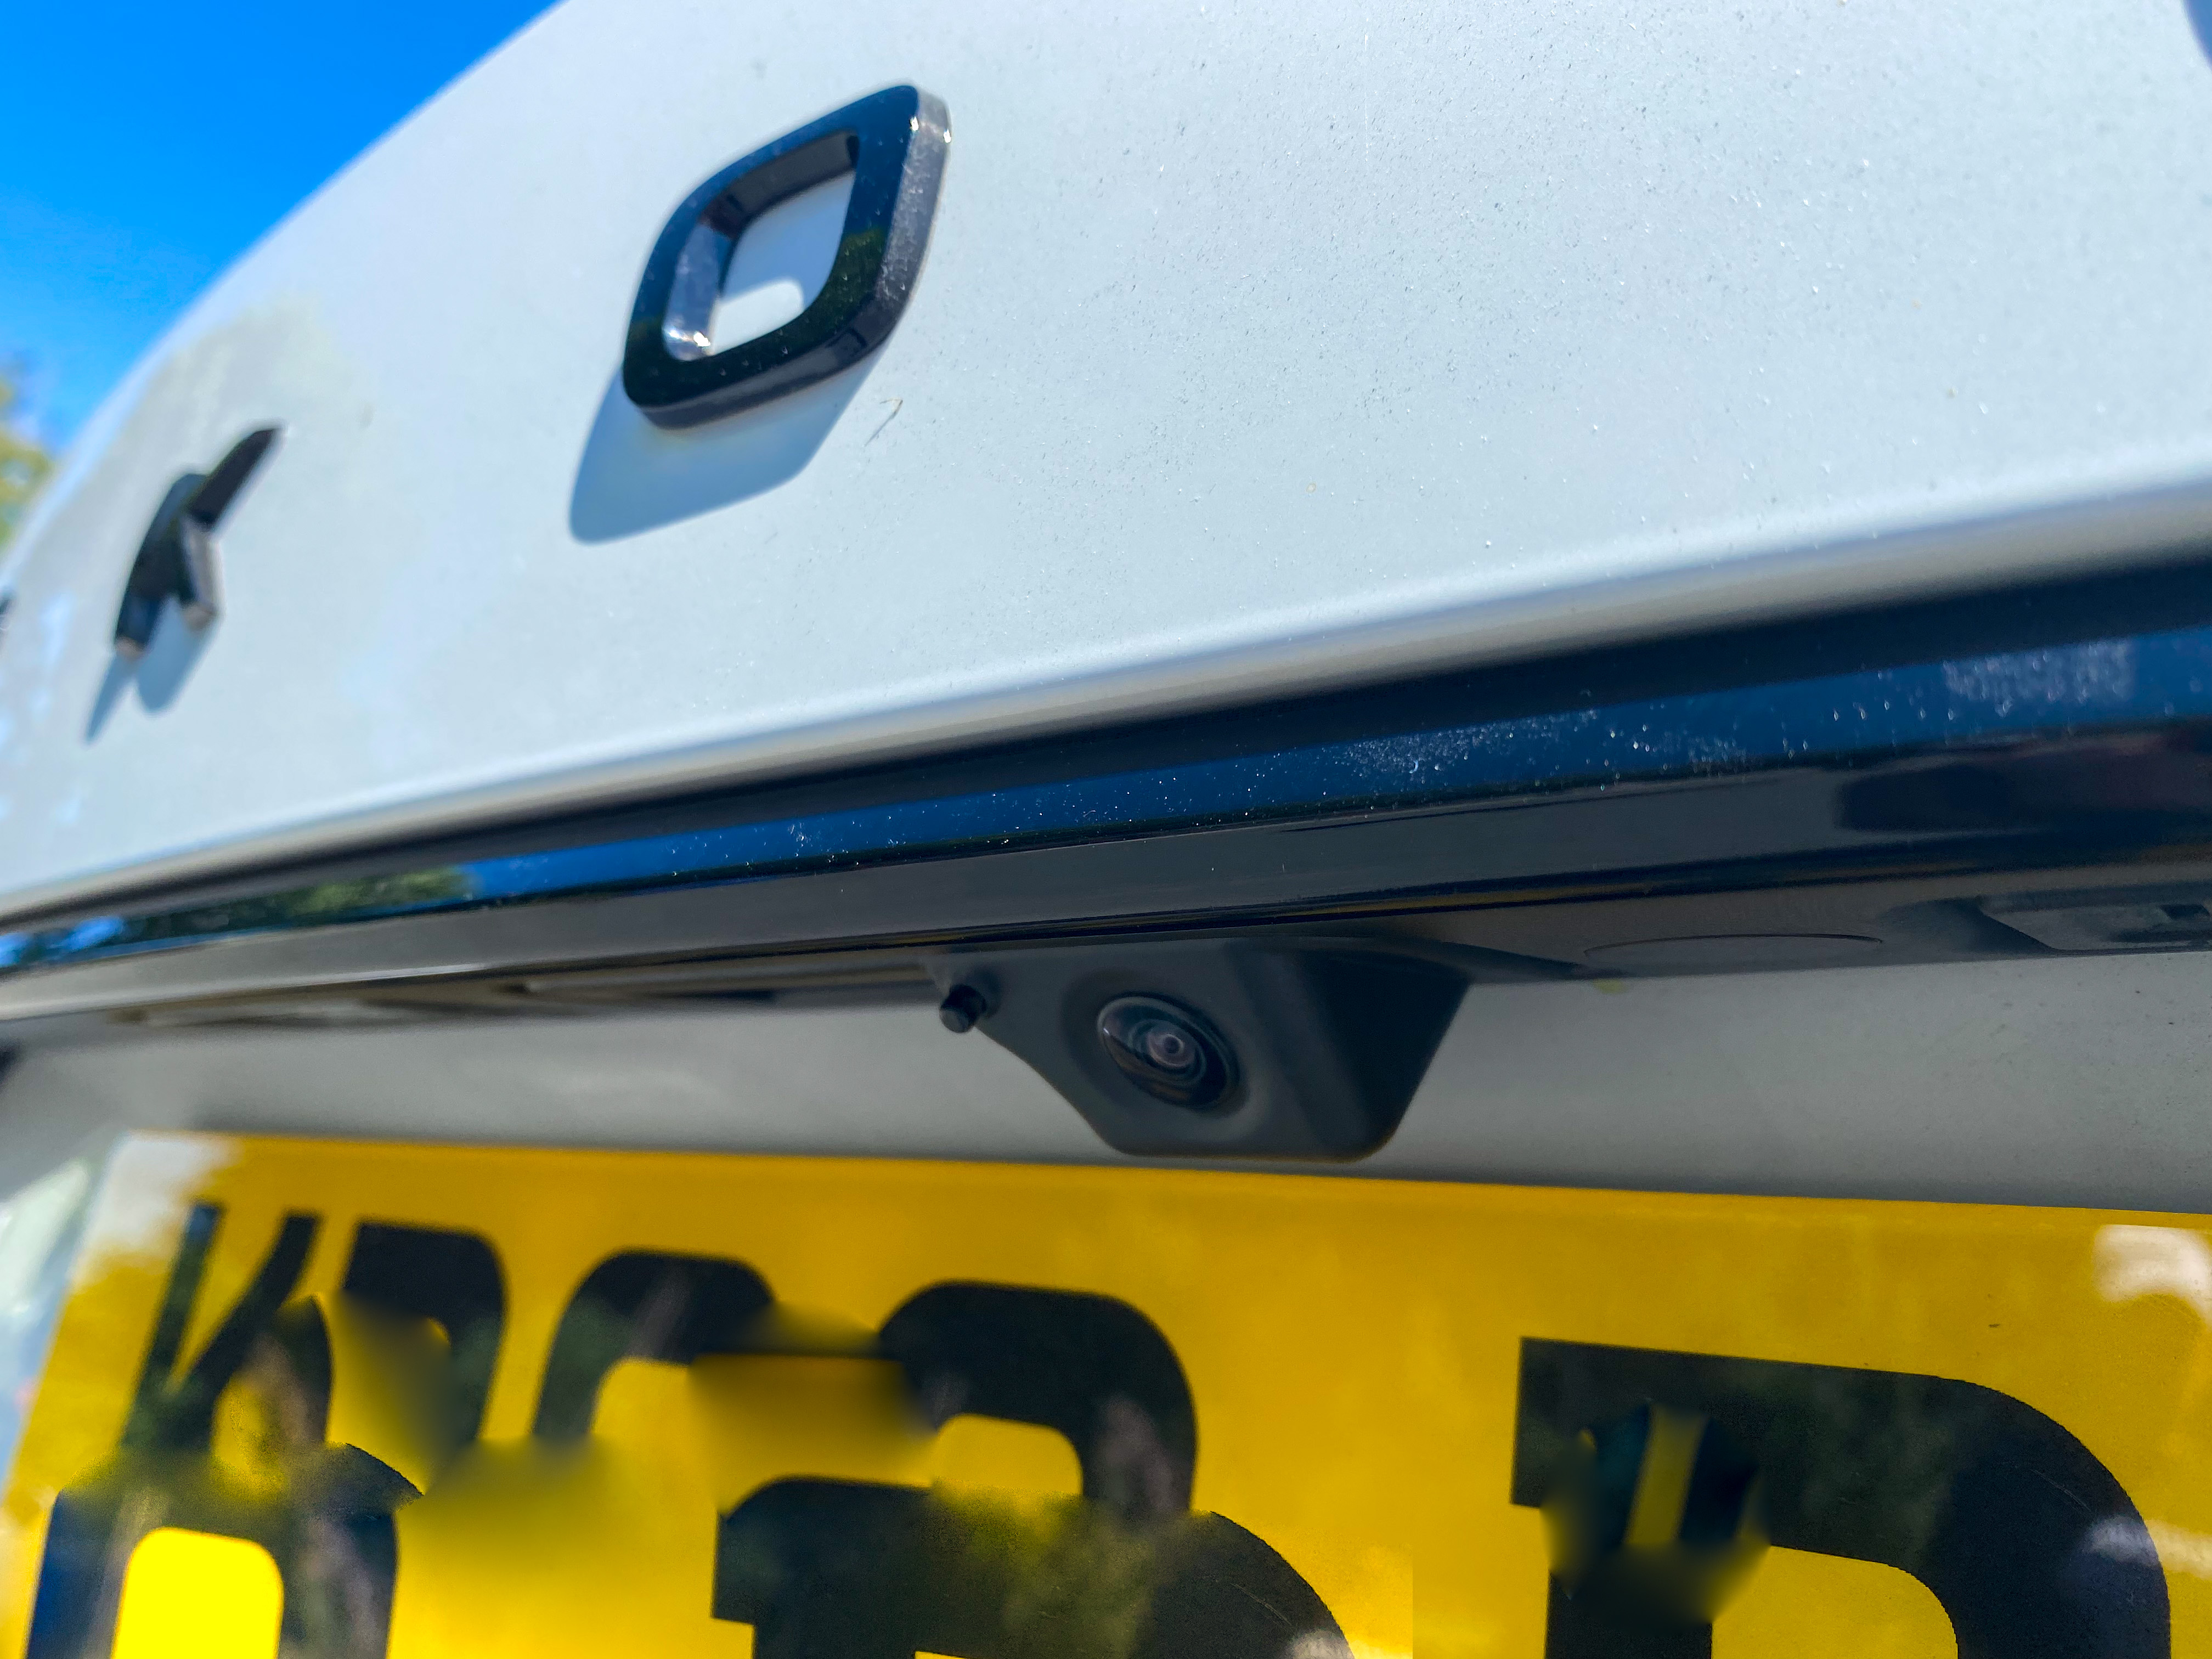
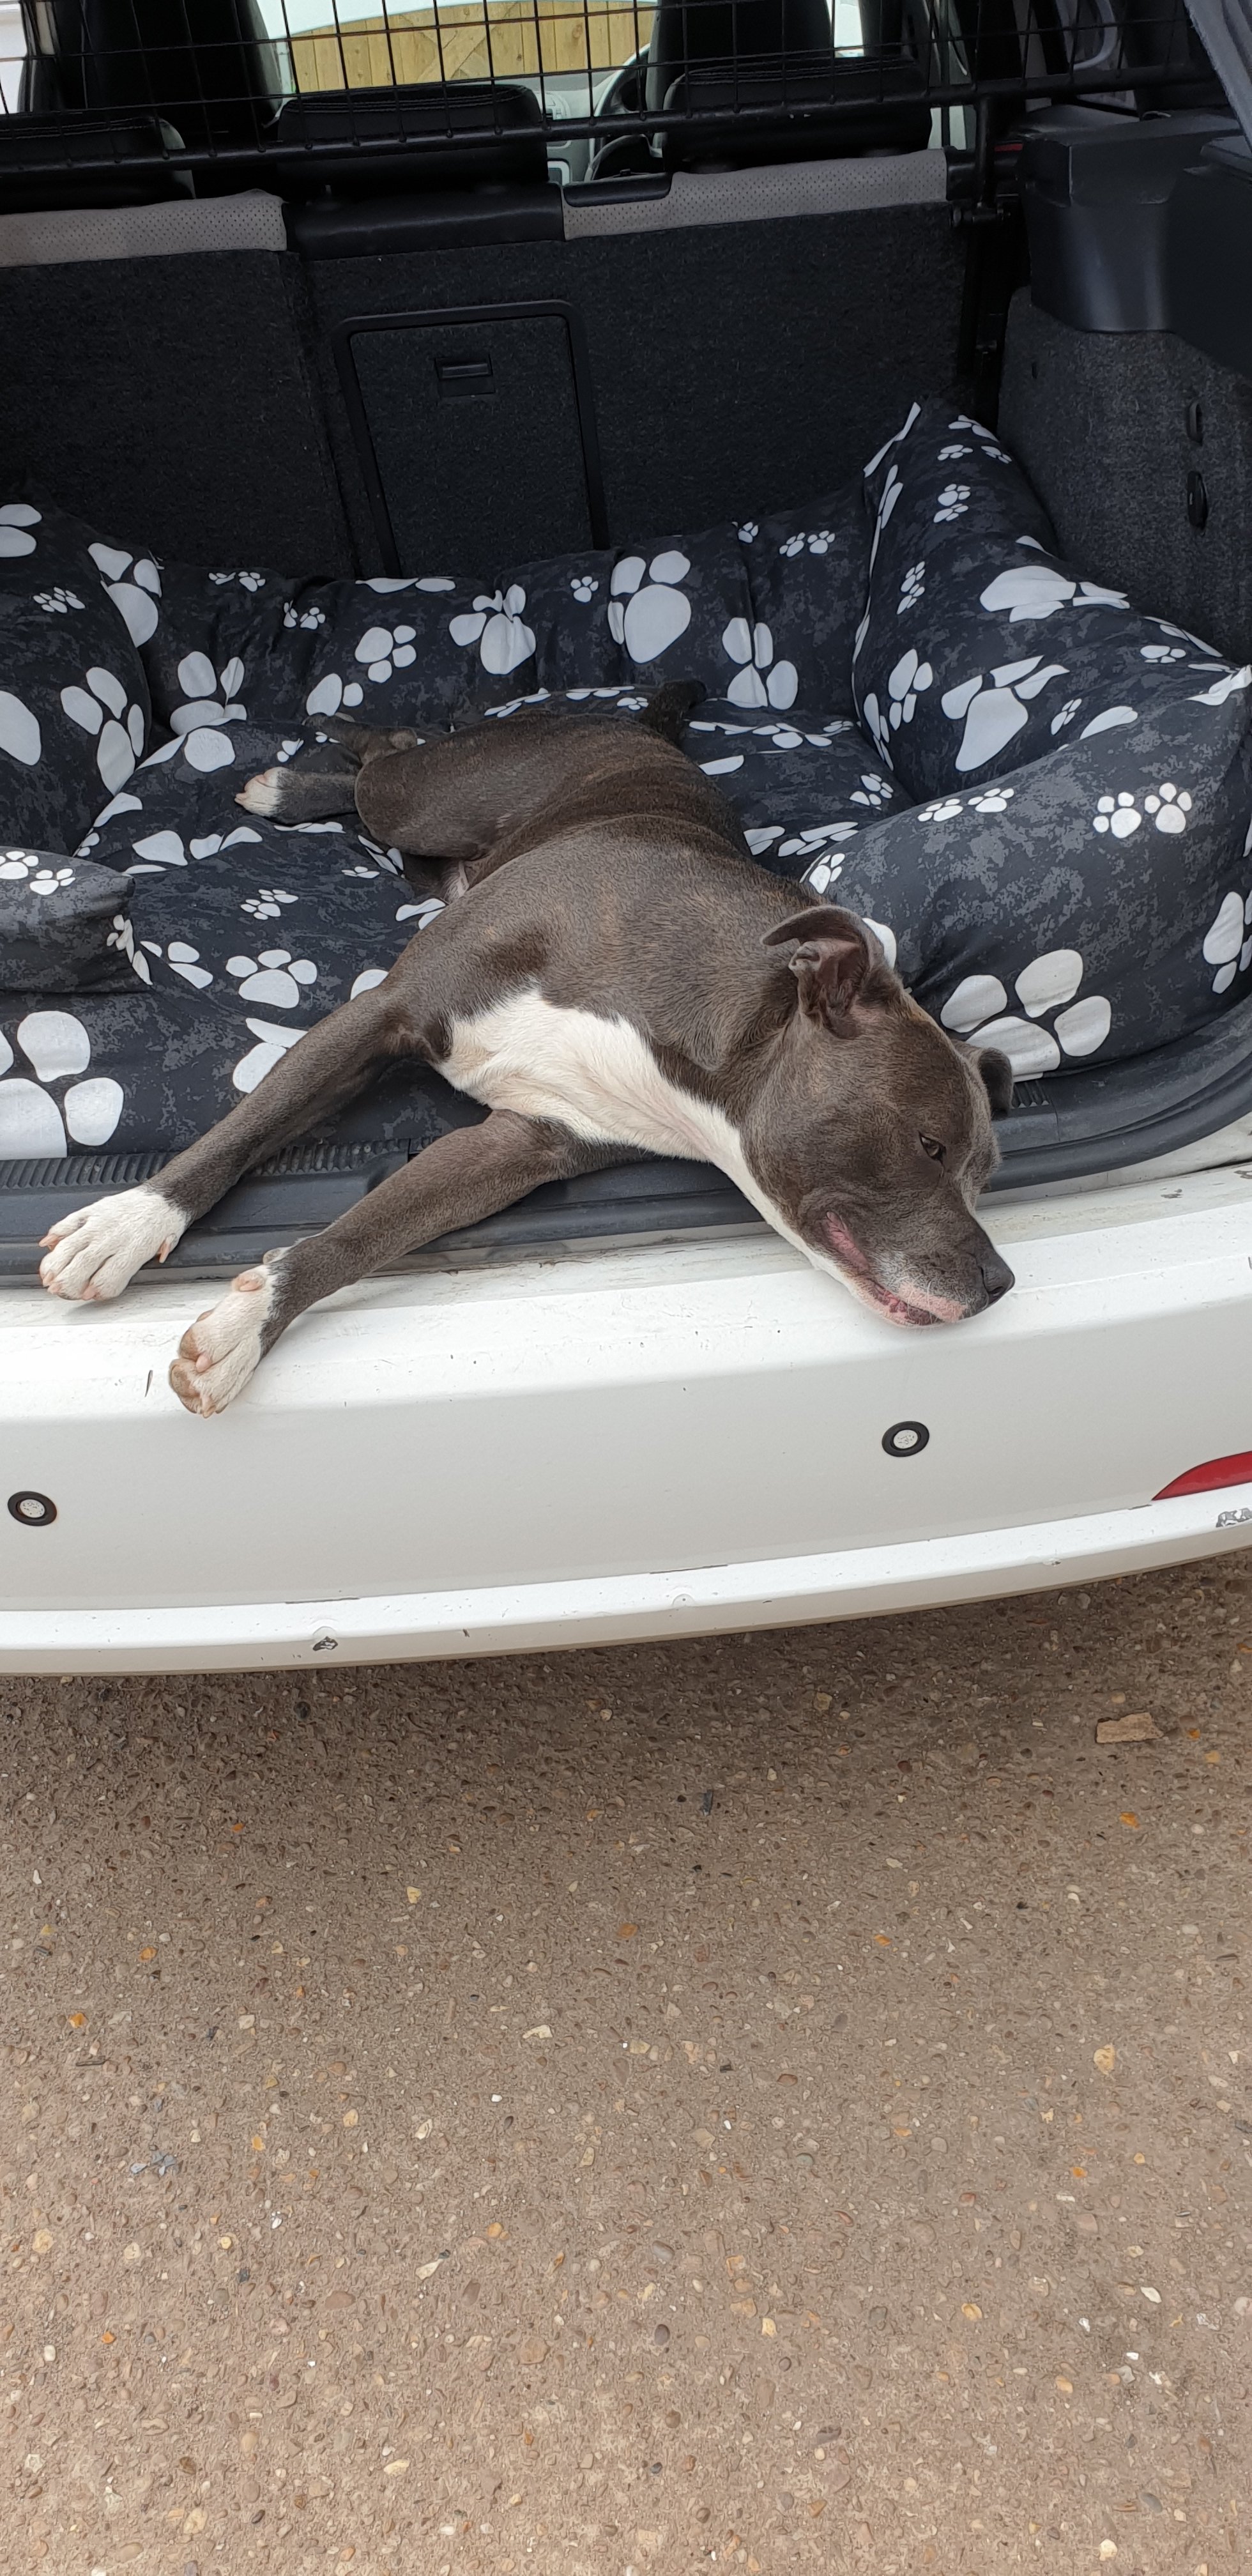
1 point1 point1 pointI agree. An even film of dirt looks "kind of clean" until some muppet closes the boot with their fingers and leaves clean finder smudges/marks that make it look even dirtier that it is/looked. I'm a big fan of the handle!!1 point1 point1 pointDog approves. Chrome grille surround was the first to go, hate chrome so black it is. Had to leave the lights in as they've chopped the grille to fit them, new badges ordered, stereo fascia and wiring ordered so I can fit my pioneer double din too
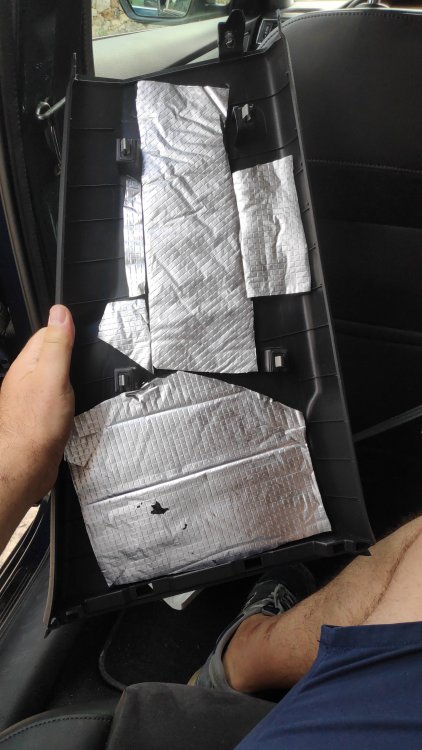
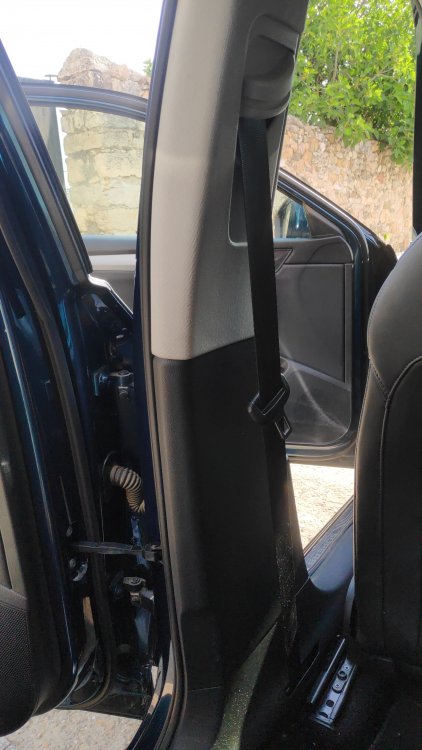
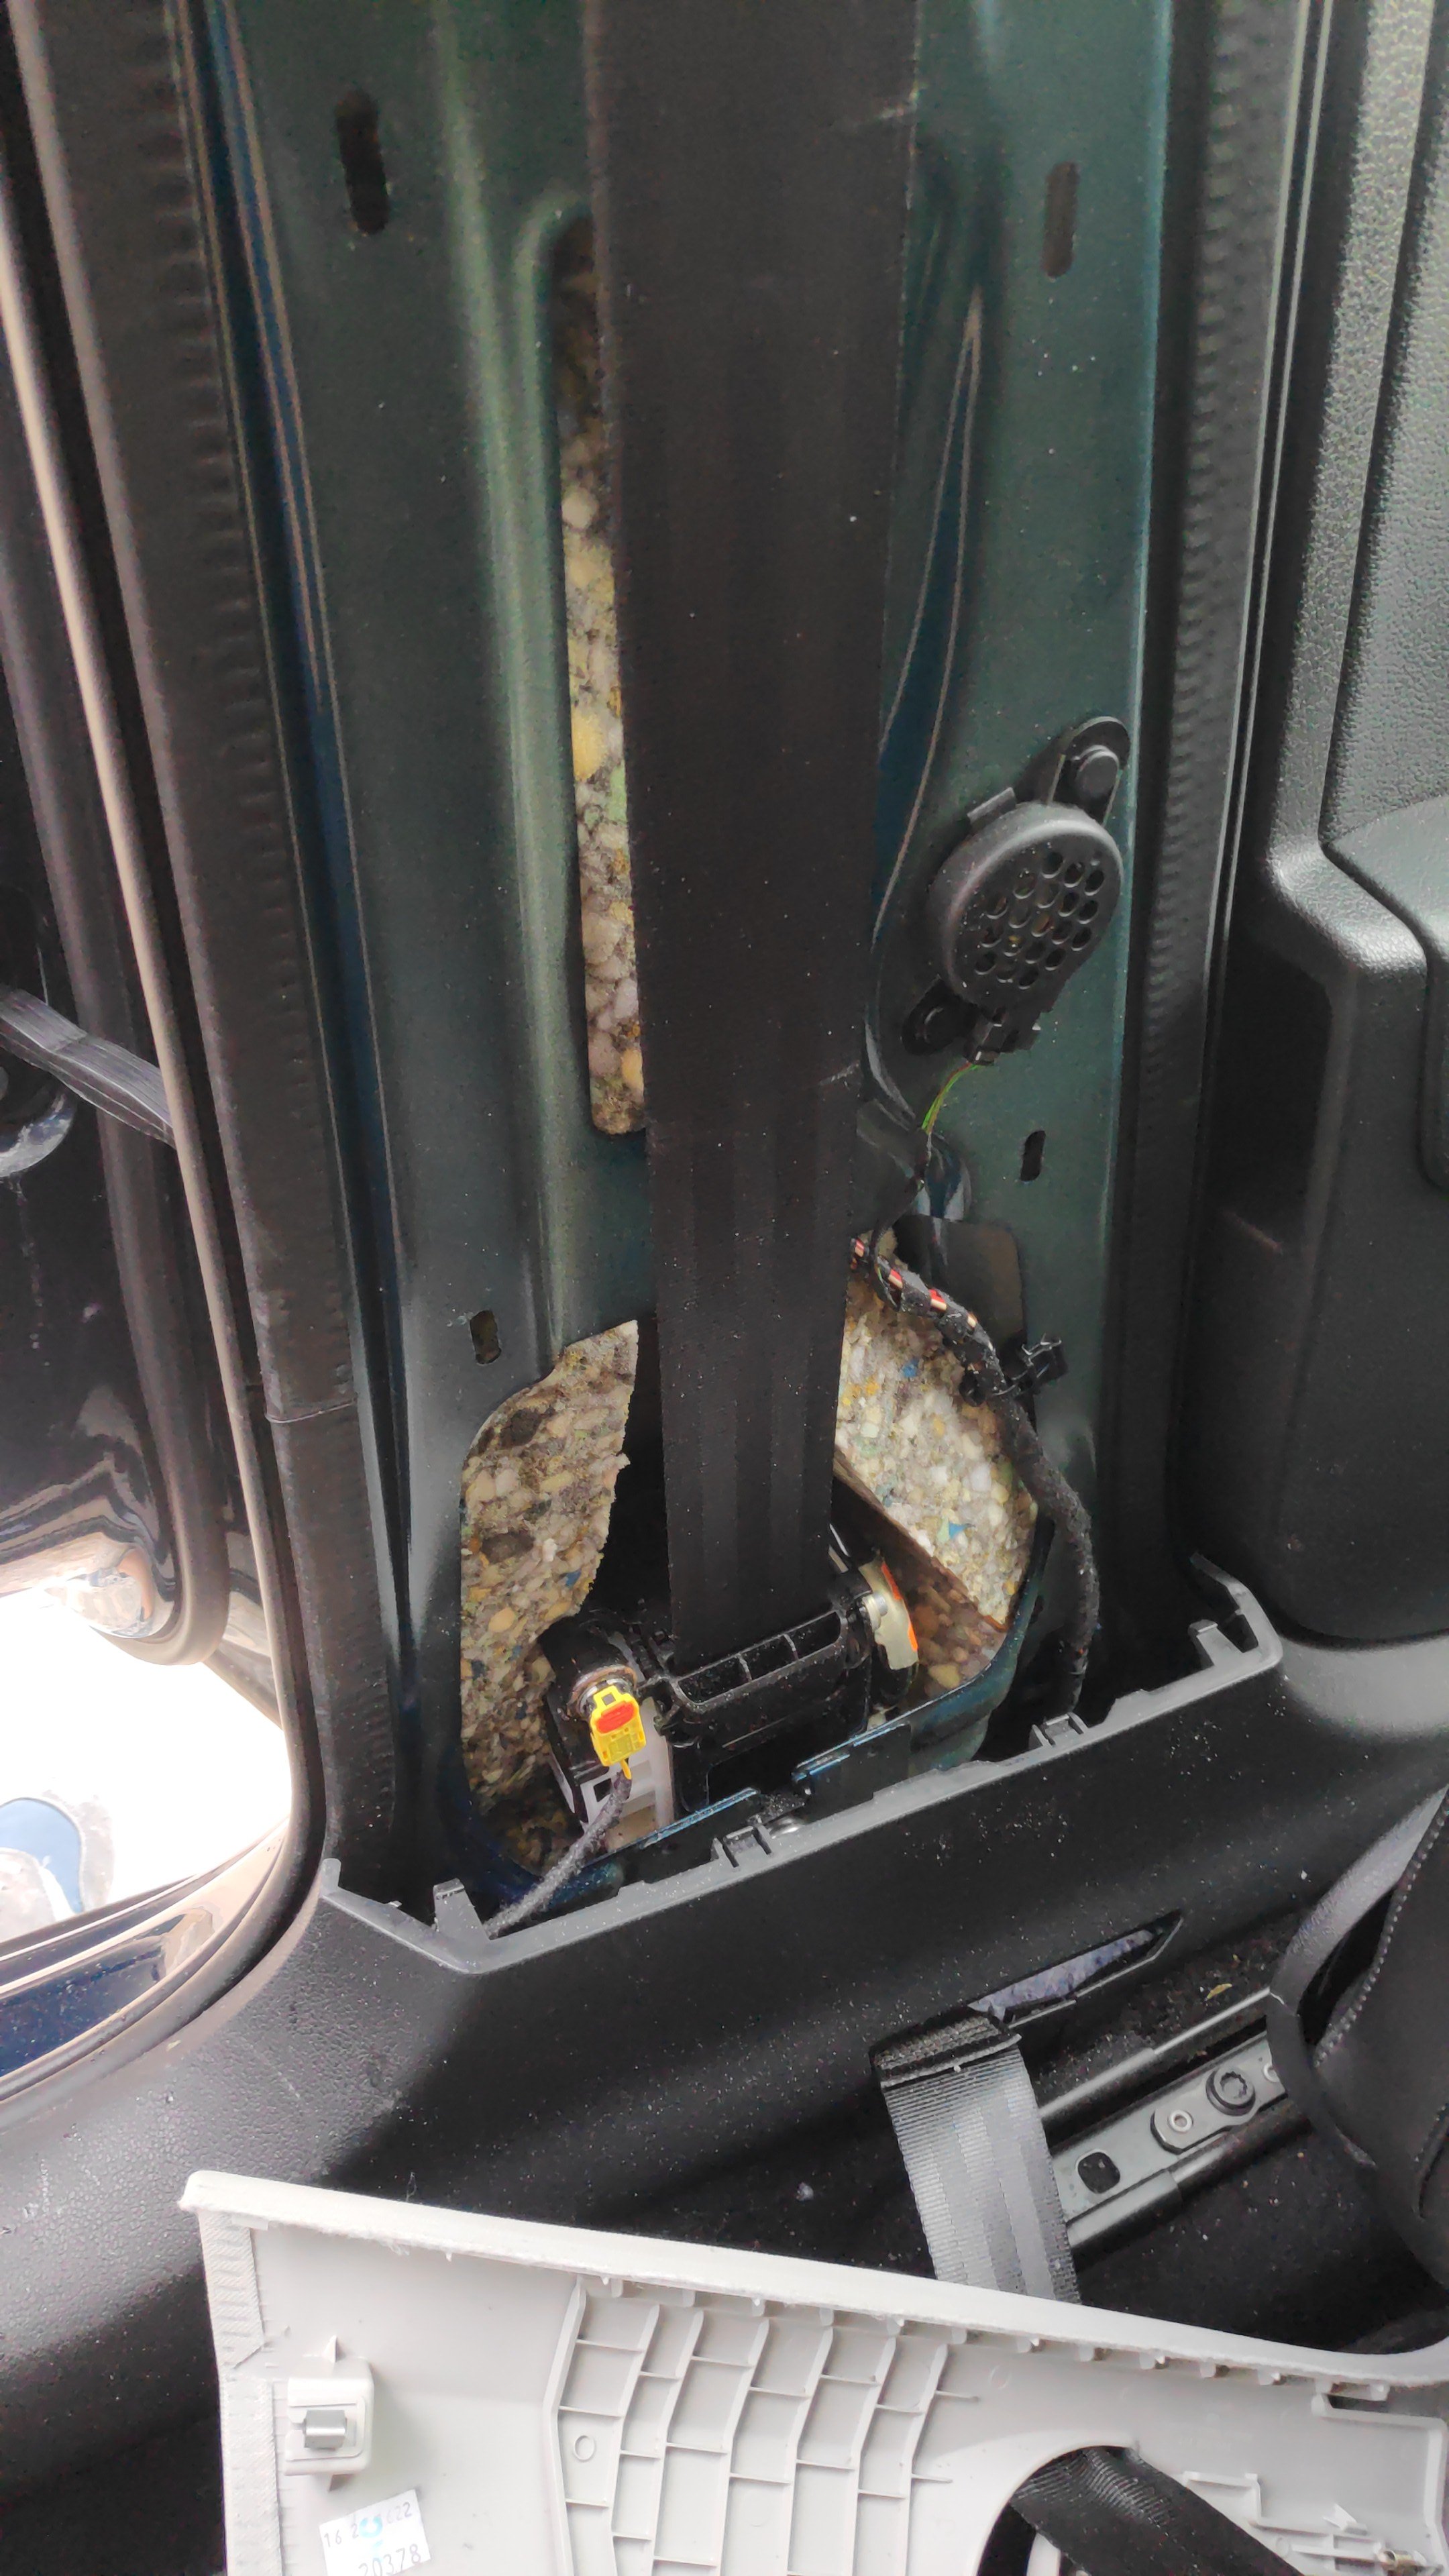
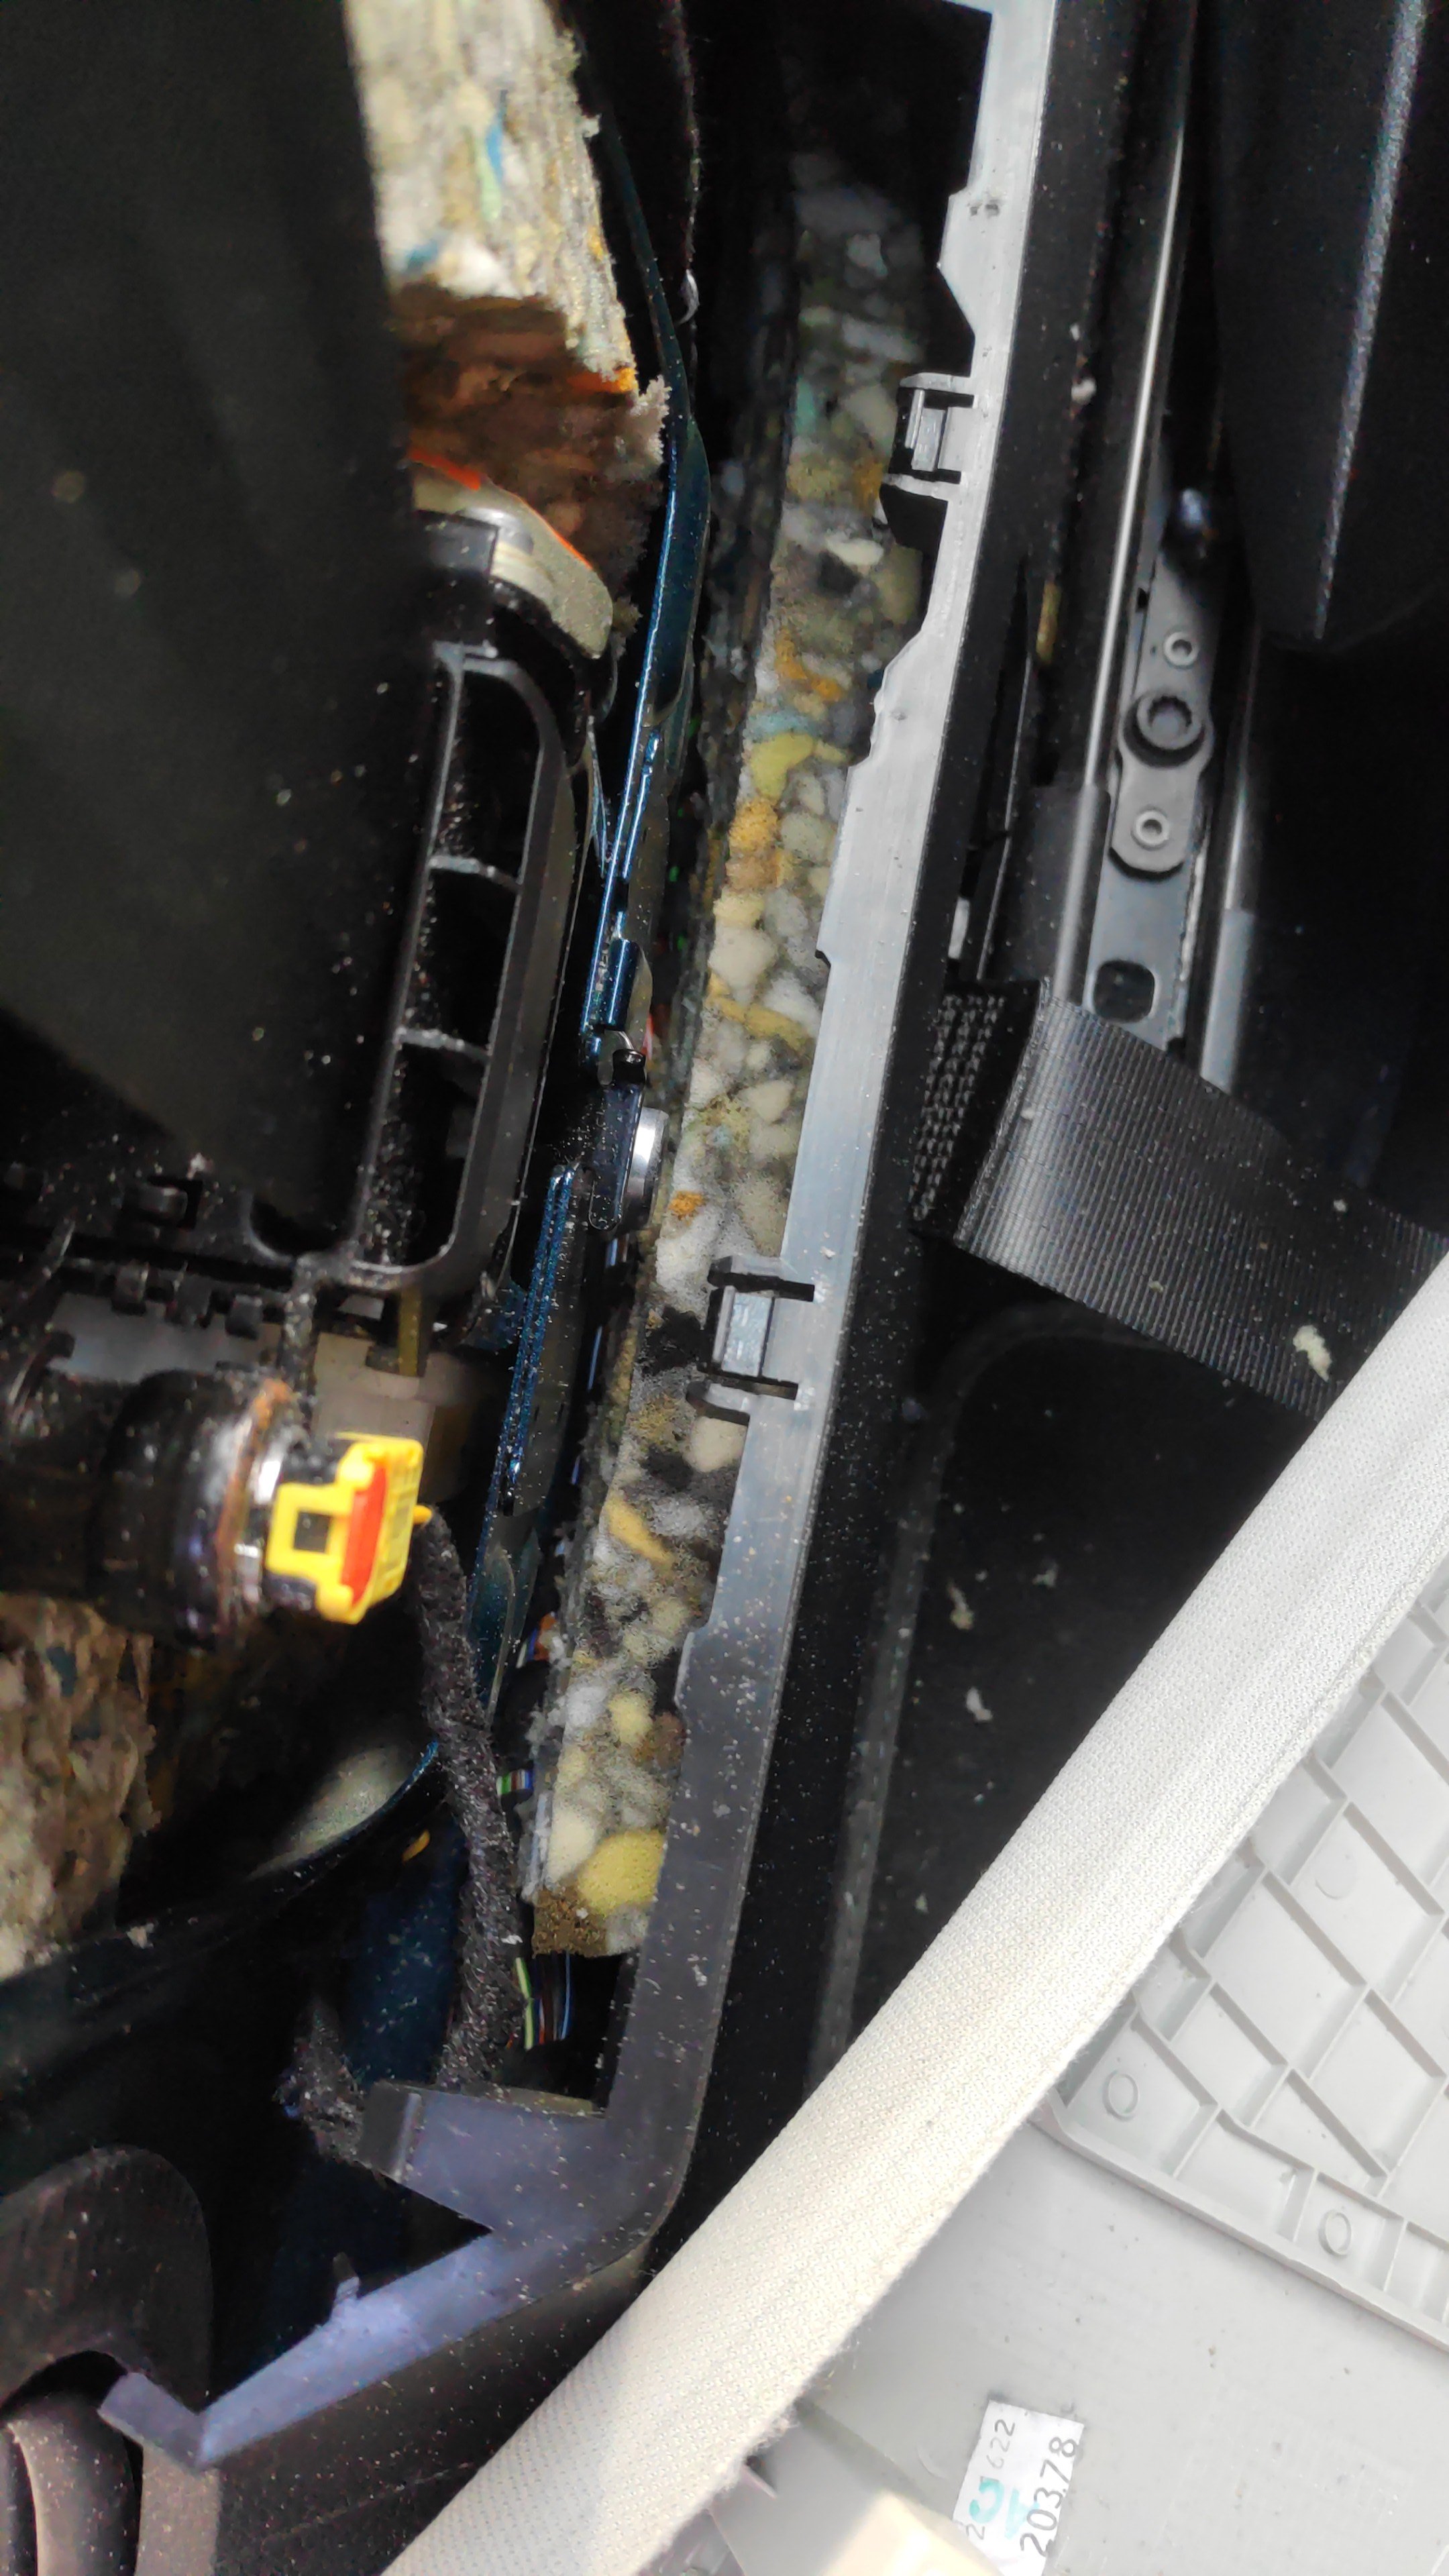
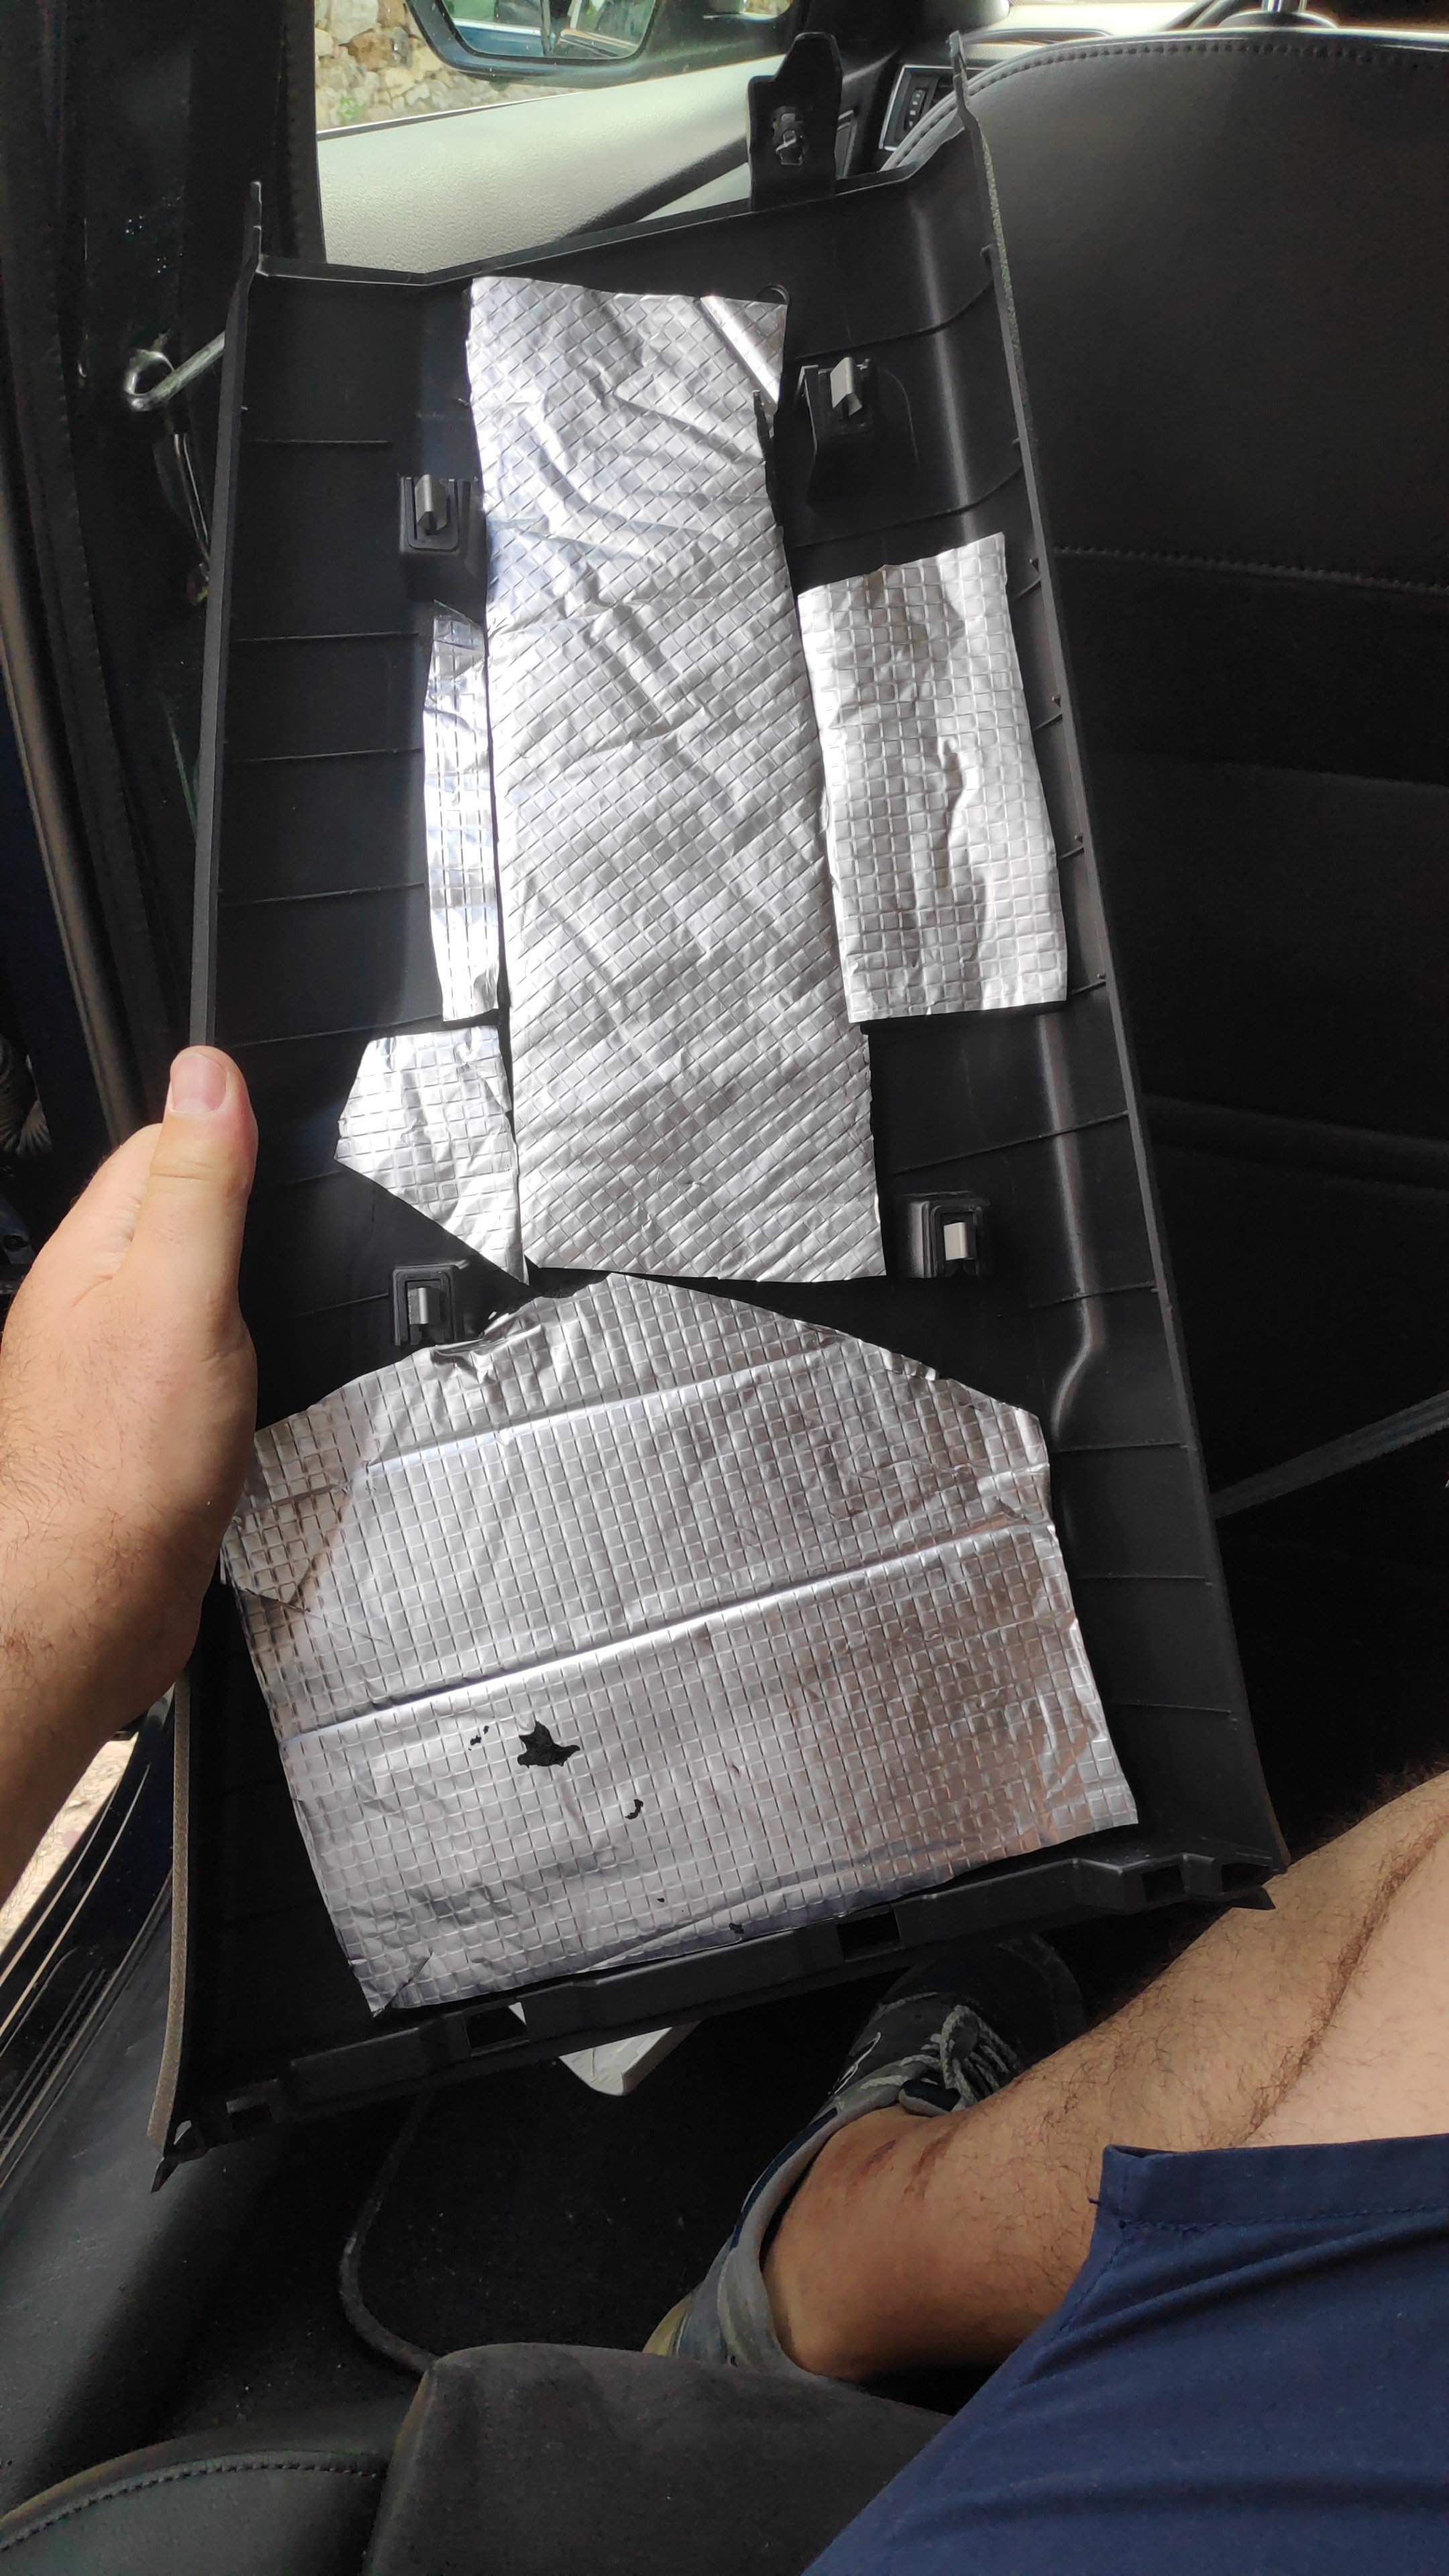
 1 point1 pointYes the blanket is there. Still the sits, especially the vertical part near the legs, are very resonant. as for the holes I was referring to the round holes with no obvious purpose. there are no clips going through them so I cannot figure 100% out there purpose. These could be to provide some sort of access or to the other layer of the car or ventilation? but most likely there are there to reduce weight. There are such holes throughout the chassis and this was the most like explanation I found on the internet - weight reduction I have disassembled the centre console now and I am waiting for my triple square bits to take the sits out. The central console took me a good few hours, mostly due to lack of exactly knowing how to proceed, also workshop manual isn't always clear enough, at least not for a layman. Anyway I got there without breaking things. I am able to lift the carpet under the front passenger / driver legs and it's shocking how resonant some parts of the floor are, especially those closest to the engine. They are covered by some sort of a rubber matt but I guess noico will help, then I'll lay my carpet underlay and MLV. BTW the improvement in noise after doing the boot, b pillars and doors is actually large. My wife and I finally don't find the car annoyingly loud, we can hear our conversations and other noises in the car with clarity. It was defo worth the effort. After doing the floor I'll see if I can still hear too much low hum from the road and tyres. If that is the case I'll do back wheel arches from the outside but for this I'll need to order more noice1 point1 pointI just did the B-pillar on the driver's side. I have stuffed high density foam up to the top of the belt. I have not noticed a difference. I have broken a metal staple and now the height adapter will not raise or lower. I have ordered 14mm staples which I think are but you may not buy in a store tomorrow. By the way, the screw cannot be dropped all the way down because the shape of the housing prevents it. Disappointed. I'm going to do the trunk.

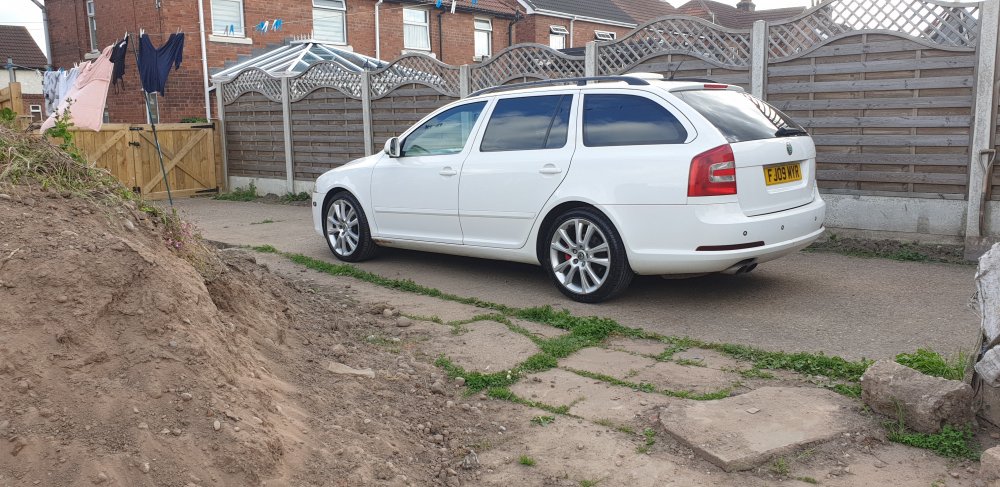
 1 point1 pointAfter trying different cars I'm yet again back in a skod. So bit of background. 2x MK1 Octavia VRs 1x MK1 Octavia estate TDI 2x MK1 fabia VRs I'm now in a 2008 Superb PD DSG. Think I got a bargain for the barge, few niggles that I need to sort but that's why I'm back. Questions questions questions to prepare me for the work
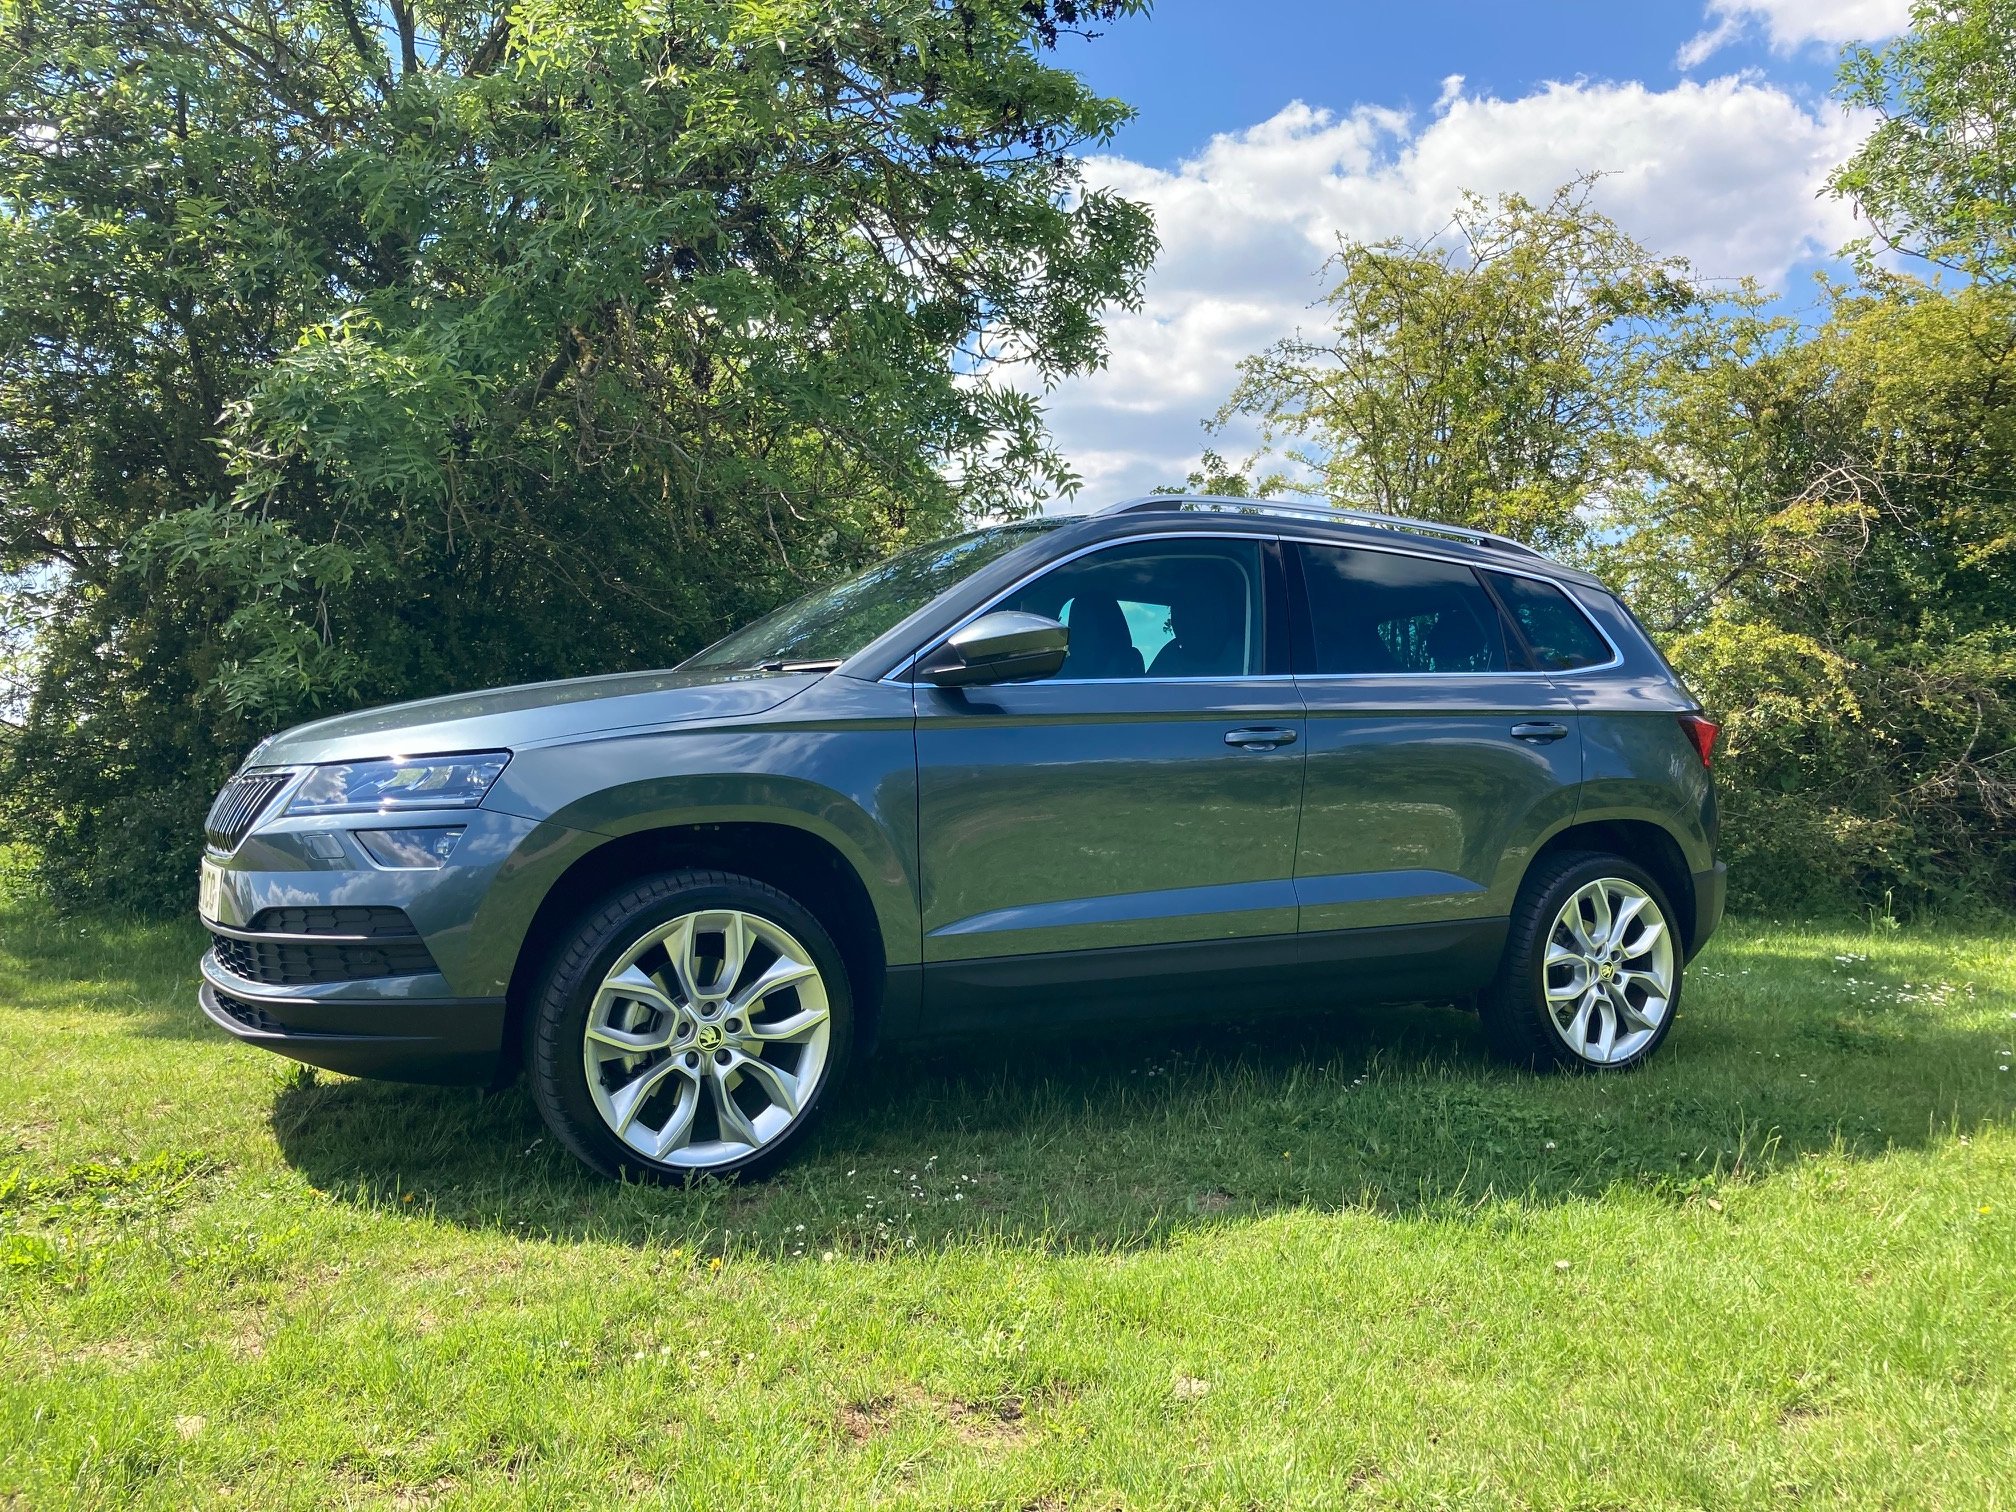
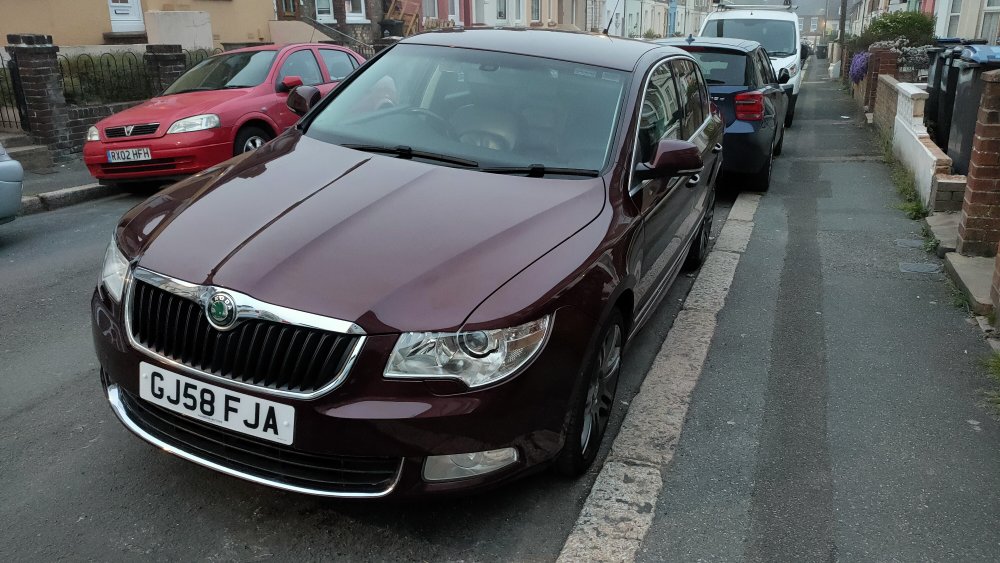 1 point@Keepersball your wheels inspired my choice! Thank you!
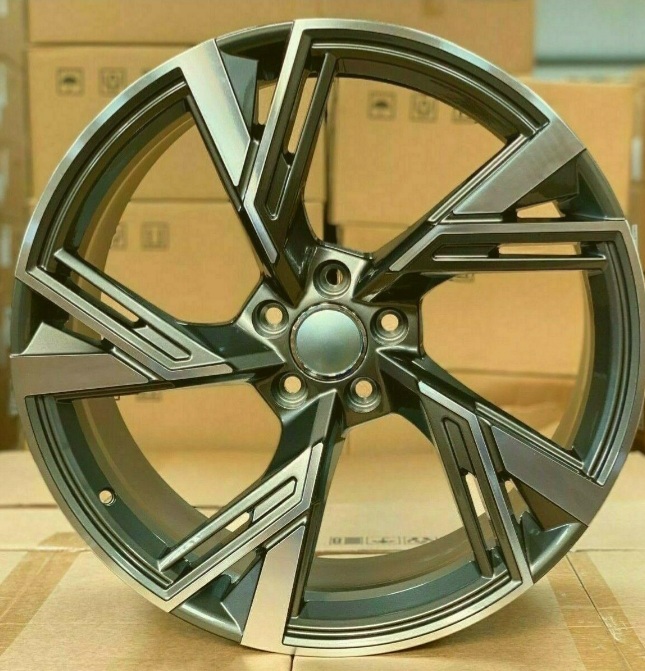 1 point1 point1 point1 pointGuess who’s back and so so happy to have her back! Long long chat with Aftersales Manager re. the situation and a full apology given. Apology accepted and happy to go back there again in future. Car performing great. Interesting comment picked up on…. ‘Another identical model / age in for the same fault’ so might become a common thing these high pressure pumps. Also SOS will be a software fix and expected a month away. Won’t be ‘over the air’ but one that must be booked in. Alls well that ends well!
 1 point1 pointI have the 2L turbo petrol and couldn't be happier with it. Last trip I averaged 5.8l/100km and travelled 760km on a tank. Although due to the car having a PPF and Australia's comparatively dirty petrol, I'm forced to put premium unleaded ( 95RON ) in the tank.1 point1 pointI will be changing my clutch, DMF and concentric slave cylinder next week, after 3 months of trying everything to avoid pulling the 4wd transmission unit out I no longer have a choice as I have to bleed the clutch after every short trip into town, a 100 mile round trip involved losing the clutch on the way & having to bleed it, the same on arriving at the destination and once again during the return leg. Air is getting in at the lowest level either the concentric cylinder or at the bleed block O rings (which have been changed for 2.0mm dia cross section from 1.8mm) but there is zero fluid loss, not even a drip I am really hoping that not only will this finally cure the problem but that I will be able to find what exactly has been happening, the only remaining theories that I have are axial oscillation from a worn DMF and/or a fractured preload spring on the cylinder.1 point1 pointThe concentric clutch slave cylinder is notorious on many makes of cars inc some Honda's. It's a bit like a set of bellows around the gearbox input shaft with a release bearing on the end of it. I actively pick versions where possible with a simple piston/seal externally mounted clutch slave cylinder. Much more reliable and if it does fail it's a simple cheap job. On that note it's reminded me of another mkII problem with some diesel engined manual cars - the dreaded clutch pressure plate failure that can machine it's way through the gearbox casing inside the bellhousing - another thing to change on some versions.1 point1 pointIf you're still on the original springs and dampers at that mileage, then it's likely all 4 dampers and at least the rear springs are shot and should be replaced. Sagging rear end is common on these cars as it wasn't unusual for them to get one of the softer setups from the factory. If you're changing everything anyway, it's worth looking to fit one of the stronger spring/damper combinations for the rear. I wrote up what I could find out about it here: In my case I ended up fitting MAD helper springs to correct rear end sag as I had already replaced the springs and dampers and the car was still sitting low. Weight range 6 is too soft to be any use on the Combi.1 point1 point1 pointUpdate - This fixed the issue, back to widescreen android auto. Thanks DManel, hope this fixes everyone elses as well1 point1 pointI work in the car industry. I know "calibration engineers" (the guys whose job it is to optimise the engine mapping to get the best possible fuel consumption and CO2 figures out of them), who would sell their own mothers for a (genuine) 2% improvement! When you see the £ millions big manufacturers spend on this, you really have to wonder about some of the claims for these tuning boxes and remaps! Yes, you can get them a bit better by breaking the law and at the expense of increased emissions, but the gains are really marginal. When one of these remap or tuning box companies posts up an independent report from an emissions lab, where the car is tested to the same requirements as it had to meet when it was type approved, I'll buy one.1 point1 point1 pointThe issue with automatic dipping is a person dips when they see the light from the other car. The car dips when it sees the other car. A good couple of seconds longer in some cases.1 pointCan this be done? Anywhere near Southern Birmingham?1 point


.jpg.d49bad84cf527e3c7b949dd98781ad95.jpg)


Important Information
Welcome to BRISKODA. Please note the following important links Terms of Use. We have a comprehensive Privacy Policy. We have placed cookies on your device to help make this website better. You can adjust your cookie settings, otherwise we'll assume you're okay to continue.