Leaderboard
-

Lee01
FREEDOM9Points36,153Posts -
Evolution13
FREEDOM9Points2,195Posts -

mac11irl
FREEDOM6Points16,636Posts -
pinkpanther
FREEDOM6Points3,911Posts
.thumb.jpg.9dd3f612ba7f13d10be5c518d3c8d255.jpg)


Popular Content
Showing content with the highest reputation on 13/01/26 in all areas
-
To clarify - the water pump replacement reference is for TDIs only.2 points
-
Worth remembering that there are people that have come to the likes of BRISKODA in the past asking how they can Disable the TC / ASR and not have to press to disable, (HOLD THE BUTTON A FEW SECONDS.) There are even those that want the ESP disabled. Then there were Mk2 Fabia pre 2012 without TC / ASR that people wanted to activate, add a button, and also ESP was a cost option on some Mk2 Fabia right up til the EU regulations making it compulsory. Long story short. Check what your model has standard or options and still you never know what previous keepers did or did not do, unless you owned from new...2 points
-
2 pointsSkoda sell a spare wheel kit for the Fabia MK3 that fits in the spare wheel well. It has OEM part number 6V0093860B which includes everything except for the actual spare wheel. The spare wheel that's normally fitted to these is 185/60R15 6Jx15 ET38 5/100 57.1 and can be ordered separately. This spare wheel kit can be ordered from any VAG parts department by quoting the OEM part number, ie. 6V0093860B The below "skoda eshop cz" website doesn't ship to the UK, but it's a useful website for finding out the OEM part numbers of spare wheel kits, etc. If you want to order a 185/60R15 84H 6Jx15 ET38 5/100 57.1 spare wheel (tyre fitted to steel rim)...this can be ordered from any VAG parts department by quoting OEM part number 6V0601011M. However, if you want to choose your own make and model of spare tyre a 6Jx15 ET38 5/100 57.1 steel rim can also be ordered from any VAG parts department. They should be able to find out the OEM part number for this from their VAG computer system using the car's VIN number. Spare wheel kit for Fabia MK3 6V0093860B (1,489CZK is about £53.16) Sada pro výměnu rezervního kola 15Určeno pro: Fabia III2 points
-
A quick and almost painless check is to withdraw a small sample of brake fluid from the reservoir (a disposable syringe is ideal) and take a good look at it (throw it away after - don't put it back!). Any cloudiness will indicate water having been absorbed and any particulates may indicate corrosion/wear in the system. A good comparison is your fluid to a fresh sample of new fluid. They should be very similar in texture and clarity; if not, change. BTW in case you didn't already know this brake fluid is hygroscopic, which means it absorbs water from the atmosphere over time and would need replacing.2 points
-
2 pointsMy 2025 Kodiaq 2.0 litre Diesel Sportline is not even 1 year old. A couple of weeks ago I got a message on the dash advising a drop in pressure on the nearside rear tyre. i pulled into a service station to re-inflate the tyre, and as luck wouldn't have it, I saw immediately a machine screw or nail protruding from the tyre tread. This was at the beginning of the holiday season and I decided not to go far. I checked over the next few days and surprisingly when I checked the pressures it told me all were within specified range. Clearly the screw/nail was providing a seal against further pressure loss. Then my dilemma. It's a heavy but powerful car. I tend to drive 'spiritedly' and regulary travel to France and Germany on holiday trips. Would I be completely comfortable at Autobahn speeds with a repaired rear tyre? Wiser counsel prevailed and I got in touch with Black Circles who offered the exact same brand and size of tyre to be fitted at a local garage near me. The job was completed this morning and I have nothing but praise for Black Circles and also the local tyre fitting place. Perfect service in this day and age !! I can't recommend them highly enough.2 points
-
2 pointsAlmost certainly not. When the next completely new version of any model is announced, then a new sub section will be created. Facelift models are always included in the original model forums.2 points
-
1 point
-
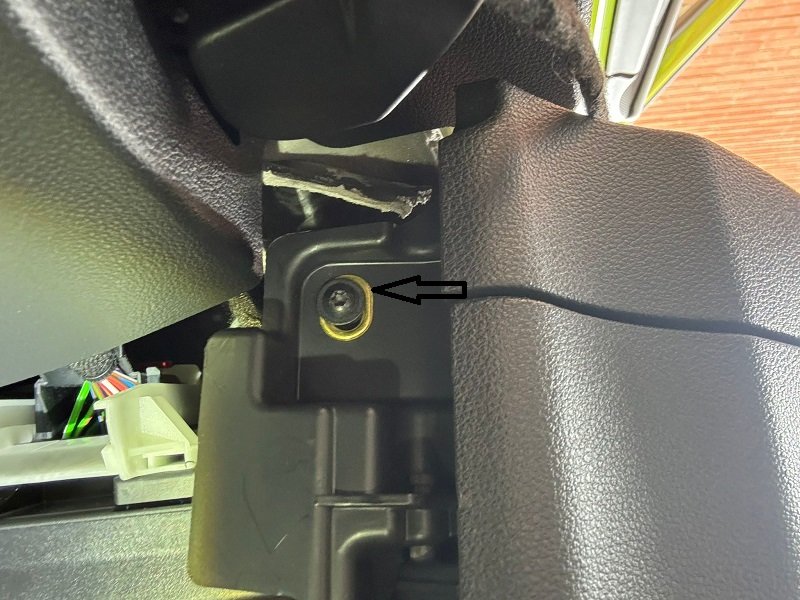
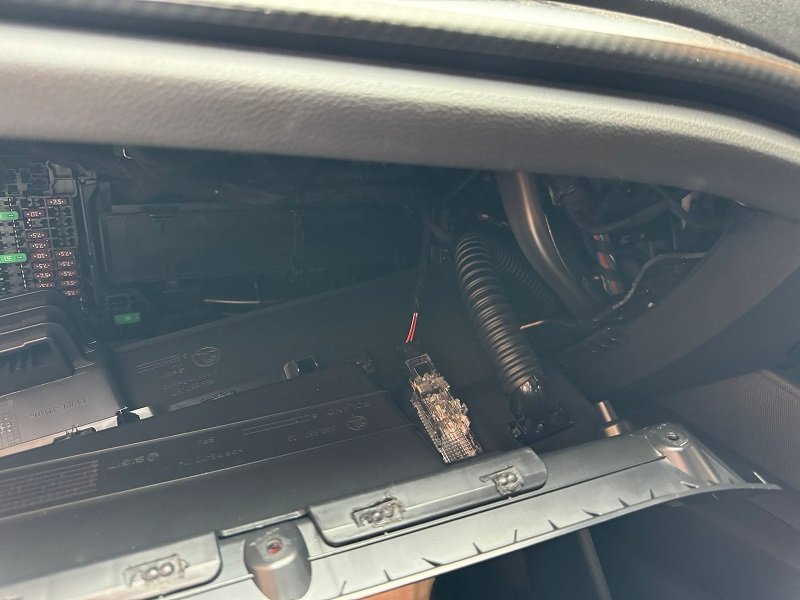
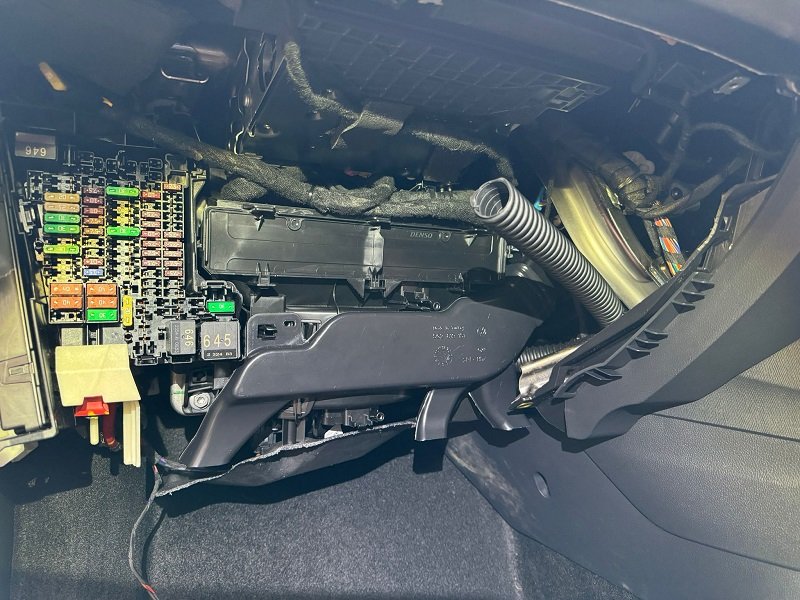
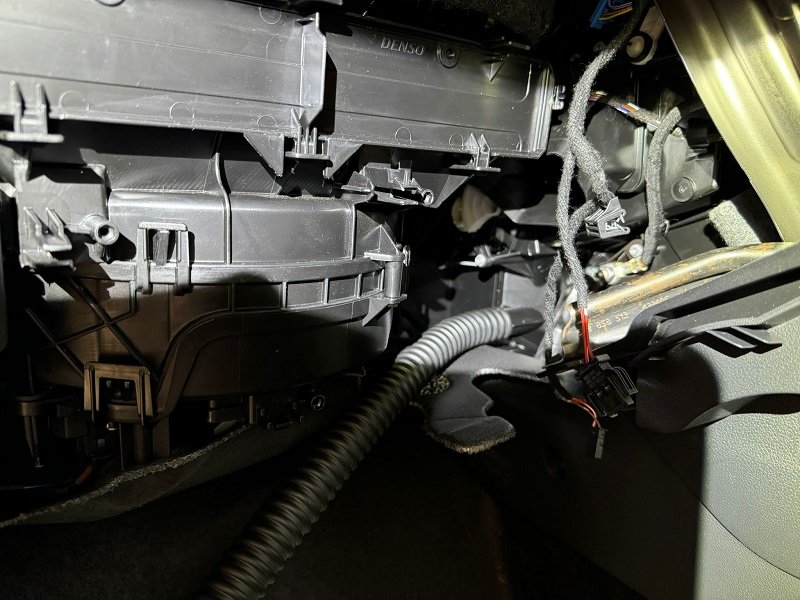
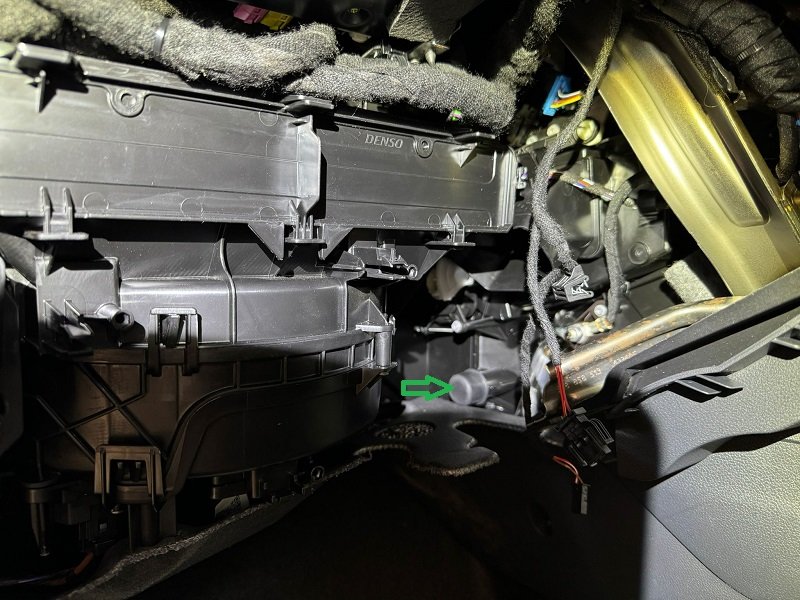
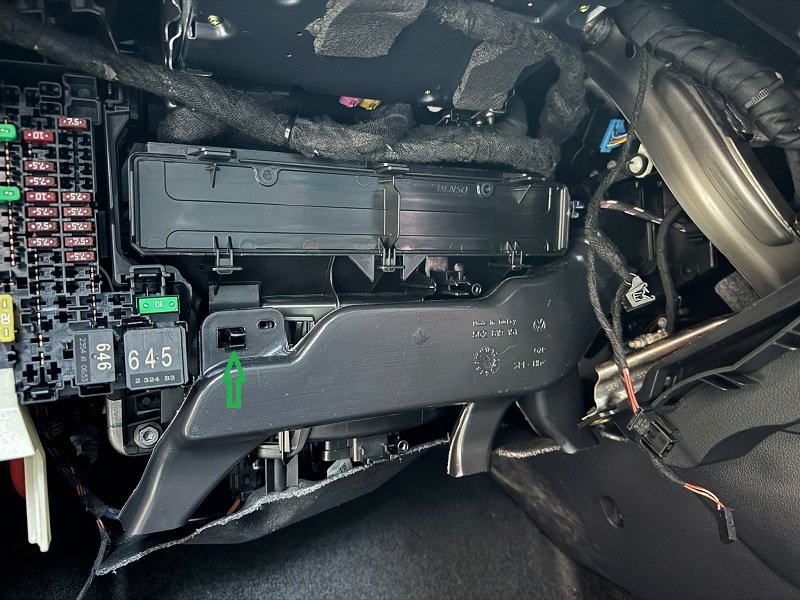
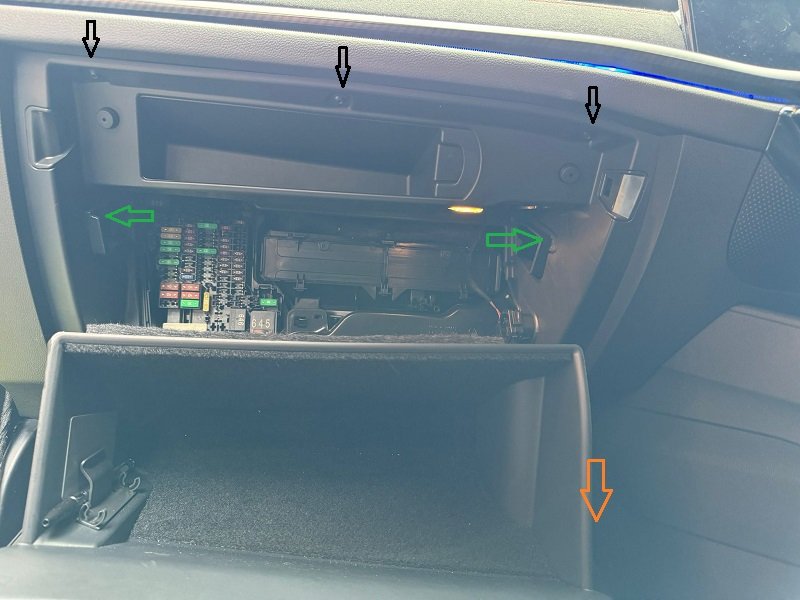
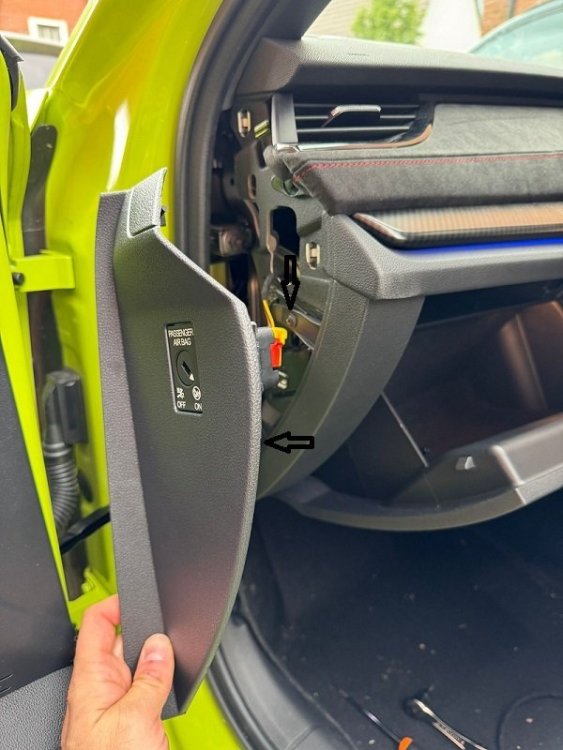
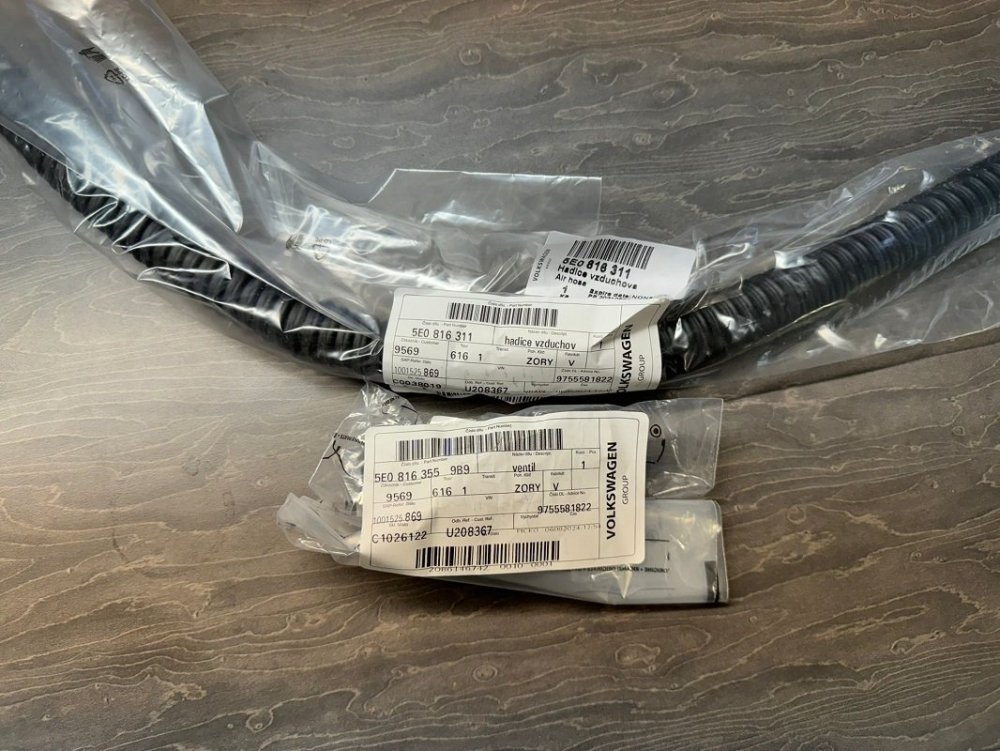
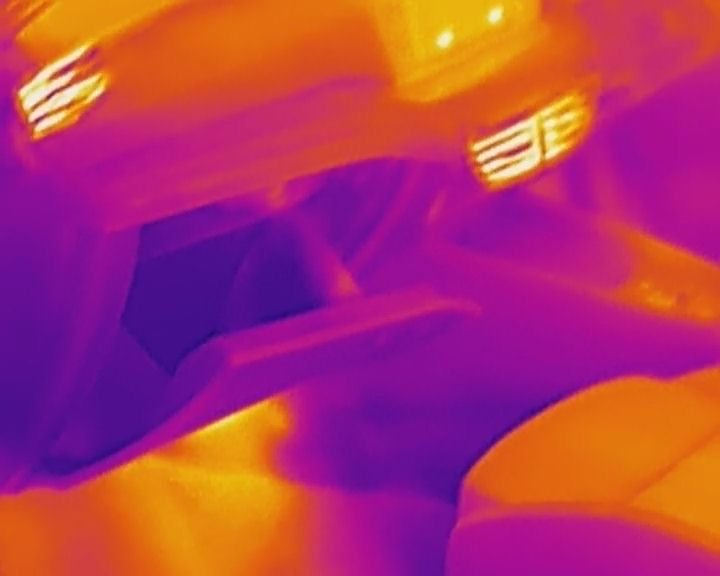
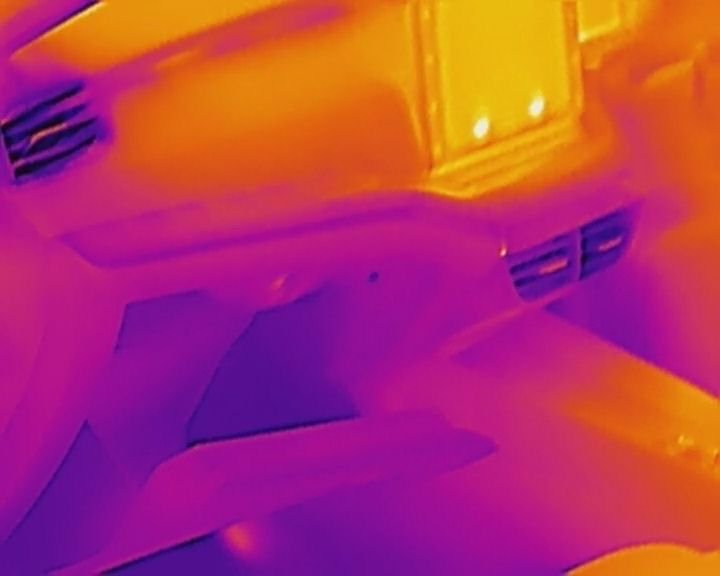
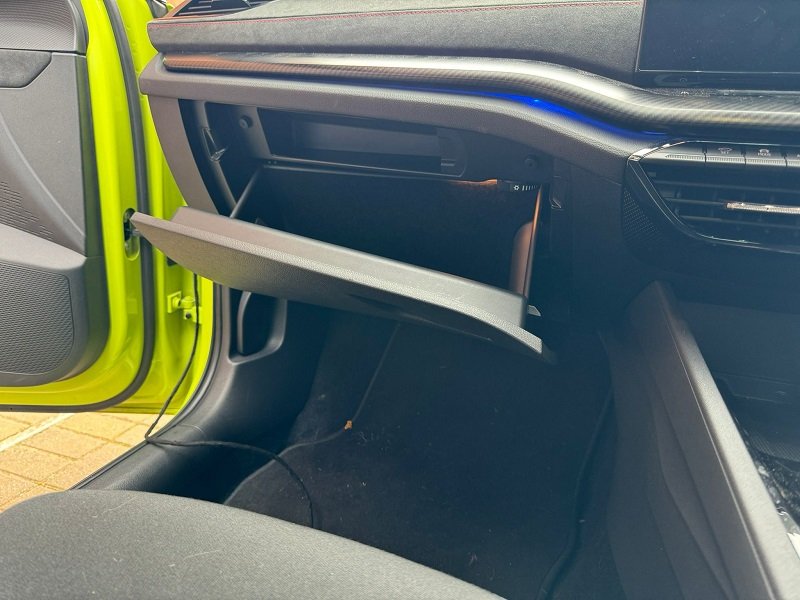
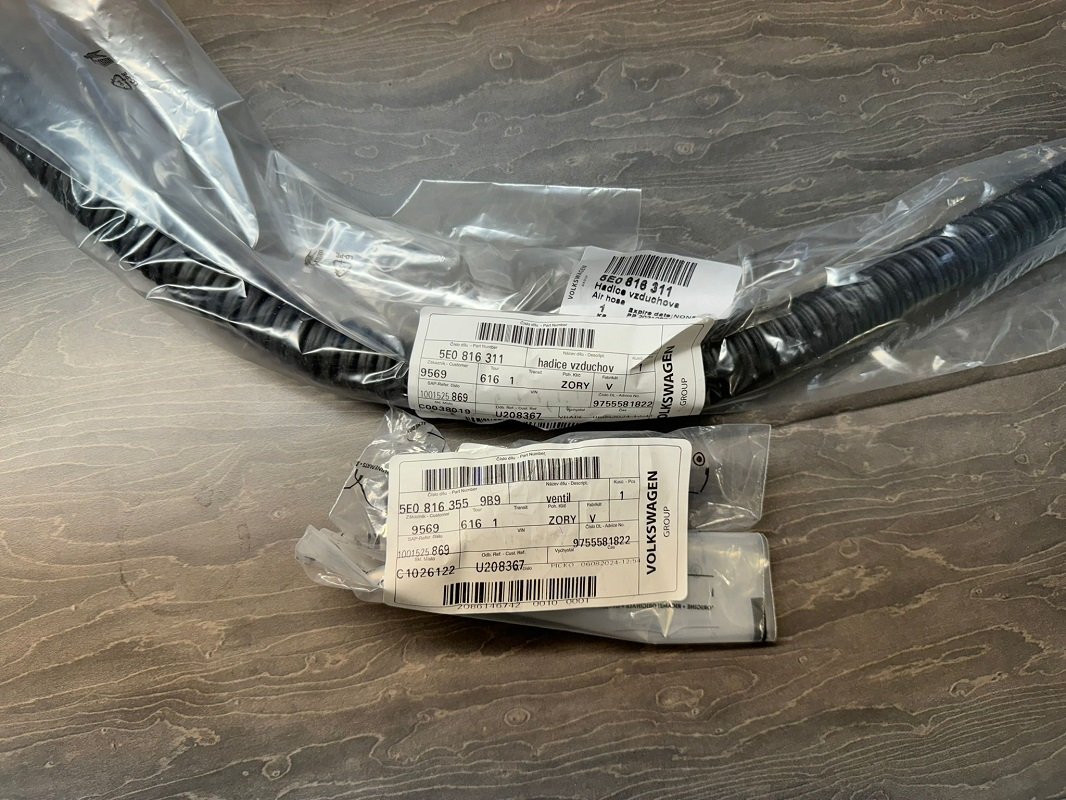
A quick guide for the Octavia 4 (NX) platform car for adding the glove box cooling, a simple mod, demonstrated here on a RHD UK car. Tools Reqd: T20 Torx screwdriver Trim pry tool Parts Reqd: 5E0816355 (Valve/Vent) 5E0816311 (Air Hose) Skoda Parts Direct (in the UK) quoted me £28.58 for these. Step 1 - use trim pry tool to remove the passenger dash side panel. If you remove the airbag swich connector you'll likely get a fault code (definitely if you turn the ignition on with this disconnected), so have your VCDS/OBDEleven ready to reset this - or leave it connected. Step 2 - undo the two screws shown with black arrows, releasing the side of the glove box. Step 3 - unhook the glove box damper arm (orange arrow). Depress the tabs (green arrows) and allow the glove box to drop to its full extent. Undo the 3 screws at the top edge (black arrows). Step 4 - undo the two screws underneath the glove box at each end. Gently pull on the glove box and release it from the dash. Undo the 3 cables (2x lights and 1x light switch on the damper arm). Step 5 - squeeze the tab (green arrow) and pull the air distribution plenum towards you. Step6 - remove rubber blanking cap. Step 7 add hose. Step 8 - refit plenum. Step 9 - fit the vent to the existing cutout in the top of the glove box, and attach hose. Step 10 - "Refitting is reverse of removal" as the Haynes manual used to say. Enjoy cold air in the glove box! You'll note that whether the climate is set to Hot, or Cold, the glove box is always fed directly with cold air. Hope this helps someone!
 1 point
 -
1 pointHello there, Been browsing through many interesting topics since I bought a 2005 Mk2 Octavia DSG estate. Look forward joining in discussions. Cheers1 point
-
1 pointThere was a fantastic amount of confusion on this forum when Skoda released the MkII Fabia. They named the trim levels as 1, 2 and 3. People were wondering why owners were posting in the MkI forum with their MkII level 1 spec cars and others arguing there was no MkIII Fabia 🤣1 point
-
1 pointOn two other forums I'm active in (non-Skoda), new sections are created only for complete new models, not FL changes. One of them covers my particular model that ran for for 9 years with at least three iterations in that time, all in one section. People learn to understand which they're driving and rarely post without clarifying model year etc. If a separate section for 4.5 did exist, those who don't know what model they have will still possibly post in the wrong section.1 point
-
😁 It's not about stranger or not , it's about knowlege. I , for one ,don't know much about car. Right now inside is 0-20 long life. It was done at 23K Km.It's supposed to be changed after 30K Km, but I'll be doing it at around 15K intervals. Car is now at 34K Km. For coming oil change I'll maybe use again 0-20 because of warranty. But after that switch to 0-30. I believe strangers more than VW 😉1 point
-
If she liked the Tiguan why not look at a Kodiaq... They are similar but larger1 point
-
1 point
-
More engine protection / longevity. Not something VW were concerned over they just liked the WLTP certification. Supposed lower emissions. real world while not doing real world temperature / climate / driving regime tests.1 point
-
I can only offer some insights from my almost 20 months' ownership, and I had over the holidays a Tiguan as a rental, a 6-speed DSG Allspace which was either a 1.4 or 1.5 150cv, for like 10 days.... Space-wise, the Superb will be more than adequate, it is cavernous for both people and cargo. Sometimes the boot's length means awkwards contorsions to get to stuff on the far end - towards the backrest. Having a lower roofline, the capacity to put "tall" stuff (say, a suitcase on its short end) is compromised. Overall, being 4 persons and associated luggage, the Tiguan did not disappointed me. Seats (even in basic trim) were comfortable, the layout was the classic one, all easy to use. Pity I my car was missing the cruise due to a reservation mishap, but it was ok. Dimension-wise, there is a distinct difference in the size of the two vehicles ... the Superb is noticeable larger, and more of a barge when comes to manouver. I recommend a test-drive to get to familiarize somewhat with its girth. After more than 20K km, I still find myself sometimes at odds to manouver "in a loose manner" ... compared to that, I still feel my P38RR like a glove, even if wider and much less prone to easy manouvering than the Superb, for obvious technical reasons 😁 The rear doors, so practical, are also vey large - watch more carefully opening in tight spaces, is easy to bang it on its edge - I havent't done so yet, but came close a few times.... In the driving, the higher driving position of the VW is a plus, here you are lower, with less visibility. The ground clearance is also reduced, a bit more care is needed. I personally found myself very easy to adapt to the Tiguan, I think the other way around is more challenging, because also the Superb is setup quite "soft", which is comfy, but not so sporty/responsive. As for the performance, true that I am pampered by the fact mine's a 280, but driving the 150cv Tiguan, fully loaded, on mountain 2-lane (that is overall 2+2 lanes) roads was frankly ... appalling. To keep up with my lead vehicle (a 2.7 V6 4Runner) to keep a brisky pace, I was honestly gunning the engine most of the time, who gave its all very honestly, but it was a tiring exercise. And all in manual, as the 6-speed DSG seems programmed by the same imbecil that did the later 7-spd, with its too early upshifts which simply kill the engines' response ... from this point of view, it your daughter was satisfied with the performance of the Tiguan, I do not believe there will be an issue making the jump! In the city or in normal driving, the engine was sufficient and ideally suited to go about and keep up with normal traffic, I assume the Superb will be similar ... Only thing to watch is to drive a little to get a feeling of the different size ... 😉1 point
-
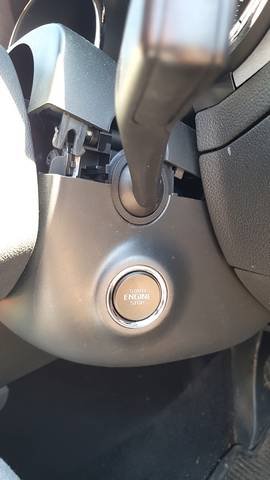
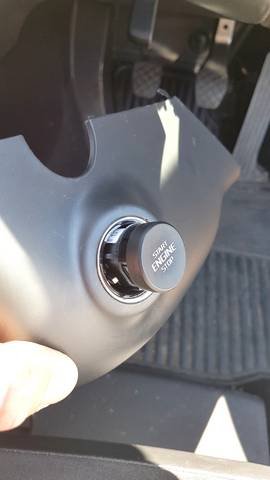
1 pointThe OP means the starter ignition button, not stop/start button.1 point
-
1 pointIt’s a pity because with the infotainment hardware and software change it’s practically a whole new model. It has been quite confusing when people post especially when they don’t even know what model they have.1 point
-
Not sure on Octavia but have you checked drivers side door pillar wiring as well. On my sons fabia the drivers side supplies/controls passenger side window etc. As for the rear wiper I have had two Octavia mk2 and a Seat altea and have had to replace wiper motor three times so far. They seem to be prone to getting water ingress and seizing. Alasdair1 point
-
Yes, I was expecting you to find that. That bearing couldn't get to that position if its spring was fully intact.1 point
-
I suspect you need to clear the standing fault codes first and then investigate the ones that arise or return.1 point
-
1 pointNo warrenty https://mega.nz/file/xn8WlQCK#vEyrHUD997FiQJmQ8jUu9a-YOxSZS1oA5TCSBHcL4SA1 point
-
Motorcycle dry chain spray.1 point
-
Sorry, my typo mistake. Car was made 24. October 2023, first registration in March 2024. Literaly one of the lasto MK3 made Superbs. On 1. November they started MK 4. So the sticker is correct. What would be the benefit of using 0w-30 instead of 0w-20?1 point
-
1 pointThe car does not happen to have Self seal tyres from the likes of Continental fitted does it? Or mouse or tyre weld already in it .? Time to flash the cash and have the wheel off the car and in the water back, or squeezy in water sprayed if not doing youself. It might well be the valve. Always worth over inflating then reducing pressure to see if that seats the bead.1 point
-
1 point
-
1 pointFunnily enough, same question in Roomster dept, same answer then https://www.briskoda.net/forums/topic/485738-best-non-hid-headlamp-solution/#findComment-55147871 point
-
For MY21, models were : SE, SE Drive, SEL, Sportline, L&K. I am not familiar with an Executive model. Only L&K had leather as standard. I can send you the MY21 brochure if you're interested. I have an MY21 1.5 TSI SEL. Not too familiar with possible Diesel or 4 x 4 issues (I have neither), but I believe there are concerns about the longevity of gearboxes, the Start button is a weak spot (I had mine replaced). Some will deter you from a sunroof, I think it adds greatly to the sense of space in the car and not had a problem with it. Virtual Cockpit I think is a nice to have and can, according to some sources, help with resale value. Rear view camera is an essential IMO. I avoided any of the safety/convenience systems, that did mean I lost the mirror USB-C socket from my order (MY21 Build Week 48 changes) and so am not using my dashcam. I could wire it in but am fearful of warranty issues. If a simply connected dashcam is important to you, or you have particular need for the mirror USB-C socket I believe there are certain pre-requisite features/packages required before it became an option which you may not want but will have to accept. I specified Virtual Pedal (boot) because it was relatively cheap and whilst I considered it would be a bit of a gimmick I thought it might be useful. I use it much more than I thought I would, not least to minimise boot switch wear and tear (had an issue on a different make/model). No spare as standard, but spacesaver available as an option on most combinations (not 5 seaters or L&K I think). EDIT : from brochure - Temporary steel space saver spare wheel with tool kit and jack. 215/65 R17 not available in combination with 7 seats or variable boot floor : Option on SE Temporary steel space saver spare wheel with tool kit and jack. 145/85 R18 not available in combination with variable boot floor on SE (5 seat) : Option on everything but L&K1 point
-
1 pointMy sons are the same on his mk1 although not bi=halogen. Think its just the way they are. I fitted extra bright bulbs which did make a difference but they are still poor. My Octavia arent bad but could be a lot better. Same as my mates fairly new vw transporter. He got them upgraded but still not that great. Maybe its a VAG thing. Daughters volvo on the otherhand would illuminate a football pitch. Might be worth getting alignment done. His were pretty low but MOT guy tweeked them for him. Alasdair1 point
-
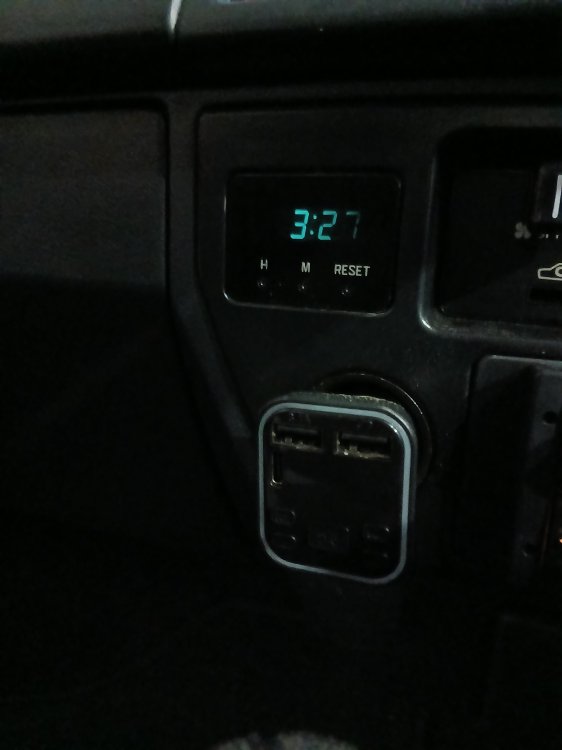
1 pointMy Felicia had that console from the factory,the cupholders are ridiculous and not capable to hold a cup of coffee or a water bottle so i removed it. The alternate solution is this: If you want to add gauges etc.1 point
-
1 pointI would just fit new one. Probably a lot easier than getting a second hand one off plus fitting new bushes etc. Had a look on IM axles and £140 for mk2 fabia. My sons is getting pretty poor as well. Thanks to DieselMonte for link. Alasdair1 point
-
1 pointI routinely turn lane assist off every time I start the car. The way in which the steering is jerked when you stray out of lane is quite disturbing.1 point
-
1 point
-
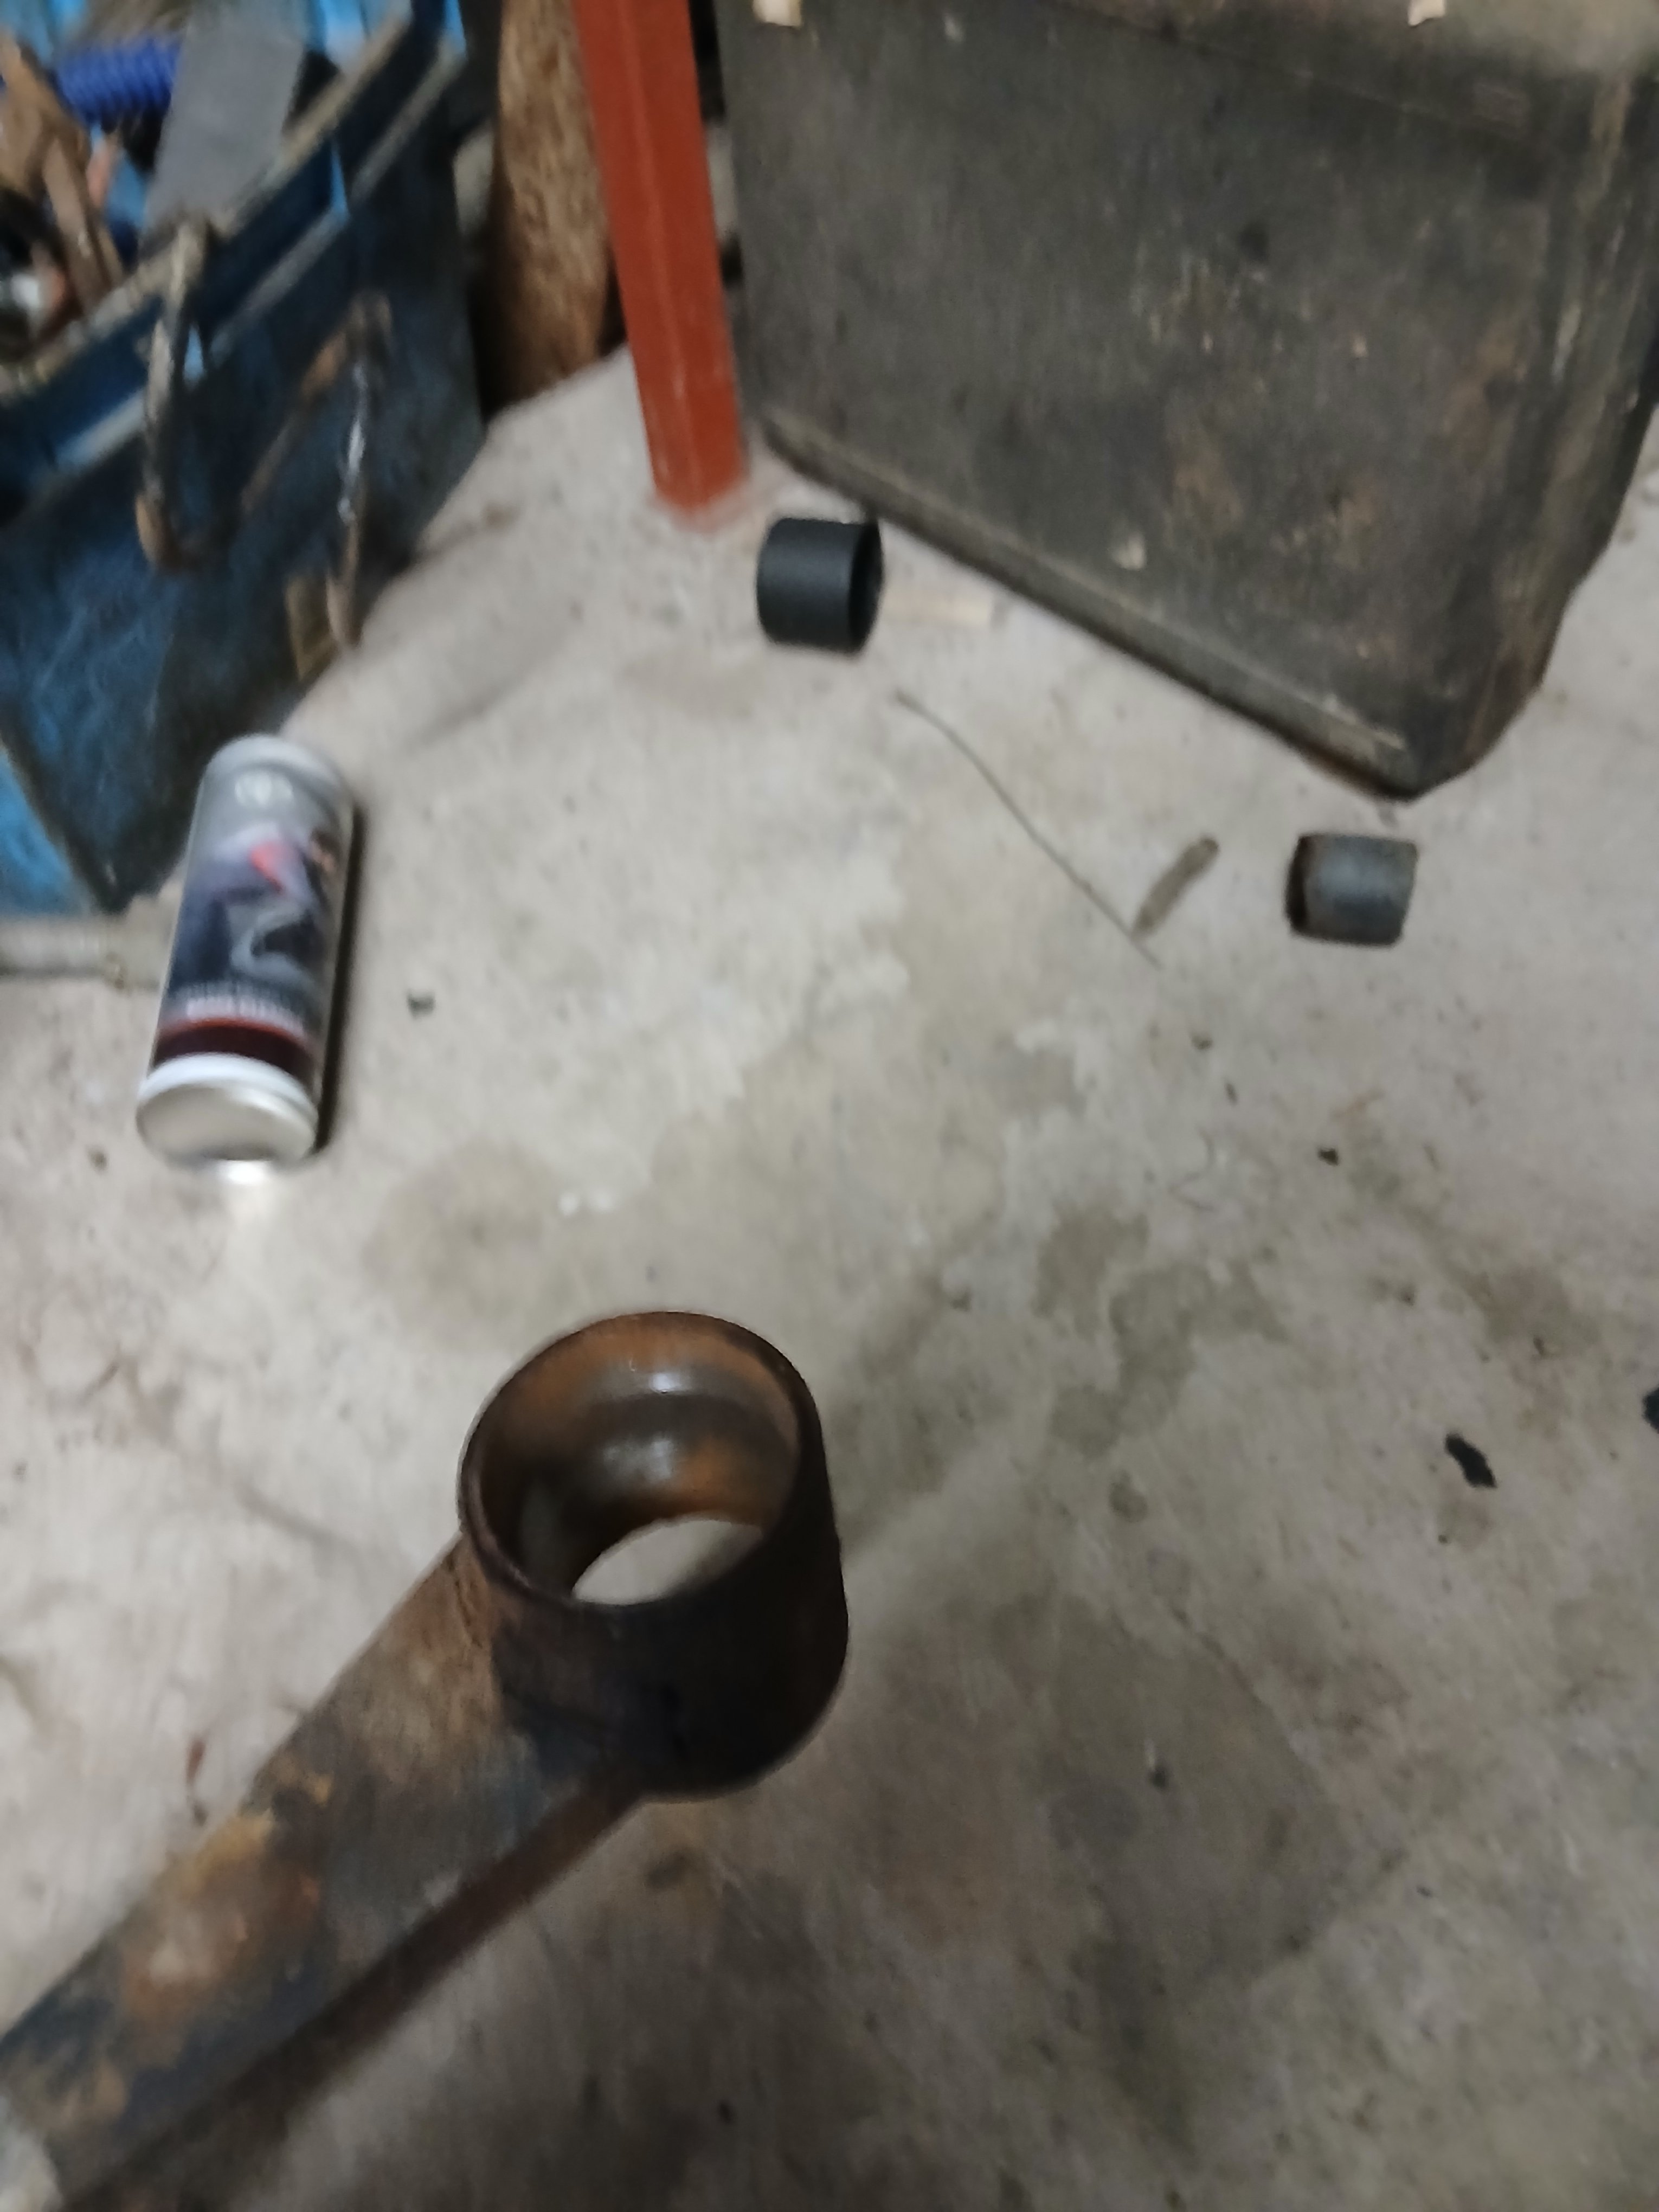
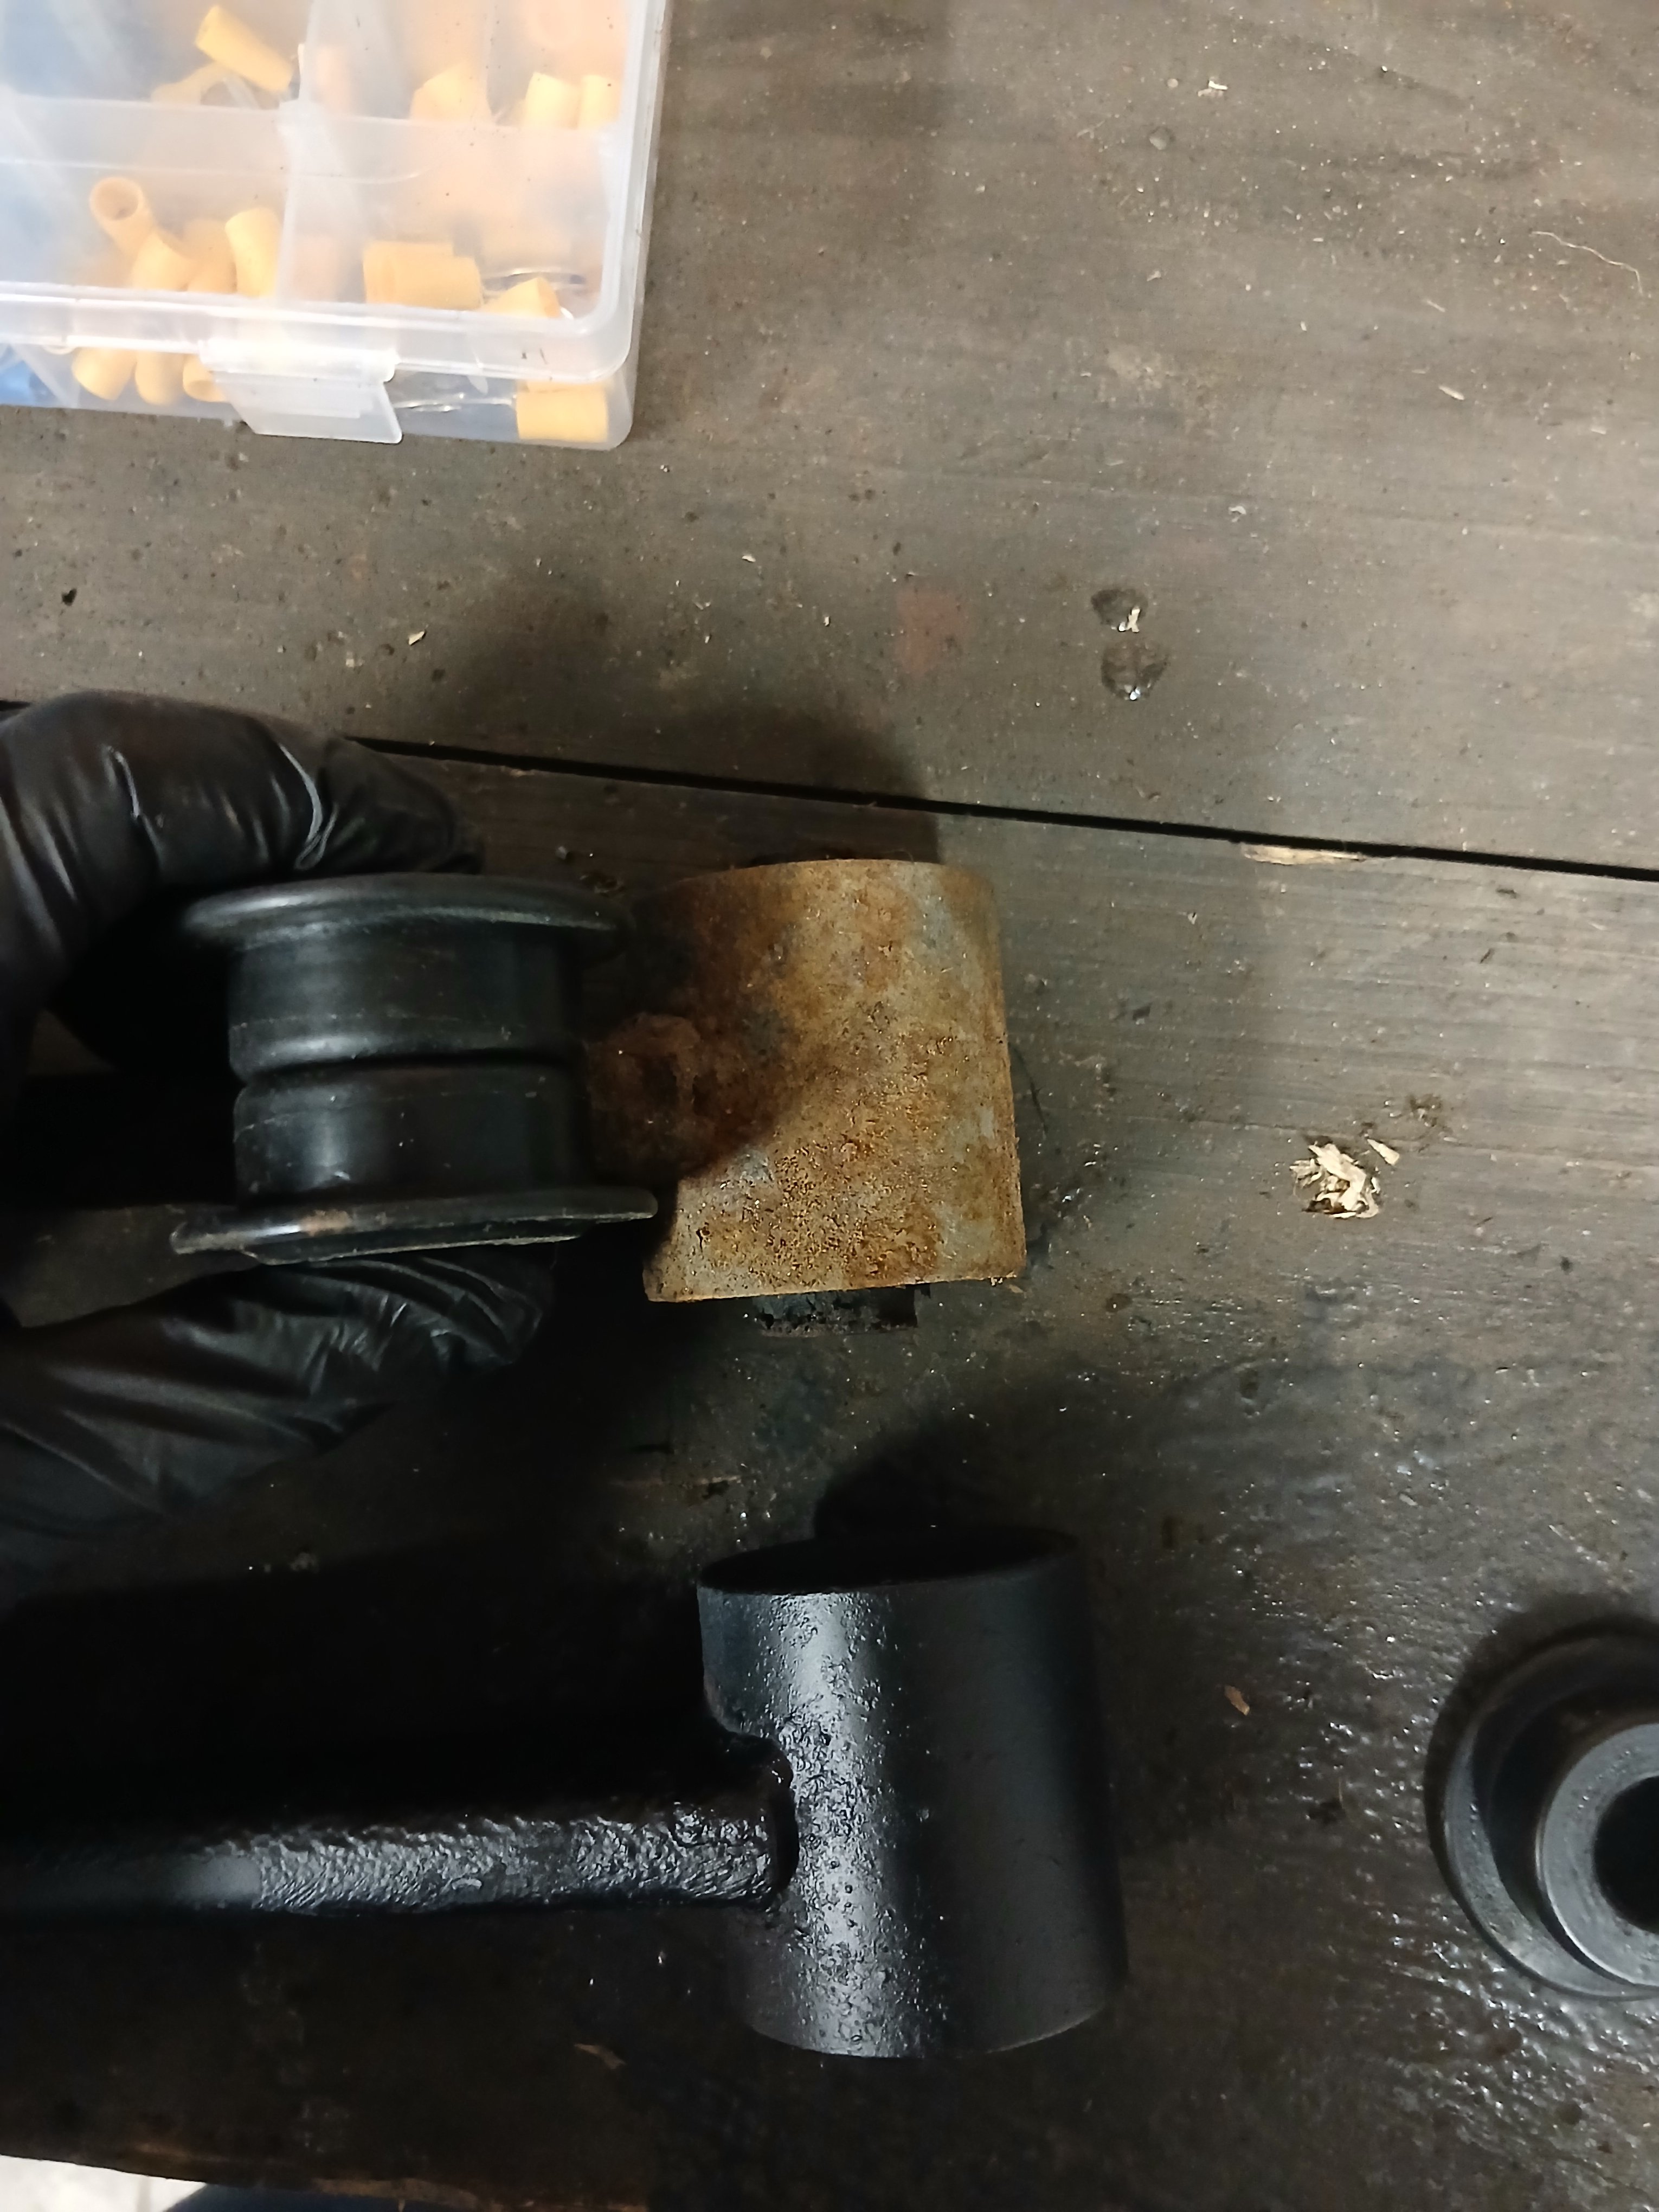
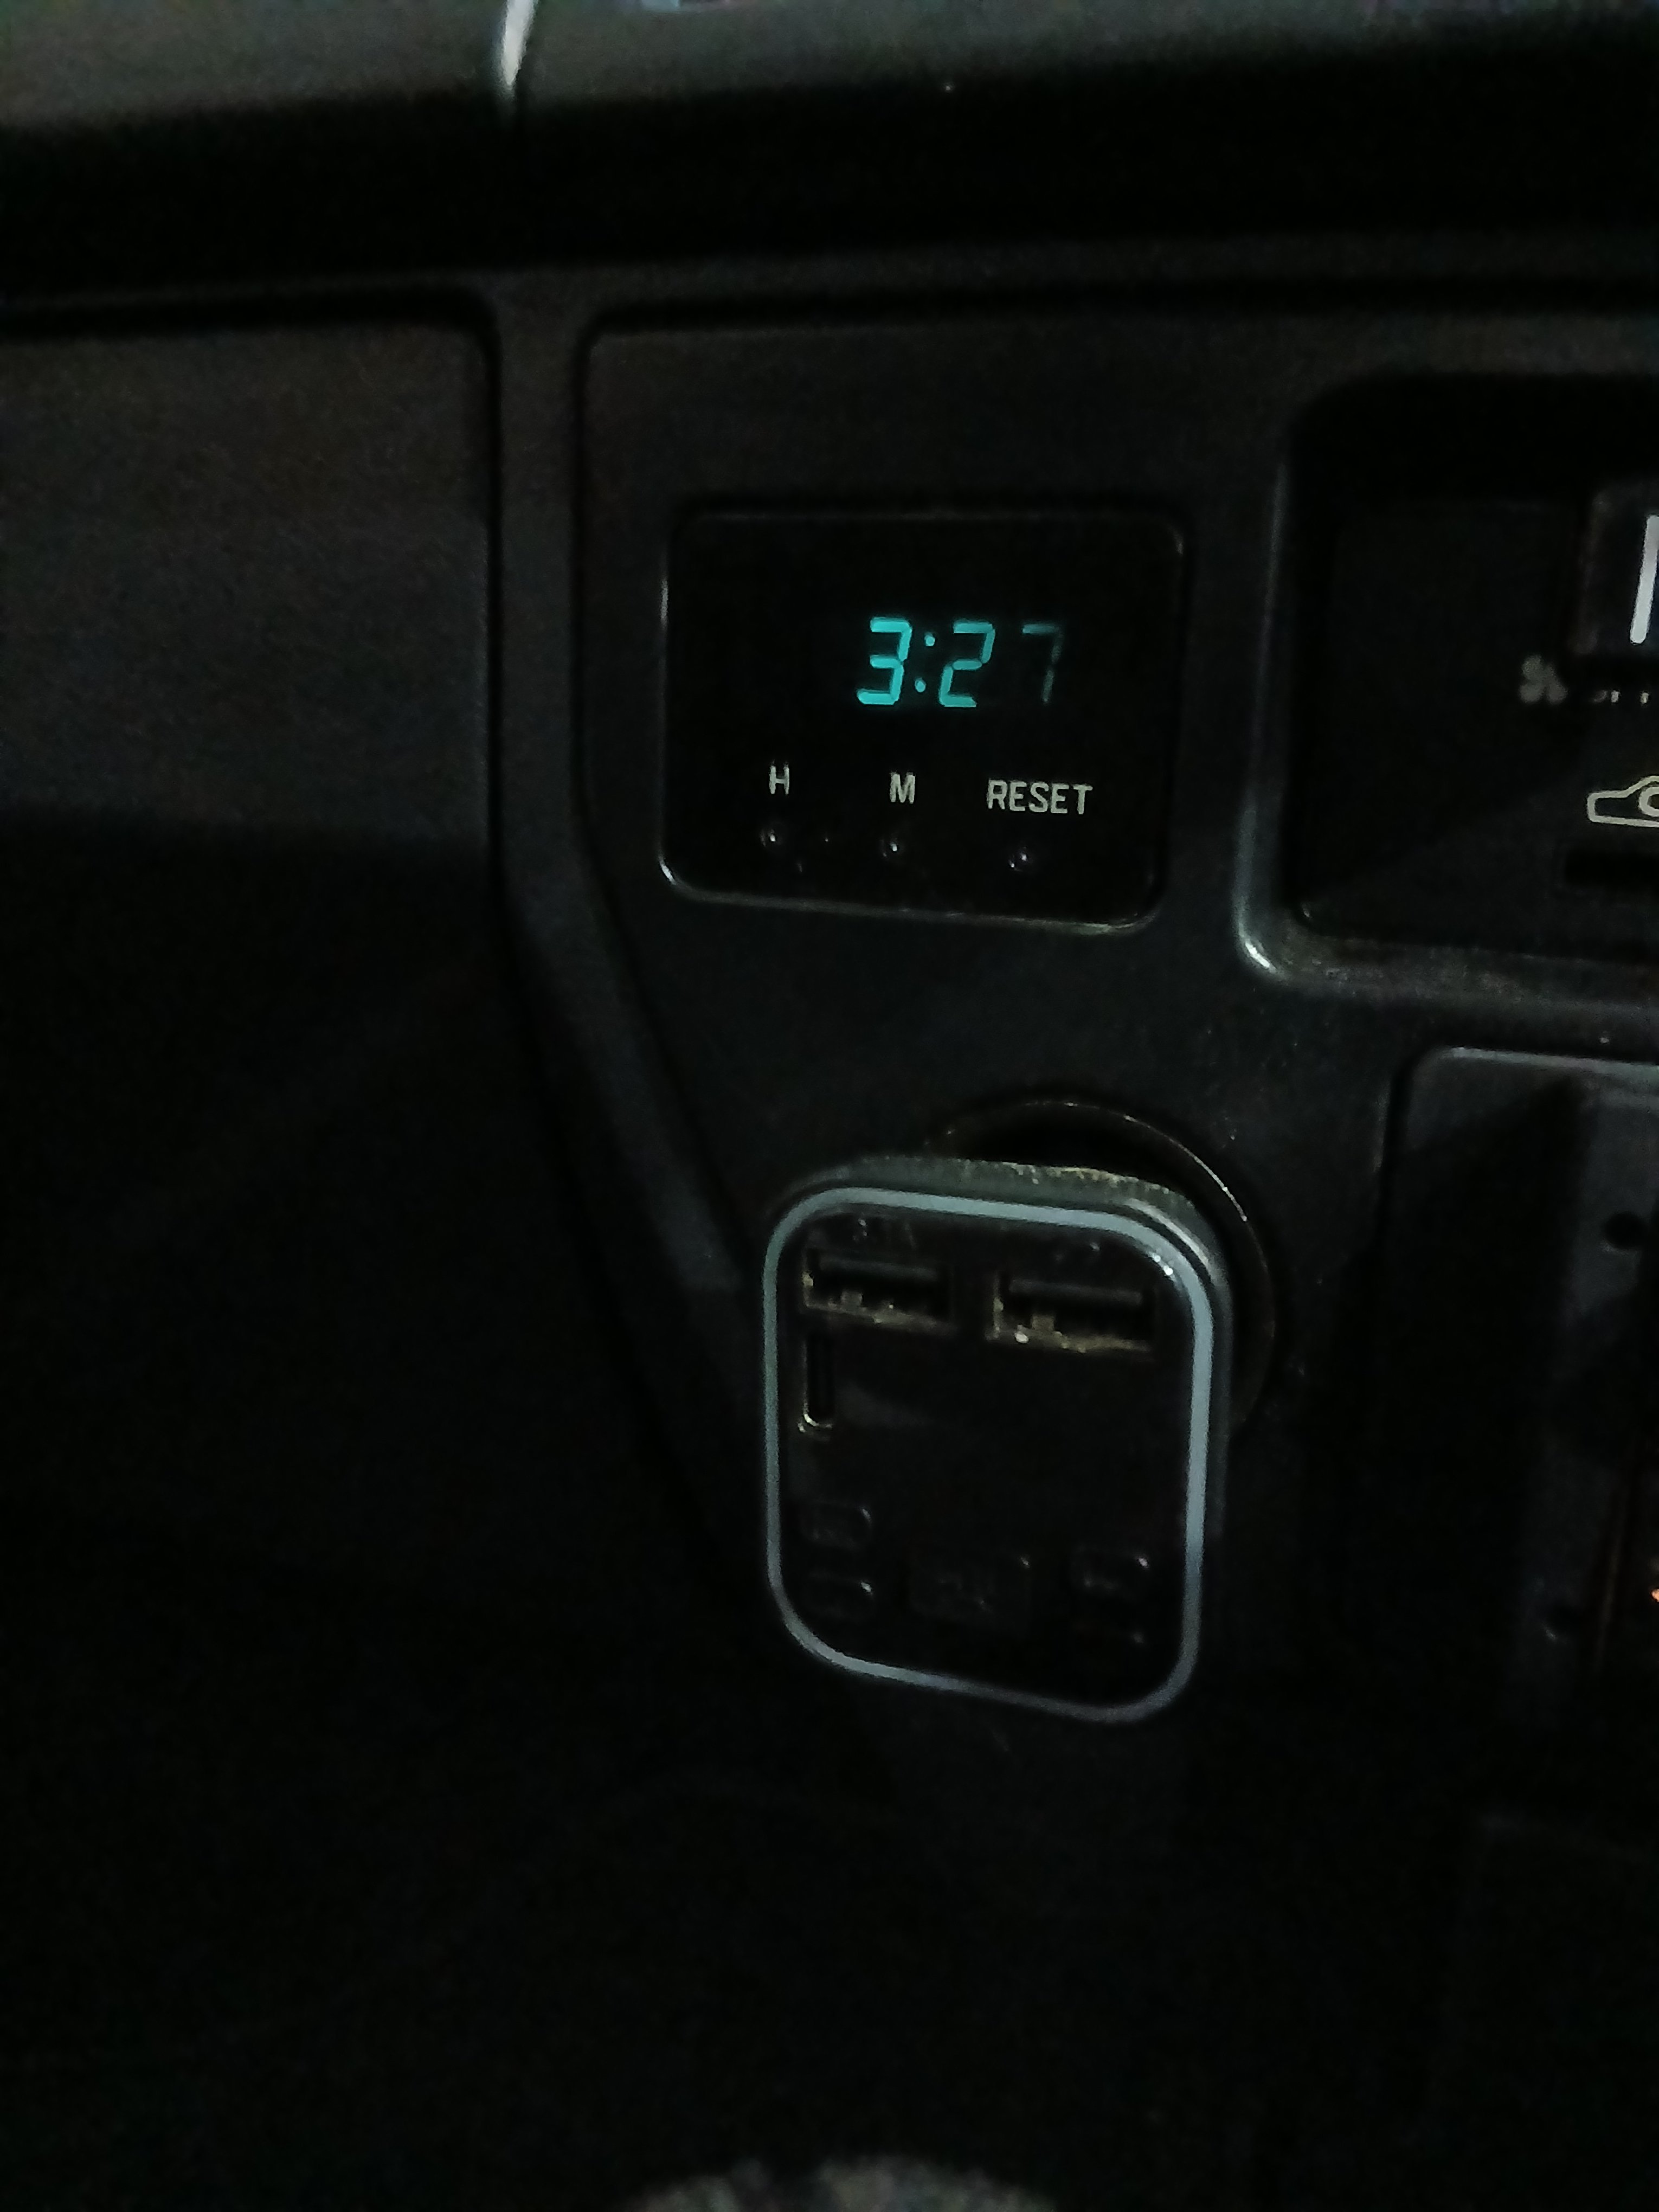
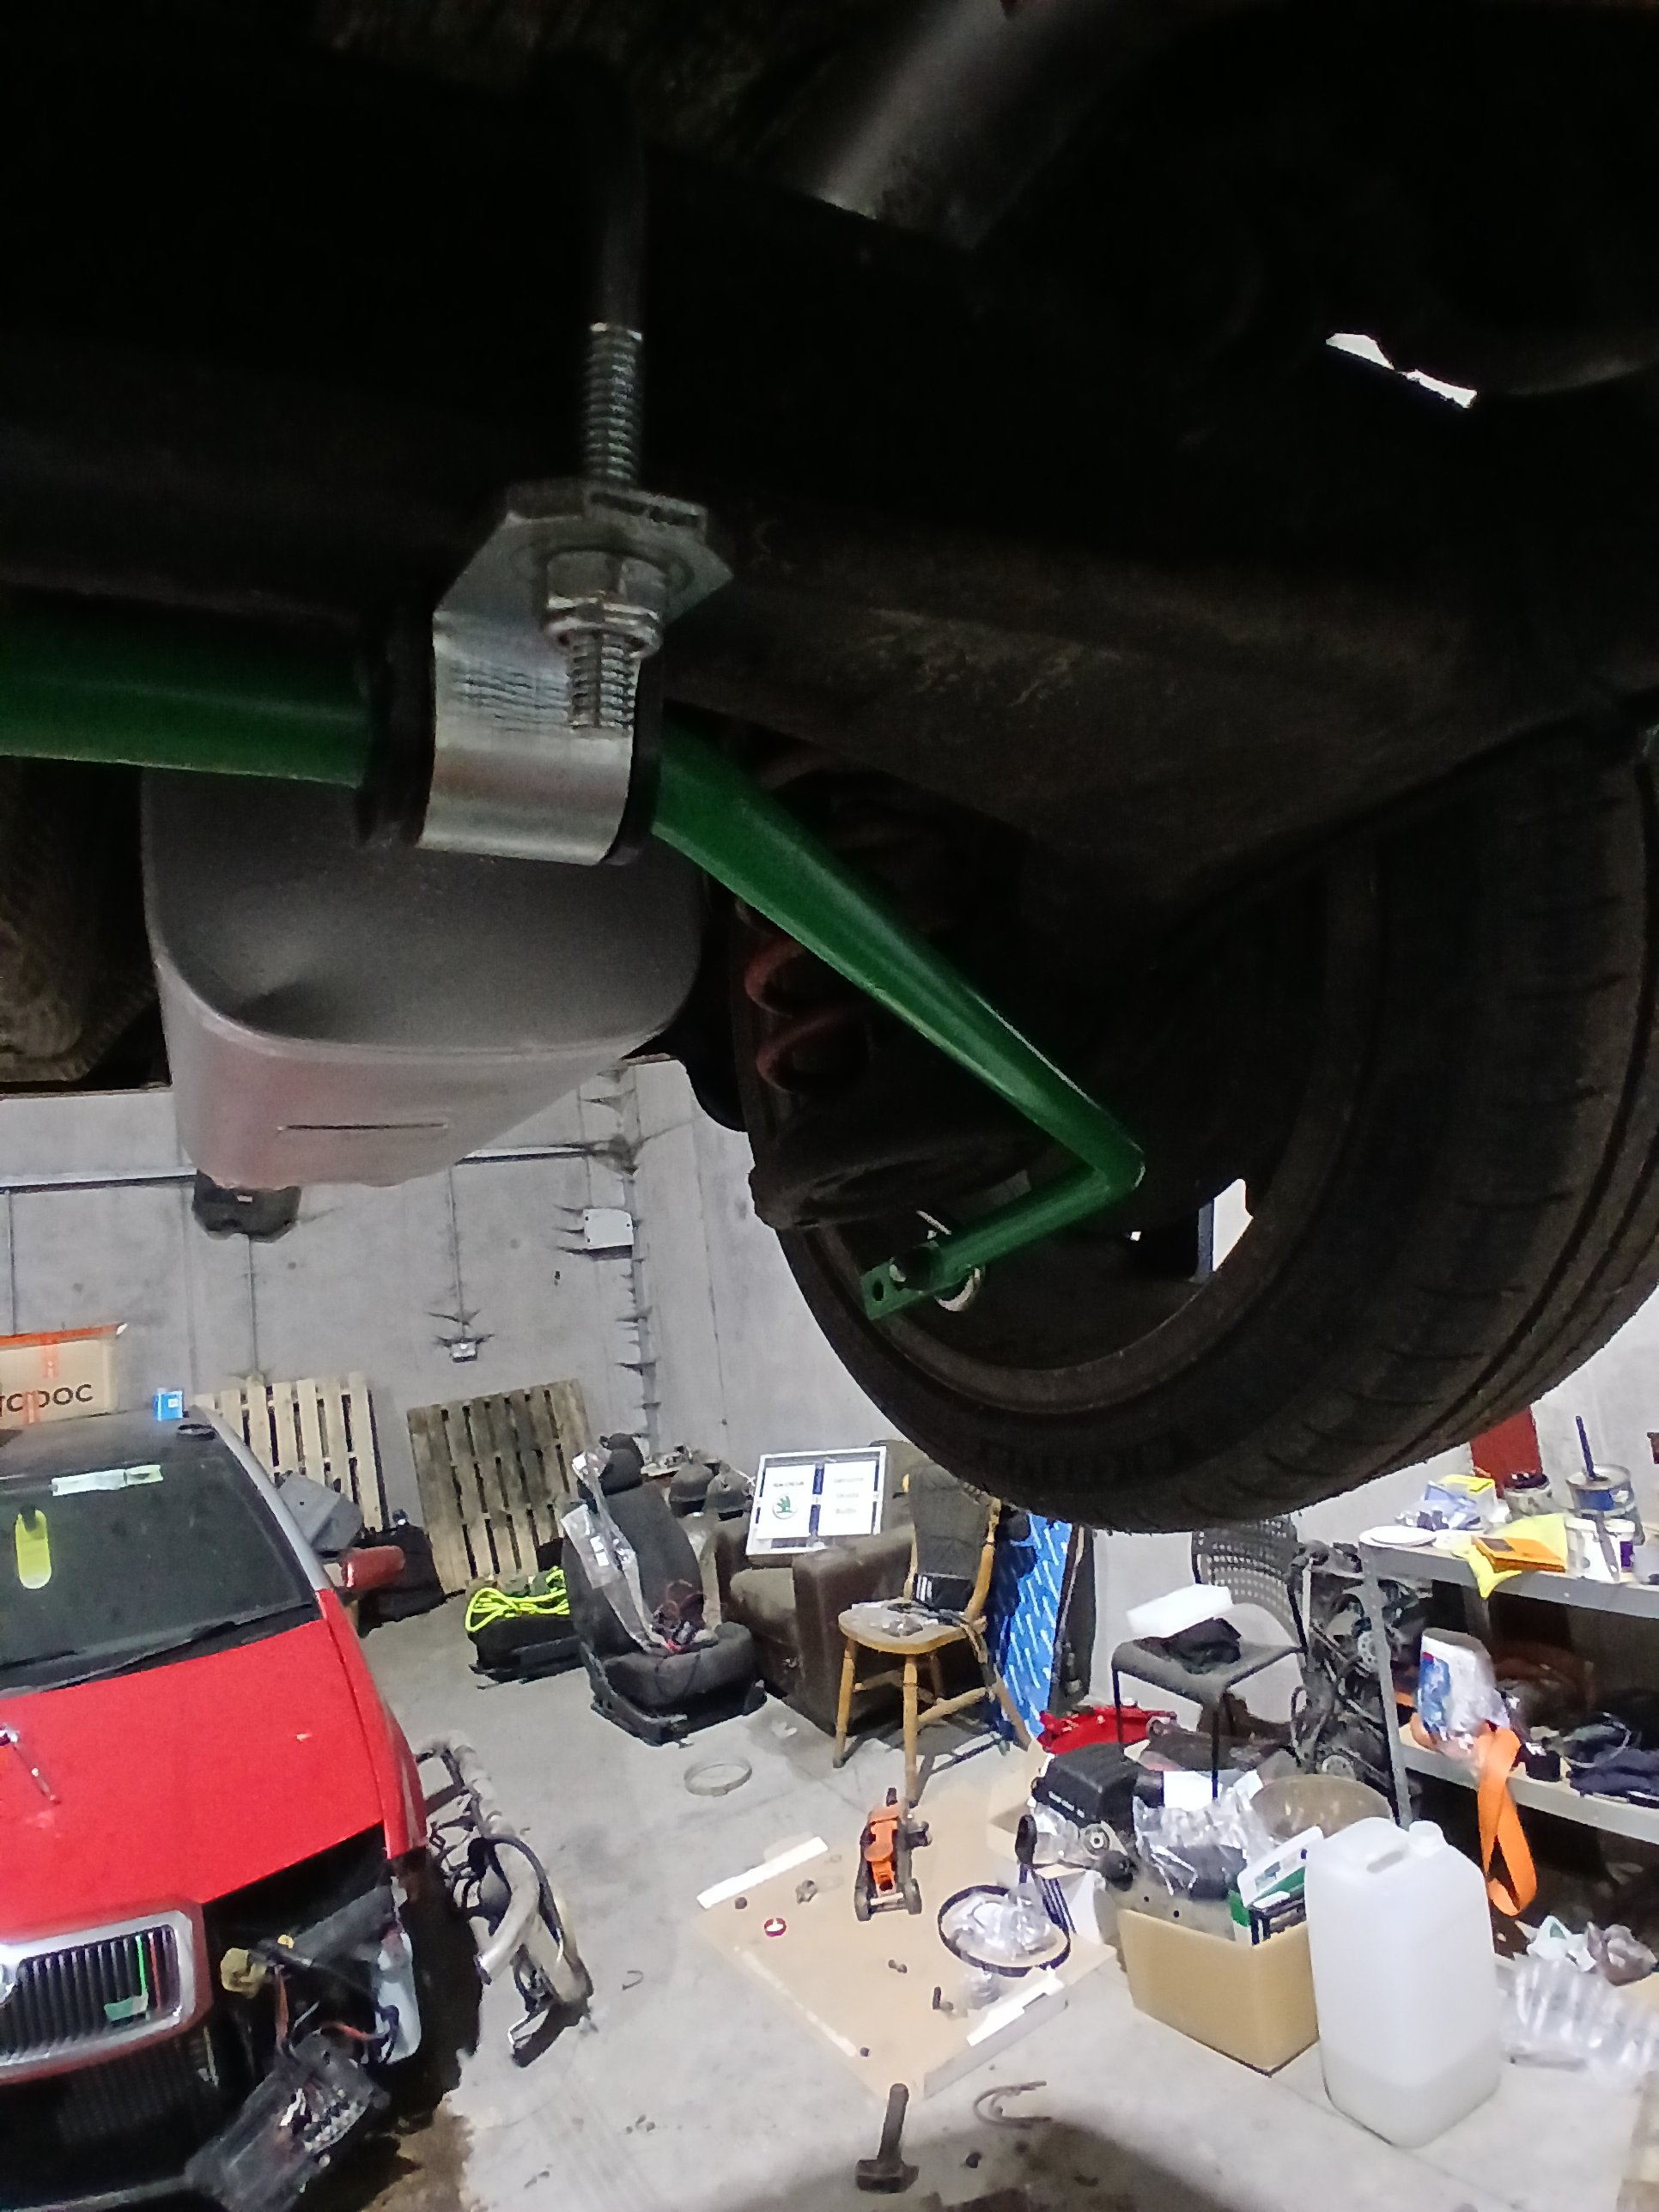
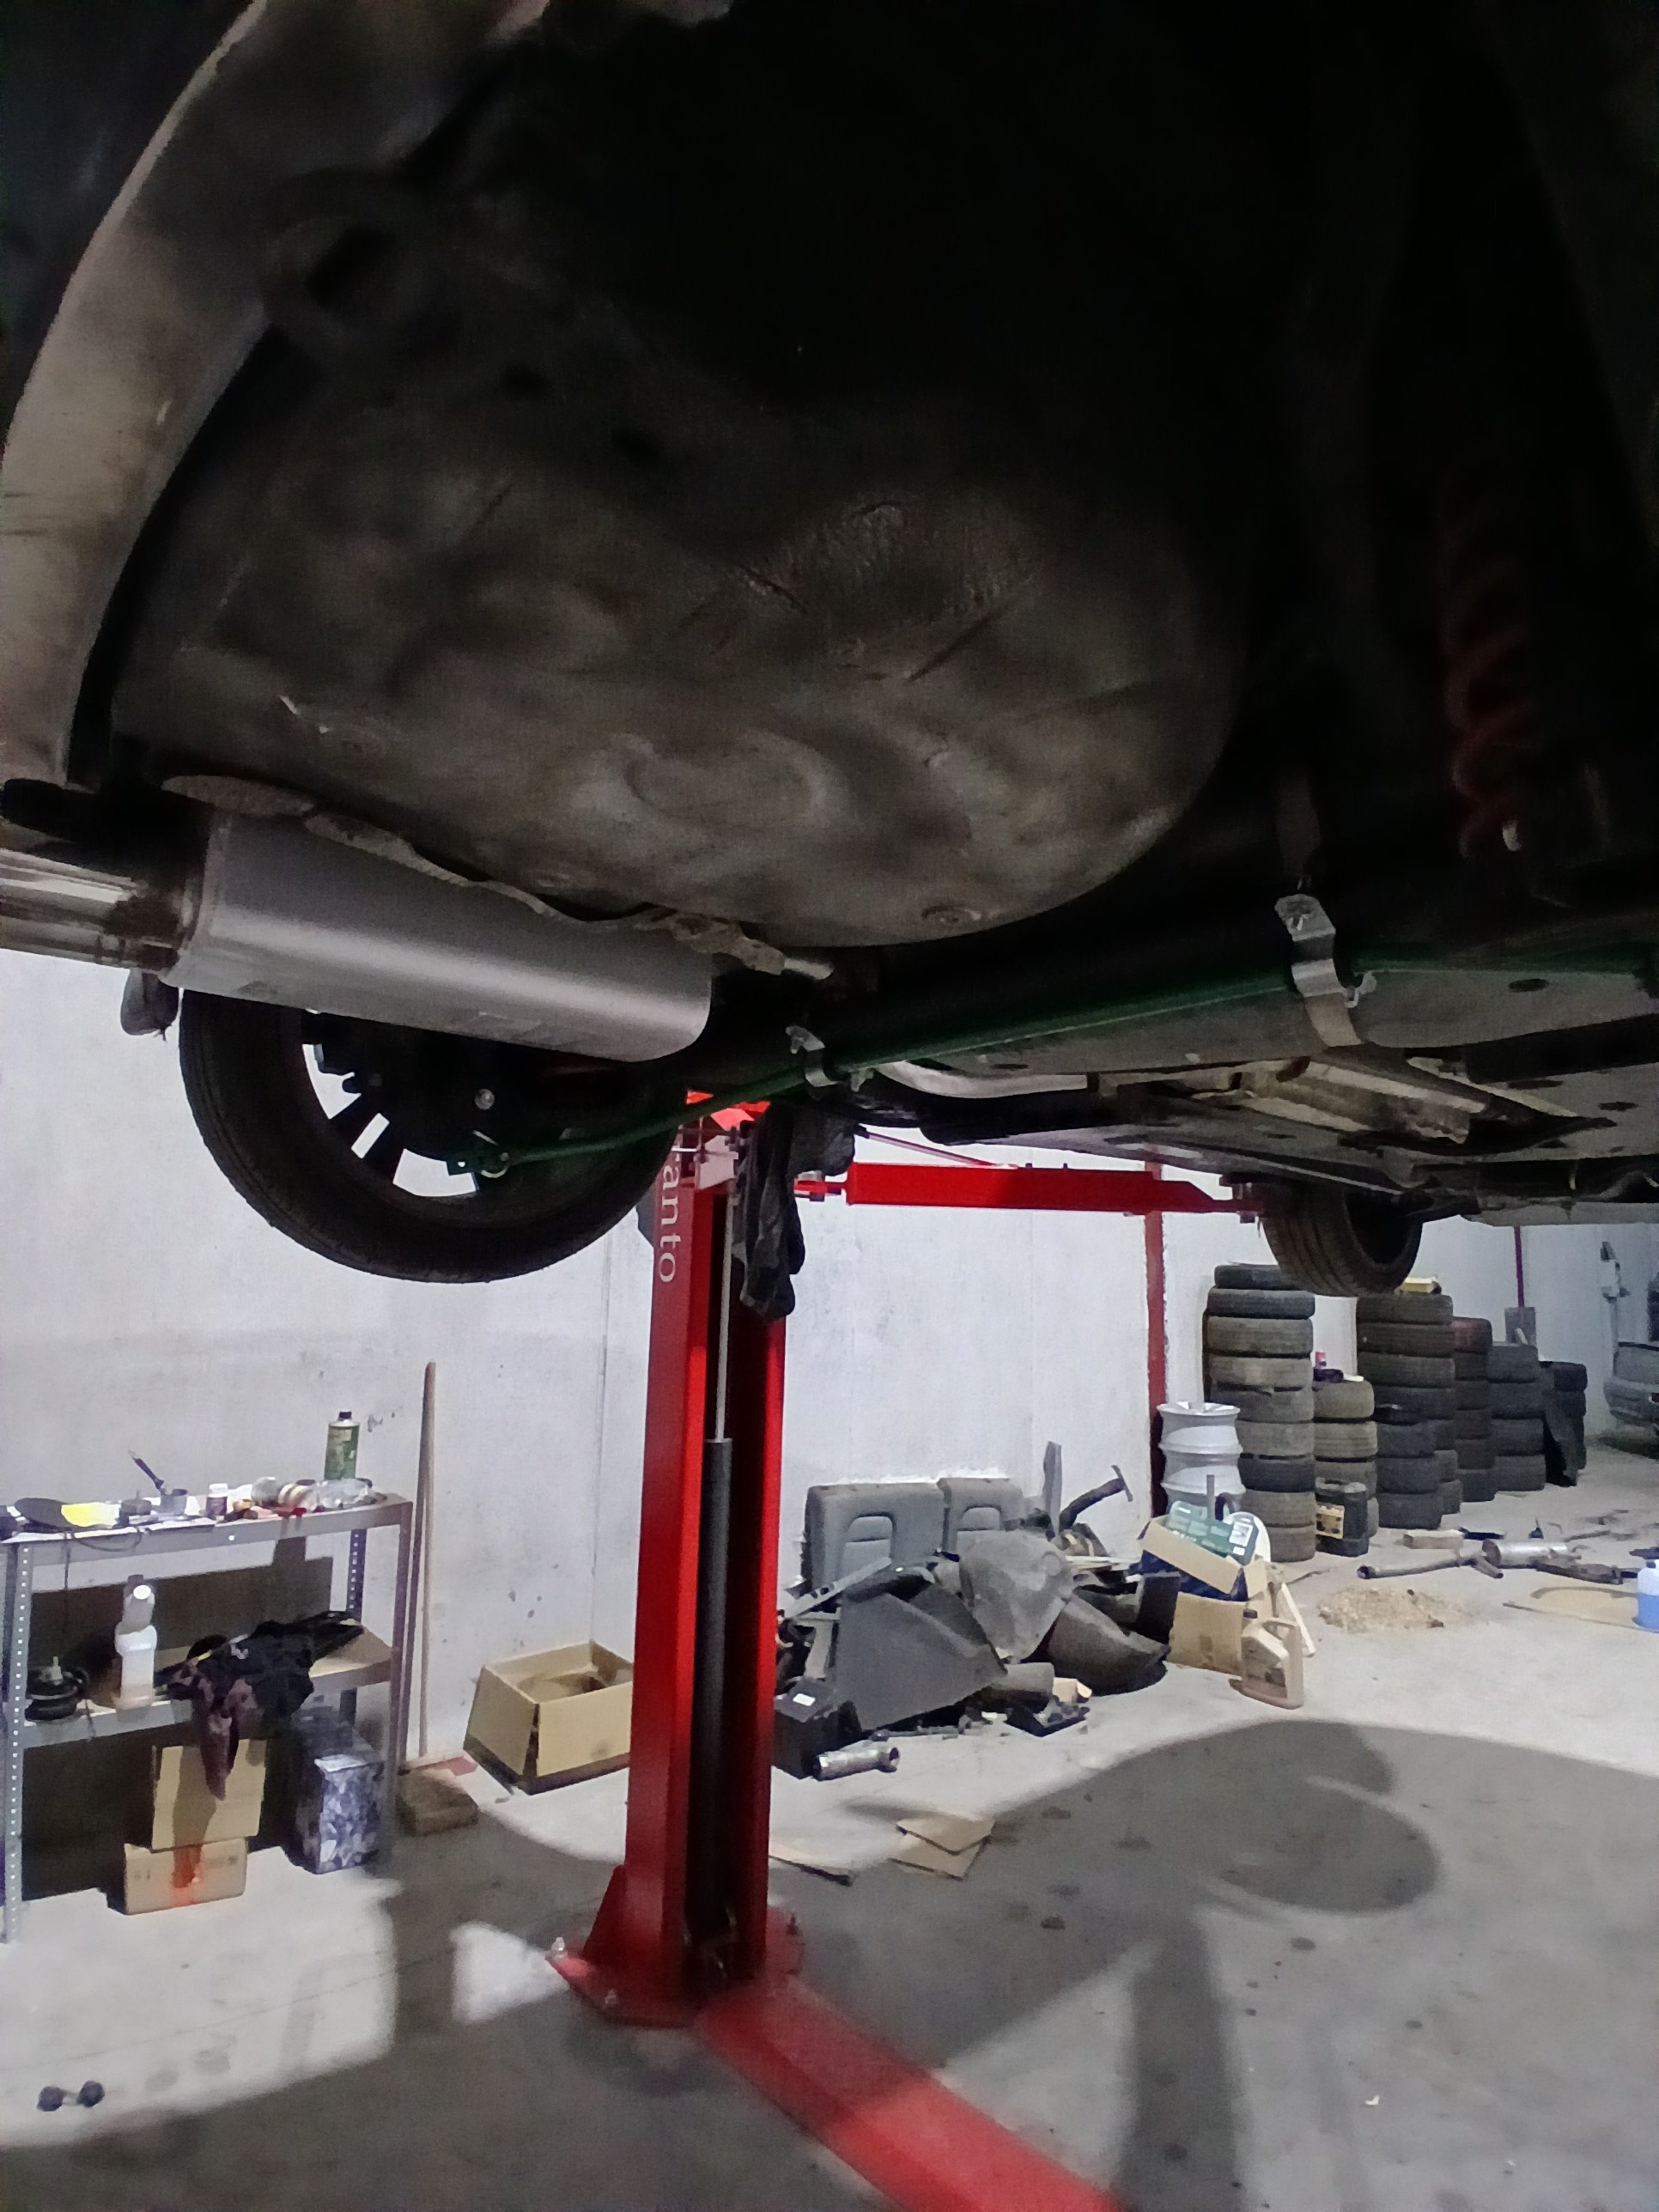
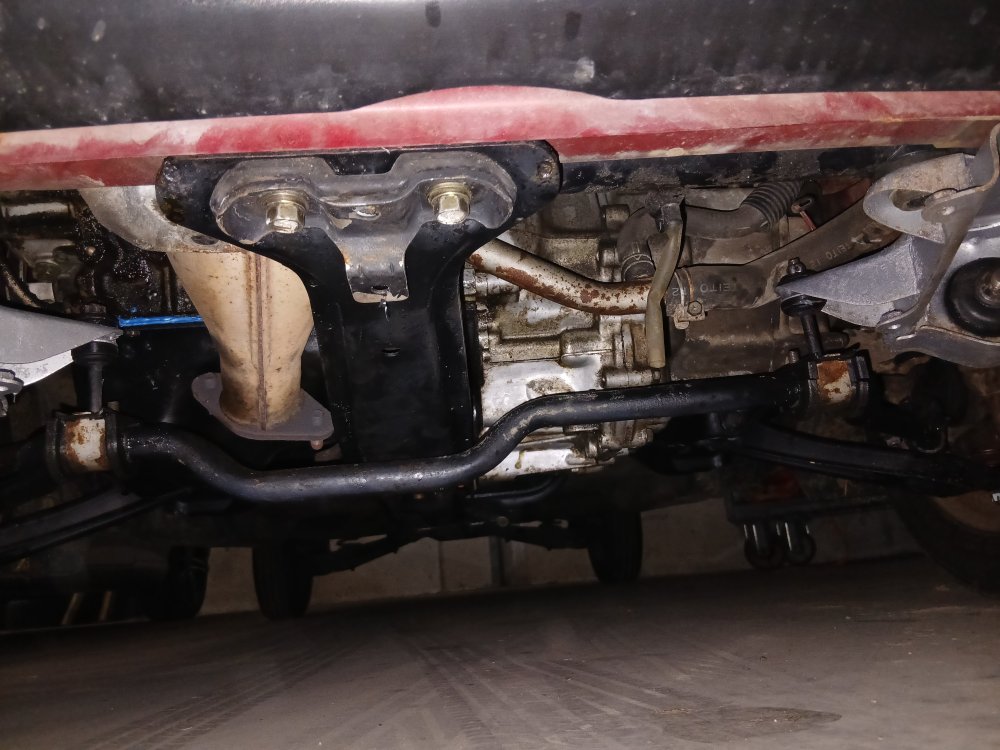
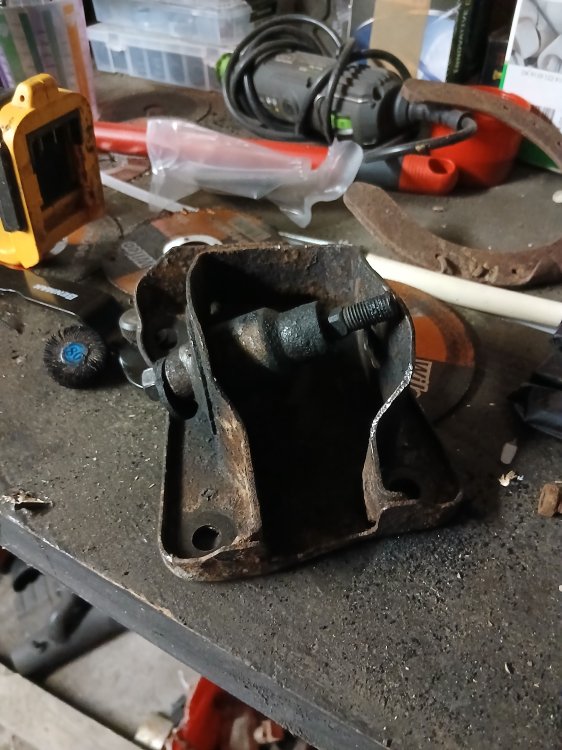
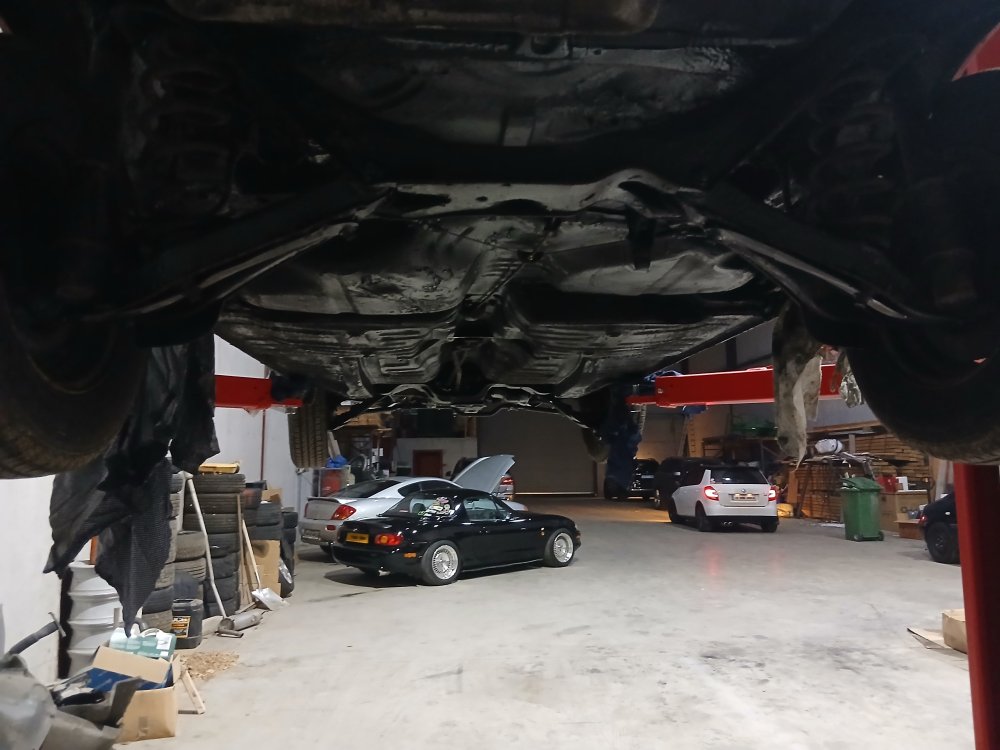
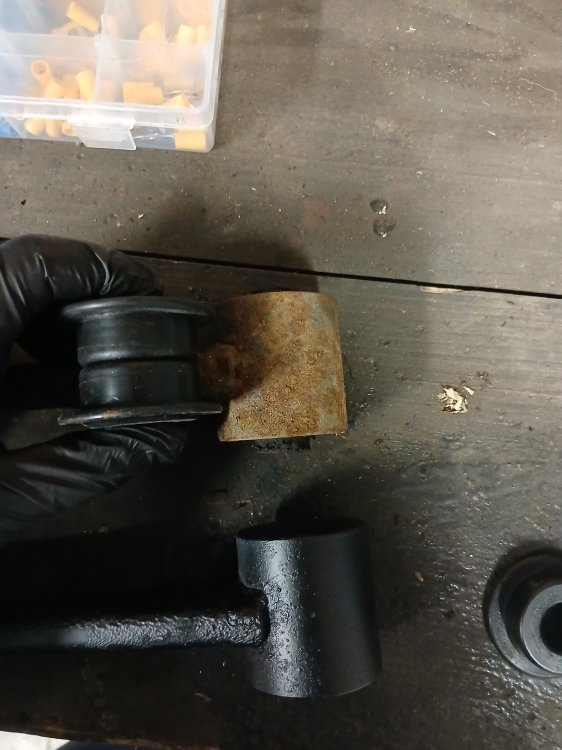
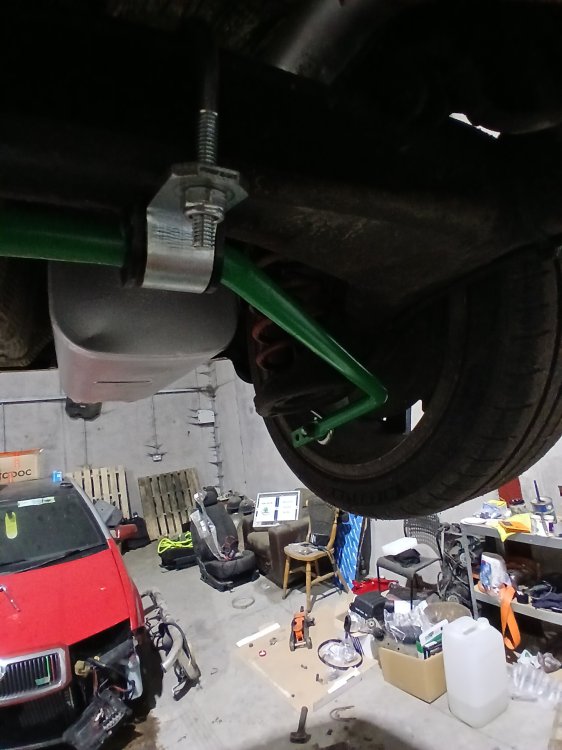
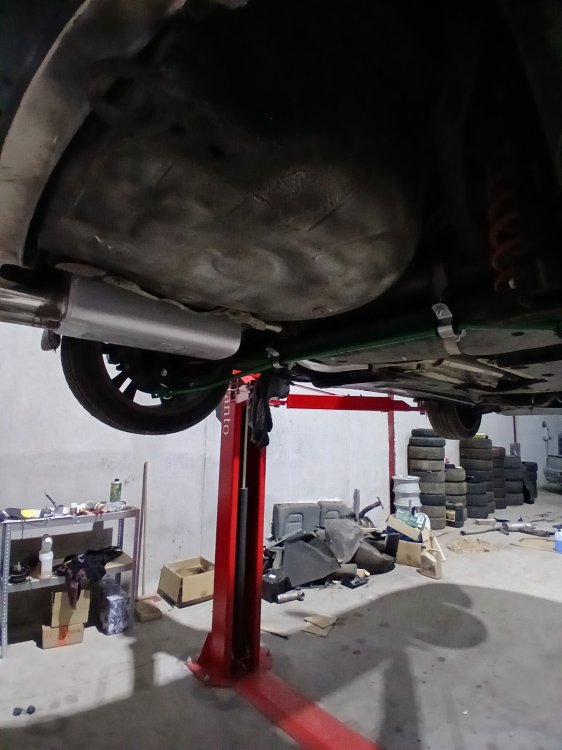
Not much else Stripped rear suspension out of parts car. Siege removing the bushes, found they had a metal sleeve that will not come out of the wishbone bushes, so cant fit them. Then moved onto the trail arm bushes, found they weren't right so cant fit them either. Also this. Thank god i stripped the parts car FIRST. So leaving the rear suspension be for now. Touched up some undercoating and refitted the exhaust, shockingly all the gaskets were totally wrong so i used exhaust paste FOR NOW. Few small things to finish up and alignment, but it is basically done and driving fine. Payed far too much money for an nos clock for it too.


 1 point
 -
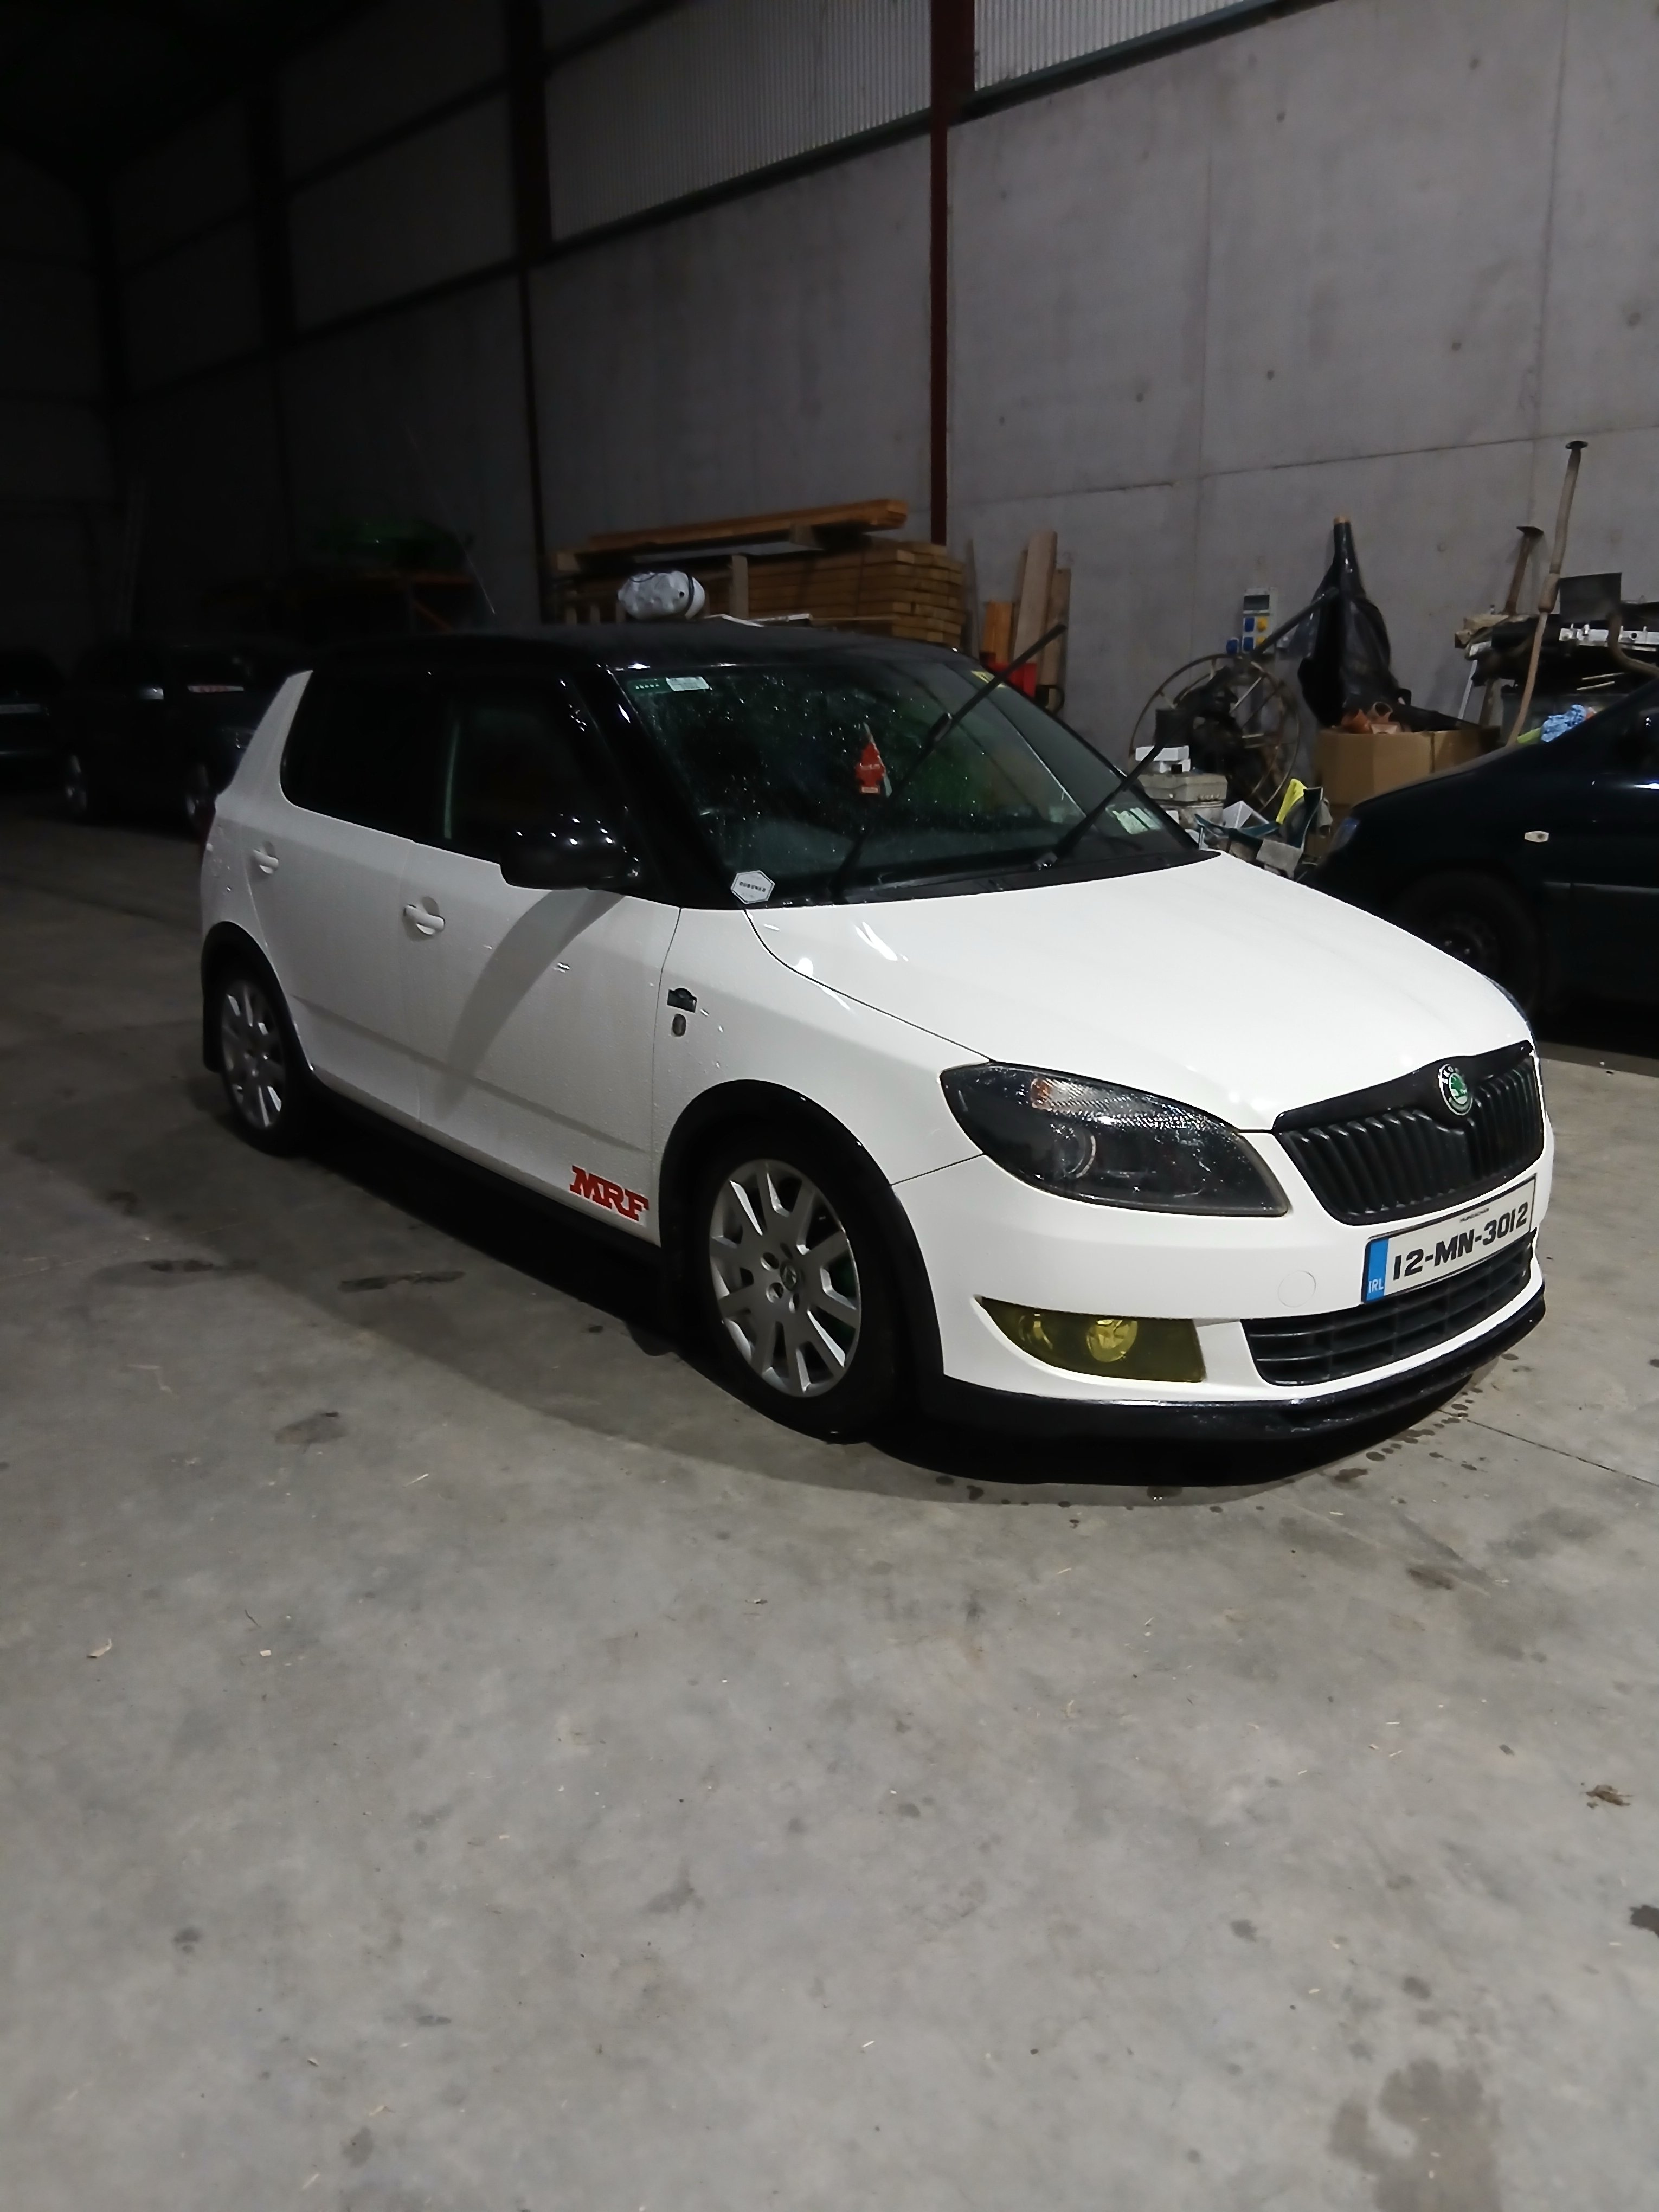
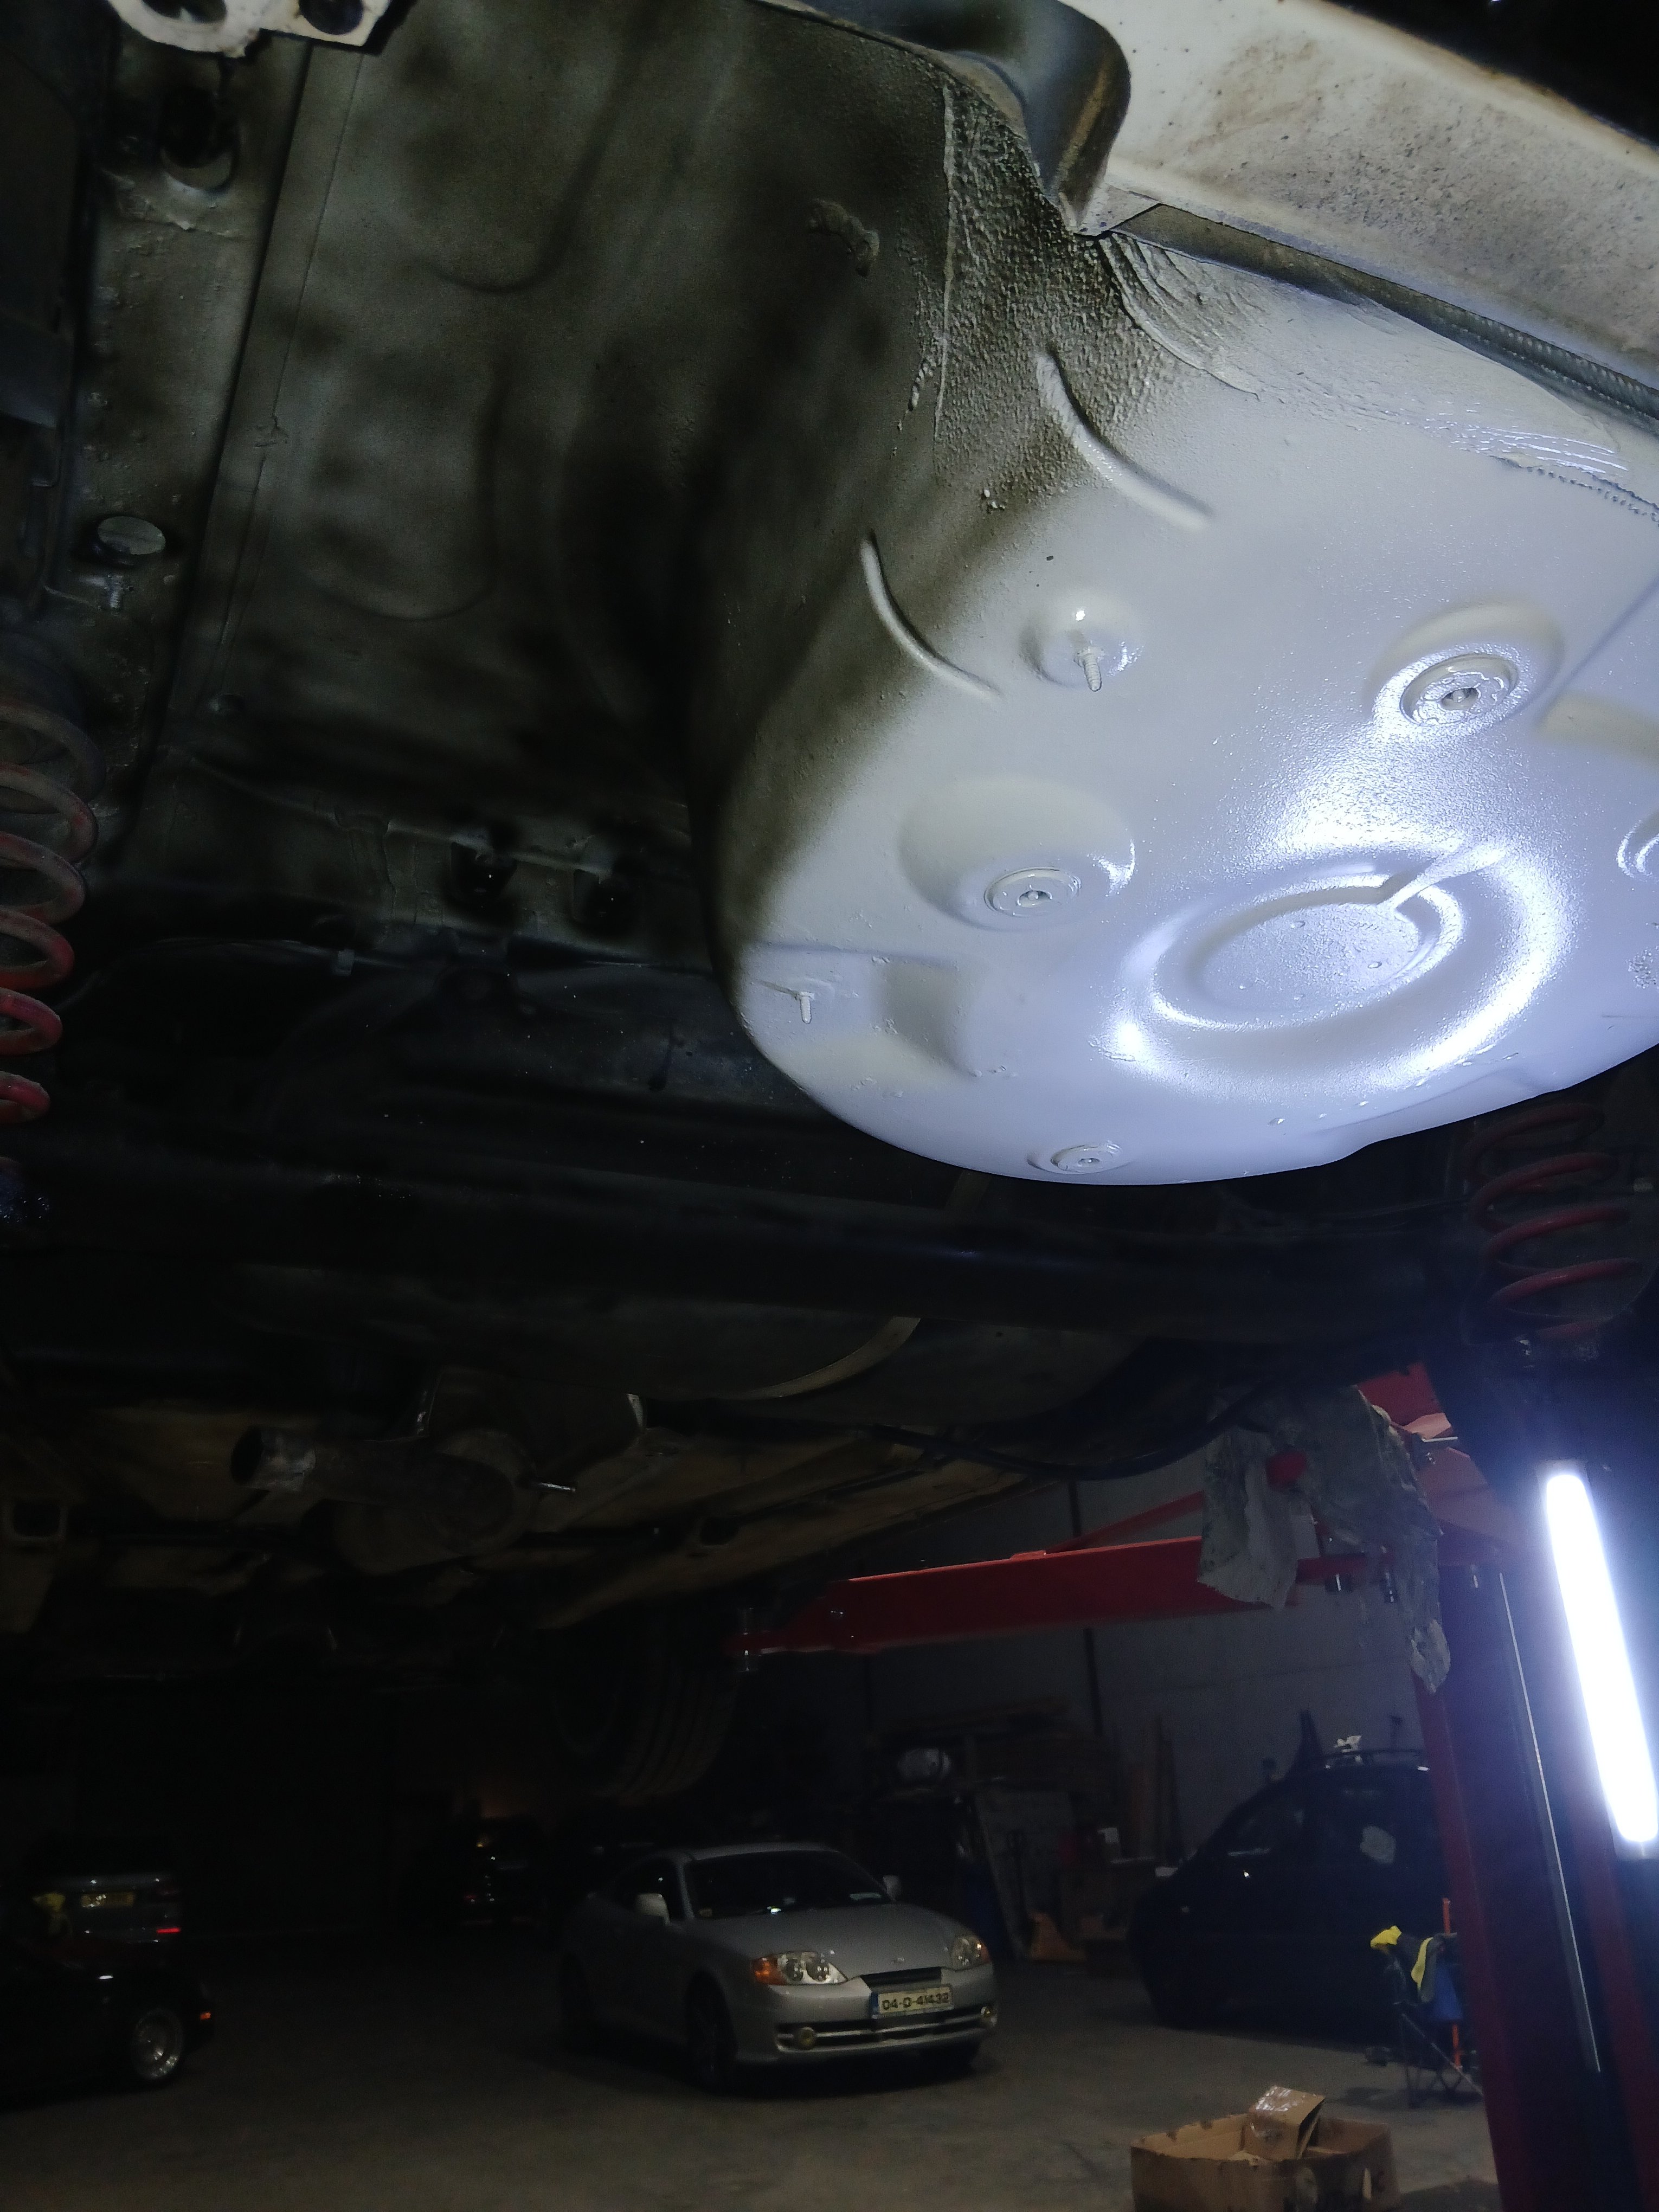
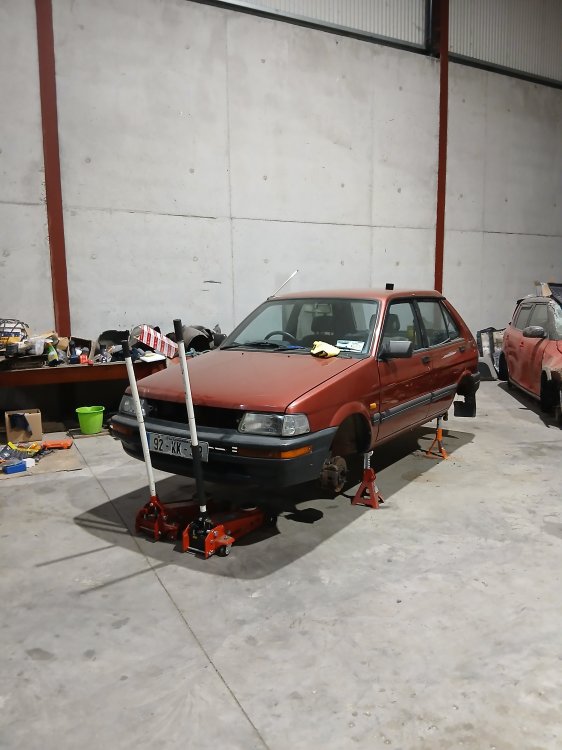
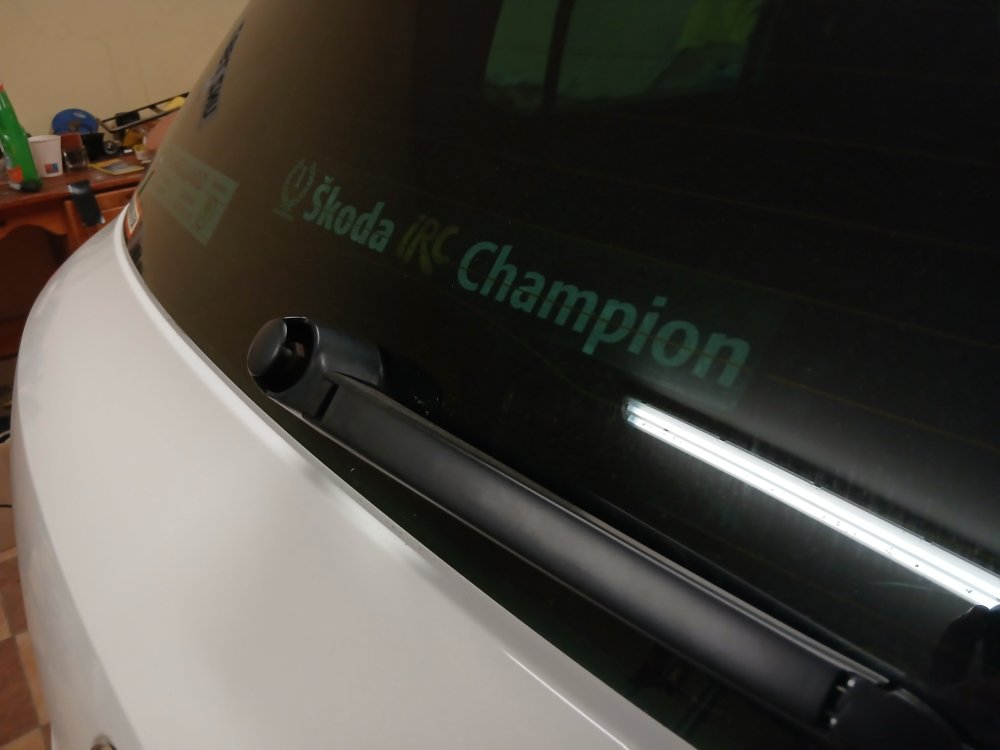
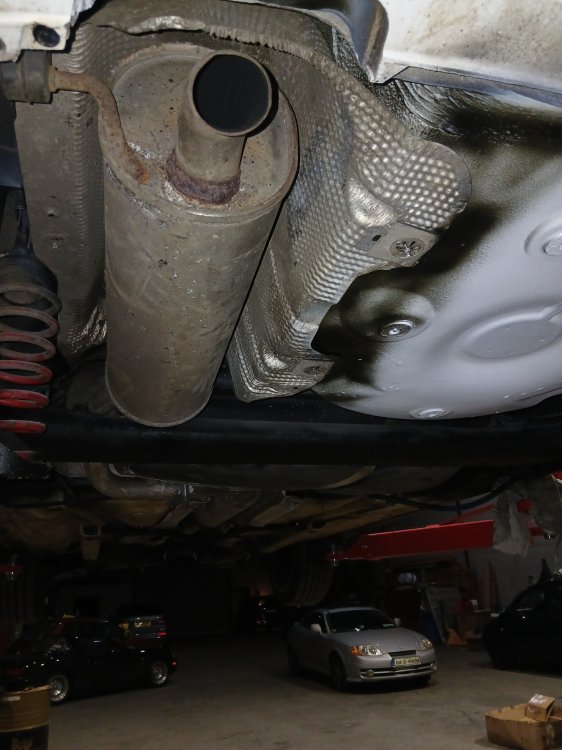
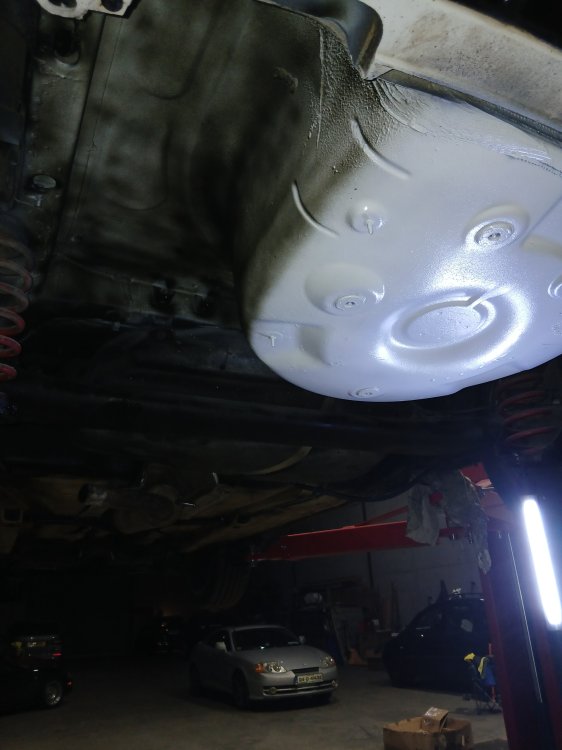
All finished off gloss white with wax coating on top. Car passed clean sheet this time. Normal exhaust painted and back on. New fitting kit for the rarb, painted it yet again. Fixed a few other things, cb etc, refitted brace too. Also got a few things off skoda parts, including an old irc sticker, always wanted one.

 1 point
 -
1 point
-
Have you compared the height of the car left and right front? Top mounts and bearings are often damaged or dislodged as a result of spring breakage and the remaining part's jagged edges digging into stuff.1 point
-
1 pointI would not be good to glue an ashtray in, as how were they going to empty it! Try hammering gently around the top, going all the way round several times. Thanks. AG Falco1 point
-
1 pointIt's my opinion that those advocating trying to set fire to the petrol in the oil are giving dangerous advice. OK It is possible but carries some risk for the unwary or inexperienced. It's also not conclusive. As has been said, there might be slight contamination for all sorts of reasons. If there is any sort of real problem there will almost certainly be DTC codes in the cars engine management computer which can easily be scanned. Severe over-fuelling will give rise to particulate filter blockage, soot in the exhaust and problems with the catalytic converter. All of which will be captured in DTC codes, not to mention poor fuel consumption.1 point
-
probably new egr cooler leaks too. if you bypassed egr cooler and then have no coolant drop, it aint head gasket. test old egr cooler for leaking. this not look like head or head gasket to me.1 point
-
The easiest way of determining whether its the cylinder head gasket that has failed is with a Borescope. Take out the injectors, looks at the mixture chamber and also the cylinder head. If its REALLY shiny and not full of carbon (most TDI's get fairly mucky inside the combustion camber and cylinders) then that is the first indication. Second indication is pressurisation. Pressurise the cooling system (I wish I could remember what the PSI figure should be - others might be able to help me here) and look inside the cylinder - if you see coolant weeping from top to bottom, then you know the gasket has failed. Third way - drain the oil - if it is a horrible [known as Forbidden Smoo] - a milky creamy substance, then that is also a good indicator that you have coolant in the oil.1 point
-
1 pointEither a bad seal around the tyre bead, leaking valve stem or screw/nail in tread. Leak partially re-sealing while running. Jack wheel off ground and check carefully for foreign objects in tyre. Test valve stem with saliva or soapy water for leakage.1 point
-
Fought my nemesis again this afternoon. Pulled a new wire through from plug under tailgate trim right back to plug behind trim on the left of the boot. Seemed much easier to navigate the route this time. To get through the rubber gaiter I taped the wire to a plastic chopstick, removed the rubber from the bodywork both ends and pushed it through. Lights now working well. Just waiting for the AliExpress super bright ones to be delivered.1 point
-
Latest Updated Speedcams - January, 2026. Here goes - my first upload for this year. Once again here's the latest update of my customised version of EUR Speedcams ( January, 2026 ). They consist of the full EUROPE speed cameras which I've split up into four consolidated poi categories i.e. Redlight Speedcams, Fixed Speedcams , Average Speedcams ( which also include European tunnel speedcams ) and Variable Speedcams. They come supplied with my own preferred personal choice of icons, shown below, to match each of the speedcam categories. Remember to Install them as I explained in the first post in this thread i.e. after extracting the zip file remember to open the newly extracted folder and place only the PersonalPOI folder and metainfo2.txt file onto your sd card ( Please Note: a usb stick will not work! ). Also, please remember to select/tick the relevant newly added poi categories and the poi audible warning alert in your infotainment map menu settings after performing the update or they will not display on your map or audibly alert you. Hope you all enjoy them! EUR Speedcams - January, 2026.zip * Credit to jungblume2005 from Gpsurl for sharing his files which I borrowed and then converted in order to make this compilation.


 1 point
 -
1 pointIn my case i have disconected for 30 minutes the 12V Battery and the problem has been solved since...1 point
-
1 pointI contacted Skoda support and tried various different approaches to no avail, the 'Globus' on the main screen was always greyed out. After the third email from Skoda support, they said they had done a few tweaks their end and to do a factory reset one more time. Tried again, the 'Globus' this time turned white, and then managed to connect and everything now working perfectly.1 point
-
Just a small point re the OP. A production date 2025 vehicle is very different from a 2020 because of the Legislation the manufacturers had to comply with from 2024.1 point
-
1 pointInformation for anyone whose interested in DIY'ing their own brakes, I guess these cars are still quite new. Applies to All Superb MK3 (3V) MQB Chassis Might I recommend Parts in Motion (Great Service, They Check your Compatibility and Offer Free Returns, Often Next Day) https://www.partsinmotion.co.uk/ I have a 65 Plate (Now wearing a vanity plate) registered early 2016, my vehicle is a 1.6TDI 120PS, Manual, Hatchback. I went for Juratek Discs with Blueprint Pads. Disclaimer - For Information only, I am not responsible for damage to yourselves or your cars. The Fronts - Chock Rear Wheels Apply Parking Brake Ensure you are on a level piece of ground ideally concrete that will support the jack safely. Position Jack Under the Correct Point on the sill (Note there's an embossed arrow, the jacking point is obvious, use jack pad if you wish to protect the underseal) Do not jack up yet Remove plastic caps over wheel bolts (There plastic tool in your spare wheel kit for this) Ensure you have the locking wheel nut key at this point. Use a 17mm deep socket and a breaker bar to crack loose all wheel bolts including security bolt. Jack the vehicle until the wheel will spin freely (providing not a DSG in park) or until you can safely place under an axle stand (I put this under the subframe) Behind the Front Control Arm Bushes. Remove 17mm wheel bolts completely. Remove tyre, can be tricky if rusted onto the hub (use a rubber mallet if necessary on the back of the wheel) Safely stow tyre rim side up so as not scratch it and so it isn't a trip hazard. Remove the T25/T30 Torx retaining screw from the brake disc. Use a pair of vise grips of similar to prevent the nut on the end of the slider boot from spinning. Undo 2x 13mm bolts from the caliper carrier (There should be replacement bolts with your new pads dependent on the brand you bought, you can reuse with Loctite re-applied) Remove the caliper and hook safely out of the way, I found on the top of the shock was a good temporary mount (pay attention not to twist the brake hose etc) Remove existing pads using a flat bladed screwdriver, note the orientation, the pad is chamfered on the bottom to go with the contours of the brake disc. If you put the pads in the carrier the wrong way, They will catch the brake disc. Note that the little tab on the pads needs to be compressed and go within the carrier not be forced so it is bent and on the outside of the carrier. For the front you need to remove two 21mm bolts for the caliper mounting bracket these are tight (use a suitably sized breaker bar and a lump hammer if required) there is debate as to whether these should be reused as with all VW bolts, I reused mine with thread lock applied. (Someone to add correct torque settings) Once the mounting brakes is removed you can now remove the brake disc, dependent on levels of corrosion it may need rotating whilst you tap the rear with a mallet. Take care not to distort the metal dust cover. Whilst the caliper mounting bracket is off the car, thoroughly clean it of any debris and dirt, ensure that the area where the pads sit is free from corrosion etc using sandpaper, a dremel etc. Ensure the hub is also clean, I put a smear of copper grease on the hub to ensure easier disassembly in future. Remove the rubber slide boots and clean out with brake cleaner, wipe any old grease off and replace with red rubber grease or similar, do not use copperslip etc on slider pins and it will increase wear and swell the rubber boots. Thoroughly clean your new brake disc with brake cleaner, some makes have machining oil etc on them. Install new brake disc and replace T30 retaining screw. Replace Caliper Mounting Bracket 2 x 22mm bolts (can be tricky to line up, careful not to cross thread) Install new brake pads. Note the driver side is the one with the wear sensor if fitted, the passenger side does not have this. The wear sensor simply unplugs and should be fitted to your new pads as necessary. Ensure that you compress the metal retaining pin when you install the pads, make sure it doesn't bend out and ensure the pads follow the curvature of the disc, they can be made to go in the wrong way, which will catch the inside of your new disc and score it. Use a brake rewind tool to push back the piston on your brake caliper (standard right hand thread tool works for both front and back calipers) Note there is no need to open the bleed nipple. It is good practice to open the bonnet and extract some fluid from the brake res so it doesn't overflow. Install caliper and new 13mm bolts or reuse with Loctite (as applicable) Refit road wheel, remove axle stand, slowly let down jack, torque wheel bolts, replace plastic caps. Repeat for the other side, when satisfied, depress the brake pedal to ensure the caliper piston is hard against the pads. The rears - For this I used OBDeleven (There is a manual way involving, releasing the handbrake and removing the motor from the epb, I have not tried this) First chock the front wheels and put the car into gear/park (as applicable) Use OBDeleven, connect to the car go into Brakes/ABS Module, Basic Settings, Then run "brake lining change" the motors in the electronic handbrake will whir for a few seconds, then the dashboard will light up with ESP and ABS Faults. People state to connect a battery charger to maintain the battery I did not do this and it was okay as the job was quick. I kept the ignition in the accessory position with the ODBeleven connected Safely Jack the vehicle and support using a axle stand and then remove rear wheels as discussed. Remove T25/T30 Brake Disc Retaining Screw (Reuse) Remove two rubber dust caps from rear of caliper to expose two slider pins. Use a T45 or Appropriate Allen Key to remove the slider pin from the caliper, these are different from the fronts, you remove the whole tubular slider pin Remove caliper and support as appropriate (take care not to strain or twist the brake hose) The caliper simply pushes back as per the front calipers once the brake lining change command has happened. Remove the existing brake pads (note that there is a pad with a spring and a pad without a spring, the pad with the spring goes at the back (away from you), the pad without the spring goes at the front (nearest exterior of the car) I did not need to remove the caliper mount in order to remove the rear discs, the simply moved out of the way being a thin solid disc unlike the vented ones on the front. If you want to remove this you need a special M14 ZXN Type Socket. Ensure all mounting surfaces, such as the hub and pad carriers are cleaned use sandpaper, a dremel etc to ensure there is not dirt or rust, clean backing plate etc. Apply a smear of copper grease or similar to the hub before installing the disc. Ensure discs are cleaned with brake cleaner/alcohol of all grease and oils. Install disc and retaining bolt (t25/t30) Install Pads into carrier (spring one at the back) Ensure slider pins are clean, use sandpaper, apply red rubber grease. Reinstall caliper Ensure that rubber dust plugs are installed once slider pins are tighten. Refit wheels Pump the brake pedal to push calipers back out OBDEleven back in ABS/Braking Module, Basic Settings, "brake lining end" the motors will whir to close up the rear calipers. Test Drive Upon first use of the brakes there will be little braking effort, this is due to them needing to bed in. Essentially there needs to be a uniform amount of brake material applied to the surface of the disc to produce better adhesion and friction. Find a empty road. Warm up the brakes essentially, drive at 40mph and brake down to 10mph, repeat this 10 times with 30 seconds in between, do not stop. Stopping causes hot spots on the disc and uneven pad material transfer (This is what people mistake for warped discs) Repeat from 60mph to 10-20mph 5 times. Drive the car normally until a safe place to stop, when you exit the vehicle you should hear the metal tinkering of the brakes being hot, place the back of your hands near a wheel and you should feel the heat. Leave the car to cool down preferably overnight. Drive carefully for the first 100-200 miles, avoiding emergency/hard braking. You will gradually feel the brakes get better and better. Note, I do not put copper grease or any other grease on the rear or sides of brake pads. The only place any grease goes is on the slider pins and between the rear of the disc and the hub. Putting coppergrease on pads, just attracts brakedusts. Good pads will always have shims etc that will stop rattling and squealing, IMO no coppergrease is needed on the pads or pad carriers of these cars. Always ensure that discs have been thoroughly wiped down before use, noting that some brakes now have a coating that is worn off on first brake, this is to prevent corrosion. always read the manufactures instructions.1 point
-
1 pointFirst and foremost, always make sure your lights are aligned correctly, some workshops seem intent on pointing them into the ground at all times and no light source will help this. I also, until recently, have used 50W HID kit in my wife's 2012 Roomster until new MOT requirements made it impossible. So, after some searching, I found OSRAM Super H7 lamps at Aliexpress (the last of the lamps shown in the ad). Note there are other sellers on Aliexpress and probably elsewhere, I'm just showing the one I repeatedly ordered from). These are smaller and slightly more powerful 65W H9 capsules put onto H7 base, and produce 2100lm instead of stock 1500lm. They are made by Osram factory in China for Asian and American markets. At ~6 quid per pair and standard longevity these are excellent bargain, though after HIDs you will find their colour a tad yellow at standard Roomster voltage of 12.5V at the lamp with the engine running. Nevertheless, even without wiring upgrade or voltage booster these produce significantly more light. On my wife's car, I also have a voltage booster and run both low and high beams at 14.5V at the lamp (with ~1.2A glow current to prevent initial switch on shock), but that requires substantially more work than just changing the bulb. I used to have the booster only on high beams for the last 8 years, so now after the HIDs went out it was just just a matter of adapting and reconnecting it for both low and high beams. Frankly, after putting the work in, I do not miss the HIDs anymore, though I did order quite a few H7 65W spare bulbs as will probably have to change them once a year, unlike the HIDs. Edit: My wife's Roomster has dual headlights, for the single headlights in early Roomsters I would probably just put in the Osram H7 Super as shown above and a fused relay and a set of chunky wires straight to the battery clamps. or a diode and a relay at each lamp, it would make for a softer start. HTH1 point
-
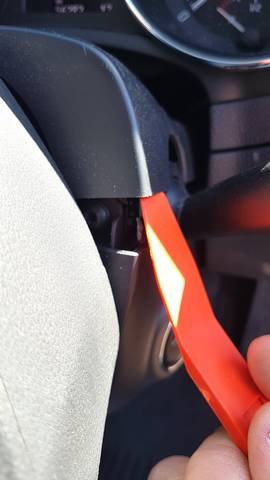
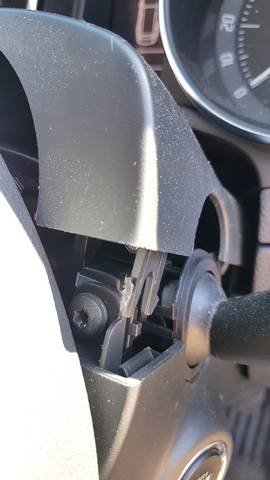
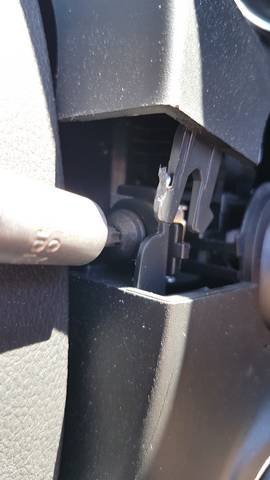
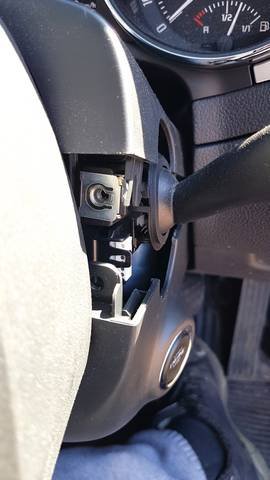
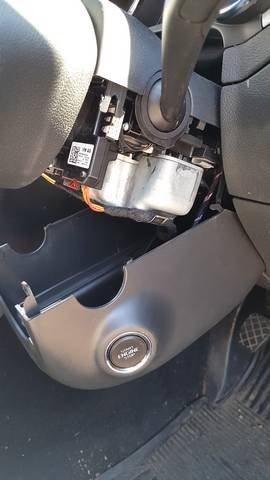
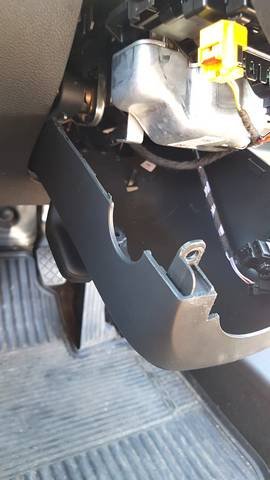
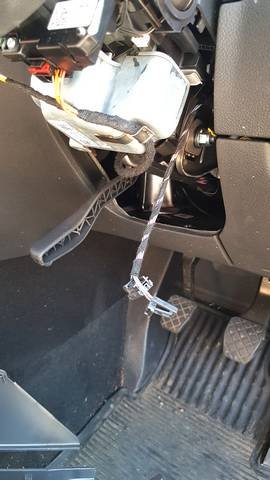
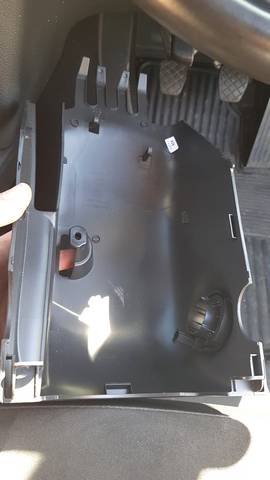
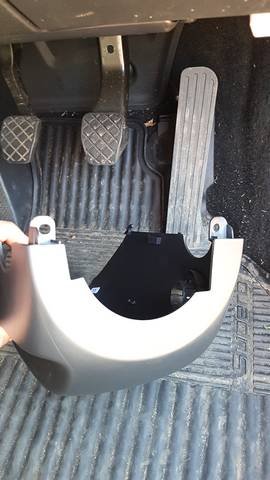
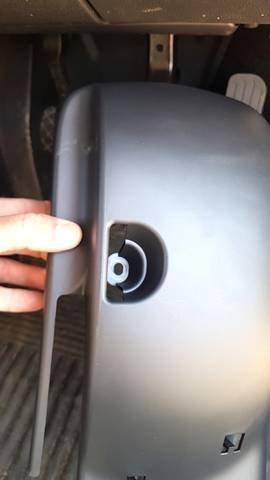
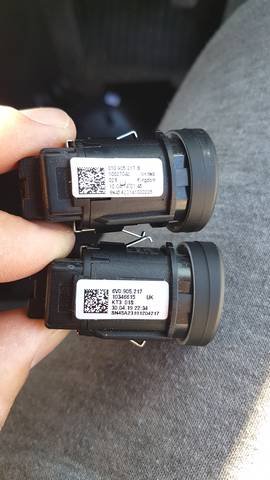
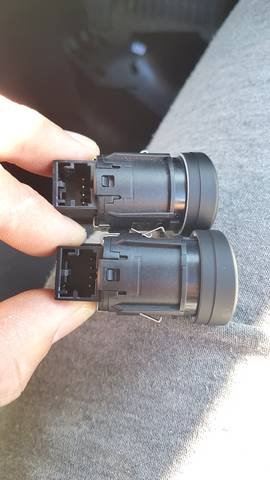
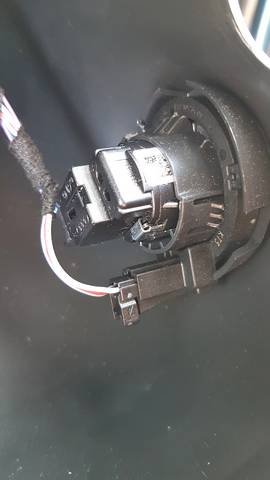
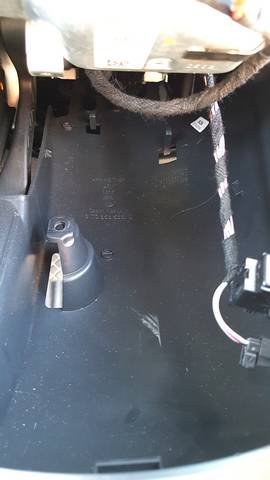
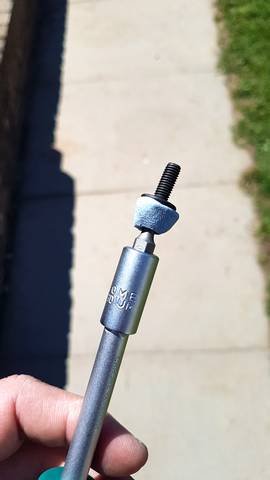
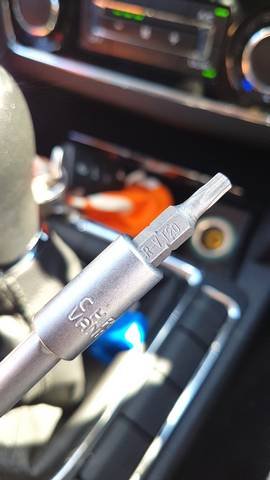
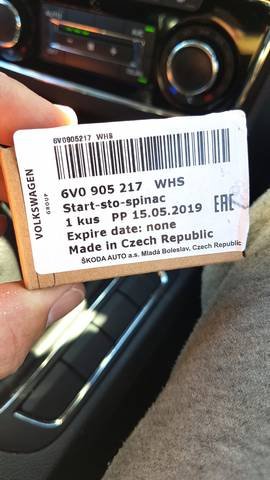
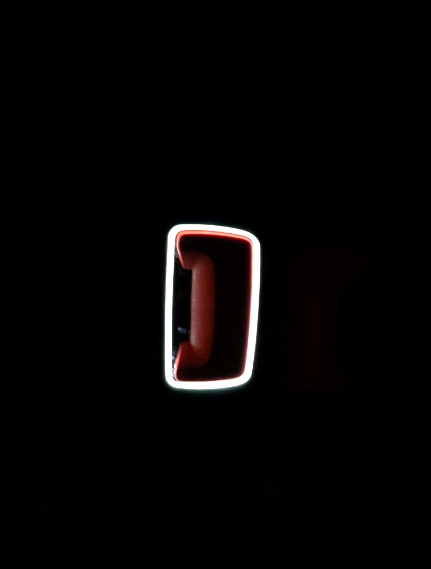
As usual things get in the road of doing jobs on the car....I finally ordered a button the week before COVID lockdown so by the time I went to collect it the dealer had shut the door...! Anyway, got the button recently and set about swapping it over. Apparently the part number had changed so the part number is 6VO 905 217 for the button I received. Pretty simple to change as other folk have said but I thought I would post up a few pics which might help others as there are a couple of other actions to consider. Popping the top trim is simple, use trim tools if you have them, and this gives access to the two screws either side of the column for the bottom trim. You will need a T20 bit for these. I was expecting the bottom trim to drop down at this stage with the understanding there were only two screws but it turns out there is a further screw right underneath. Bit of a pain to get to but it comes away no problem. I still wrestled with the bottom trim until I popped the steering column adjustment lever down and it all dropped down. Full access now available so I very carefully released but connectors to the button and reader coil. A very narrow flatblade screwdriver helps release the connectors. Study the new button and you will see where you gently release the clips on the side of the existing button, a little jiggling around and it will slide out through the reader. New button just clips back in, refit the connectors and rebuild. The screw on the underside was tricky to get back in, my driver wasn't magnetic so I used blu-tak to hold the screw on 🙂 Anyway, worked fine and the difference is night and day when pushing the button. I have kept the old button as I believe some folk have cleaned them with contact cleaner so might give that a go to have a spare available. Hope that is of interest.... A saving of approx £80 on dealer charges....! New button highlighted red.

 1 point


.thumb.jpg.06721e8c8b33ed0eea16572ff131b291.jpg)