Leaderboard
-
MikeTheThinker
FREEDOM12Points8,509Posts -
Graham Butcher
FREEDOM11Points6,645Posts -
Lady Elanore
FREEDOM9Points24,912Posts -

mac11irl
FREEDOM8Points16,703Posts


Popular Content
Showing content with the highest reputation on 03/11/25 in all areas
-
3 points@Graham Butcher Please stop banging on about ice cubes in a glass as being an accurate analogy for melting sea ice. It’s been debunked a hundred times by actual scientists. If you want to find reliable information you just need to look for peer reviewed science papers and journals. Why? Because the peer review process is what weeds out crap studies and shady practices like P-Hacking. Some lad making YouTube videos in his kitchen is probably not getting his content peer reviewed or fact checked before uploading. AntarcticGlaciers.orgWhat is the global volume of land ice and how is it chang...Most (99.5%) of the permanent ice in the world is locked up in ice sheets and glaciers. The Antarctic Ice Sheet is the largest store of frozen freshwater; it would raise sea levels by 58.3 m on ful...Link above shows that nearly 10% of the world’s surface area is covered just by the Greenland and Antarctic ice sheets. And they are well over 500m thick in parts. So spread that out across the total earths surface in a full melt and basic maths - 50m rise in water level ignoring existing land mass area just putting the depth of ice as water everywhere. I’m not sending you this stuff as a PM, not to join in the public personal attacks that I’ve been asking everyone to stop but because I think it’s important for everyone to see this and realise what I’m trying to get across. The amount of terrible science that gets reported on as fact without proper review or replication of results is infuriating. And pseudoscience lives in the crap experimentation. Here’s a good place to start learning how much junk science is out there - https://www.skepdic.com/ All compiled by actual scientists, experts in the fields who use the scientific method in their work and researchers who examine actual evidence not just hearsay etc to find answers.3 points
-
Škoda StoryboardAn electric car in winter. Practical advice from driver a...How to extend the range of an electric car in winter, increase comfort and preserve its battery life? We bring you tips from the best experts - an experienced user and an engineer who develops elec...The experienced driver is a Briskoda member.2 points
-
2 pointsHopefully NASA are reliable source... https://sealevel.nasa.gov/news/261/melting-ocean-ice-affects-sea-level-unlike-ice-cubes-in-a-glass/2 points
-
Think if you lock car and then manually open doors with key it should go off. It could be that the internal sensors are disabled. On mine theres a button switch on drivers door pillar. Alasdair2 points
-
1 pointAll, Getting to grips with tech, no SD card slot in the new Karoq and I don't tend to keep a lot of music on my phone. FWIW I purchased a usb-c micro flash (PNY 64gb elite x fit) that is tiny and more importantly fits beautifully in the 2nd (to the right) usb-c socket in the front console and allows the slider cover to be closed if desired. If put in the other slot it just catches on the cover - doh! Probably enough music now to drive to Oz and back. PD1 point
-
The oil temperature when the engine is at temp. 90ish Is mid 90s 96C1 point
-
You're looking for the "driving data" menu, then you can scroll through the various readings until you find "oil temp" If you don't have MFSW, then use the rocker switch on the end of the right stalk to find the "driving data" menu, then use the same switch to scroll.1 point
-
sponsored by Tena? 🤣 7500 miles between Jan and mid August (was away for most of july with no car so in reality this is 7 months of data) , total cost of public and home charging £230. That is basically just over 2 fill ups in my diesel so roughly 900 miles or so in the diesel. I call that a finanical advantage1 point
-
1 pointOn my fourth Skoda, first was a Felicia (great car with VW quality at the old Skoda price) then followed by two Fabias mk 1. My latest car is a 2016 Fabia estate1 point
-
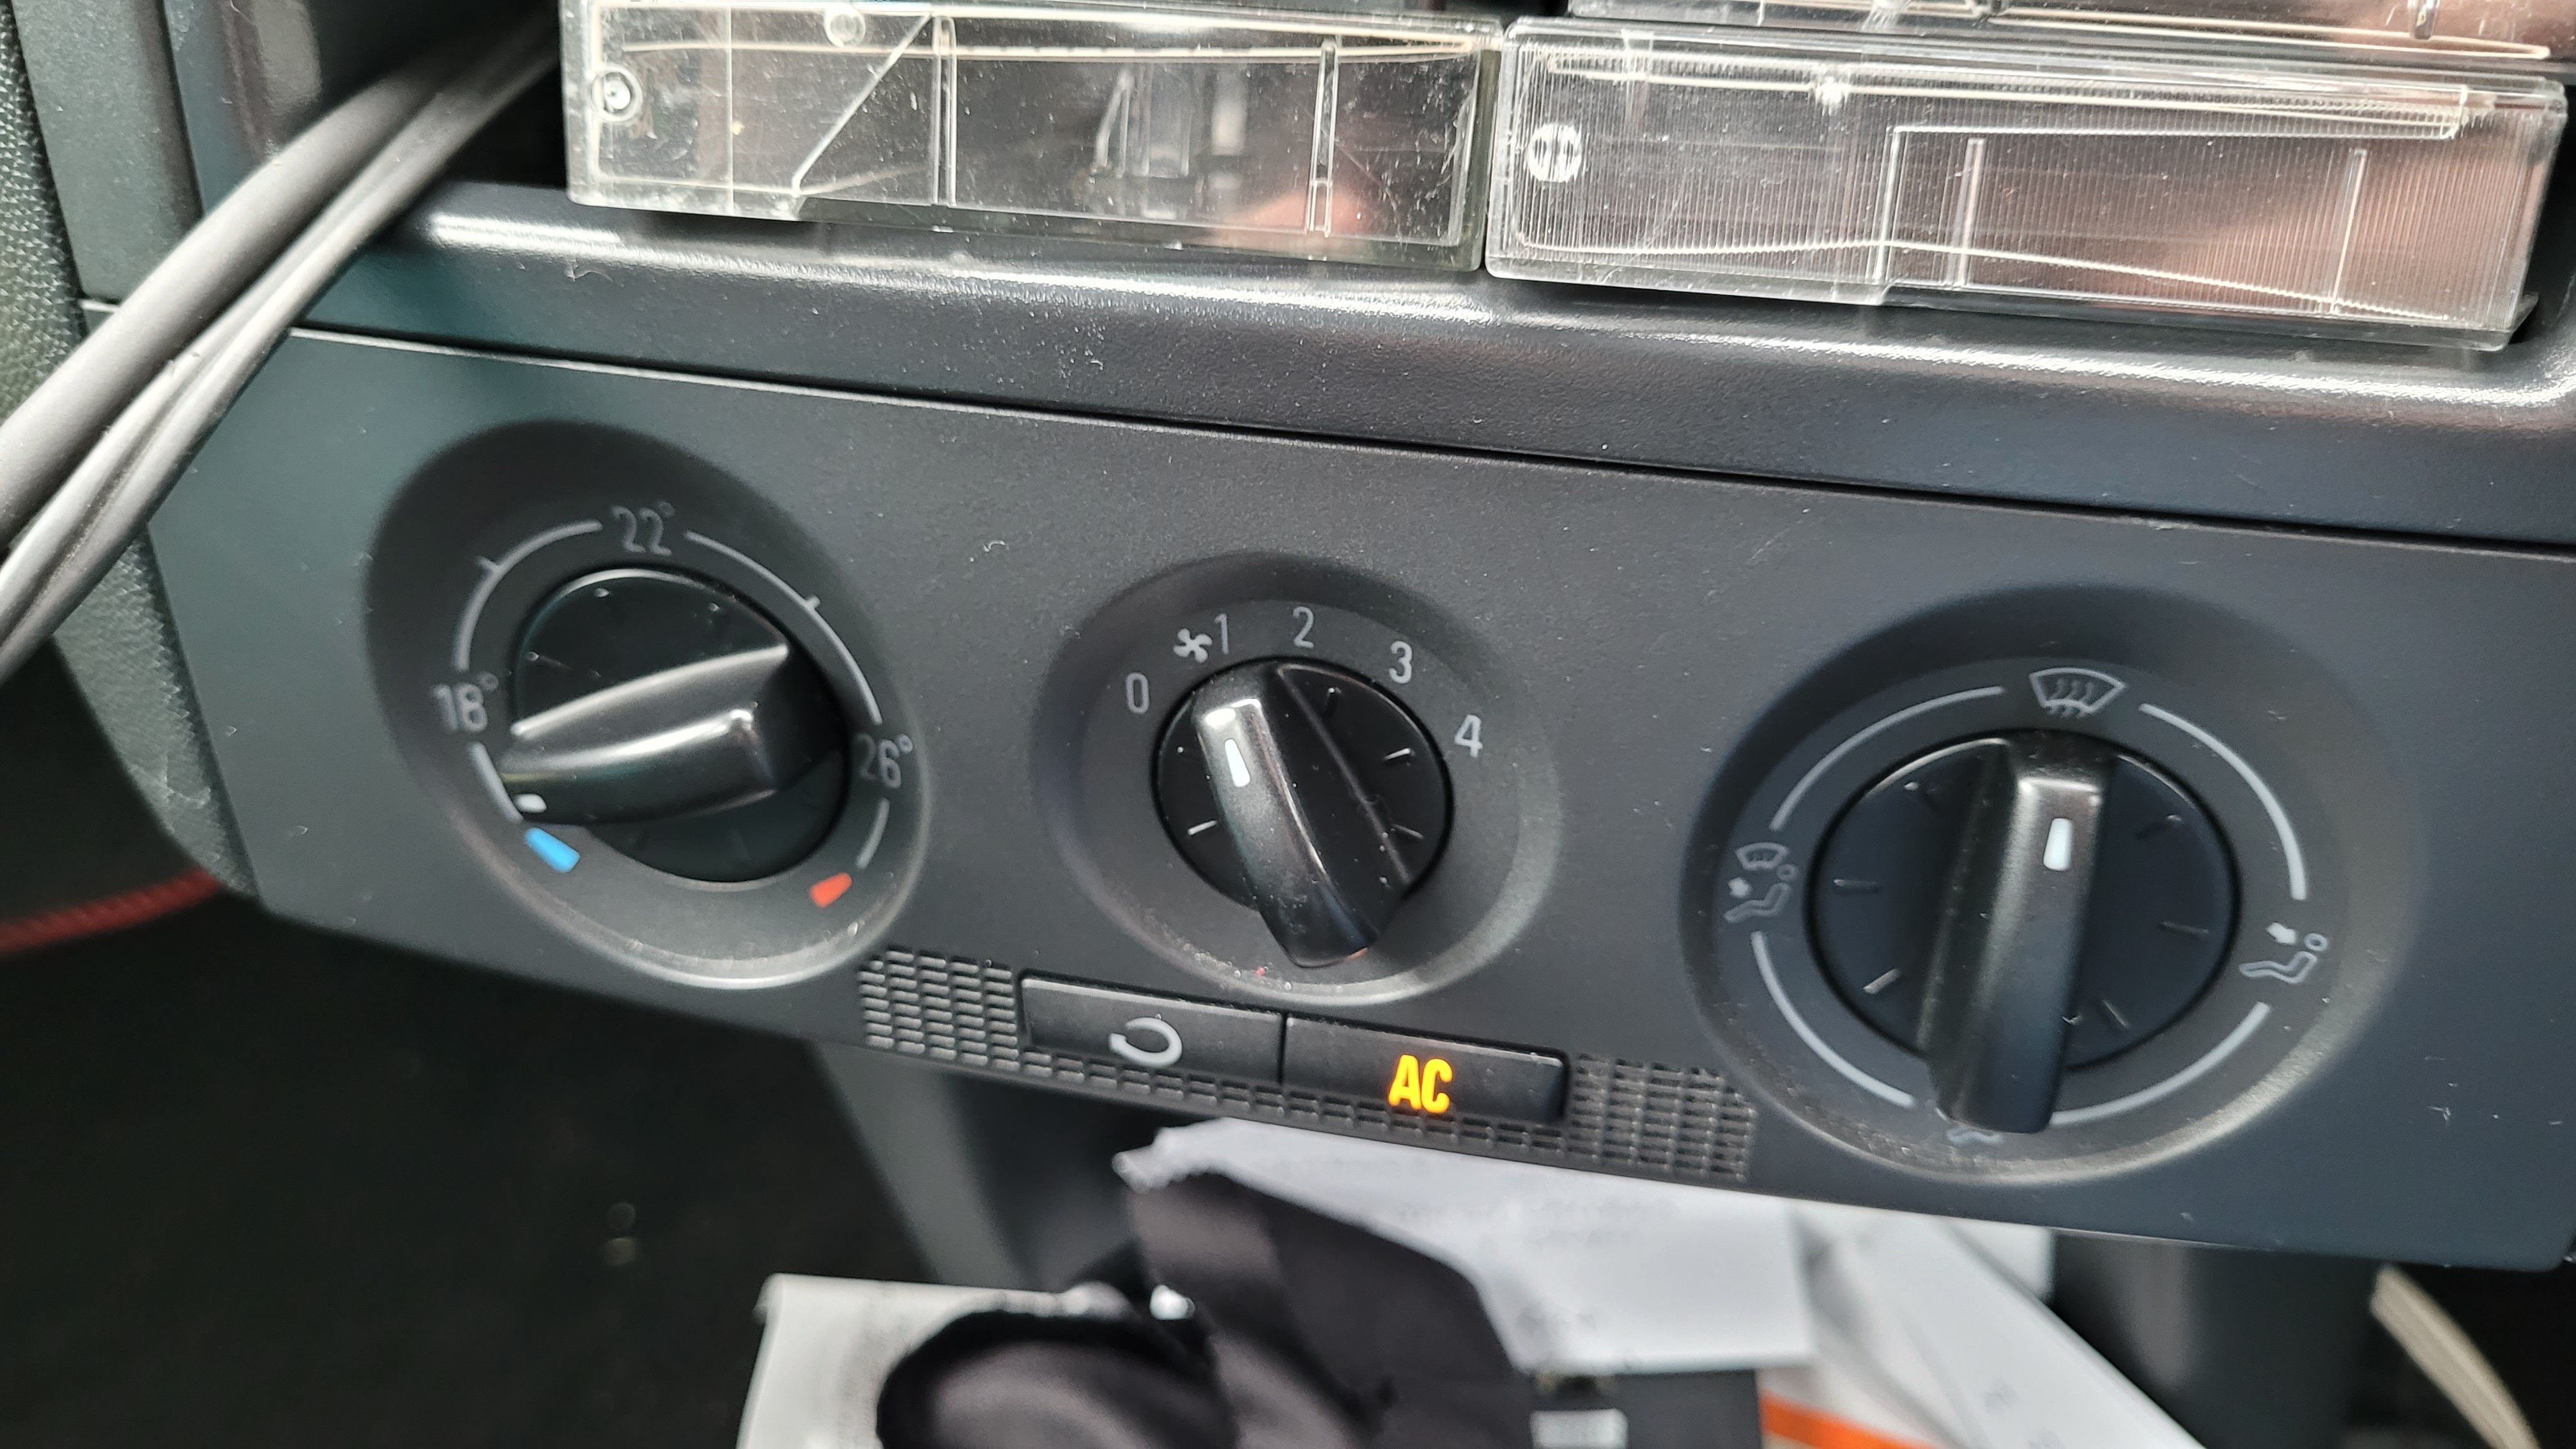
Does you vehicle have the MFSW ? - On the Mk3, oil temperature can be displayed on the Maxi-dot screen (between the two main dials) by selecting from the function menu.1 point
-
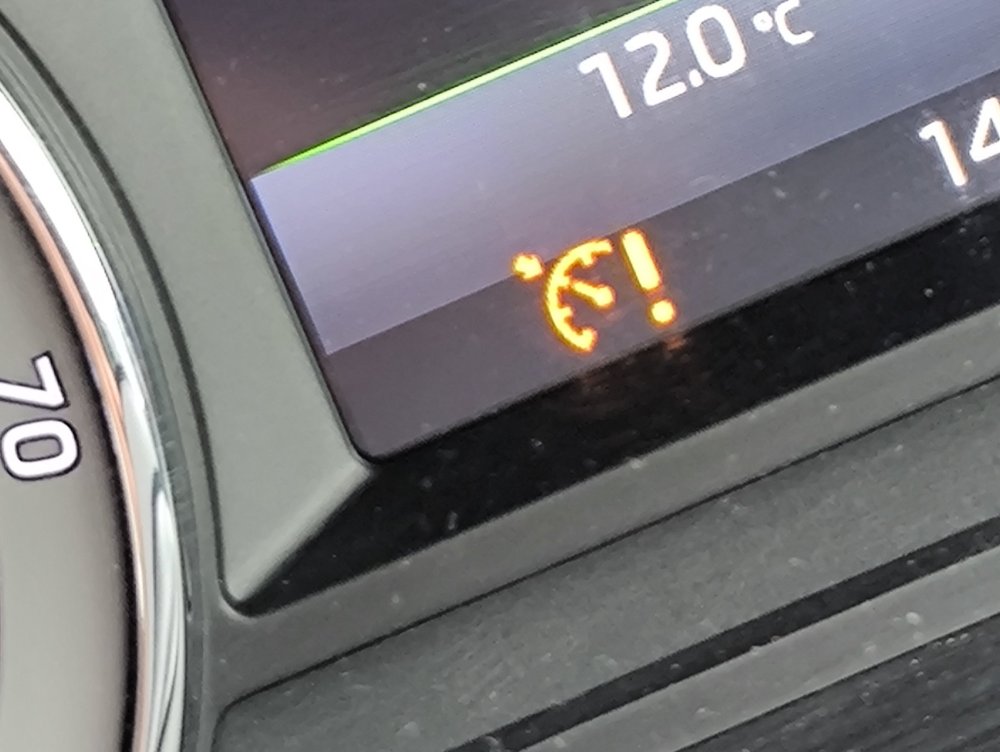
Does the temperature gauge indicate overheating when this happens? Do you monitor the oil temperature on the maxi-dot screen? Do all the fault indicator lamps show correctly during the self-test before the engine is started? You say 'Timing Chain' in part of your post - and 'Timing belt' in another, do you know which is correct? What is your engine code?1 point
-
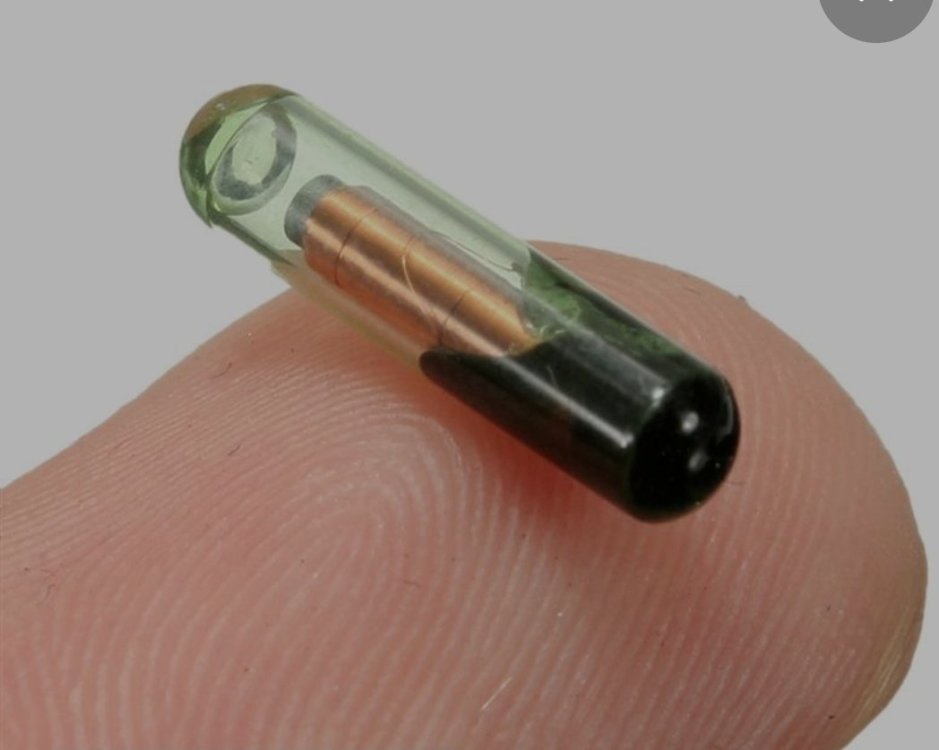
I wasn't asking what it was, I was showing you what Alasdair meant, but which you thought would be soldered to, or part of the PCB. So look for it in the fob and see whether it looks damaged or absent.1 point
-
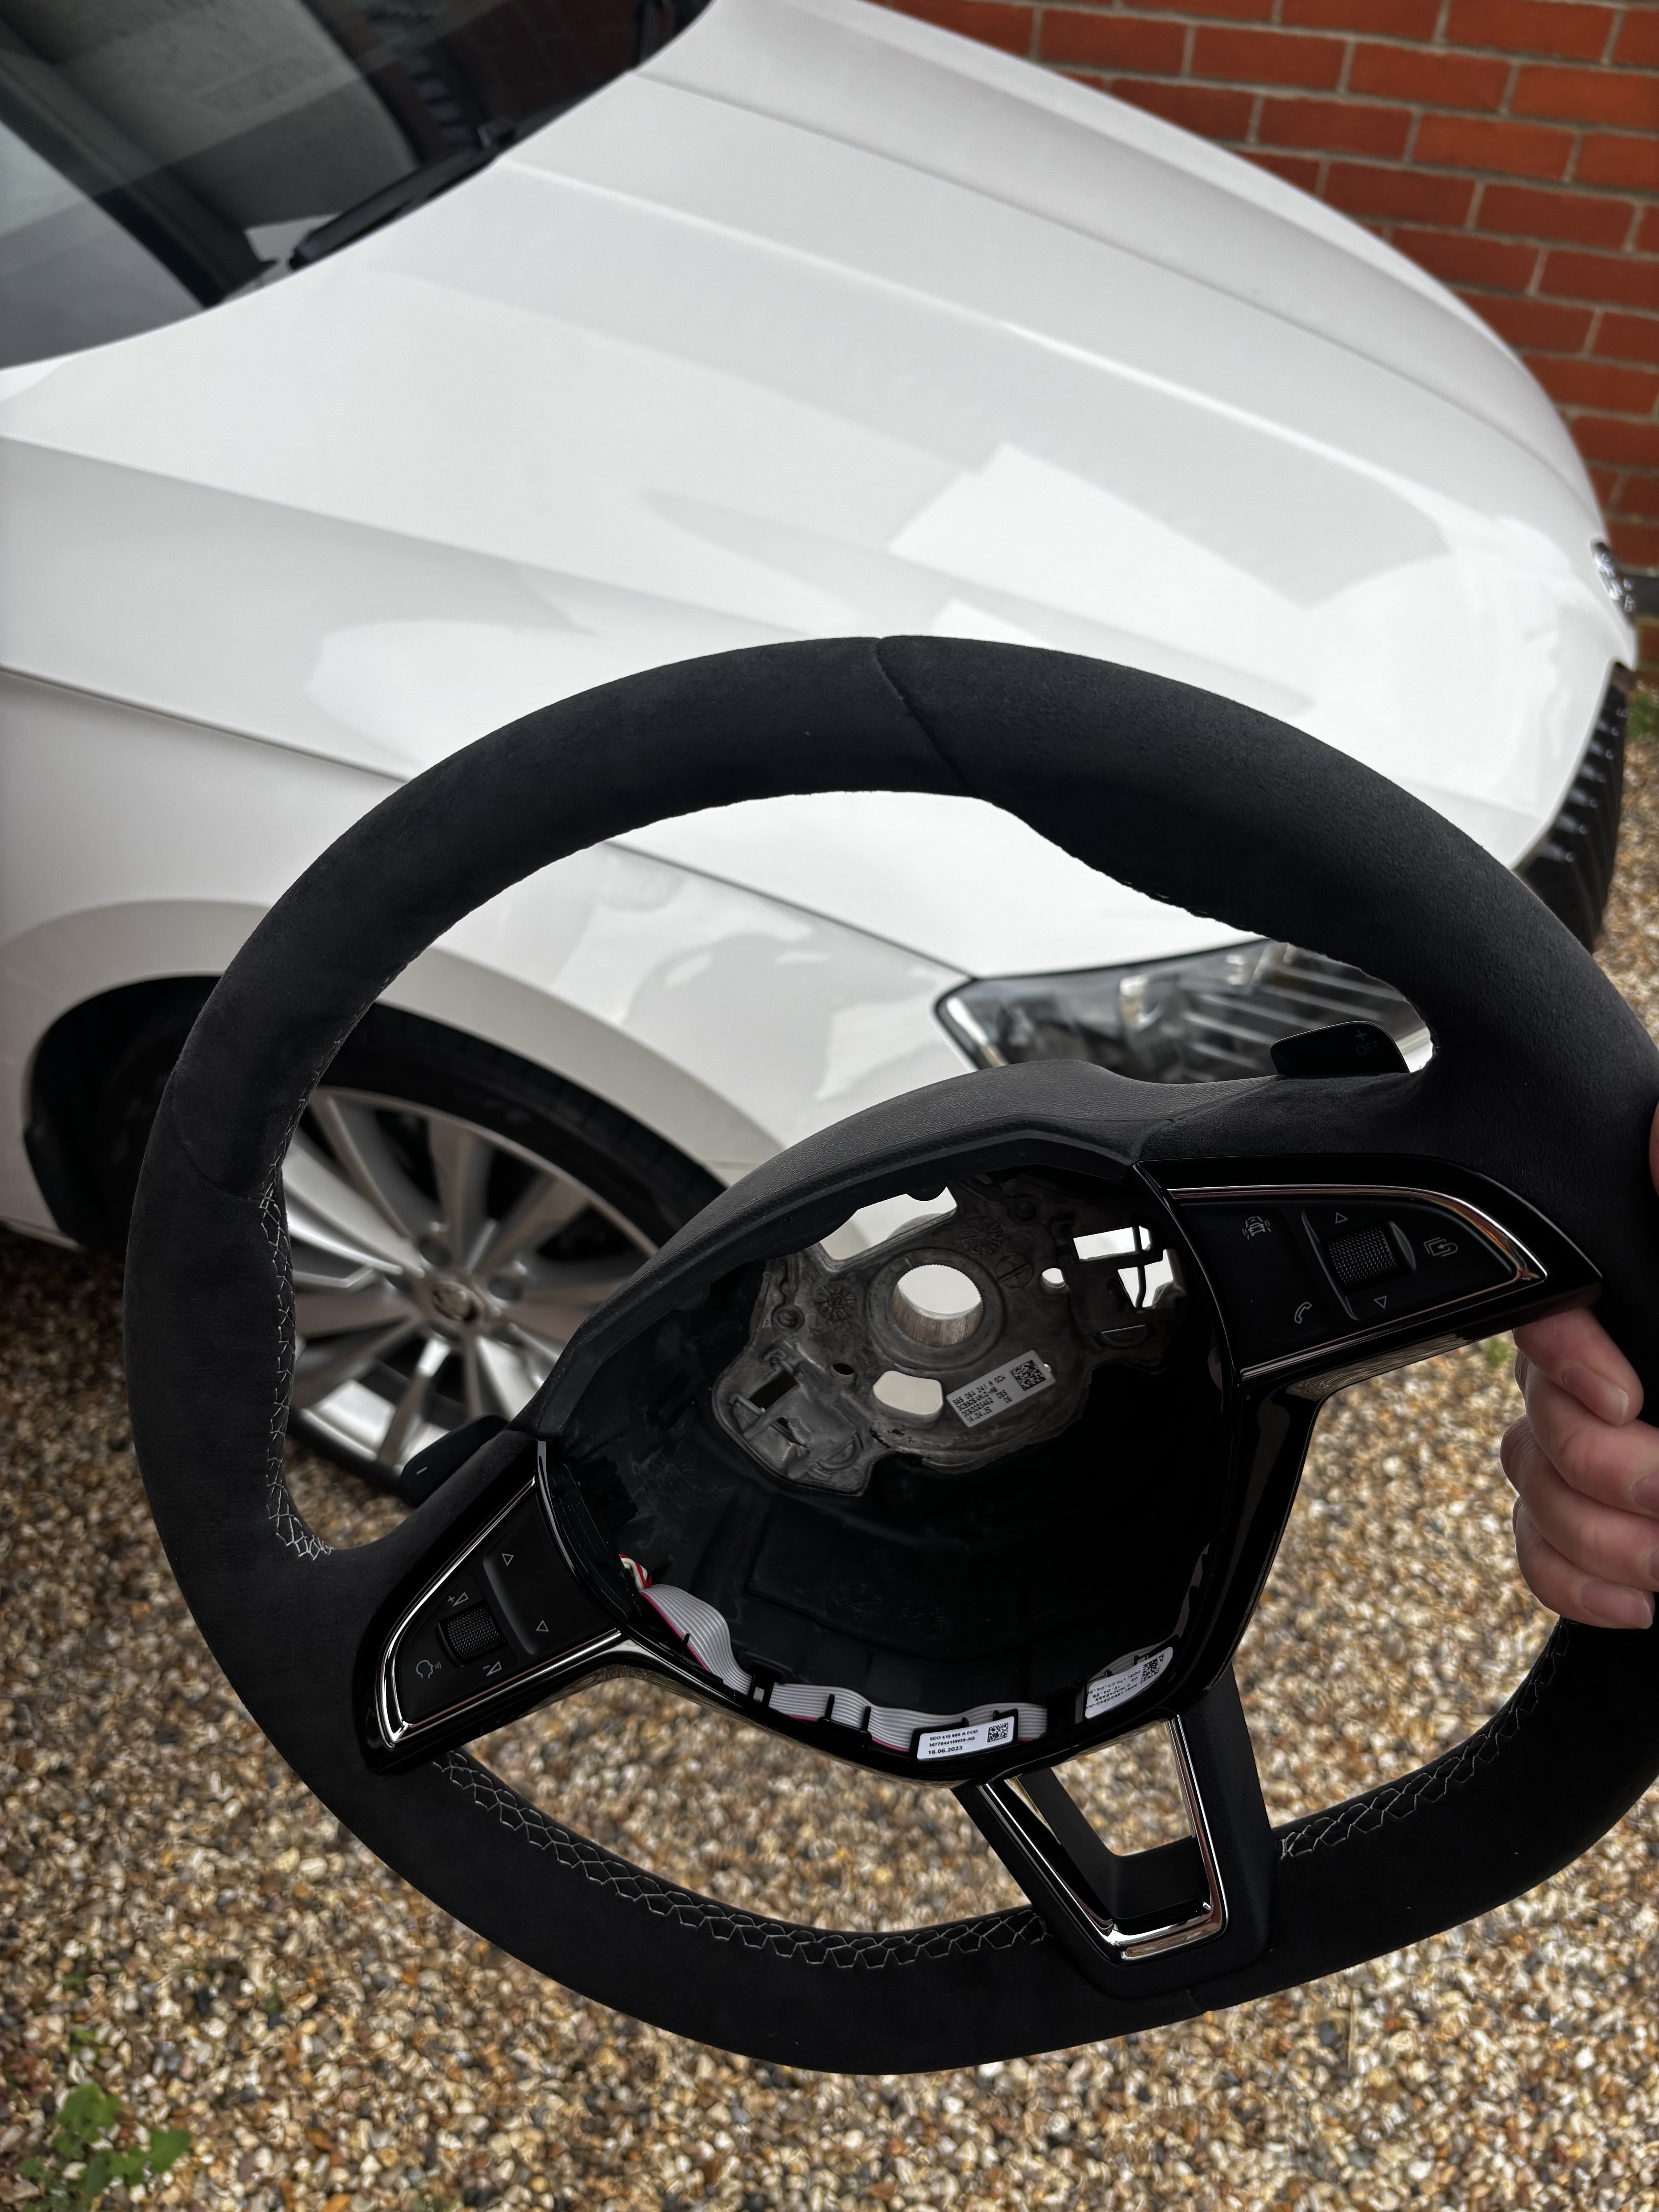
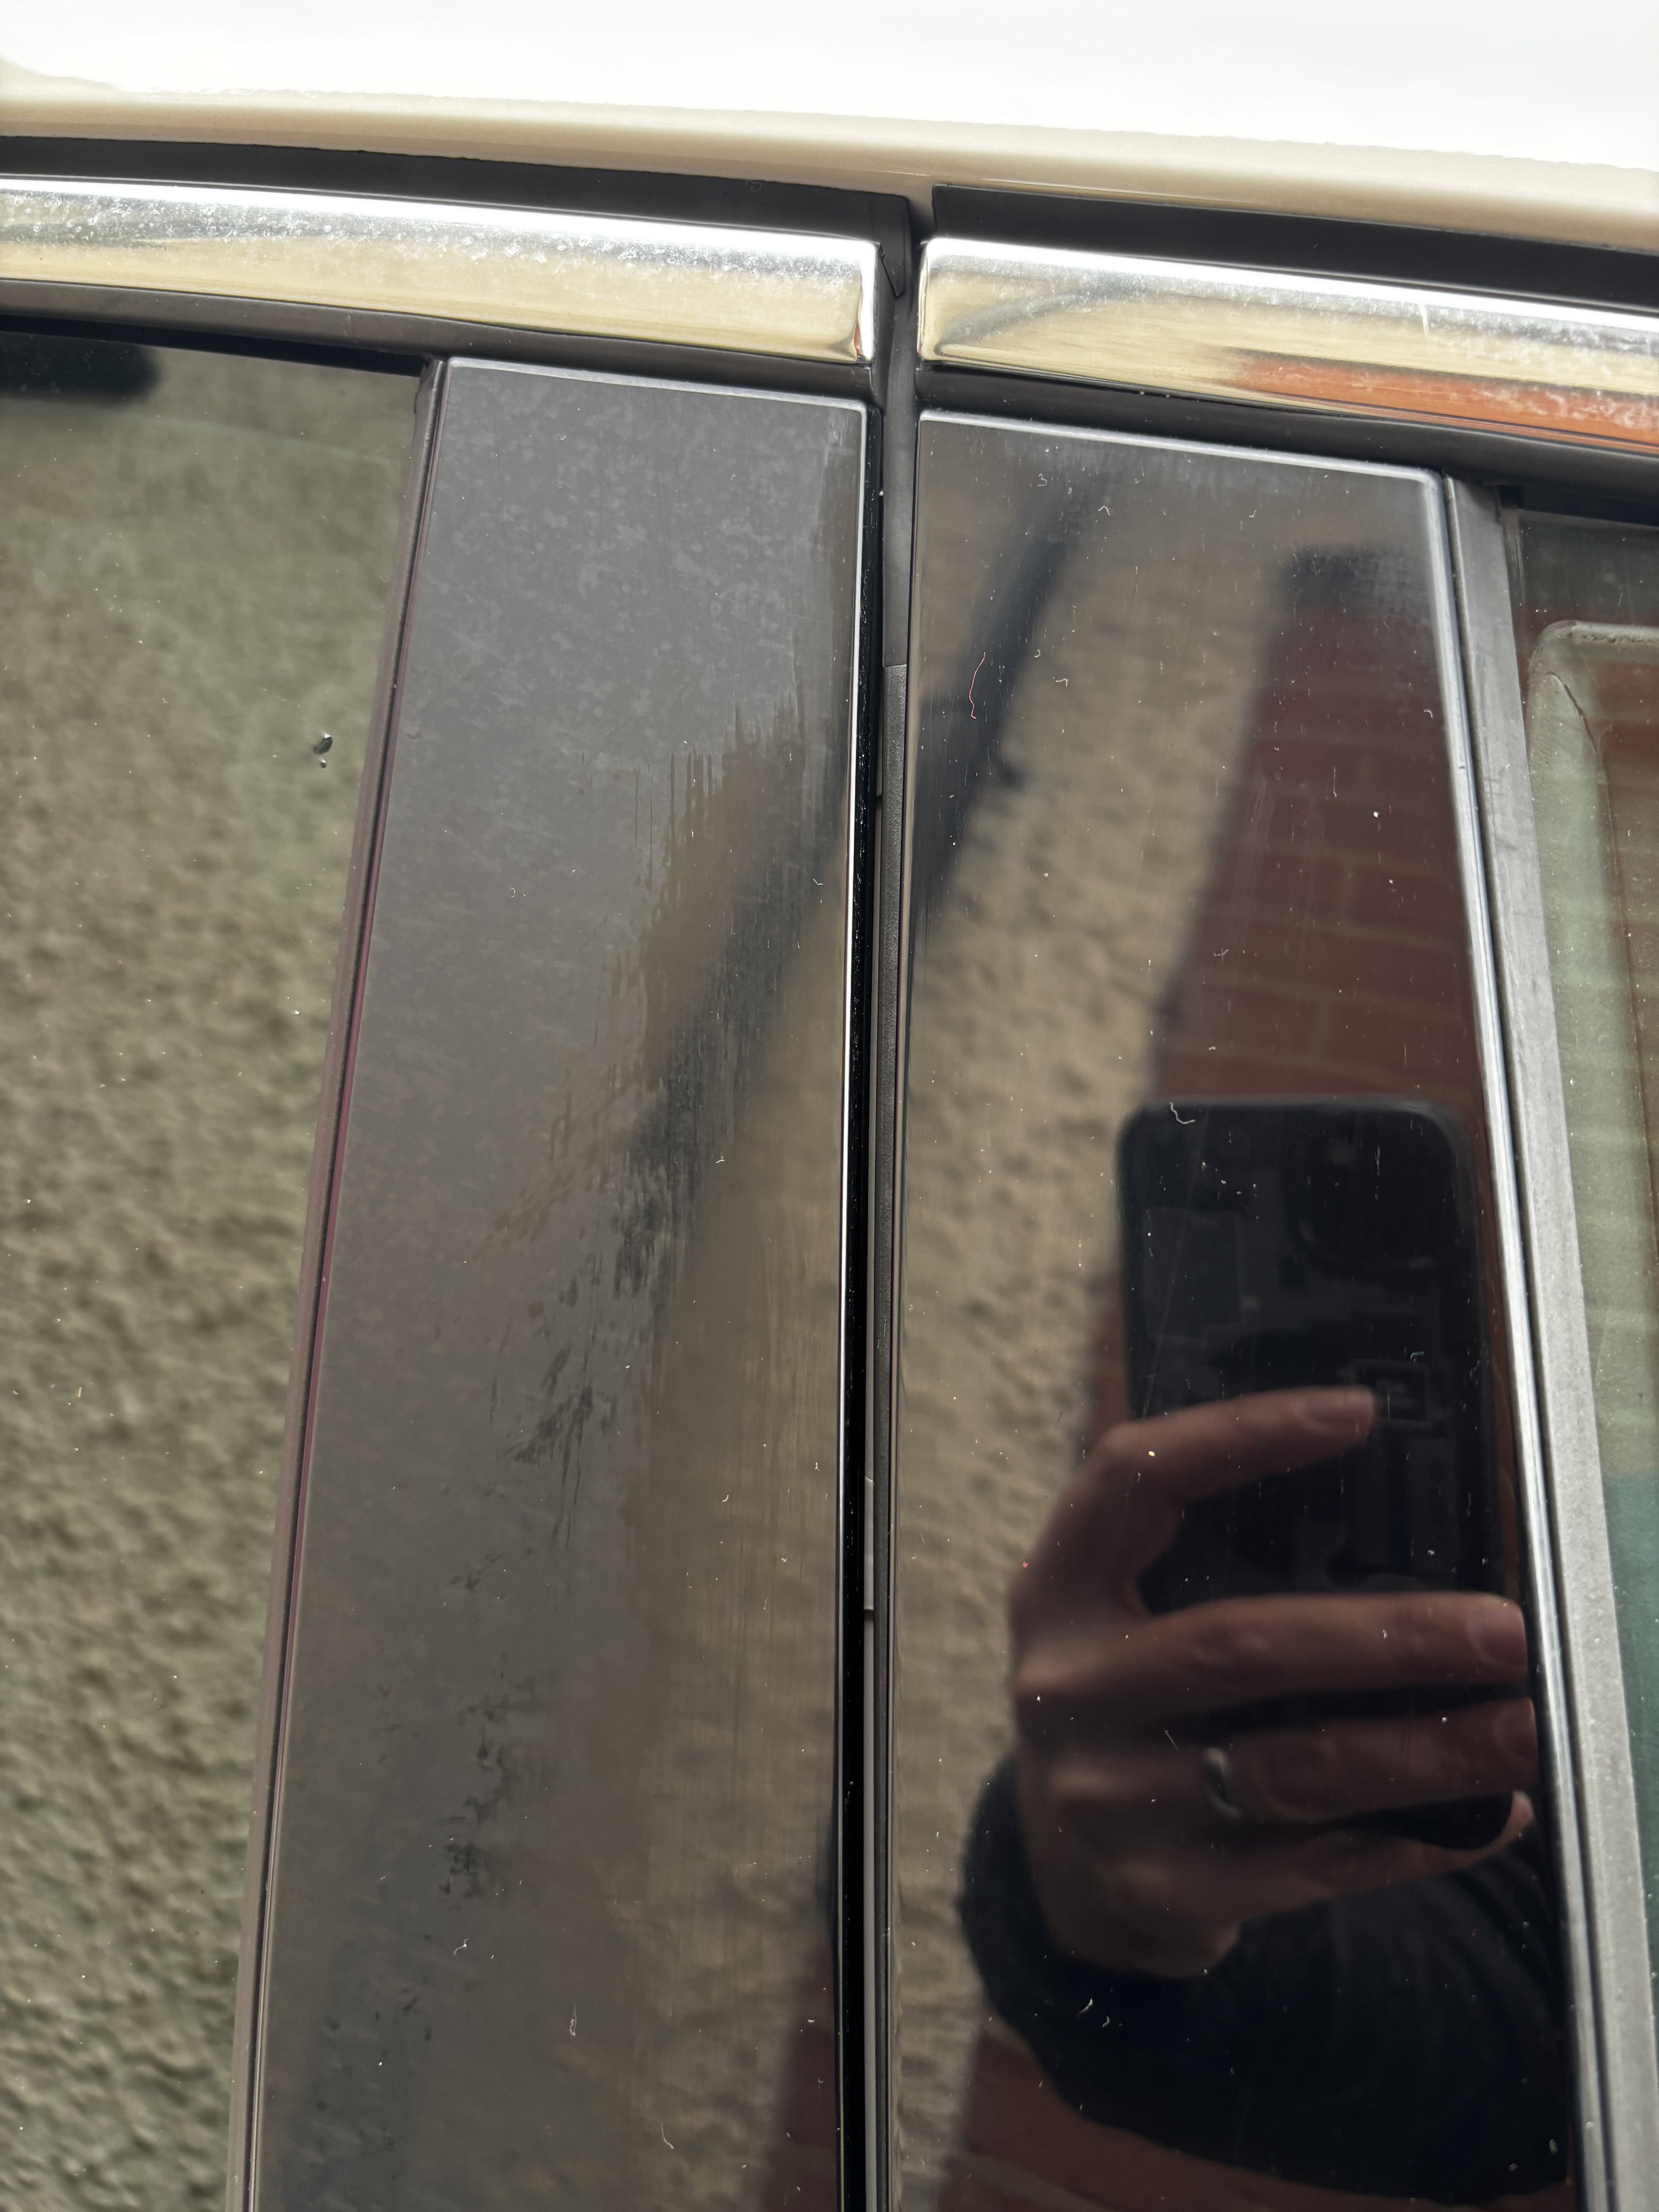
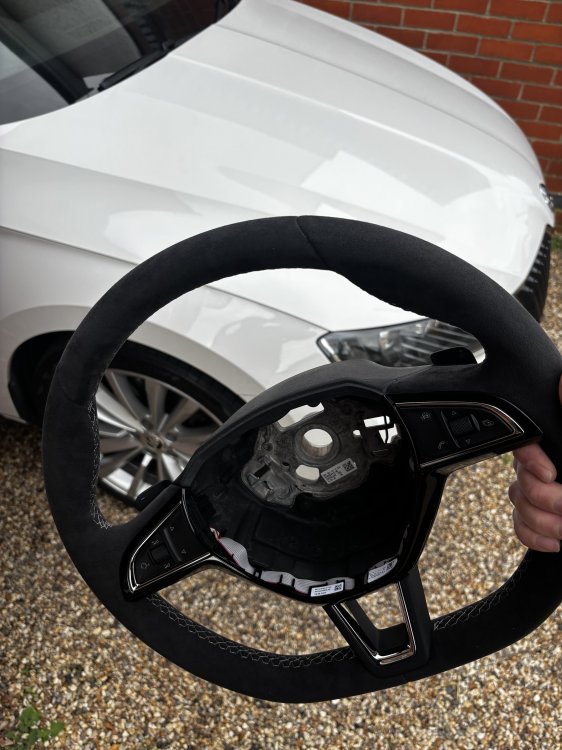
Just collected the Alcantara Steering wheel with Flat bottom and paddles from the dealership this afternoon, along with a new nut. Will fit tomorrow, was too good a price not to do it in the end. Was able to get the dull door inserts back to gloss after getting the Meguairs Compound on them, picture of half way to see what the difference was
 1 point
 -
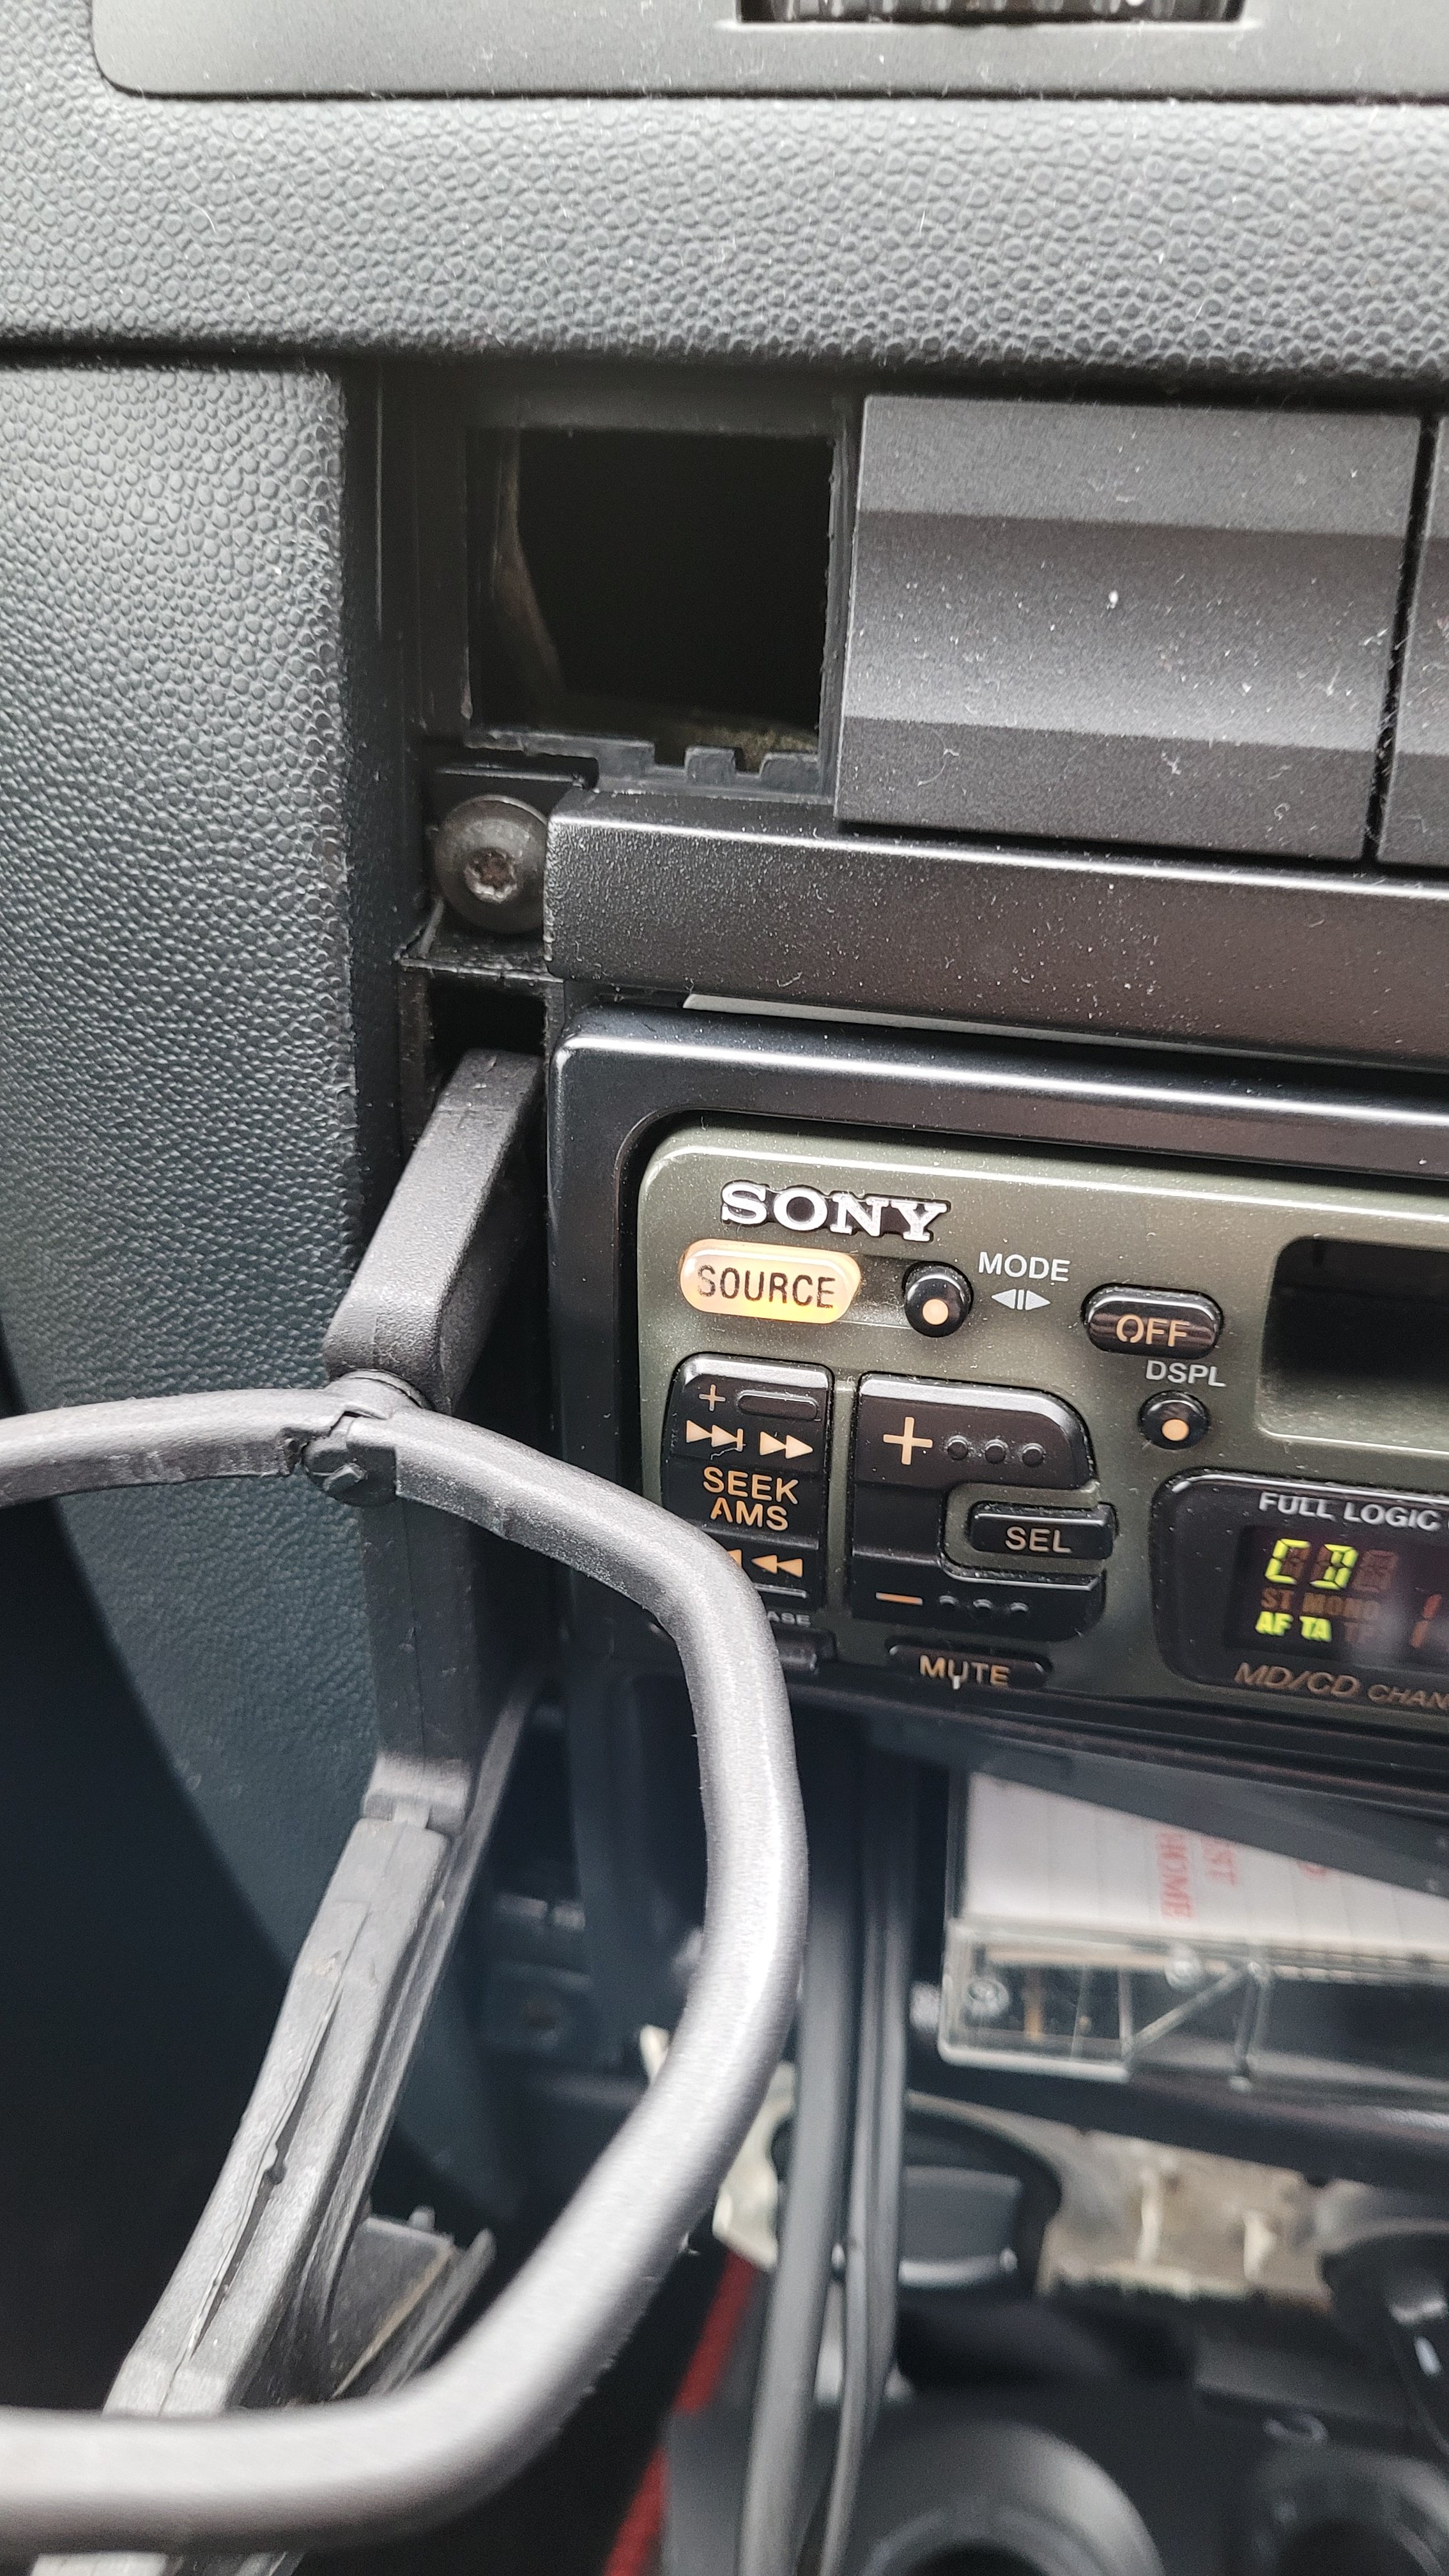
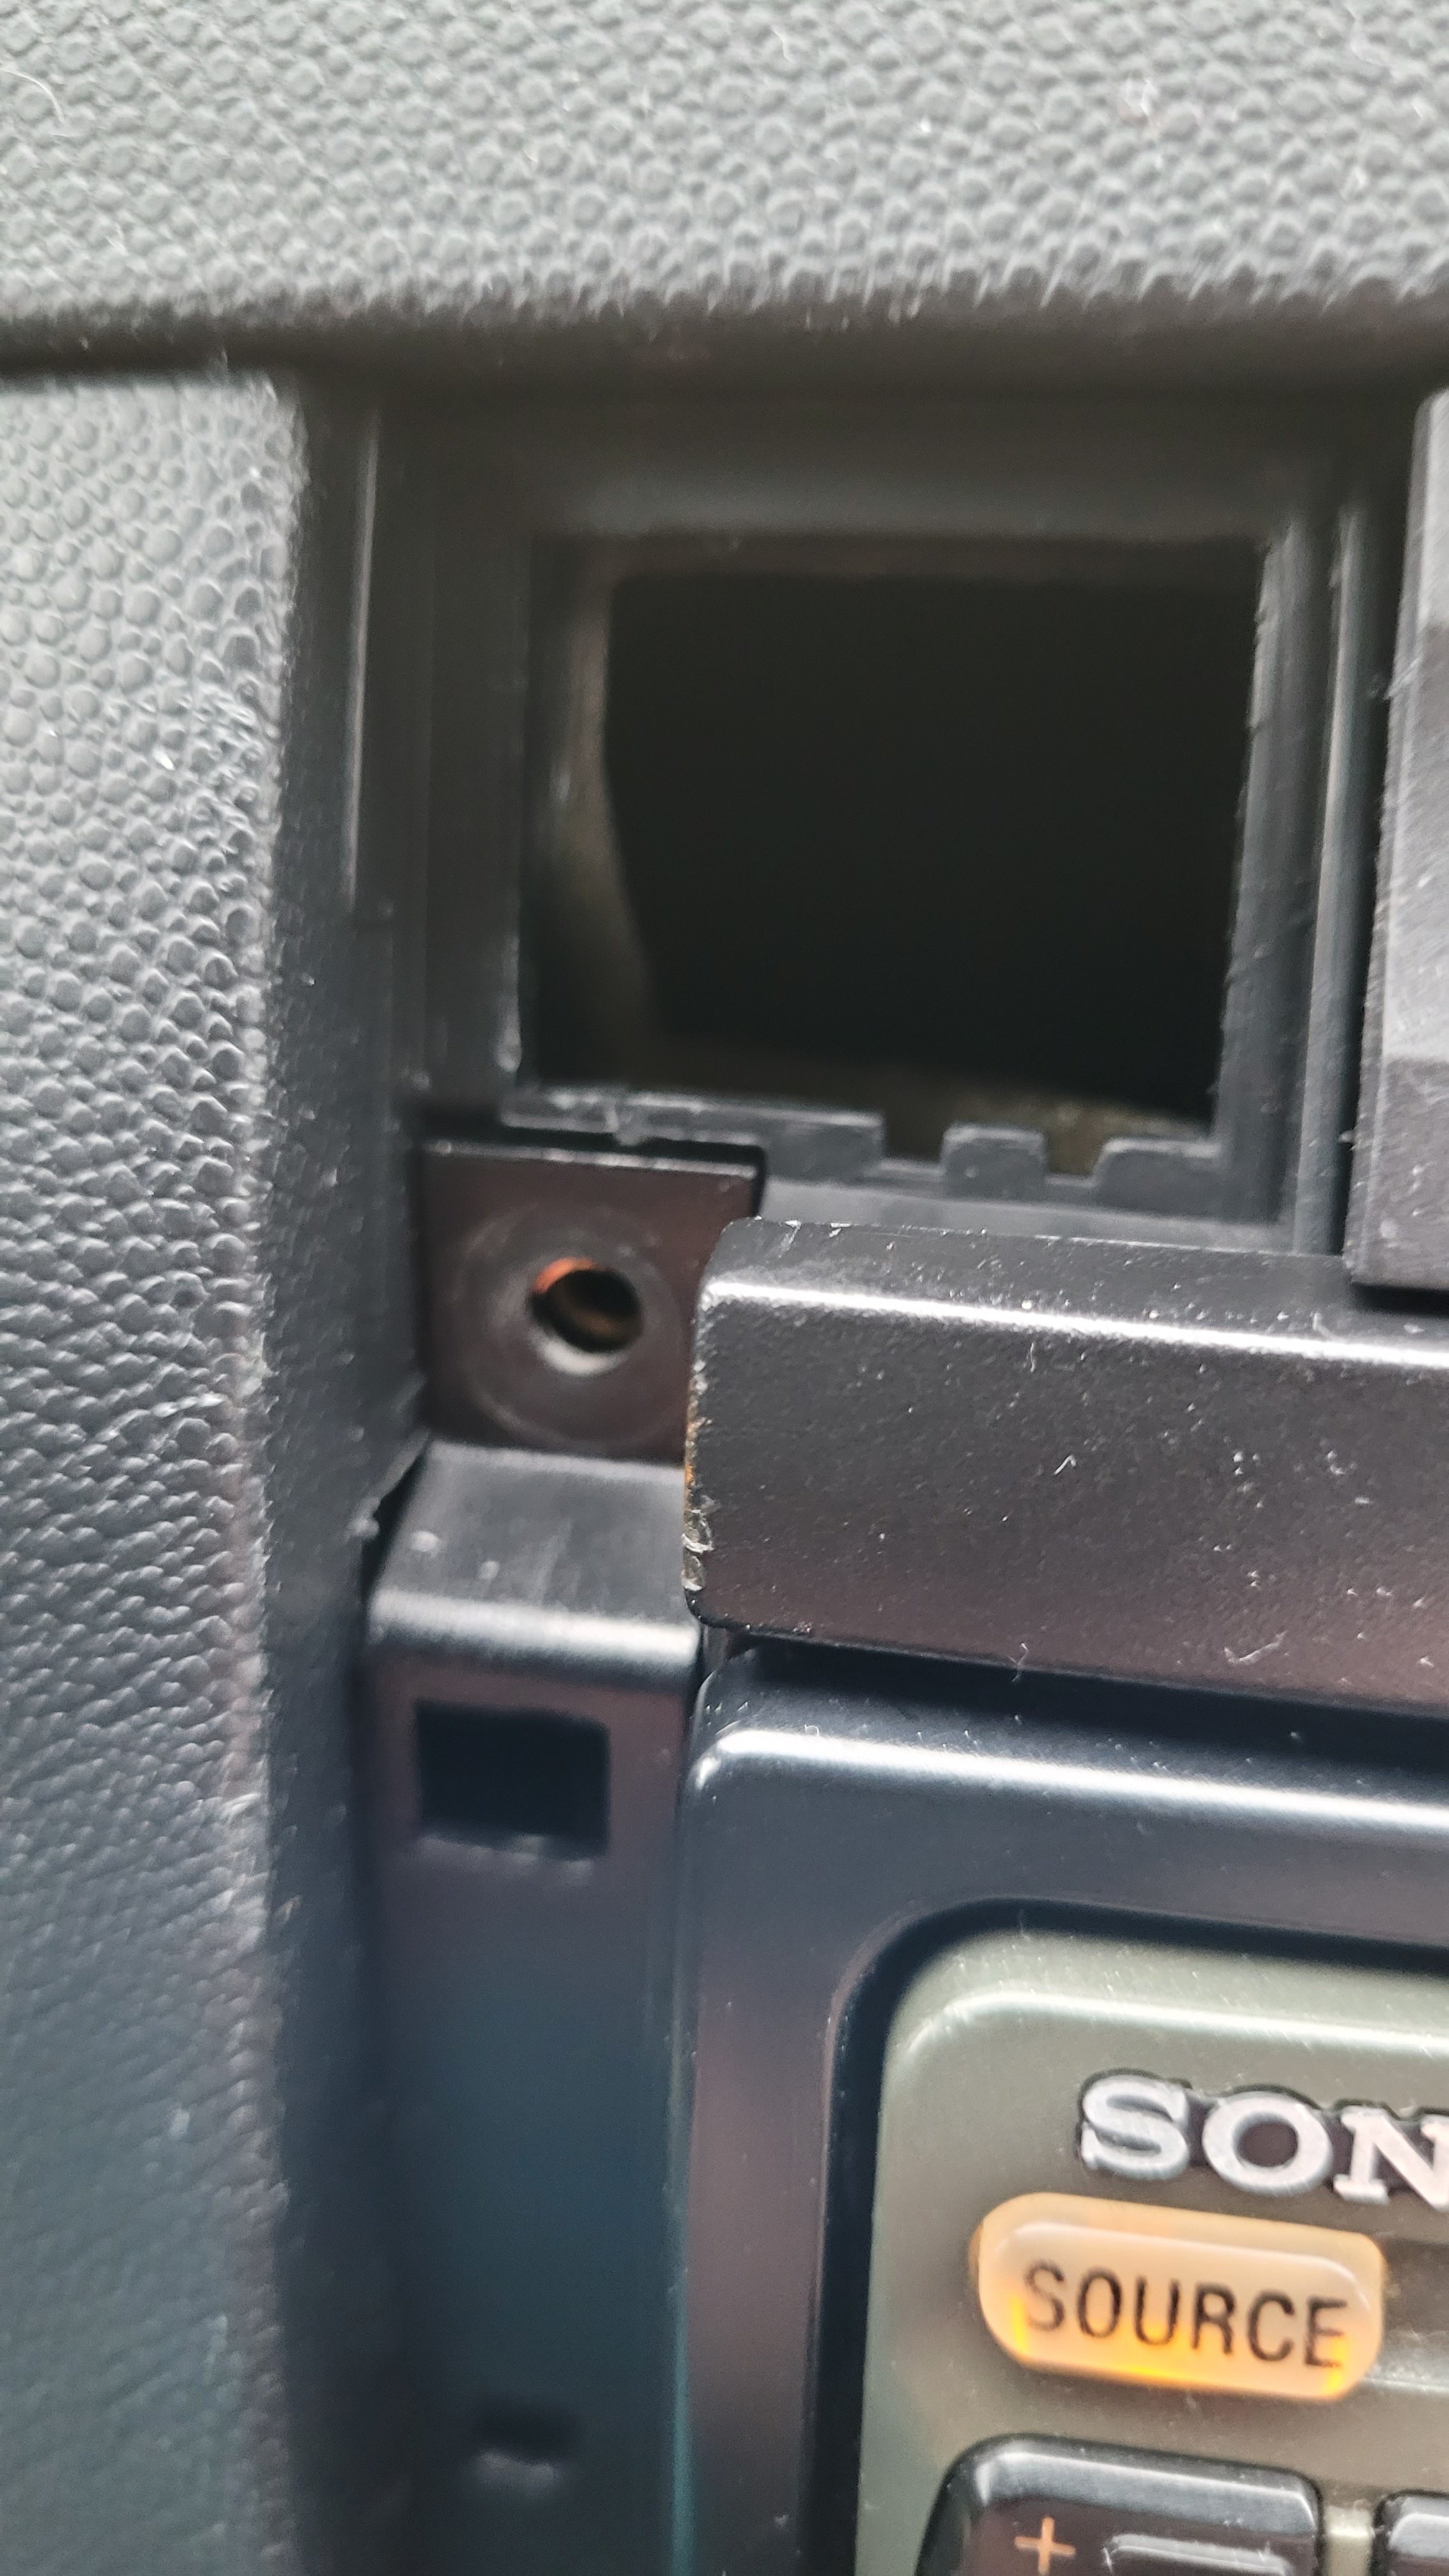
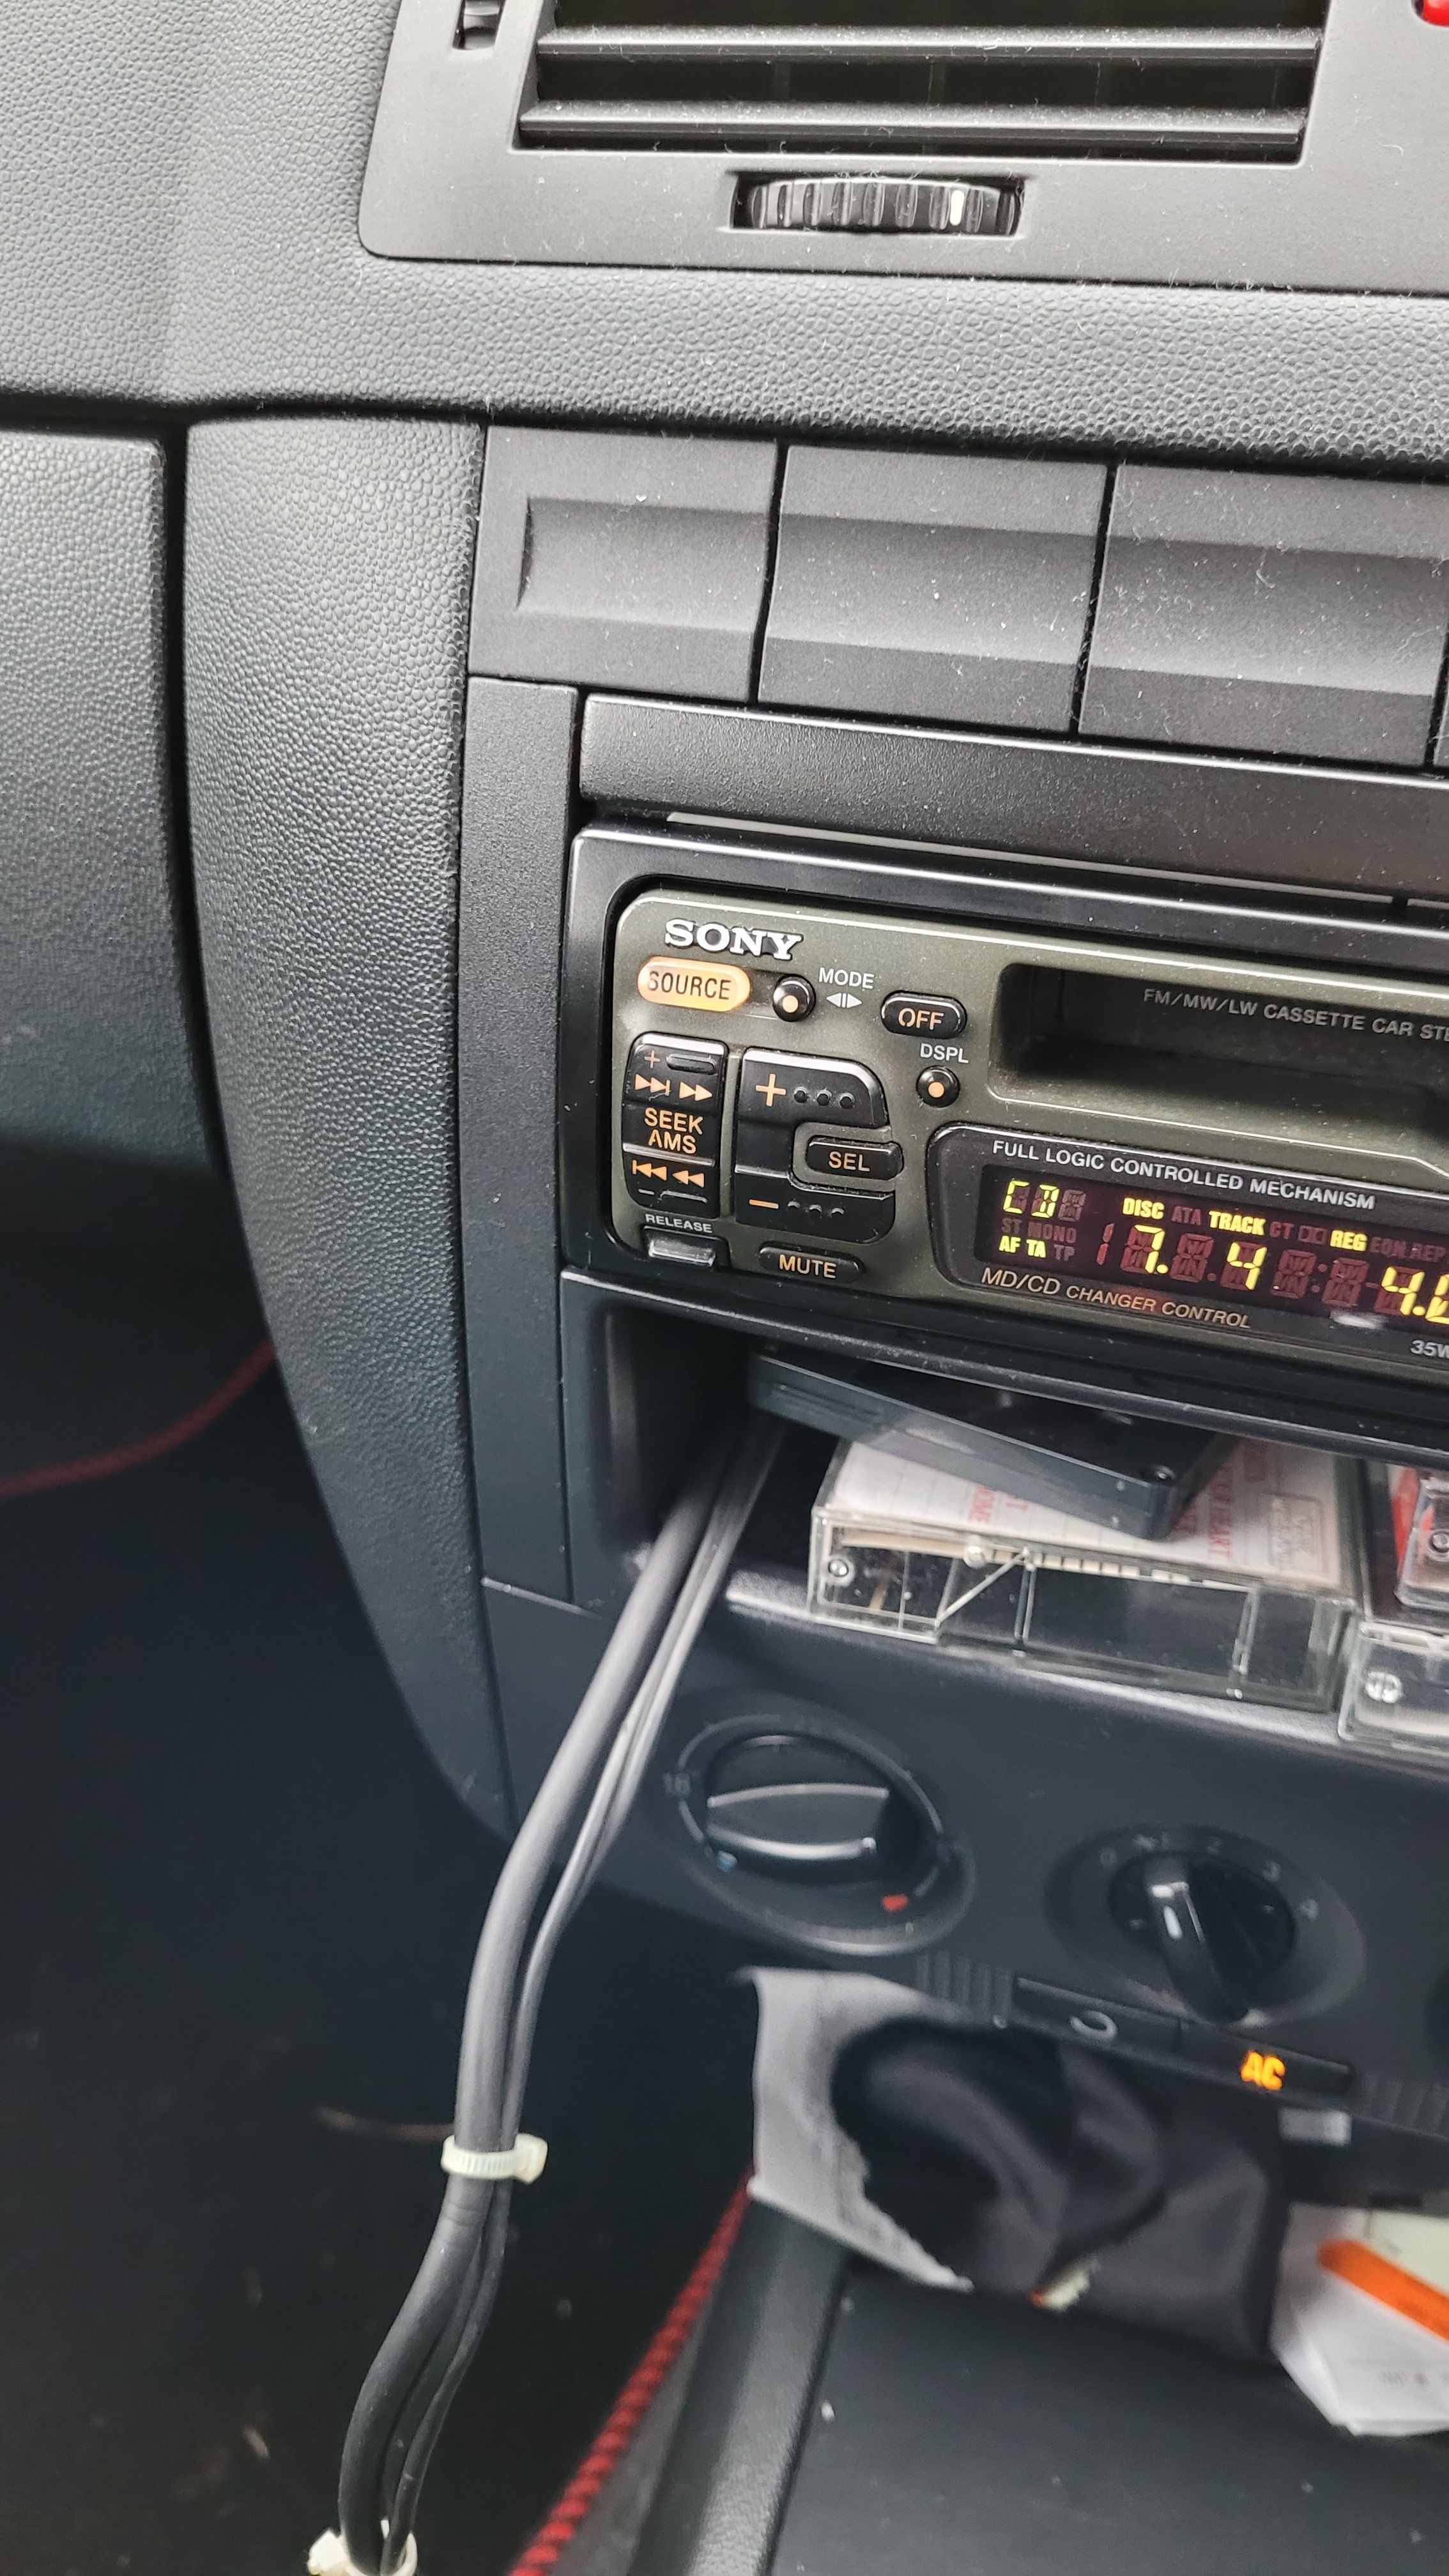
1 pointThanks for the heads up all - no tinkering down there then. I thought the 'PC unit' was directly behind the screen. Memories of my old 6 cd changer on a VW Bora back in the day... Thx PD1 point
-
1 point
-
Message me with the VIN if you would like me to check via the car data (this evening).1 point
-
1 pointWeird, but sound issues are typical HARDWARE issue of dry joints in power amplifier ICs.1 point
-
1 point
-
1 pointThanks for the tip, don't know why I didn't think to check the V5! I've ordered a test kit and will check the coolant before doing anything else.1 point
-
Many will have in classics. I did in V8,s. But a Euro 6 emissions TDI is hardly that & it has been 5w 30 FS III for 'Long time mister!'. .1 point
-
1 pointI've seen the line, and decided to hit the report button. By the way, there is a climate thread in my signature with all the facts and figures.1 point
-
I've seen suggestions that Skoda sometimes have Black Friday deals, so maybe hold on before committing elsewhere. But obviously worth looking at alternatives in the meantime.1 point
-
That is standard cruise control. You have it turned on. Can you set a cursing speed with it? You do that using the little button on the very end of the stalk, you can just see it in your photo. Is the car new to you? It may be that somebody (previous owner) has attempted to enable a feature you don't have.1 point
-
Haven't done much except traveling, but I have noticed after almost 6k km that these pads do NOT dirty the rims so much as the previous mounted ones, that were some TRW. Amazing amazing difference! Just by the effort in cleaning up the darn rims - will see after the ceramic coating how it will go - is sufficient to justify the price difference ... Once again kudos to @travs for his great advice. In time, I'll do the fronts ...1 point
-
What premium are they quoting and what excess? Do you get some choice about the excess?1 point
-
1 pointMy post literally explained why that analogy is pointless. And is bunk science used to form a narrative of climate change denial. Here’s a better experiment Put a jam jar lid on a small plate. Pour water onto the plate around the lid, to just below the top of the lid. Put the ice cubes on the lid. Wait for them to melt and then see how that water level is around your jam lid island… That is what happens when the ON LAND glaciers melt. As for “documents that prove the scam” that will NEVER be released because they probably don’t exist… Actual documents and studies exist and are available to read showing that Exxon knew fossil fuel consumption was causing climate change in the 70s and how they could bury the truth and then position themselves to take advantage of (profit from) the changes they were predicting into the future. So, I advise you go and read some actual peer reviewed science papers on the subject and stop posting misinformation or I’ll report the posts for spreading misinformation.1 point
-
1 pointI love when people roll out the “an ice berg melting doesn’t raise sea levels, so the Arctic melting won’t change anything!” argument, because it’s like listening to a flat earther describe why the horizon isn’t real. Loads of technobabble and science words, but doesn’t actually hold water (hah, water humour) when applied to actual science. Yes, It’s true, the Arctic SEA ICE melting isn’t itself a major risk factor for rising sea levels, because it is an ocean. However 2 things - 1) the reduction in the annual surface area of artic sea ice IS indicative of rising average temperatures. I hope why is fairly self explanatory. 2) the glaciers that are melting in, eg, Greenland and the Antarctic are ON land. So when they melt and fall into the ocean that water DOES cause an increase in the oceanic water volume thus DOES cause sea levels to rise. And the volume of water frozen in those glaciers is HUGE, so all of them melting or just sliding into the sea will be a major rise in levels. It’s been asked in several other threads to not post unsupported or just down right wrong information. So here’s another reminder for in here too. If a report or study or experiment has not had its results peer reviewed and accepted as accurate there’s a good chance it’s ****e science or comes with an agenda.1 point
-
Yes, 'twas a mis-type. Still, 5W30 is still knatsy thin - like sewing machine oil. I'm much more used to 20W50 or even straight SAE40 in my classics......1 point
-
1 pointThat’s that then. It was all just a scam and some of us actually fell for it. Embarrassing. Thanks Graham, I don’t think anymore needs to be said I’ll be the first to acknowledge being taken in.1 point
-
1 pointJust to add - this is what it looks like The way I could do it is put the open part in first and then use a screwdriver to stretch the other part over. Its easier said than done in situ in the car though. ImgBBPXL-20251102-140038679 hosted at ImgBBImage PXL-20251102-140038679 hosted on ImgBB1 point
-
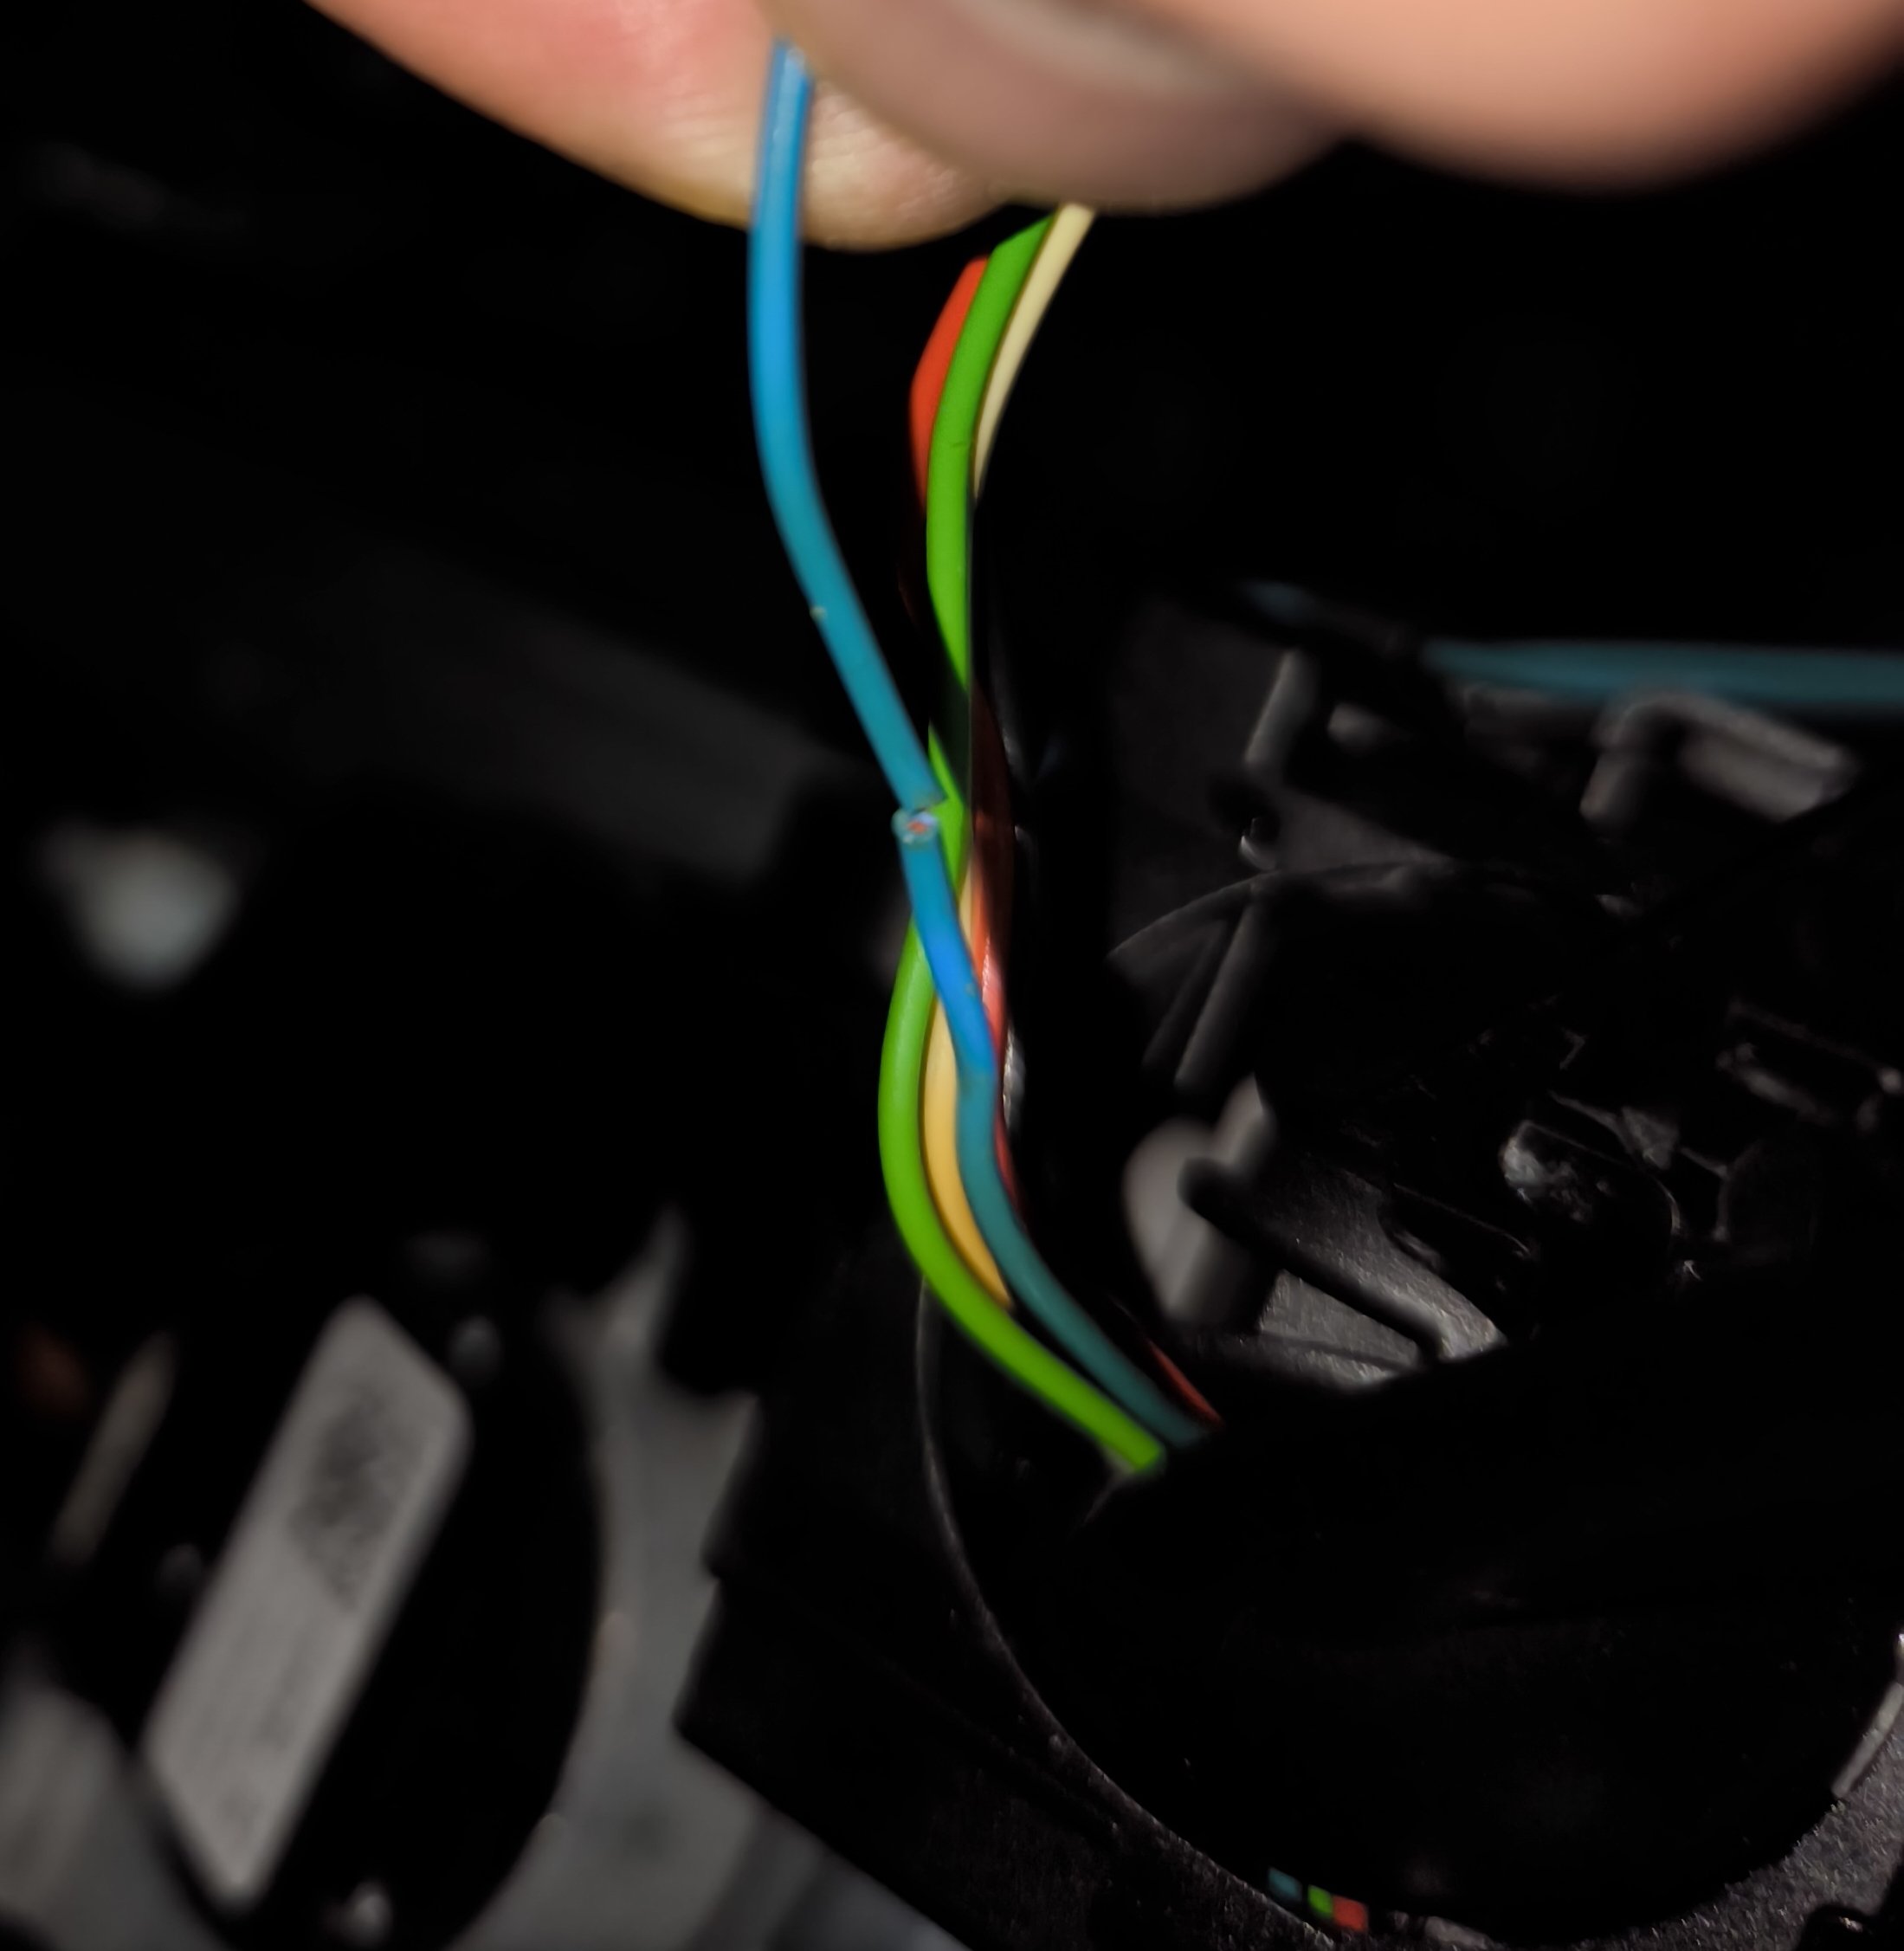
1 pointJust to make others aware and hopefully help someone else fix a similar issue. I own a Skoda Octavia MK3, 2017 model (new facelift), chassis type 5E, engine code CZDA. Recently, I had a problem with the cruise control: it stopped working. When starting the engine, everything seemed fine, but after driving past about 20 miles per hour, an error appeared on the dashboard and the cruise control became unavailable. No other faults were shown anywhere. When checking the car with VCDS, I was getting the following errors: 01-Engine – Status: Malfunction 0010 - This fault kept coming back every time, even after clearing it with VCDS. 16-Steering wheel – Status: Malfunction 0010 - This error could be cleared, but it returned at the next engine start whenever the cruise control was activated. Address 01: Engine (J623-CZDA) Labels:. 04E-907-309-V1.clb Part No SW: 04E 906 027 HD HW: 04E 907 309 BH Component: R4 1.4l TFS H26 3742 Revision: R7H26--- CVN: 65239CB2 Coding: 01190032232401080000 Shop #: WSC 73430 031 00000 ASAM Dataset: EV_ECM14TFS01104E906027HD 001007 ROD: EV_ECM14TFS01104E906027HD.rod VCID: 6DD17CB3BC91F7F308-8038 VINID: 91D4924C779519A0001091021CE819DDF1 Center armrest control head 1: 1 Fault Found: 17165 - Databus U1123 00 [00100100] - Received Error Message Intermittent - Not Confirmed - Tested Since Memory Clear Freeze Frame: Fault Priority: 6 Fault Frequency: 1 Mileage: 128339 km Date: 2025.10.31 Time: 10:51:44 Engine speed: 993.00 /min Normed load value: 11.8 % Vehicle speed: 14 km/h Coolant temperature: 88 °C Intake air temperature: 28 °C Ambient air pressure: 1000 mbar Voltage terminal 30: 14.536 V Unlearning counter according OBD: 40 Acceleration: -0.270 m/s² Cruise Control System (CCS): status-Bits 0-7: 2 Cruise_control_shutoff_conditions_irreversible-Bits 0-7: 0 Cruise_control_shutoff_conditions_irreversible-Bits 0-7: 0 Cruise control system: temporary deactivation-Bits 0-7: 255 or 24 Accelerator pedal travel: 0.00 % Cruise control switch actuation-Bits 0-7: 49 Cruise control switch actuation-Bits 0-7: 129 Readiness: 0010 0001 Address 16: Steering wheel (J527) Labels:| 5Q0-953-549.clb Part No SW: 5Q0 953 507 GD HW: 5Q0 953 549 F Component: Lenks. Modul 003 0140 Revision: -------- Serial number: 24031704221492 Coding: 1400 Shop #: WSC 73430 790 00000 ASAM Dataset: EV_SMLSKLOMQB 020002 ROD: EV_SMLSKLOMQB_018_VW37.rod VCID: 7EF34BFFE1F77C6BA1-802A 2 Faults Found: 229163 - Turn Signal Switch B1144 13 [00011000] - Open Circuit Intermittent - Confirmed - Not Tested Since Memory Clear Freeze Frame: Fault Priority: 2 Fault Frequency: 3 Reset counter: 3 Mileage: 128339 km Date: 2025.10.31 Time: 10:51:43 Operating time: 204269 min Terminal 30 power supply: 14.8 V Vehicle speed: 16 km/h Voltage at switch: 4.98 V Terminal 15 status: active System status: 30 FF U Blinker GRA Plus Minus AD value: 254 FF U Blinker GRA Resume Cancel AD value: 254 FF U Blinker GRA Main Switch AD value: 193 229179 - Turn Signal Stalk; Switch for Cruise Control B1144 F3 [00011000] - Electrical Malfunction Intermittent - Confirmed - Not Tested Since Memory Clear Freeze Frame: Fault Priority: 2 Fault Frequency: 3 Reset counter: 3 Mileage: 128339 km Date: 2025.10.31 Time: 10:51:43 Operating time: 204269 min Terminal 30 power supply: 14.8 V Vehicle speed: 16 km/h Voltage at switch: 4.98 V Terminal 15 status: active System status: 30 FF U Blinker GRA Plus Minus AD value: 254 FF U Blinker GRA Resume Cancel AD value: 254 FF U Blinker GRA Main Switch AD value: 193 After investigating the steering wheel turn signal stalk, I discovered a nearly broken wire that was hanging on by just a single strand. I had to unplug the cruise control wiring to inspect the entire section, as it was hidden inside. Because the wires aren’t long enough, using the stalk for signalling causes them to pull and push slightly up or down. I assume the damage occurred due to this repeated movement over time. You don’t need to remove the entire steering wheel unless the issue is more complicated. I only had to undo one screw underneath and the two screws hidden behind the steering wheel. These become visible if you turn the steering wheel halfway to the left or right to remove the cover. The stalk has a small cover behind it, which you need to take off to access the wiring and the circuit board for the cruise control.
 1 point
 -
I think the part Alasdair is referring to is this, which has no electrical connection to anything in the fob. Known as ID48, "immobiliser chip", or "bugger, that was fragile" depending on the circumstances. I'm not sure if a 2017 keyfob still has such a device.
 1 point
 -
The Perspex is clipped to the covering trim. Easiest way is get a new cover with Perspex from a scrappy. Look on here for other posts that include access to the display panel as they also describe how to remove the cover. You cannot remove the Perspex from the trim cover with the trim cover in place as the fixing clips are inside.1 point
-
I'd disagree. Thicker oil can still be DPF compatible. Oil viscosity is more related to climate and bearing clearances than DPF life. Low ash 5W30 exists yeah1 point
-
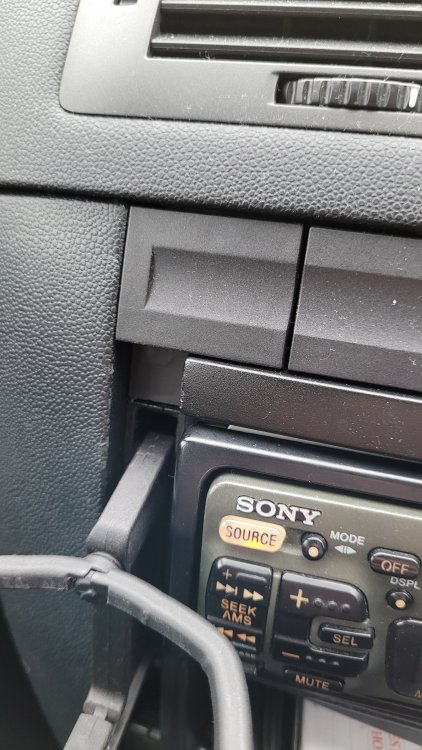
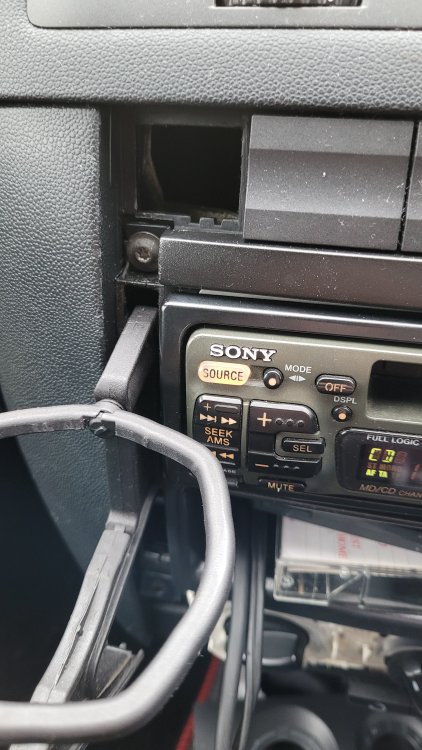
1 point+1 to the above. Think of the unit as a PC linked to a monitor on your desk. The desk in this case being the dashboard.1 point
-
1 pointThis. I wouldn’t go trying to pull the cover off expecting to find a random hole there. That’s the MIB unit for the screen.1 point
-
1 pointOh my god. This is definitely now the bitchiest busiest thread on here. Guys, Seriously ease up on all the personal slagging and unveiled insults! Colin is big on self regulation but as we know when things get very dirty he and the mods will step in and force a ceasefire.. I only pop in here every few days and in the 4 days since my last advice there’s been 6 more pages of just pure arguments and insults fired back and forth. It’s gonna get locked if ye don’t start breathing more slowly before posting. Here’s a line ———————————————— Now, why not pretend the previous 435 pages of bickering doesn’t exist and start again with some civility? New line and attitudes start here? Or I will report this… ———————————————————1 point
-
1 pointThat 'blanking plate' will be the front cover of the main infotainment unit as the screen in the dash is just a screen...1 point
-
1 pointUnfortunately there is one person on this forum who does profess to know it all... From his familiarity, qualifications, experiences... Oh and many jobs. 😉1 point
-
1 pointVery little with the local council actually. Mostly private sector consulting with major clients such as National Grid, water companies, Manchester Airport Group, Ports of Jersey, Royal Mail, Environment Agency, British Steel, National Highways plus stuff I can't tell you about and the like. Proper stuff not your messing about with boats and spreadsheets etc. 😉1 point
-
1 pointCheck that the wear sensor plug from the off side front pad is connected to the loom socket just above. It is not unknown for lazy mechanics to not bother connecting the wear indicator even to cutting it off from the pad. Usually this had no effect as the wear indicator in the pad needed to short circuit to indicate it had worn down. But with the Karok pad it is the opposite and goes open circuit when worn down so needs a short circuit to avoid an error message.1 point
-
1 pointTHe wear indicator on my car is only on the off side front nothing on the rear.1 point
-
1 pointSo for those that are interested, 2 weeks in and 1200 miles I can happily report that the car is superb. The Wife is very happy with the vRS. Super quiet and very comfortable. Given the drop in temps over the last couple of weeks, the car is giving roughly 250 miles in range. Not bad for an 85kw battery and a car that's just over 2200 kilos. Only niggle is regards to not being able to hang up a car using the steering wheel controls. Road noise is minimal even on the massive 21s. I took the wheel trims off the other day to wash the car and the alloys underneath are pretty nice however the massive drum brake on the rear isn't. I must say though, I felt a little better when I say an Audi Q4 with the same said drum brake at the rear. I'd also like to see more options to customise the instrument cluster, it's a bit bland. The HUD is really good especially when using the built-in sat nav however Waze doesn't project onto the HUD. Overall a great car up to now. The Wife has decided that she'll use Eco on a long run and Individual on shorter journeys. The suspension on Normal is quite floaty (if you like that kind of thing) so we've chosen the Sport setting for the dampers in Individual and everything else in normal apart from the steering which we have in Sport. Tip for those when you collect, check your tyre pressures, ours were all over the place.1 point
-
1 pointHurrahh , she's finally in the country and exist, they are hoping to transport for the end of next week . Will get some photos up when it's collection time1 point
-
Hello, what engine do you have and what's the problem you're getting?1 point
-
1 pointHi all, I've just replaced the digitizer on our 2016 Yeti and found this video extremely helpful. I thought I should share with everyone because if you are like me, I was not brave enough to just dive in without exact instructions. Also, as per the earlier reply, ensure you have T6 & T8 torx bits (this is a jolly good excuse to buy a whole set of torx bits)1 point
-
1 pointHere you go. You’ll need to get your current key cloned. I have one and it’s identical to the OE unit. £5.28 | Liberty Keyless Go Remote Car Key 3 Buttons 434MHz MQB 48 Chip FOB For VW Volkswagen Passat B8Superb A7 Magotan MQB48 2015-2019 https://a.aliexpress.com/_EQUmtE81 point
-
Fabia Mk1 Centre Console Cupholder Fitting Guide Much like my other guide(s), this will “talk” you through fitting one of these elusive cupholder doodads… if you can get your hands on one, mind you. This is good modification instead of having to resort to cheaper, rattlier, vent clipping alternatives. Trust me, I know. Massive thank you to @KeithCheetham for supplying this item all for gratis. This guide works for both Pre-FL and Post-FL Fabia Mk1 models of all body types since they all share the same dashboard. DISCLAIMER, as always: I’m not responsible if you eff this up or take your fingers off (somehow). Do this at your own risk. Take proper care working with tools, or else the only tool will be yourself. Step One – Acquiring Parts and Tools: AHAHAHAHAHAHA… good luck. Alright, the process of finding the cupholder is tedious, so just wait until one pops up. The part number is 6Y0862531H47H. So erm, see above. Tools required – Torx driver with T15 fitting (or T20, whichever fits). Get some trim removal tools too, or a screwdriver with tape around the head to prevent damage. Step Two – Check Parts and Fitting: Check the parts work. Cannot explain that any simpler than that. This is what you should have: If you don't have this, then you have the wrong one. Begin removing this trim panel... Then this blank button (or heated seat module if you’re posh) … Remove screws with Torx driver. Remove the heater control panel which comes off with a little persuasion… Remove the remaining panel… Insert cupholder and refit screws… And the blank button… Refit your heater panel… Step Three – Admire Yer Handiwork: Good lad (or lady lad), you’ve gotten this far hopefully without spontaneously combusting or dying. Now take a step back (or move the seat back a notch) and admire your efforts. Finally, put the tools away, go back in the house, get a cuppa, and fire your feet up for a job well done. Job’s a good ‘un.


 1 point
 -
0 pointsIt is not the first time. Back on 1896 there was an OTA coming, which was not even SW version update but something minor, which caused infotainment to reboot all the time.0 points

.thumb.jpg.9dd3f612ba7f13d10be5c518d3c8d255.jpg)