


Leaderboard
-
Lady Elanore
FREEDOM13Points24,873Posts -
.jpg.1006585dfe4e2977315b67c3d642e37b.jpg)
Guest_
FREEDOM6Points83,824Posts -
pinkpanther
FREEDOM6Points3,911Posts -
Breezy_Pete
Sponsor5Points24,187Posts


Popular Content
Showing content with the highest reputation on 09/06/21 in all areas
-
3 pointsThe Answer :. Indeed the sensor at the bonnet catch had failed . Replaced today , all working as normal . Washing and wiping to my heart's content, whether stationery or moving . Strikes me as a totally pointless sensor , driving 48;years and never had a bonnet fly up or elude the catch Thanks to all that responded3 points
-
2 pointsJust an update... Have replaced all the damaged wiring, soldered all joints and heat shrinked. Ordered diodes from Amazon, soldered new one in and heat shrinked. Connected clocks. Connected battery up and put Temp 80A fuse on main battery fuse spare slot. Turned ignition key - life on clocks. Carried on turning Car fired up and ran a bit ropey until it settled down, not surprising as apart from clocks everything else is disconnected! Stop/started car at least 20 times, leaving to run for 5-6 mins at a time. Just literally wrapped up the loom with friction fibre tape. Will start/stop car as before, tomorrow prior to replacing dashboard etc. Just want to say a massive Thanks for your assistance and guidance - it really did help!
 2 points
 -
2 pointsBut someone may try the wipers with bonnet up and that could lead to damage to bonnet and wipers2 points
-
2 pointsNope. Also if you want all of Europe on a 16gb card a trick has been found where you delete all other language countries apart from your own. It buys sometime before you need to get a 32gb card. Alternatively if you aren't planning to drive across Europe just use one of the zoned releases. You can always test it by enabling the demo options. It works. Trick: For GB language across Europe you just need GB and the meta_info.db in the folder: maps\00\sds That's a fix till it out grows the card again. Other languages pick your plate and delete the rest except meta_info.db --- The language in total come to 1gb. Just one language saves a lot of space... 😍2 points
-
2 points
-
2 points
-
the mk3 220 does not come with 340mm disc brakes up front. it has 312mm front disc brakes - 1ZA (PR Code). it has 300mm rear disc brakes - 1KU (PR Code) the 16" factory spare fits over the front brakes with no issues.2 points
-
1 point
-
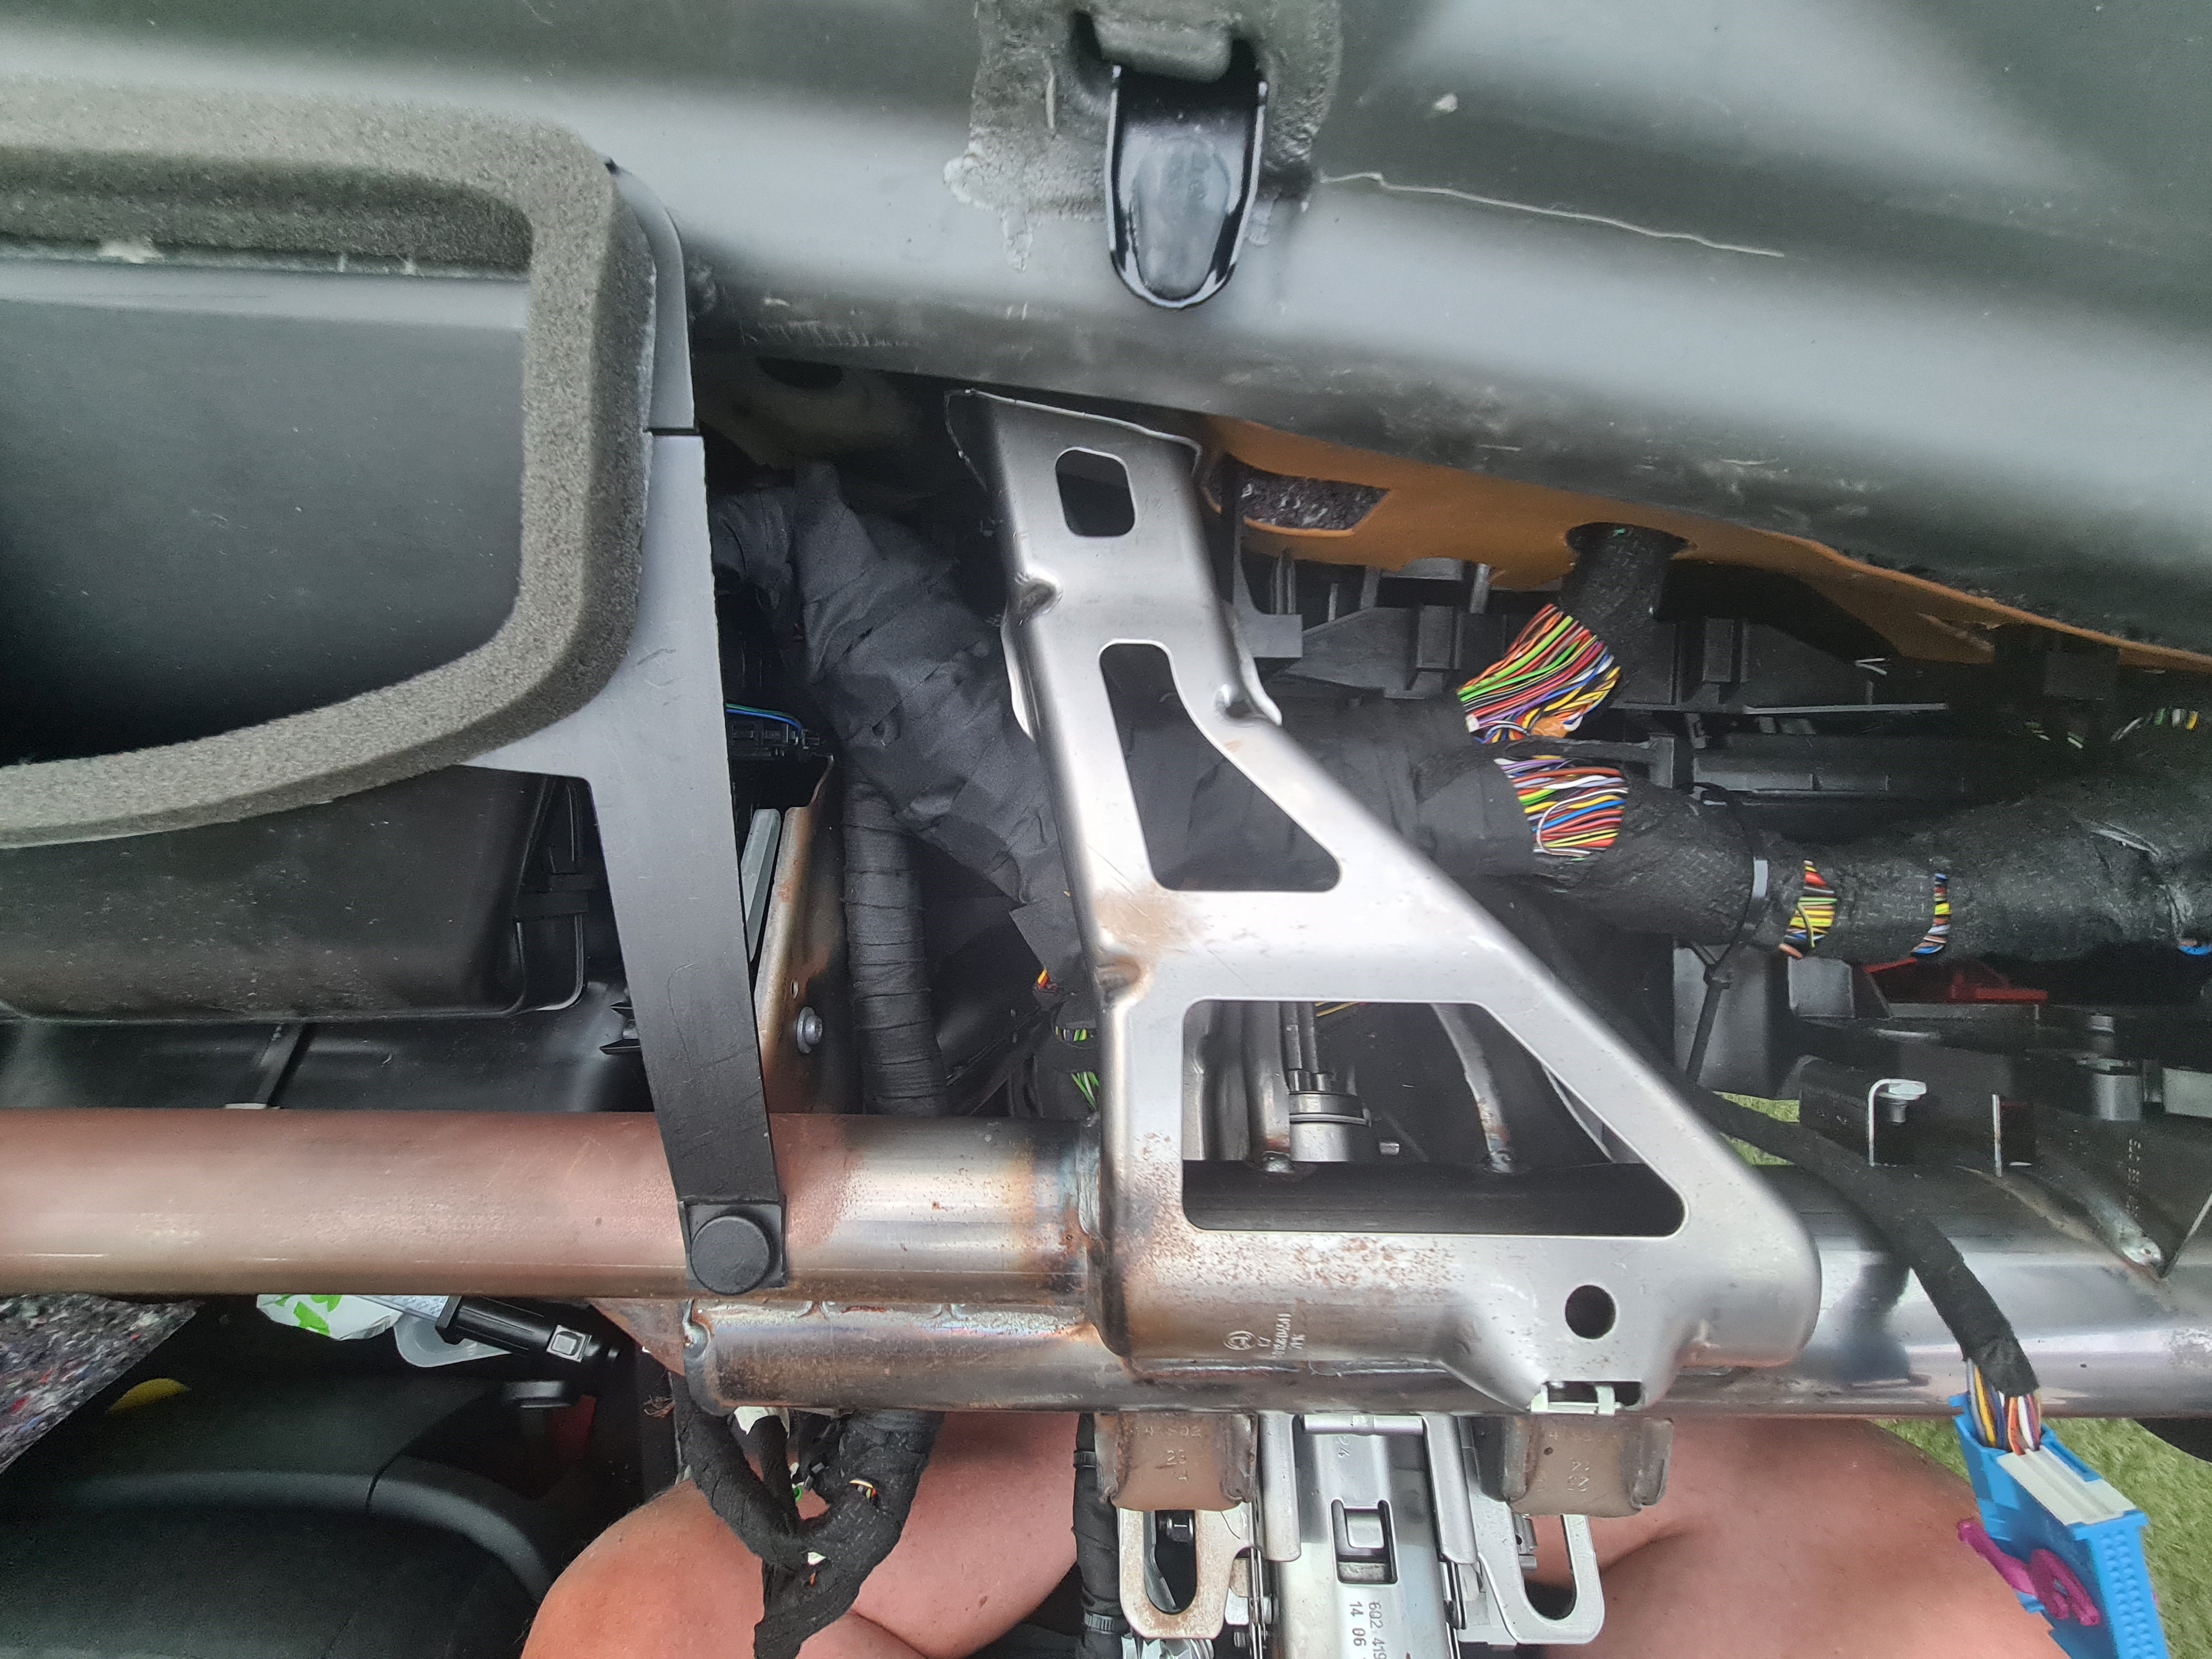
I haven’t ever written a guide before so please bear with me I will try and keep this as short and simple as possible, and I won’t go into detail in every area as there are loads of guides out there already for door card removal etc. The main focus of this guide is the wiring side which is where I initially got stuck. I now have a fully working reverse dip mirror on my passenger mirror with no errors. I can confirm that this works 100% and you don’t need the memory module on the drivers side. If you later wanted to add power folding mirrors or auto dimming mirrors this module will handle that as well (although I don’t personally plan to add those and you would then also need the drivers side module) What you need: 1 – Memory mirror motor and wiring loom - 3D0959578C 2 – Memory door module - 5Q4959592B How to do it 1 – remove door card and door mirror 2 – replace mirror motor with new one 3 – snake the new wiring alongside the existing wiring and connect the additional wires into the 16pin connector that goes in to the door module 4 – change a few settings with VCDS Parts needed: Memory Mirror motor, part number 3D0959578C, The standard mirror motor has only 3 wires in its connector, the upgraded one has an 8 pin connector and uses 7 wires. I got this one from Ali express which includes the 8 pin connector and the wiring which was longer than I needed, also was pre wired with the correct pins on the end to insert straight into the 16 pin connector that goes in to the door module https://www.aliexpress.com/item/32350405340.html?spm=a2g0s.9042311.0.0.49254c4dP8nHxR Memory door module, part number 5Q4959592B. I picked one up 2nd hand on ebay for £15, and there are loads on there. The job can be made slightly easier if you use a set of plastic trim removal tools like these https://www.ebay.co.uk/itm/12Pcs-Car-Trim-Door-Panel-Removal-Molding-Set-Kit-Pouch-Pry-Tool-Interior-DIY/154017521367?epid=12022344510&hash=item23dc28ded7:g:yXoAAOSwtPlbYVfh but it can be done without. Step1 - remove the door card, follow this guide Removing the mirror is easy, from memory there was just a single screw holding this in place, I managed to remove it with a torx bit, but that wasn’t the right bit. Once you have removed the mirror housing, you can strip the mirror down, replace the mirror motor with the new one and feed the new wiring through the mirror (just follow the old wiring). I then snaked the new wiring alongside the old wiring and wrapped it all in cloth tape. The exisiting connector was just tucked away but if you wanted to you could remove it. The Wiring I found a few guides on line with wiring instructions but none of them worked. A lot of them referenced pin 12, my module was missing pin 12 so I knew these guides weren’t for me. The wiring for me was as follows (16 pin is door side into the module, 8 pin is the connector that goes in to the mirror), there are a number of wires that go in to the mirror that aren’t on the motor connector, these should be left untouched. On the 16 pin module they are PIN3 – black/blue – common ground PIN15 – Red/black – heated mirror PIN11 – Yellow – indicator So onto the 8 pin connector Mirror controls, these 3 wires replace the original 3 wires, so these will need removing from the 16 pin connector. Mirror number, Colour, 16 pin connector number Pin2, White > Pin7 Pin6, brown/white> Pin5 Pin8, Red> Pin8 This leaves 4 wires yellow/white, blue/brown, grey/white, grey. These wires handle the x/y co-ordinates on the mirror, 1 set handles the position reporting, and 1 handles the return values, if you get these mixed up the mirror displays erratic behaviour and whenever it tries to move it will go in seemingly random directions, I resolved this by swapping around a couple of the wires and came up with this Mirror number, Colour, 16 pin connector Pin1, Yellow/White > Pin14 Pin3, Blue/Brown > Pin16 Pin5, Grey/White > Pin4 Pin7, Grey > Pin13 I have done these 4 from memory as I stupidly forgot to take note of the final wire positions before I put the door card back on. Untested are the other positions on the 16 pin connector (taken from a german forum), these might be useful in future for anyone wanting to add the other features 1 orange boarding spot + 2 black / gray mirror dimming 6 black / green mirror dimming 9 pink motor mirror folding mass 10 gray motor mirror folding +1 point
-
1 pointI tried it in a traffic jam on the highway and it works perfectly. This weekend last 50km of my highway was a mess. First full stop, then stop and go and then 30 - 60km/h with frequent braking. All this 50km I just kept my hands on the wheel and the car did the rest. I also tried it in the city but it is to aggressive for my taste (there is style option for ACC but i didn't try anything except normal. I will try comfort mode and let you know)1 point
-
1 pointThis thread might help you with that reversing camera. Sasha is very knowledgable on mods to the MK3 Octavia.1 point
-
1 point
-
1 pointI have an MY18 Superb with Columbus and Traffic sign recognition. It is extremely good at picking up signs on side roads even if they are set back 10+ metres and at 90 degrees to your direction of travel. So I am constantly being reminded that I'm breaking a 20mph limit, even though I'm on a 40/50/60 mph road. Its far less good at seeing the small signs stuck on lamposts or if a sign is less than 99% clean. It's often/mostly blissfully unaware of the NSL/end of restriction (black diagonal on white backgound) lit up on a smart motorway overhead gantry. Pity anyone if TSR is linked in any way to predictive ACC or automatic speed limiting which is due to be imposed on us by the EU soon. Caravans will then no longer seem to be the enemy.1 point
-
1 pointIt happens to me already and yeap it did try to slow down the car but I was ready and reacted quickly. I've already share it with skoda Spain and I'm waiting for a response. Quite dangerous indeed if you're using acc, if not it's simply annoying.1 point
-
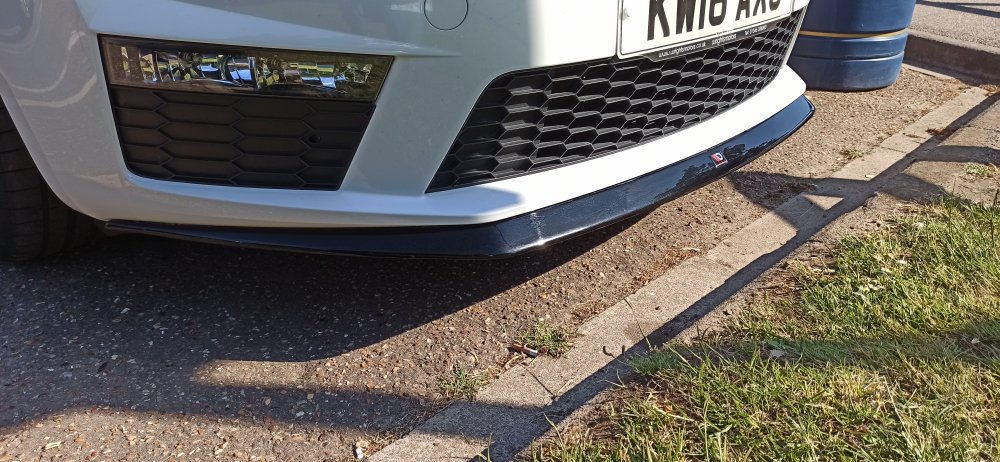
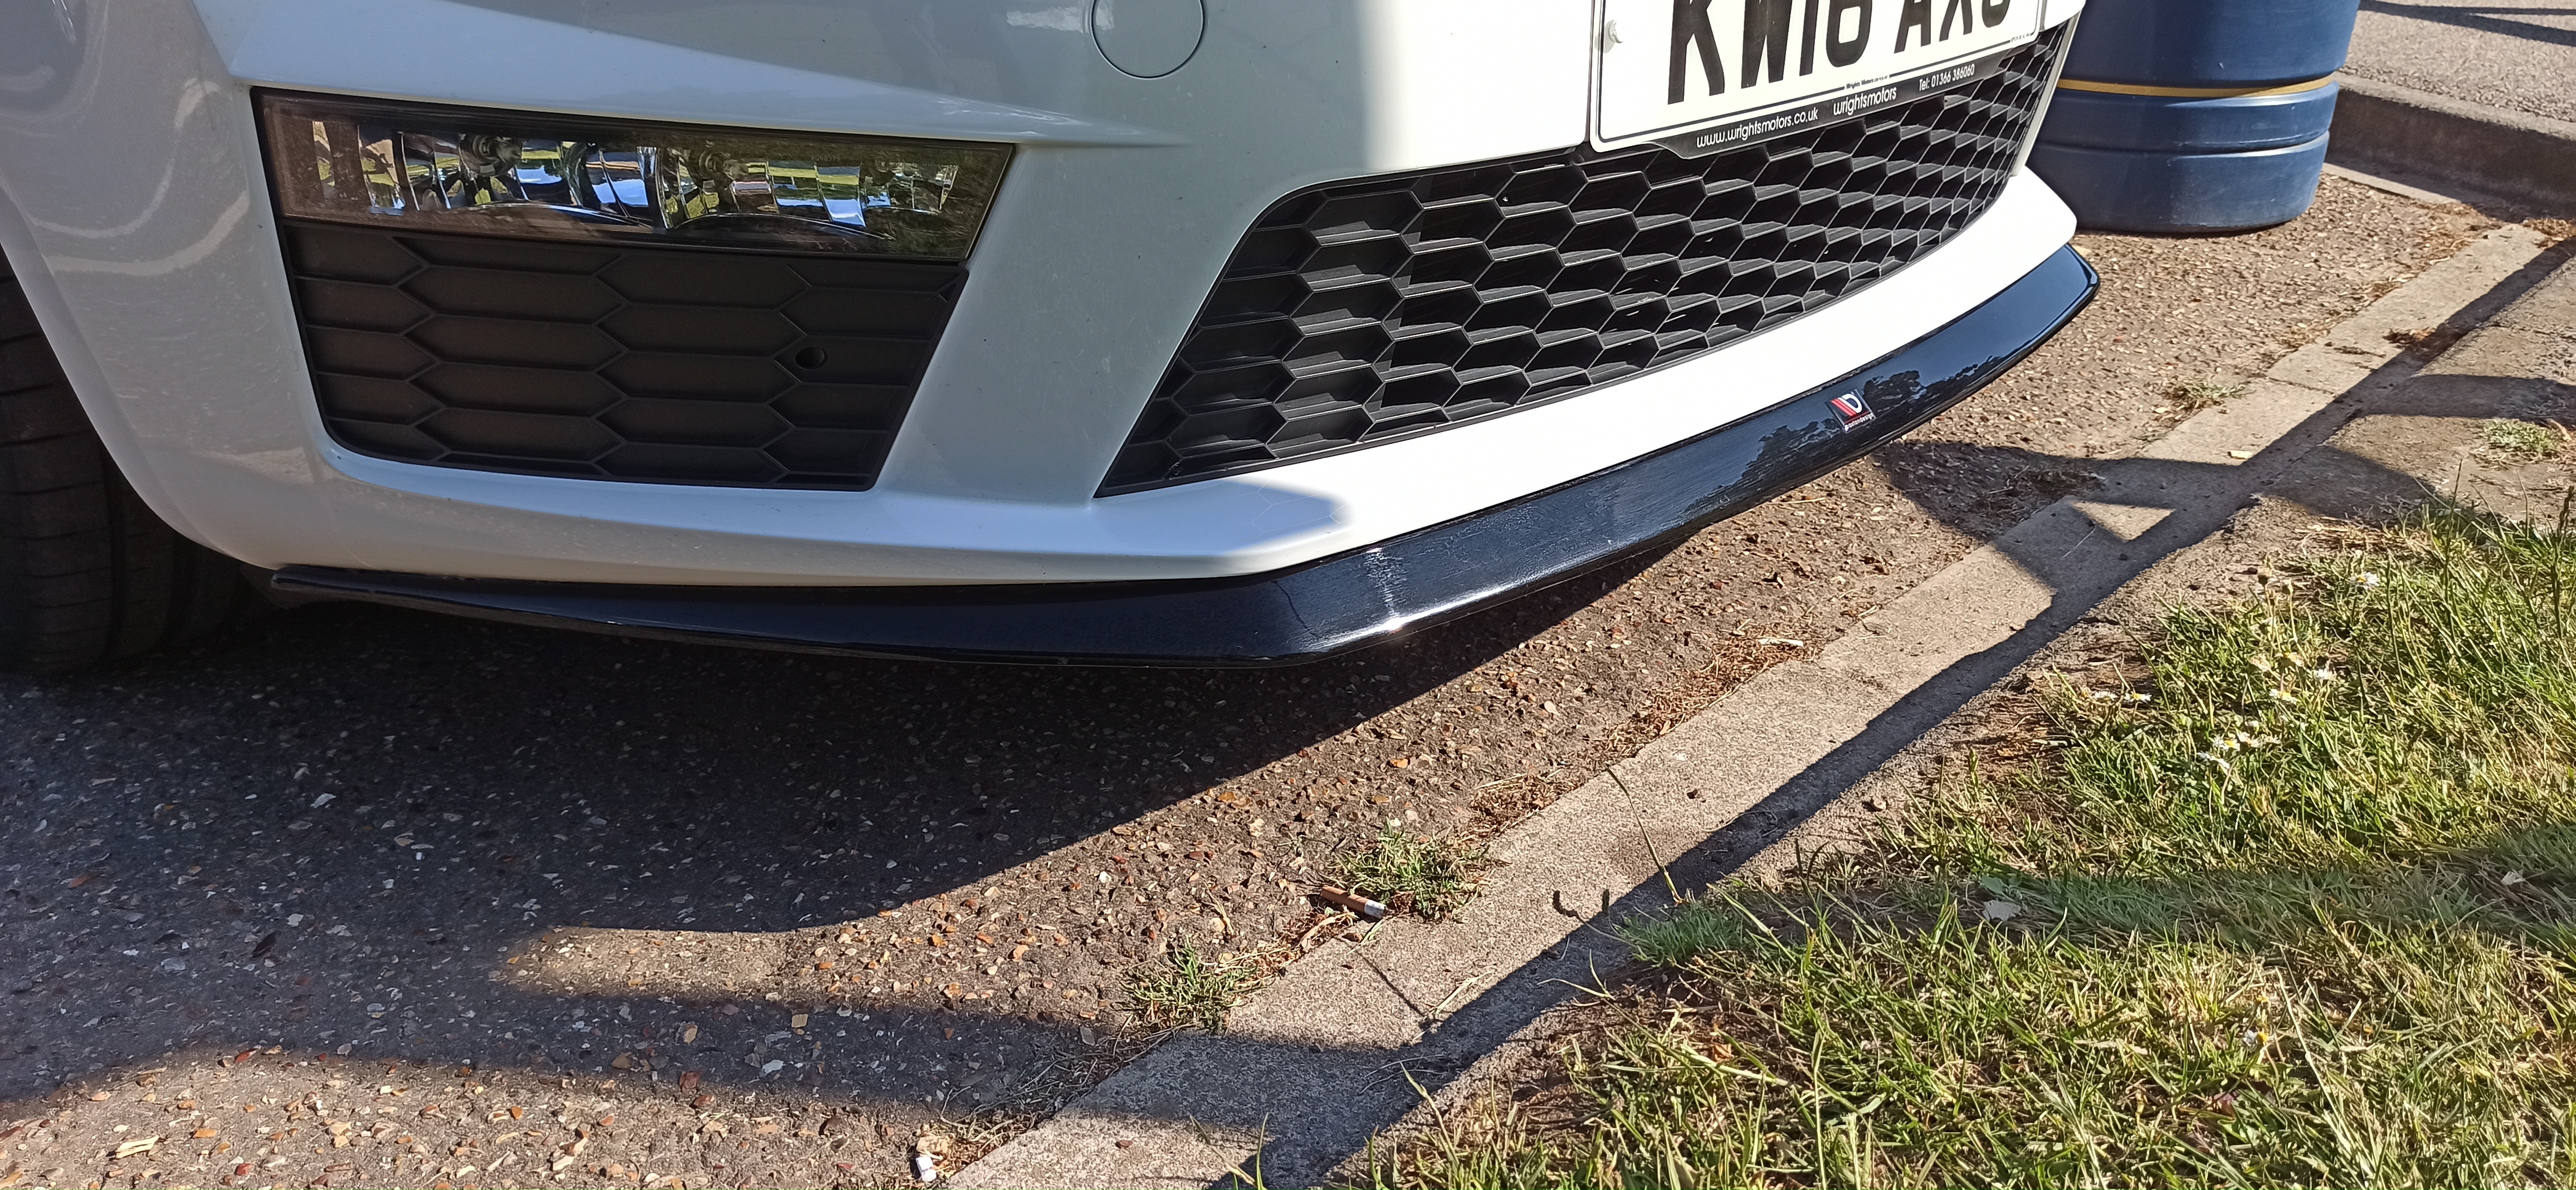
1 pointI have a Maxton front Splitter on my 2016 Vrs. I fitted it myself but it would be easier with two people, I used various props and low tack masking tape to hold it in place. I didnt use the bolts supplied as they advise removing the front bumper. Used push in expanding button trim fixings, a couple of self tapping screws with prefixed washers and some Evostik Sticks like clear, which is the best grab adhesive. Wouldn't trust double sided tape.
 1 point
 -
1 pointSimple answer is no... Easiest way for you to do what you want is to but a set of components. Box will have the 6.5's, the tweeters and a crossover for each pair. The crossover splits the frequency's to each type of speaker. And in most cases, components sound so much better, especially when correctly set up. You can use the wiring from your existing 6.5 to the crossover and then wire to the new speakers.1 point
-
1 pointSlight change to what I had said before: For the signal path, it's not an Audison DMI used, but a Zen5. Sounds like there are issues with the DMI and the Zen5 addresses them all. My mistake And update after a few weeks of running in.... SOUNDS AMAZING!!!! Any one who says the stock or Canton system sound good, need to have a listen to a proper set-up!!! They are night and day, plain and simple!1 point
-
1 pointWelcome to the forum. @robert125 My first idea is that you should go to see a mechanic that can get your car on a ramp and see that all is well with the job you paid Halfords to do. ? Has the DSG had oil changes 3 or 4 times already and the Haldex much the same done?1 point
-
1 pointI believe if it needs to be recalibrated ..... It's not cheap ..... Go through insurance ...1 point
-
Which can lead to being stopped by Officers of the Law when their ANPR shows up a vehicle that looks like it does not match the Registration Plate. But then that is how it has been for a long time in the UK. If your wrap is on for more than just a few days for the likes of a show, or there is just part of the body colour changed it is dead simple to have the V5 changed for as long as the car is the colour it is.1 point
-
1 pointThe 4x4 system is probably working a lot more than you think. You will not notice most of the time. The slightest slip of a front wheel sends power to the rear. Large steering angles or large amounts of power applied will also send power to the rear even with no slip at the front. Apart from the extra weight it brings and the need to service the Haldex I can't see any good argument not to have it in a more powerful version of the car. I often feel a push from the rear when turning out of a junction accelerating fast for safety. And the argument above over not wanting a dsg as I want to select gear myself is crazy. The gearbox will change much faster than you can and apply power almost all the time. When you manually change gear you have to disconnect from the power, and then change gear and reapply power which takes a finite amount of time. With a dsg and paddles on the steering wheel you can have the best of both, selecting whatever gear you want when you want, but also being lazy at most times and let the car do it for you. A dsg in sport mode will always beat a manual car of the same power output as it can change gear at exactly the right time and virtually instantaneously. I had some terrible experiences in long stop start traffic jams in manual cars. Constant clutch operation becomes painfull after a long time but you still have to do it until clear of the issue. A dsg if effortless in the same situation.1 point
-
1 pointFound the issue, there is a seal inside the cap that was slightly over the movement fillet part which prevent it going in all the way. After pushing the seal slightly back, the cap screws on all the way and spins freely, it works now. Thank you!1 point
-
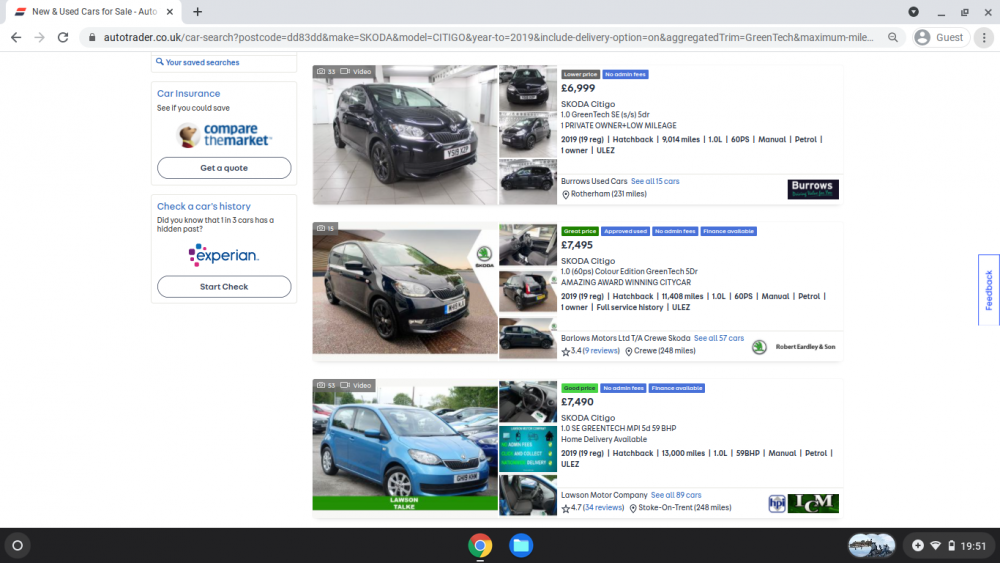
1 pointDefinitely worth shopping around. Sometimes it's about how much profit dealers have in the car you are looking, what they have in stock already, where they are with targets etc. A lot of variables, which can affect what you are offered. A free private ad, e.g. on Facebook Marketplace might be worth a shot but selling privately has its pitfalls, timewasters, security of payments etc, plus you're unlikely to get much, if any, of a cash discount for having no part exchange. Overall, cars are priced high at the moment as there's a shortage of used cars. WBAC have offered me £5K for a 2017 Citigo with 27000 miles. It's a sellers' market so you should get more for yours but will pay more for what you are buying (this is compared to 18 months or so ago)1 point
-
1 point
-
1 point
-
Indeed, have the correct tool for the job is the best plan. Not all do when they go to do a job. Plug sockets with rubber surrounds or magnetic as re fandabbydozzy but if someone is buying they need to remember for some vehicles they need thin walled ones. I have all the gear but still put the plugs down the hole on the end of a rubber pipe.1 point
-
1 pointChanged the water pump again and all seems well went for a drive last night no problems and again this morning no problems so happy days1 point
-
1 pointIt's got 47000 km/29000 mi and the plugs were exchanged at 35000 km according to the service history.1 point
-
1 point
-
Swap the front and rear wheels over. If the steering wheel vibration goes away, the problem is one or both of the front wheels (which are now on the back).1 point
-
1 pointThat’s a good list of kit you have. Can’t wait to see how you get on! That DAS6 Pro kit is what I started with - it’s a great polisher to get started with.1 point
-
1 point1803 version is an upgrade for the 1788 one. And needs to be installed by the dealer. A few people already reported that upgrade to 1803 version has eliminated the faults.1 point
-
A sad ending, but at least it's out of the way! And better to have loved and lost, than never to have loved at all1 point
-
1 point
-
1 pointAs previously reported, had this problem a couple of years ago, rear o/s, managed to take the caliper and disc off, ran some roughish wet and dry over the castellated sensors, cleaned up the plug socket with switch cleaner and vaseline, remounted it all, and no subsequent problems, --- maybe I was just lucky!!!1 point
-
1 pointI can get my folding bike in,24" wheels,rear seat down,no false floor fitted...😉1 point
-
1 pointLinks on PM. You can use VW map update use Bettle then Discover Media1 point
-
1 pointSeems low. What about advertising on Briskoda and selling private? Check what WBAC are offering and you know it is worth a good bit more than that as they will be giving less unless the car is perfect and then it is going to have an Asking Price at a Car Supermarket / Dealers £1,500 or so more. There are some on Autotrader with asking prices less than £1,000 more than you are being offered.
 1 point
 -
1 point
-
A stop gap might have to be the way forward. I still have a few months so hoping something comes up in the mean time. Is the limited edition what they call the 'VRS Challenge'?1 point
-
1 point
-
There does not look like there is enough bolt on the surface to get a set of mole grips on there. On watching Wheeler Dealers on TV, they had the same problem with some bolts. So they put some Tig weld on the end to create more metal to get mole grips on there to unscrew it. That of course means going to a garage for help.1 point
-
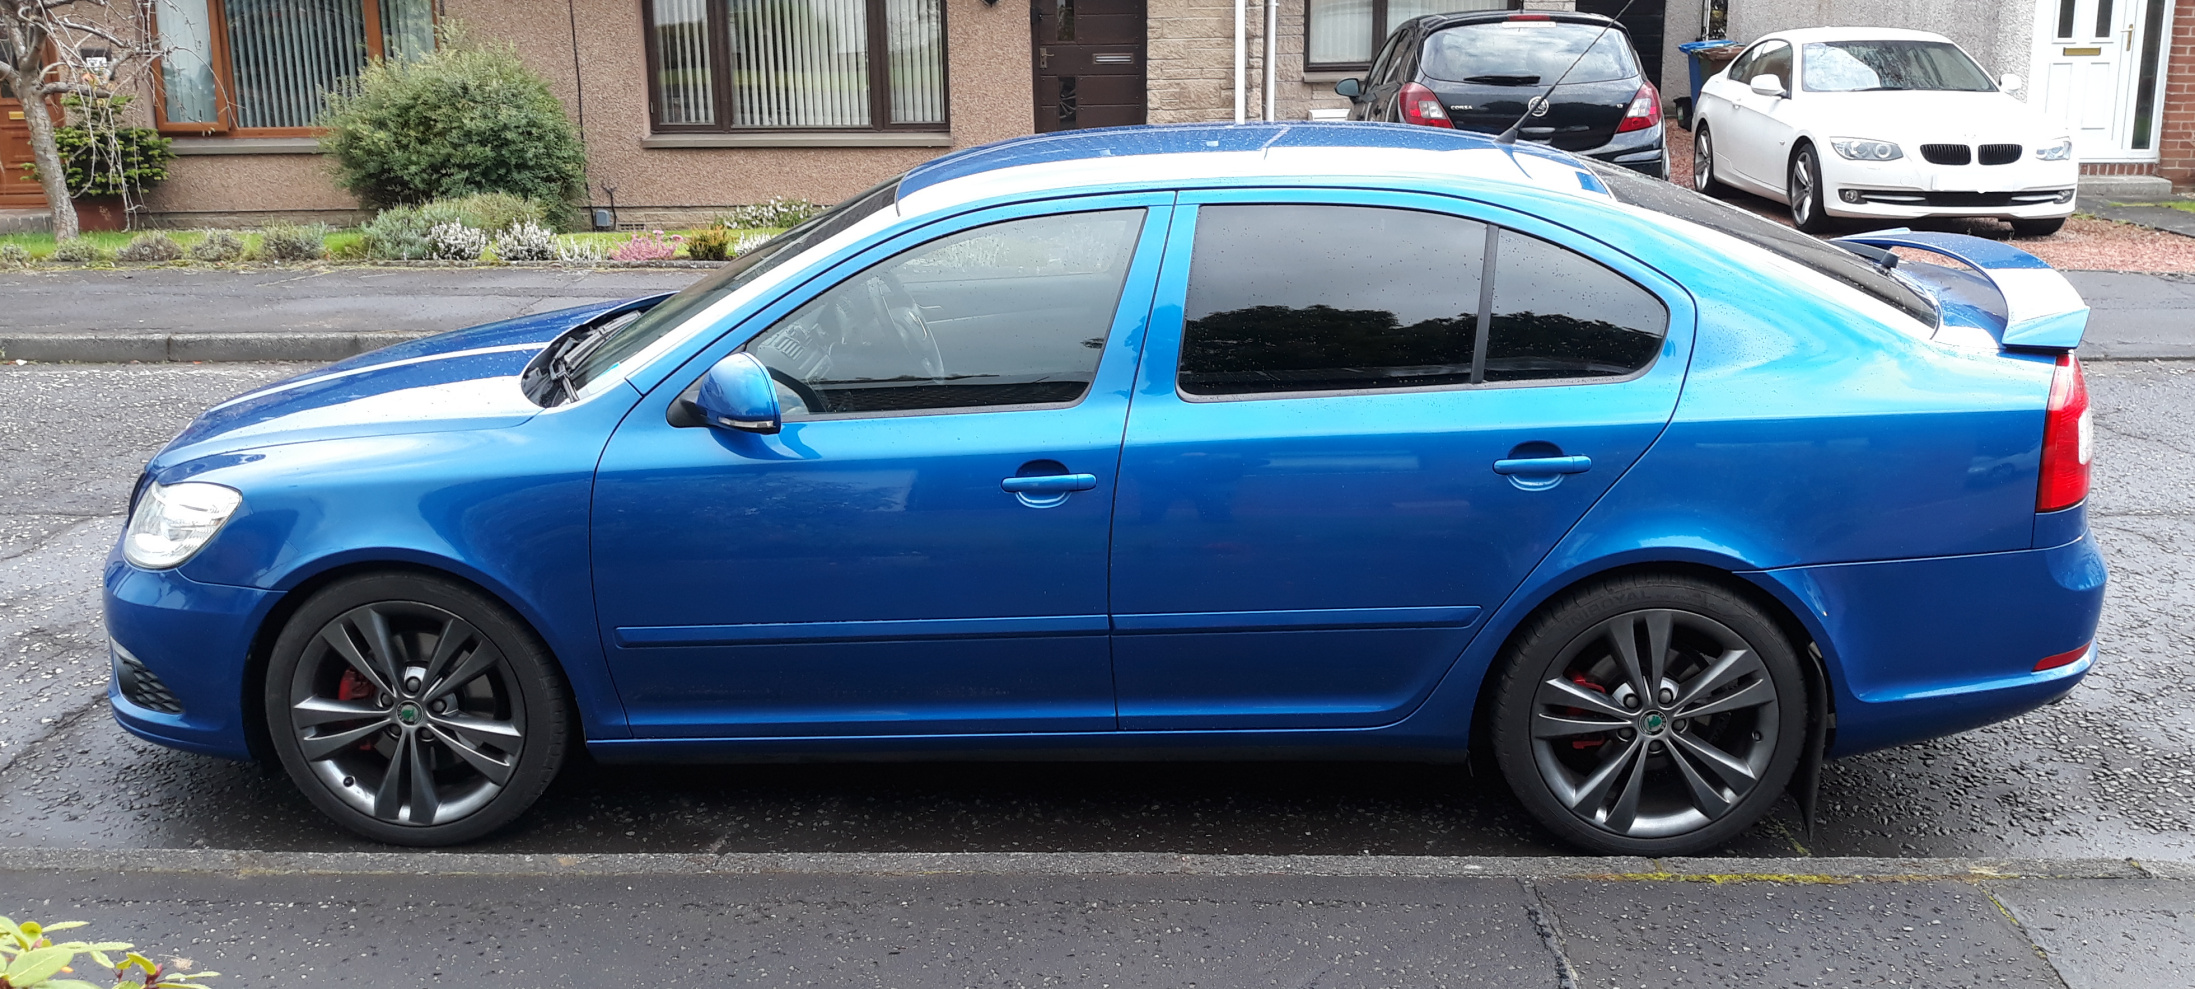
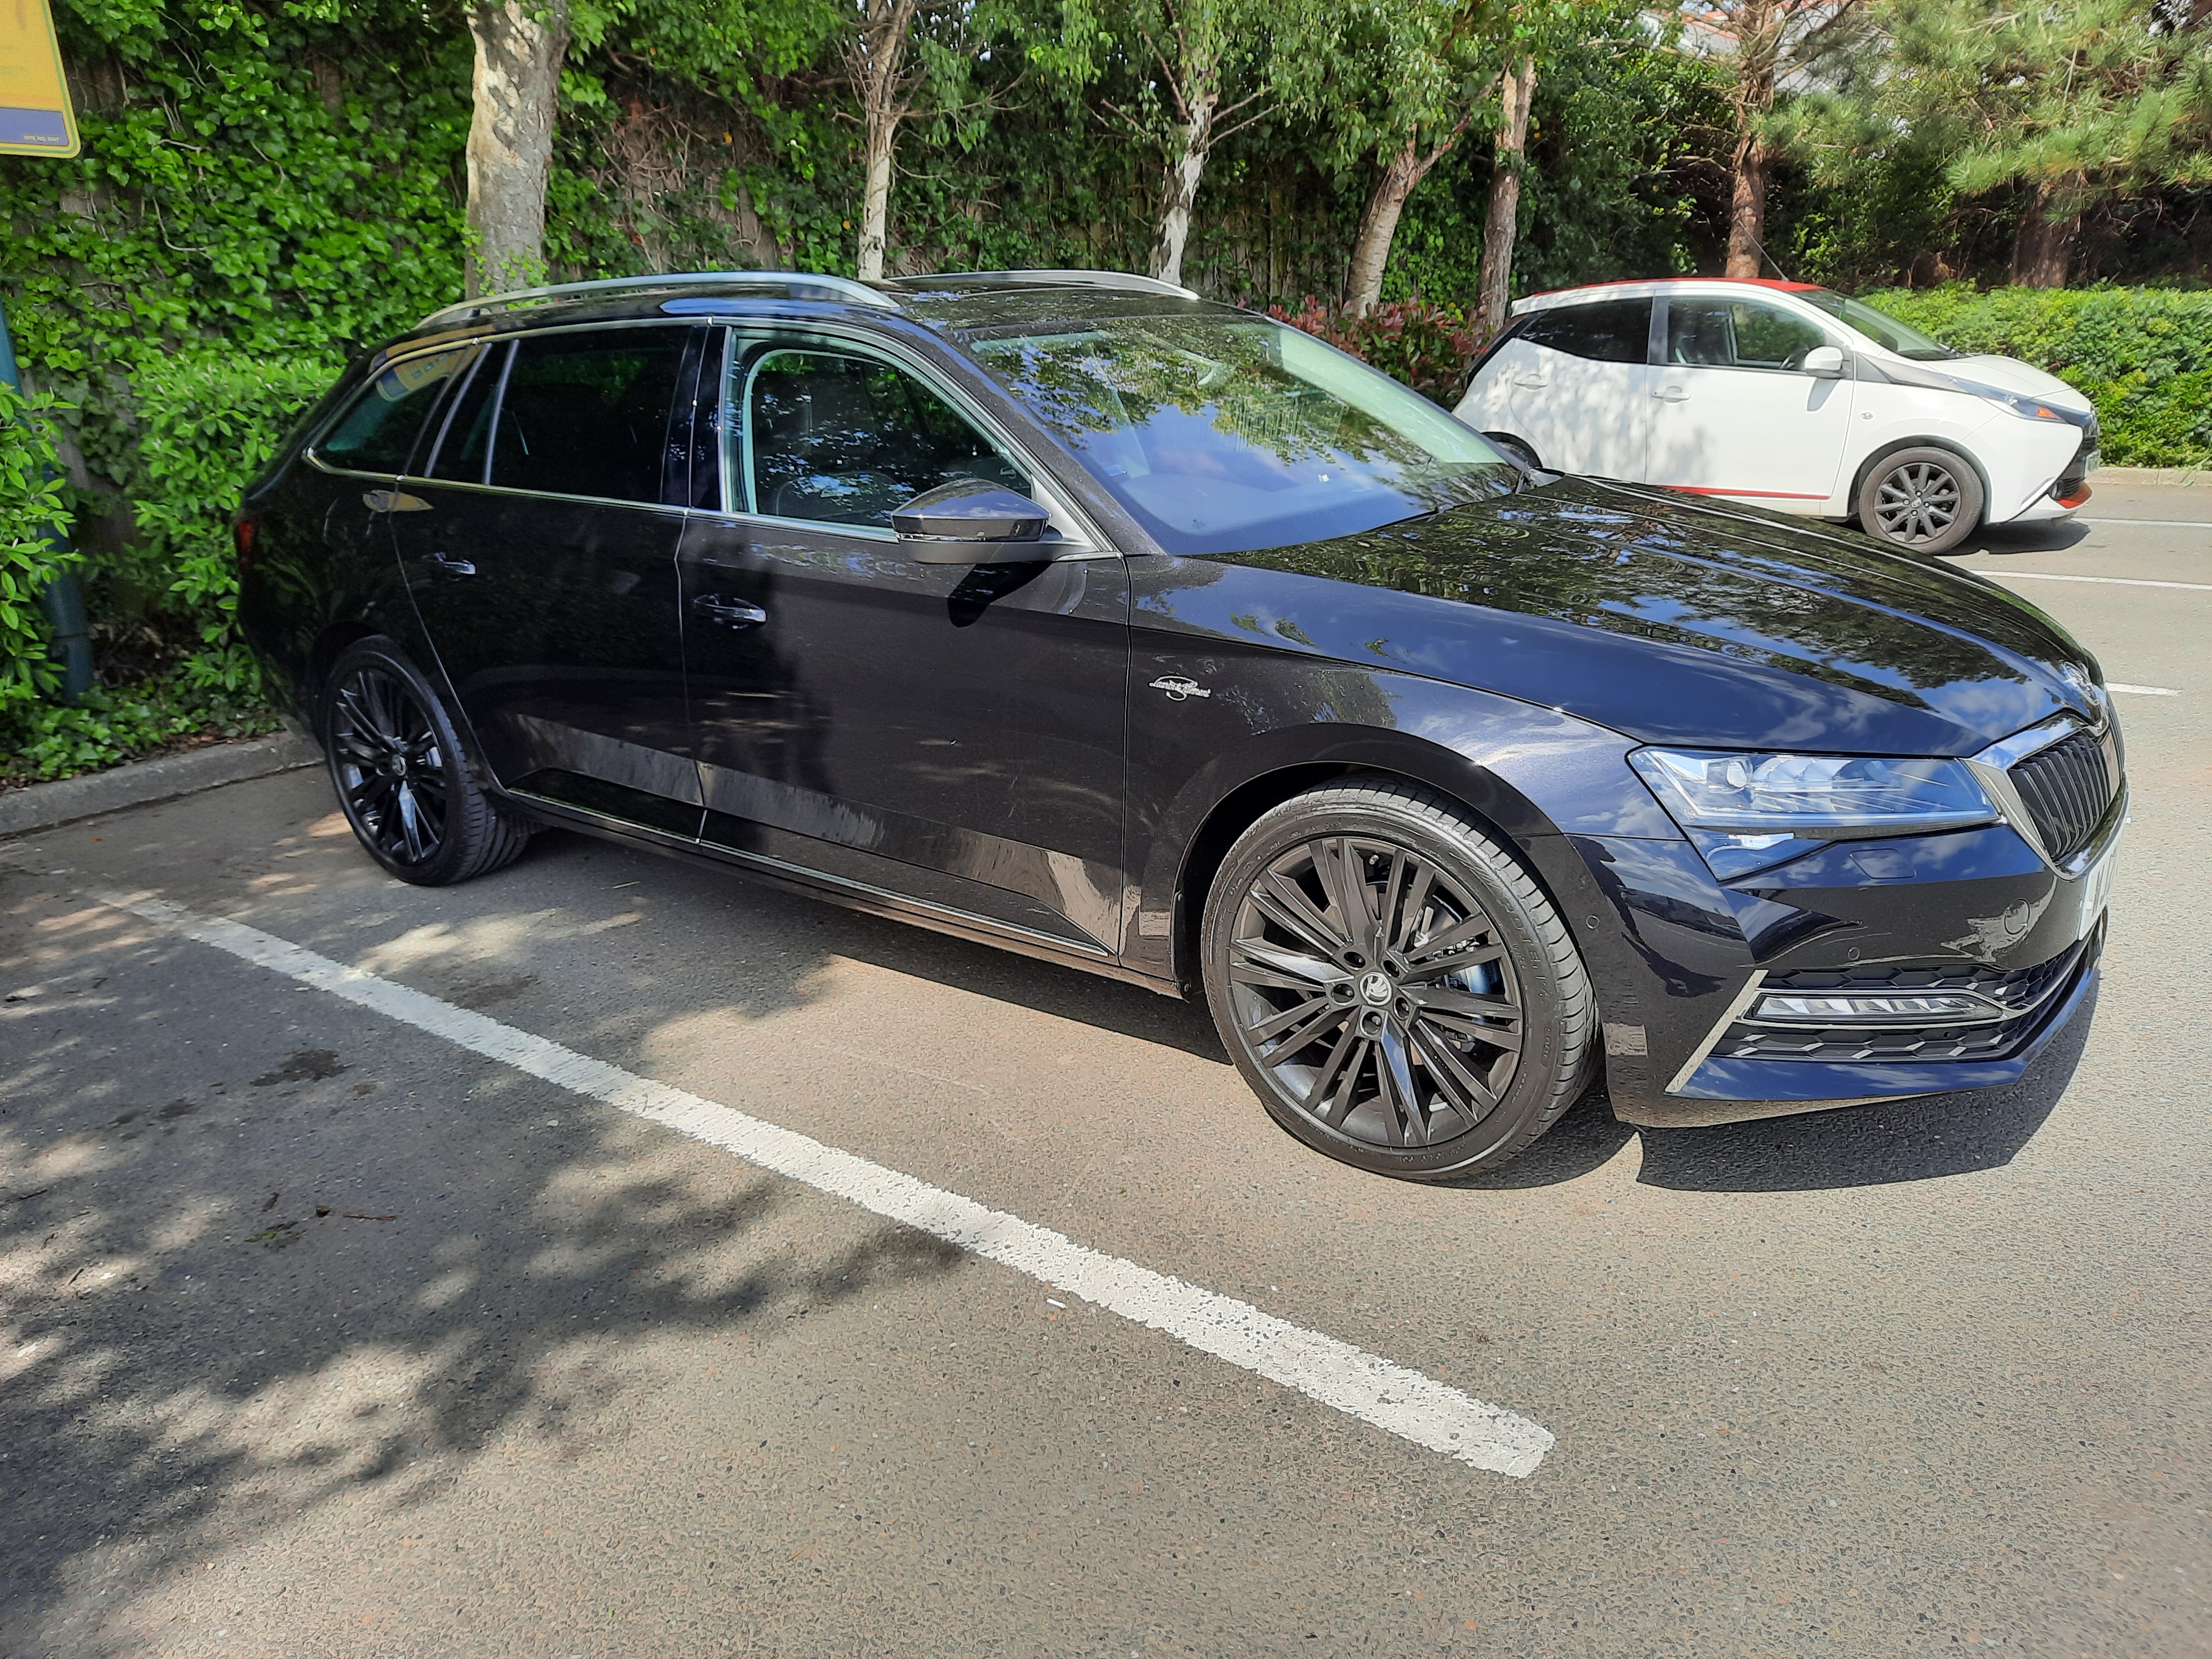
Just my regular wash cycle yesterday, but reapplied some Autoglym performance tyre dressing too. Thought the car looked lovely, so I took a snap!
 1 point
 -
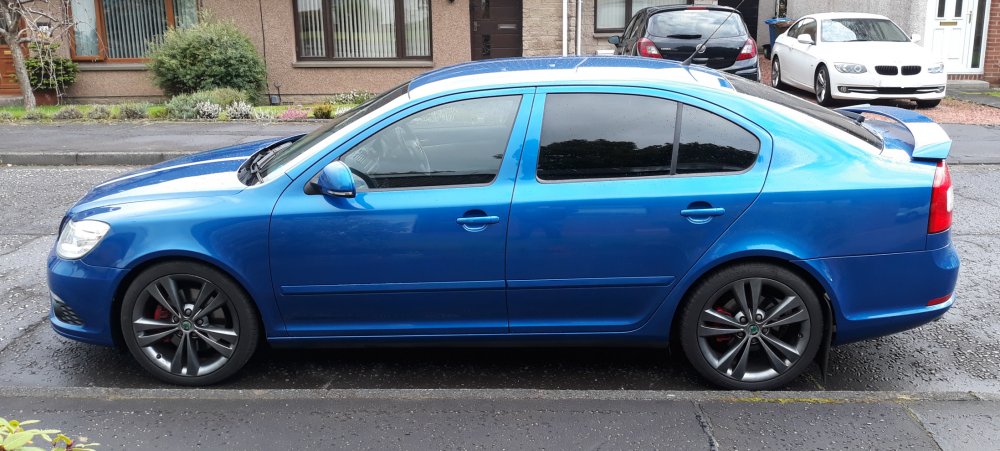
1 pointOur mk2 with the H+R -50mm Cup Kit. Actual lowering was -35mm lower than VRS suspension.
 1 point
 -
1 pointEasiest thing to do is to cut off the end of the tailpipe where it bends downwards then you can fit whatever style of slip on tailpipe you like.1 point
-
Replace the gearbox, it's completely worn out after 380k.1 point
-
Is there any good advice? Yeah, post it in a readable format.1 point
-
1 point1 point1 point1 pointIt's not a hard job at all to fit - remove wheel, place spacer on, put wheel back on. However, make sure the spacers r hub centric and the correct bore size. Also make sure u use longer bolts, usually supplied with the spacer, as the factory bolts won't cut it any more. I would also recommend that u don't go less than 10mm. Likewise don't go more than 20mm. N lastly, don't buy el cheapo ones. Get a good quality brand. I've got 15mm hub centric spacers on mine, front & rear. I have 19" wheels and it's lowered 25mm - the car looks much better with it. It's been 3 yrs now, and I've had no issues.

 1 point


.thumb.jpg.f83a46b9b3c0d976b9dbffbb523c9874.jpg)


Important Information
Welcome to BRISKODA. Please note the following important links Terms of Use. We have a comprehensive Privacy Policy. We have placed cookies on your device to help make this website better. You can adjust your cookie settings, otherwise we'll assume you're okay to continue.